7 articles
Counter-Strike 2 is a highly competitive game and having the proper optimization and higher FPS is extremely important.
Better FPS will mean lower input delay, allowing you to react better and faster to the action!
In this guide, we’ll go over the key settings you need to know to increase FPS in Counter-Strike 2.
How to Improve Performance in Counter-Strike 2 and Increase FPS
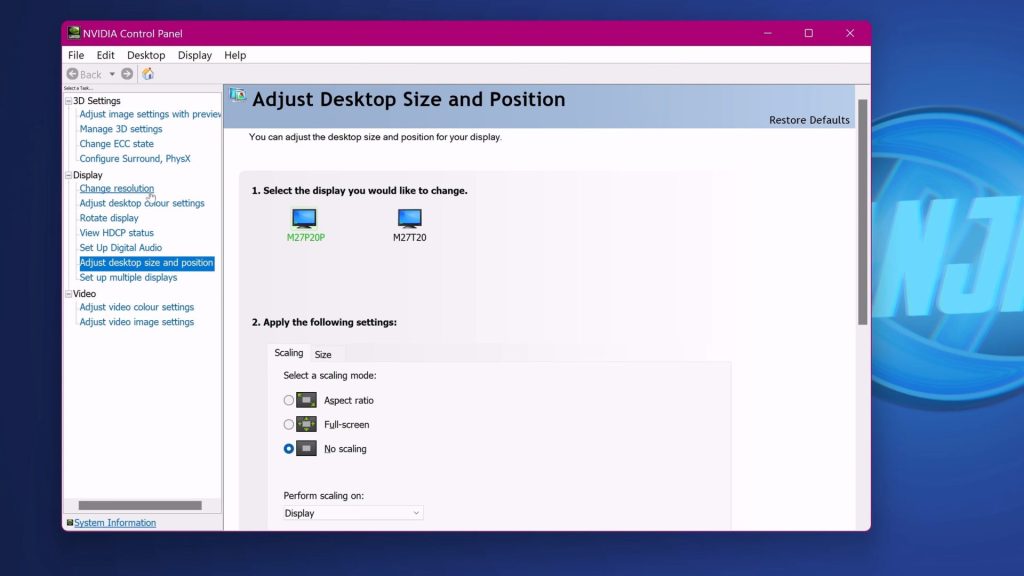
Optimization starts before even booting up the game, it turns out! We’ll go over the GPU control panel settings first. These are different for both NVIDIA and AMD, however.
 Ultimate Beginner’s Guide to Counter-Strike 2Oct 9, 2023
 Counter-Strike 2: When to Buy or Save Money | Economy GuideOct 9, 2023
 Counter-Strike 2: How to Improve AccuracyOct 8, 2023
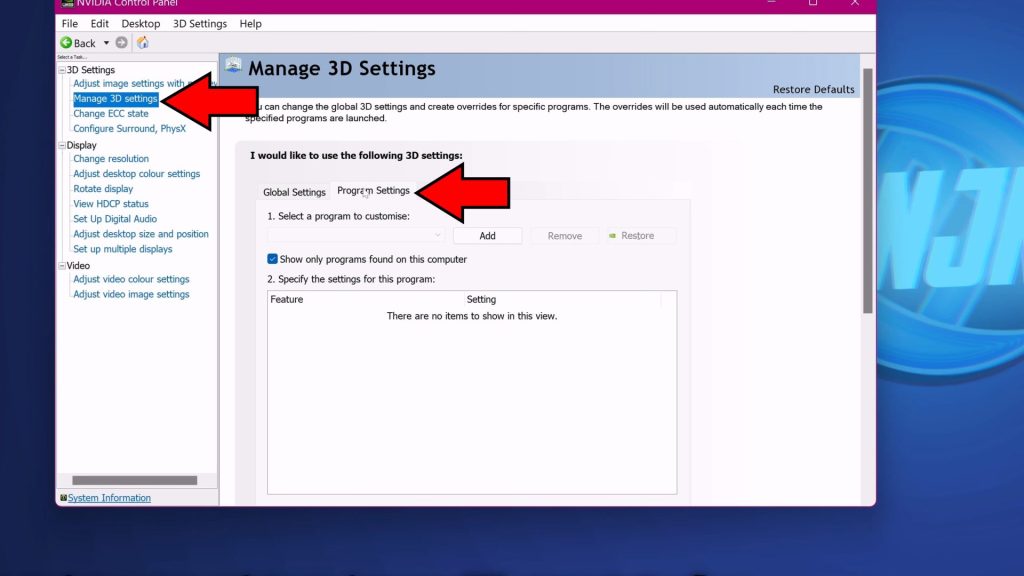
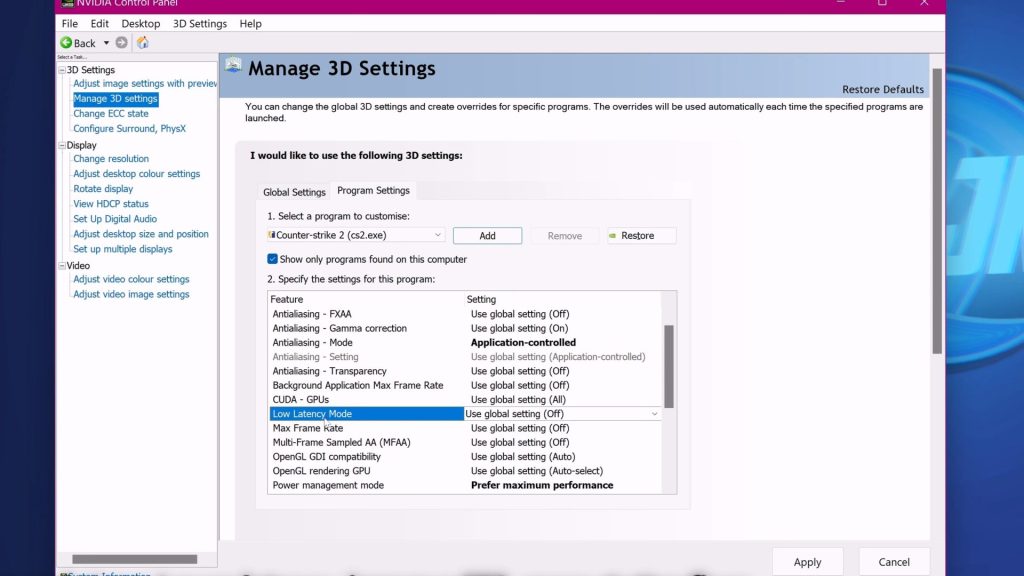
Let’s start with the NVIDIA control panel. Launch the control panel and select “Manage 3D Settings” option from the left side of the panel. Now click on “Program Settings.”
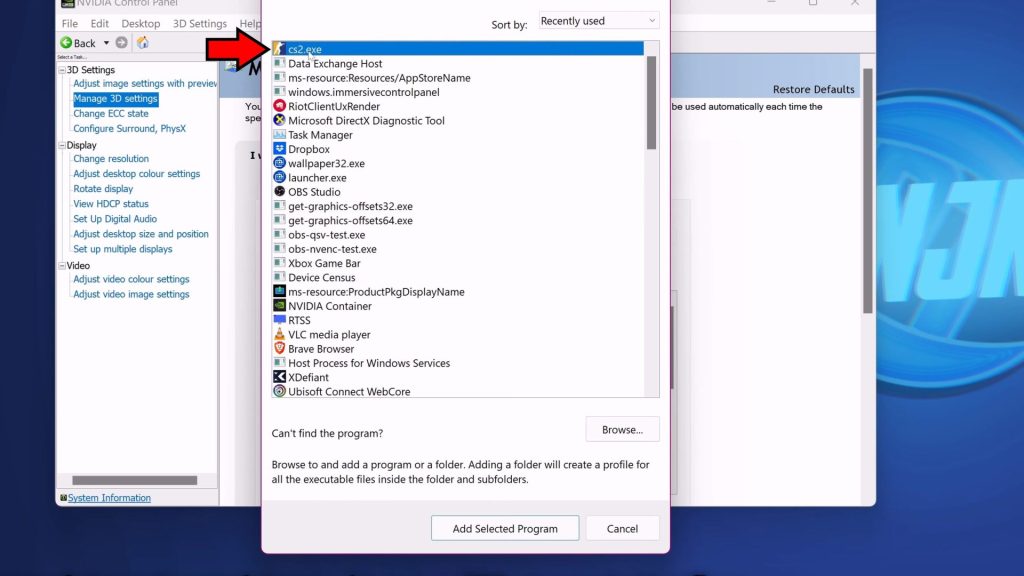
In the new window, choose “Counter-Strike 2 (cs2.exe)” from the drop-down list under “Select a program to customise.”
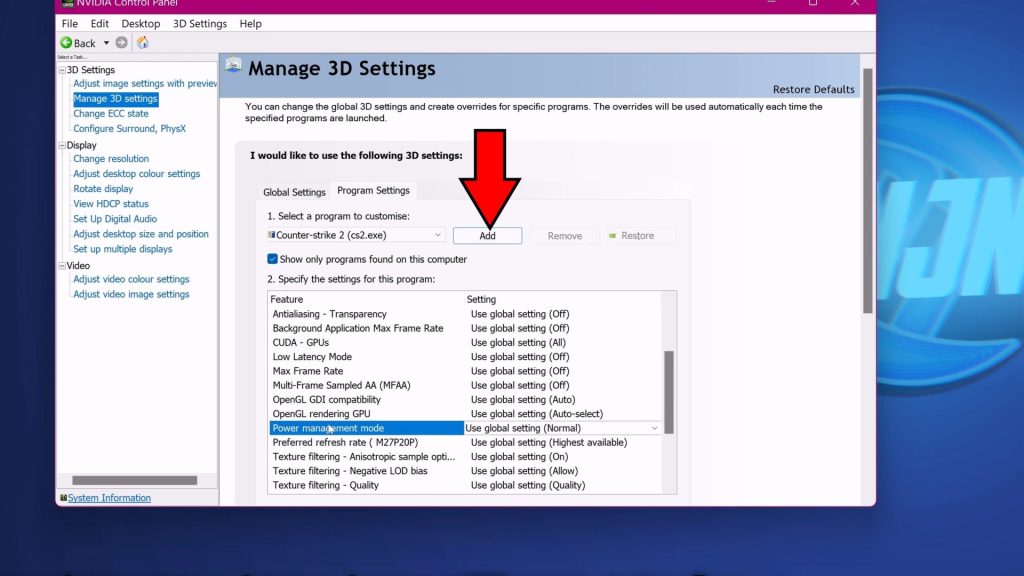
If the game doesn’t show up on the list, you can click on “Add” and then select cs2.exe from the list. You might need to have launched the game first for it to appear, though.
Once you’ve got Counter-Strike 2 selected, look for the “Power management mode” feature and set it to “Prefer maximum performance”.
Additionally, look for the “Texture filter – Quality” feature and set it to “High performance” as well, although this will sacrifice visual fidelity for performance.
Look for “Antialiasing – Mode” as well and set it to “Application controlled”.
Lastly, navigate to “Vertical sync” and set it to “Off” as well. VSync can introduce input lag and affect performance, although having it on can reduce screen-tearing artifacts.
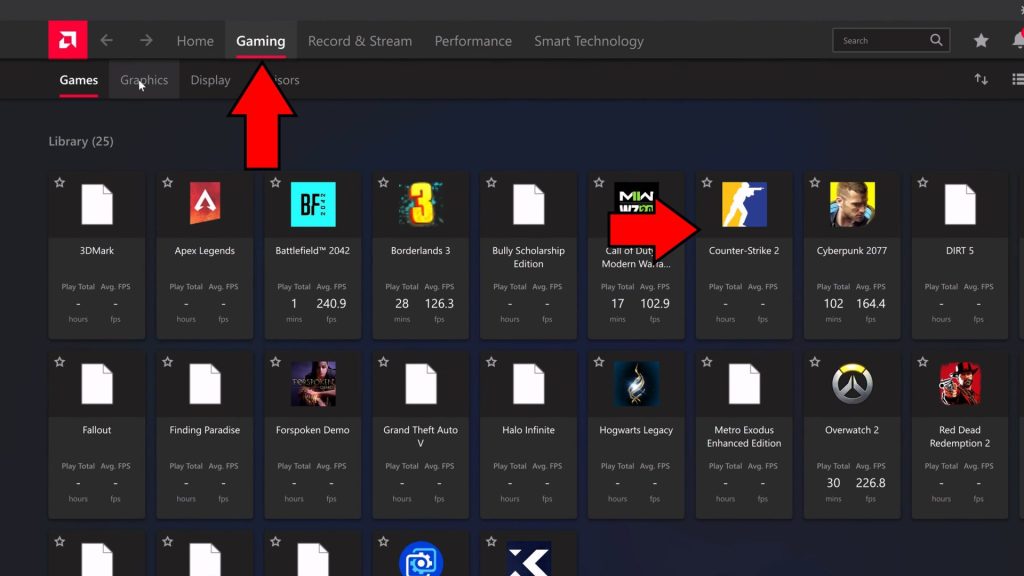
AMD users will want to use a similar setup, although the panel’s navigation differs. Start by clicking on Counter-Strike 2 within the Gaming tab of the control panel.
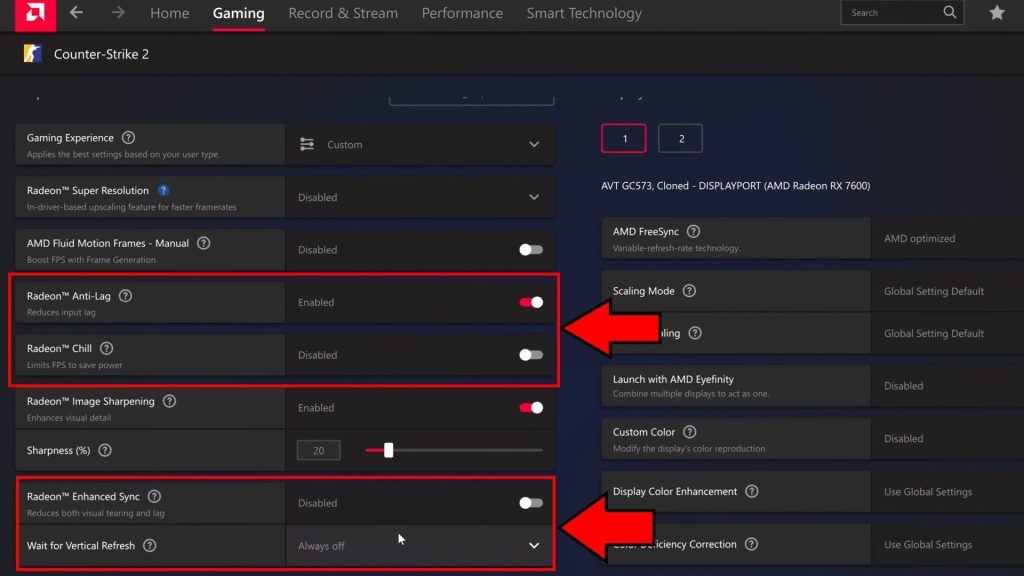
There are a lot less settings to mess with in the AMD panel, but these are the major settings you want to set:
- Radeon Anti-Lag: On
- Radeon Chill: Off
- Radeon Enhanced Sync: Off
- Wait for Vertical Refresh: Always off
We’re almost done with the prep work here, but there’s still something else to do before launching the game!
Launch Options
Launch options are commands that can be set on Steam and applied every time the game launches, just like the name implies.
Start by finding Counter-Strike 2 within your Steam library and right-clicking on it. Choose “Properties” from the drop-down menu.
Now type or copypaste this launch option into the text box: -high
AMD and Intel GPU users might also want to add -vulkan to use the Vulkan rendering API instead. It’s generally more consistent for those GPUs, though NVIDIA users should stick to the default DirectX API.
Additionally, you might want to put in -allow_third_party_software if you are using overlay software like RTSS.
All done? It’s time to launch the game!
In-Game Settings
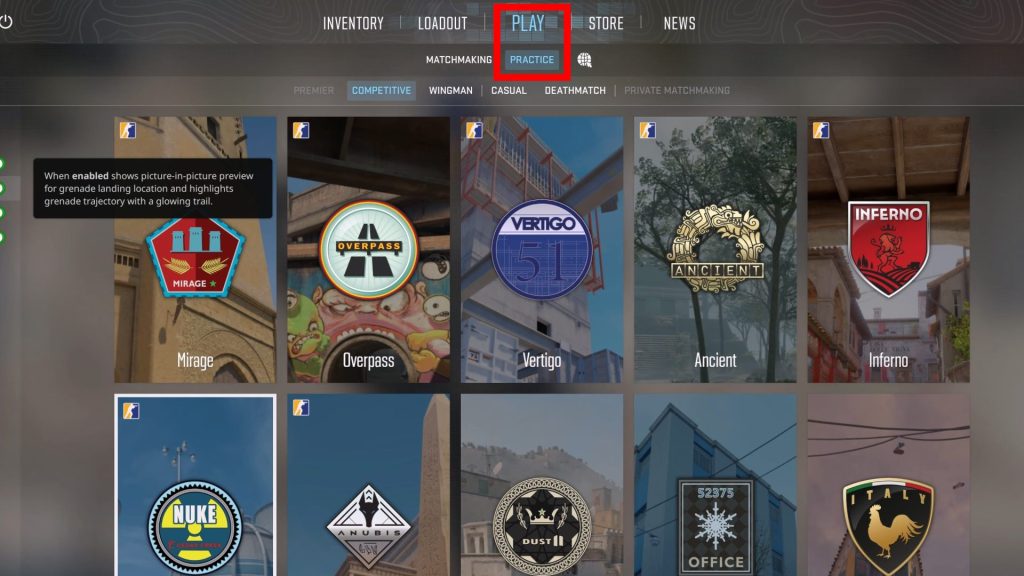
For the sake of testing, select “Play” and then “Practice”, then pick whichever map is your favorite. This will load a single-player instance and allow you to check FPS changes in real-time.
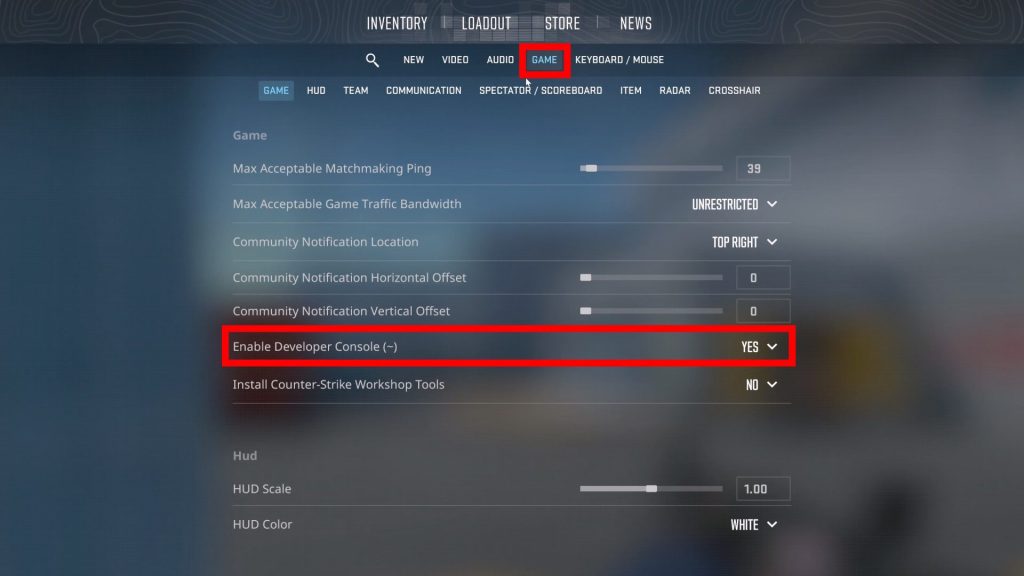
Once you’re loaded in, pause the game and go into the game’s settings. Select “Game” and then look for “Enable Developer Console” and turn it on.
You can now open the dev console in-game by pressing the tilde key, directly left of the 1 key.
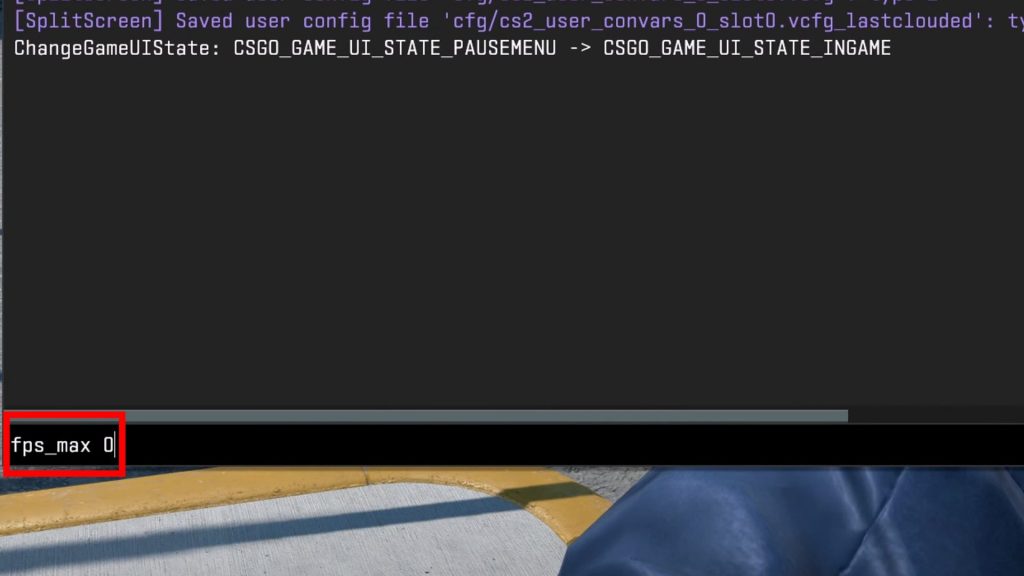
Back out into the game and open the dev console then type “fps_max 0” and press enter. This will disable the FPS limit until you restart the game.
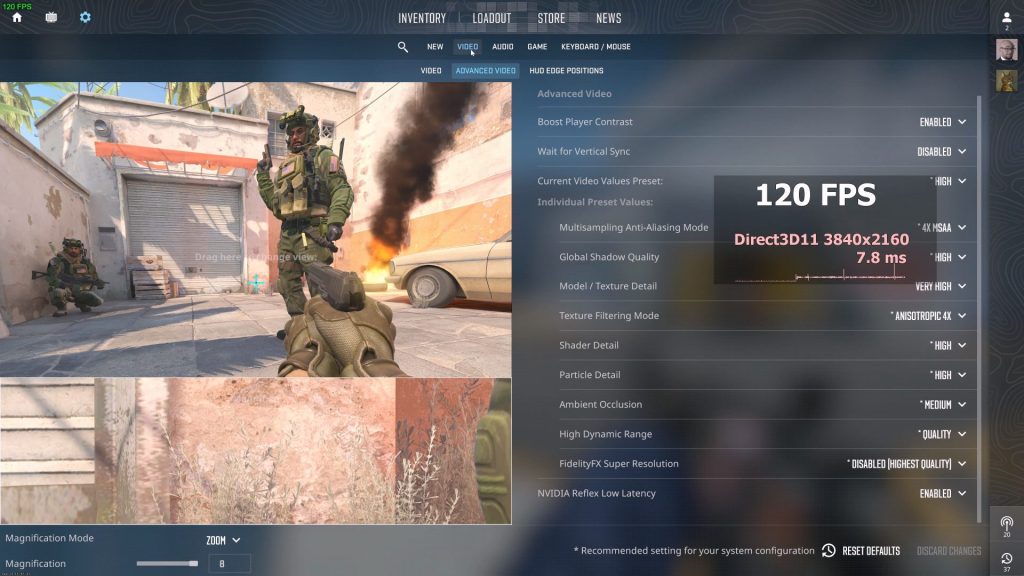
Now we’re ready to dive into the settings properly! Pause again and go to the “Video” tab in settings and then select “Advanced Video”.
The recommended settings here are as follows:
- Wait for Vertical Sync – Disabled.
- Current Video Values Present – Custom.
- Multisampling Anti-Aliasing Mode – None. Alternatively, use CMAA2 for a blurrier image but better FPS.
- Global Shadow Quality – High. Setting it lower yields better performance, but also causes player shadows to not display! This is a huge disadvantage, so you should keep the setting on High.
- Model / Texture Detail – Medium.
- Texture Filtering Mode – Bilinear or 4X.
- Shader Detail – Low.
- Particle Detail – Low.
- Ambient Occlusion – Medium. Alternatively, set it to Off for a huge FPS boost that sacrifices visual clarity. For competitive reasons, Medium is preferable.
- High-Dynamic Range – Performance.
- FidelityFX Super Resolution – Balanced. You can set it to Quality, Ultra Quality, or Disabled if you want better visuals. However, Balanced provides a huge FPS boost in comparison!
- NVIDIA Reflex Low Latency – Enabled. This setting isn’t available for AMD GPUs, however.
You should now be ready to go! Some settings can be lowered further, sure, but these give the best balance of FPS and competitive visuals.
ALSO READ: Disgaea 7: How To Unlock All Classes Guide