

If you want to get better equipment in Skull and Bones, you’ll need to bring out your inner pirate to harvest resources from anything you can.
A pirate’s life is all about looting, after all, and that includes salvaging shipwrecks and gathering resources. Finder’s keepers, arr!
In this guide, we’ll tell you everything you need to know to harvest all types of resources in the game.
How to Harvest Resources
Step One – Getting Tools

The process to harvest resources in Skull and Bones is a three-step process. The first step is to get the tools for the resources you want to harvest.
You can get tools from Carpenters, the easiest one to find is the one in Saint-Anne. In fact, you’ll meet him during the game’s tutorial quest, “Tools of the Trade.”
He can craft and upgrade your tools for you, provided you bring him the required materials and some Silver to pay for his handiwork. Even pirates have to pay up sometimes!
These are all the tool types and what types of resources they can harvest:
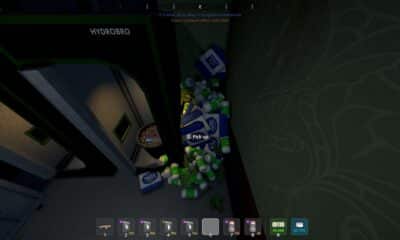
- Crowbar – Used to scavenge shipwrecks for sails, planks, nails, and other types of salvage.
- Hunting Spear – You can use it to hunt animals like Sharks and Crocodiles, allowing you to get Shark Skin and Crocodile Hide, amongst other resources.
- Pickaxe – As you might imagine, you can use it to mine ores. Necessary to get things like Nickel, Copper, Zinc, and Pure Iron.
- Saw – Your go-to tool for cutting down trees, allowing you to get wood materials like Acacia Wood and Ironwood.
- Sickle – Used to harvest plants. A must-have to harvest resources like Linen, Sisal, Ramie, and more.
When you’ve got your tools ready to go, it’s time for step two!
Step Two – Finding the Resources

You can find the vast majority of resources by simply exploring the open world. Or rather, the open seas!
All of the resources can be harvested from the comfort of your own ship, so you don’t need to abandon your vessel to chop down trees and the like.
As you might imagine, though, the vast majority of resources can only be found on land. You won’t find trees in the middle of the sea, for example!

So, you want to try to sail close to landmasses to find resources. Any resources you’ve spotted will be added to your map, hover over their icons to see exactly what resource they are.
Additionally, resources required for Contracts will be marked on your map even if you’ve never explored the areas near them. These are only suggested resource nodes, though, not all of the existing nodes.
Lastly, it’s worth noting that sometimes you will reach a resource node marked on your map and find nothing to harvest. This is due to the game’s multiplayer features; someone else already harvested it!

Nonetheless, simply approach an unharvested resource node and you will get a prompt to harvest it yourself. This will start the final step of the process, the harvesting minigame!
Step Three – Harvesting Minigame

Once you start harvesting a resource, you will have to play a small minigame. It varies slightly in presentation slightly for each type of resource, but the gist is the same for all of them.
You will see a visual representation of the tool used for the resource and a small animation will play out. The icon for the tool has green and yellow areas marked, as well.
What you have to do is press the button shown on the screen whenever the minigame points to the green area of the tool.
For example, the salvaging minigame will have a white crowbar move across a quarter circle with the green and yellow areas. Press the button on the screen once the crowbar is on the green!
Pressing while the icon is on the orange will still harvest successfully, but will give you fewer resources.
Failing to press anything within either of the colored zones will give you a strike. Fail multiple times and you will be unable to harvest resources at the node anymore!

If you don’t like the minigames, you can turn on “Auto Harvest” in Skull and Bones’ gameplay settings. Harvesting will be noticeably slower, but you won’t need to input anything at all.
But, that’s the end of our guide! Now you know everything you need to harvest all of the resources you can find in the open seas in Skull and Bones.
Get harvesting so you can make new ships with blueprints and whatnot!


Tips & Tricks to Get Rich in Schedule 1
Rapid fire tips and tricks to help you boost your profits!

How To Get Rid Of Items In Schedule 1
Vanish unwanted items straight into the void with one simple trick!


Should You Buy The Laundromat In Schedule 1
Laundering money at a laundromat is a straight-up genius, nobody will ever know!

Should You Buy The Mixing Station Mk2 In Schedule 1?
The upgrade sounds quite appealing, but is it worth shelling out the big bucks for?