1 articles
In Scene 4 of Vampire: The Masquerade – Swansong , you’ll be playing as Emem Louis who is one of the playable characters in the game. In this level, you’ll find yourself visiting the Jefferson Library under the command of Hazel Iversen. However, things have gone haywire and you then find yourself behind bars.
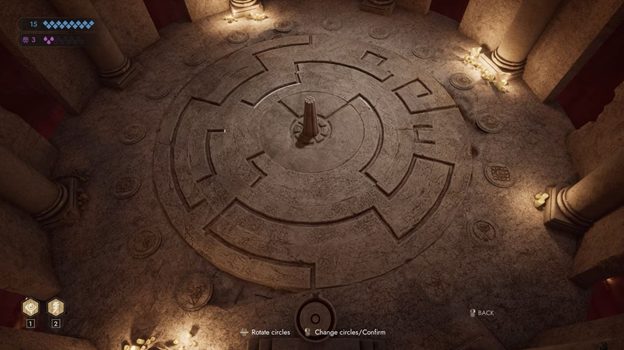
Throughout the scene, you’ll have to plot your escape from the prison until you arrive at a floor puzzle right at the center of a massive tower. This is the Rotating Floor Puzzle, and it features a disc-like shape with three rotating parts.
If you’re struggling to solve this puzzle, then this guide is for you.
How to Solve Rotating Floor Puzzle in Vampire: The Masquerade – Swansong
Right at the foundation of the floor is a lectern containing a blood pool. In order to solve the puzzle, you have to guide the blood from the pedestal into the center of the stone circle. Each of the rotating circles will have lines and patterns to them. Also, you’ll find a lectern in the room which allows you to switch your camera view to a top-down perspective.
From this perspective, you’ll then be able to rotate the stone circles to solve the puzzle. There are a total of three puzzles in this one, with the first one being the easiest. It’s the other two that can be rather confusing. Let’s have a look at how you can solve them.
First Floor Puzzle Guide
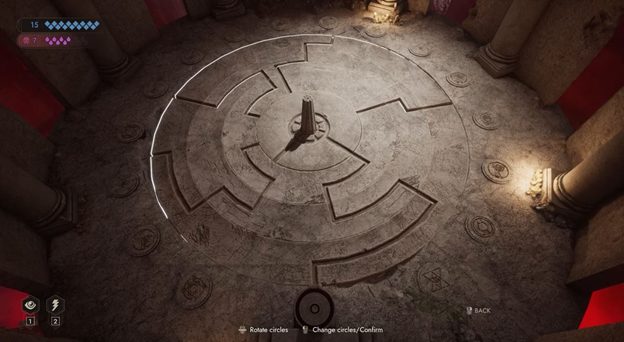
The first floor is quite straightforward as it only involves one moving part. All you need do after interacting with the lectern is to rotate the floor to the right until the second pattern from the left is connected to the middle point on one end and the lectern in the center on the other. You can see the above image for reference.
After solving the puzzle, head to the middle point and interact with it. From there, head to the second floor to solve the next floor puzzle.
Second Floor Puzzle Guide

From this point onward, the puzzle will start to get more complicated. As for the second floor puzzle, you’ll have to correctly rotate three circles to solve it. However, the middle circle will cause the innermost circle to rotate alongside it. As such, you’ll want to position the outermost circle first.
After interacting with the lectern, rotate the outermost circle to the left until the pattern on the right lines up with the lectern in the center.
Next, rotate the middle circle to the left as well until the pattern on the right connects with the pattern from the outermost circle.
Lastly, rotate the innermost circle to the left and make sure the third pattern from the right is lined up with the rest of the pattern from the middle and outermost circles. Once connected, it should allow the blood from the lectern to flow to the middle point.
You should have a pattern similar to the one in the image. Then again, interact with the middle point to head up to the third floor.
Third Floor Puzzle Guide
Similar to the second floor puzzle, this one also has three circles. However, moving the outermost circle will cause the other two circles to move as well. For this one, you’ll want to start from the outermost circle as well.
After activating the lectern, rotate the outermost circle to the right until the first pattern from the left lines up with the center. Then, rotate the middle circle just a bit slightly to the left until the pattern lines up with the one on the outermost circle.
Lastly, rotate the innermost circle to the left to connect the last pattern to the one from the other two circles. This should then allow you to solve the puzzle and activate the middle point.
This will allow you to head to the fourth floor where you can see a portal that will take you to Deneb Osborn.