 1 articles
Inkbound is the newest roguelike in town, and it draws inspiration from the developer’s previous game, Monster Train.
Basically, Inkbound is all about mixing and matching classes and abilities to help you progress even further with each run.
But as a roguelike, it will have elements that beginners might find confusing. So in this guide, we’re going to tackle everything that you need to know about Inkbound.
Everything You Need to Know about Inkbound
Combat in Inkbound is turn-based, though it’s done in a seamless way that lets players take turns simultaneously.
Each turn, you will be able to perform a series of actions depending on your Bindings’ Will cost and cooldown.
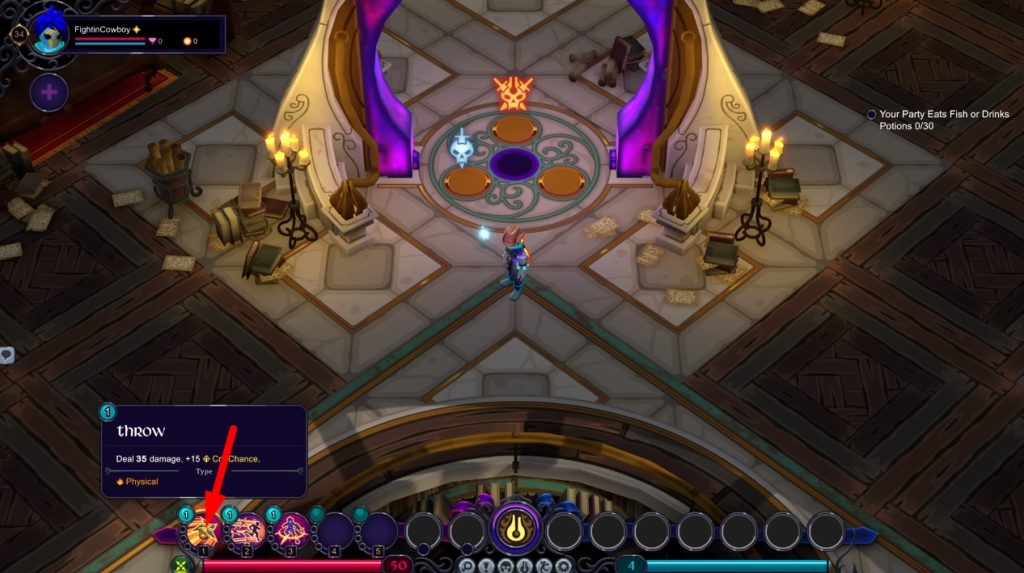
In case you’re wondering, your Bindings are skills or abilities you can use during combat.
Your first Binding will always have no cooldown whereas your second and third Bindings will have around 2-3 turns cooldown which you can reduce using items or certain traits.
Also, you’ll spend Will if you want to move during combat, though you can recover your Will at the start of each turn.
With that out of the way, let’s now move on to the other important things worth knowing about the game.
Starting a Run

After choosing between Ranked and Unranked Dive, your next step is to choose which run you want to start. You can choose from the three options as you can see above.
Each run will have different objectives that you can pick, and it’s up to you to choose which one you think is viable enough for your current build.
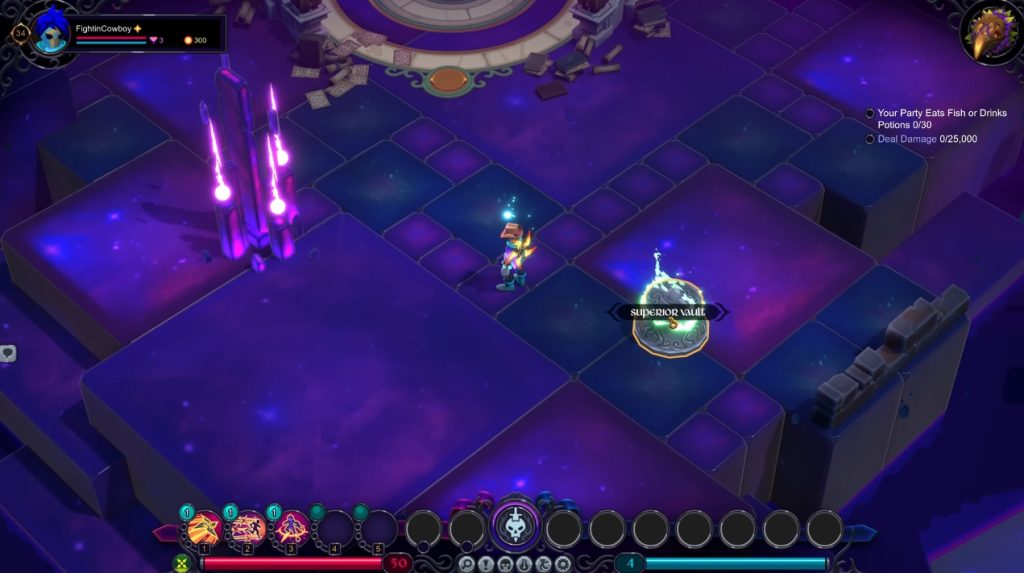
After starting a run, you can then gain access to a Common Augment and a Superior Vault. Interacting with the vault will let you pick a vestige from a selection of three vestiges.
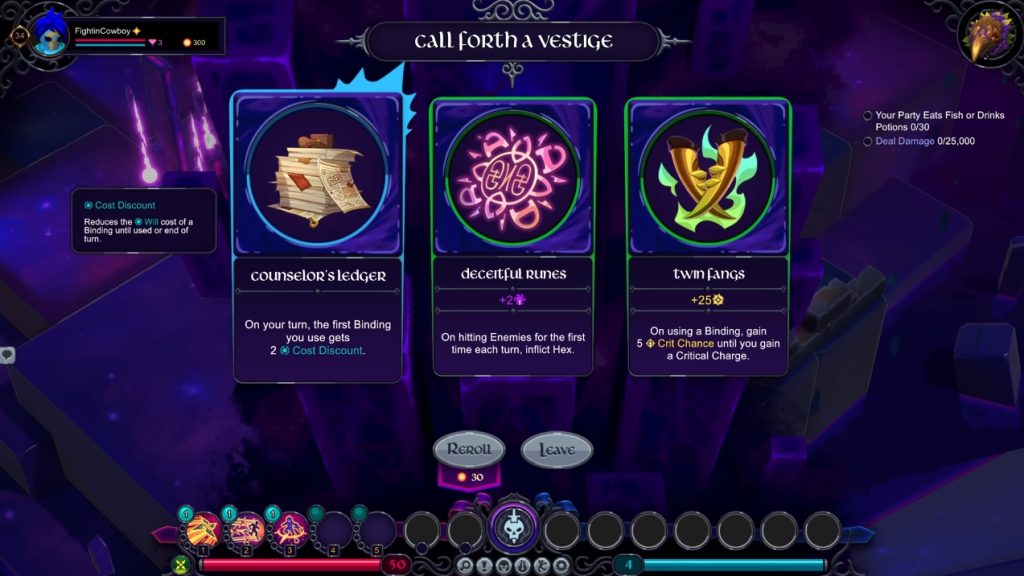
These are basically buffs that will grant various effects depending on which one you choose.
As you can see above, there’s a vestige that reduces a Blinding’s Will cost, one that inflicts Hex upon hitting enemies, and another that increases crit chance when using a Blinding.
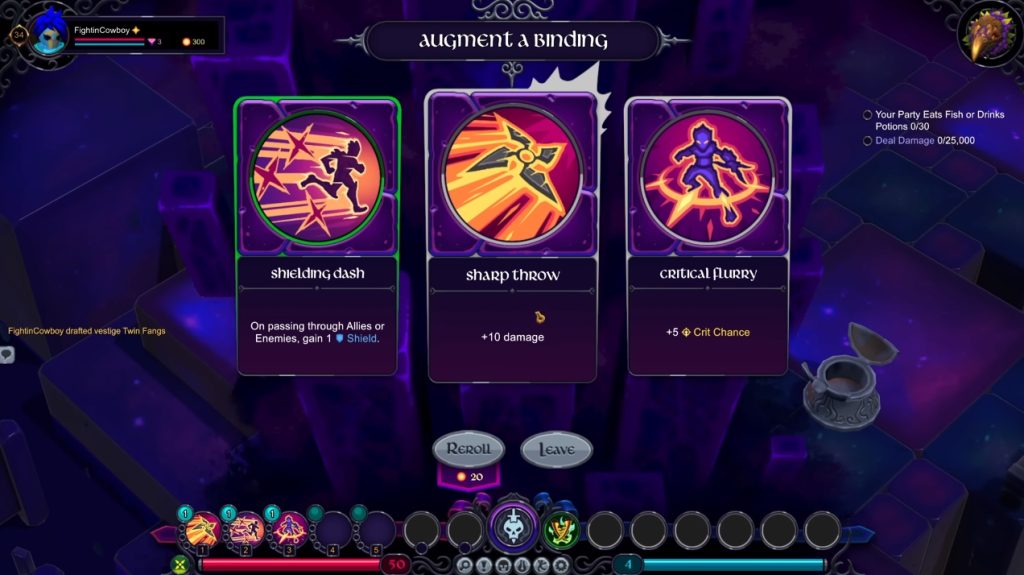
After that, interact with the Common Augment to choose an upgrade for one of your Blinding in random.
Choosing a World

After starting a run, the next step is to choose a world. Ideally, you want to pick a world that contains an active quest. This way, you’ll be able to complete your quest all at once.
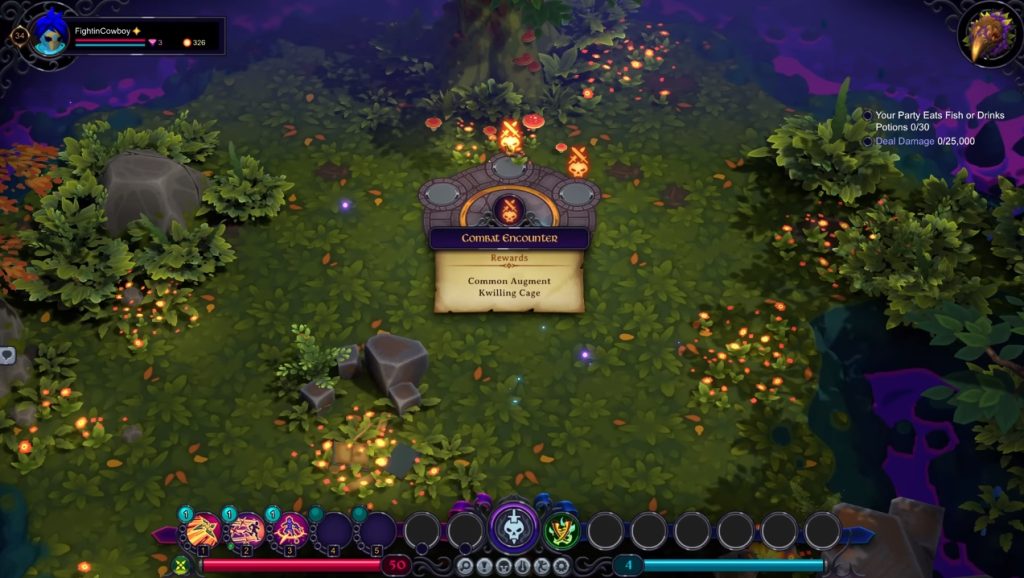
Next, you’ll then have to pick a Combat Encounter depending on which type of combat you prefer. After that, move into the arena and click the red glowing icon on the middle to start.
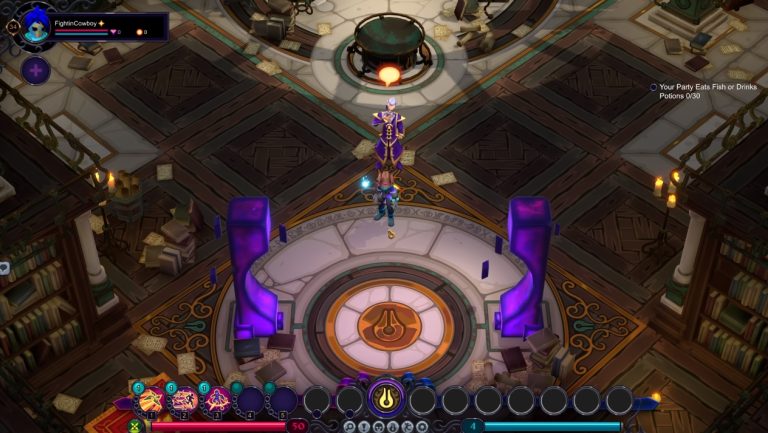
Combat Basics
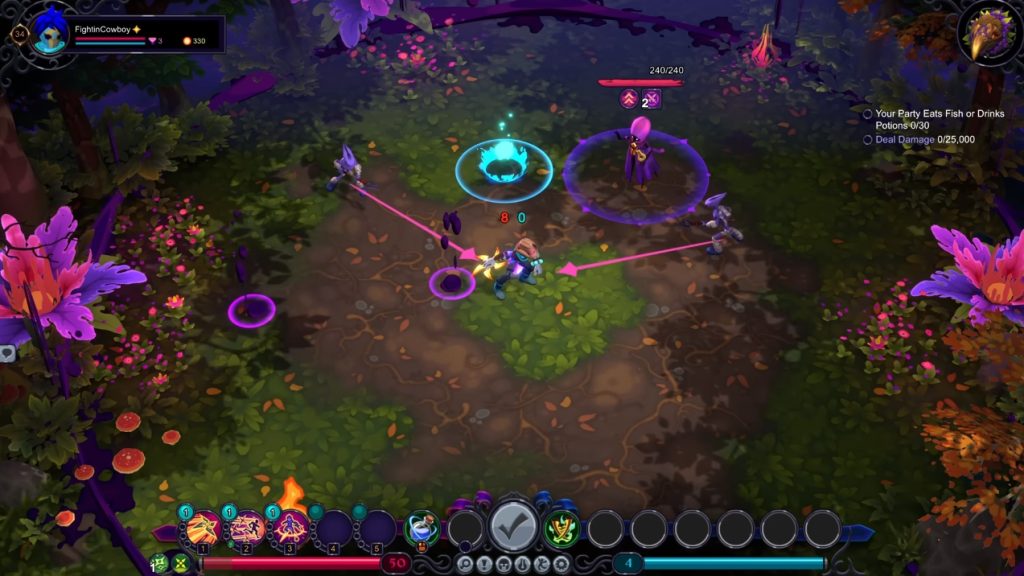
Let’s talk about the game’s combat mechanics.
Using the example above, you can notice two enemies pointing an arrow at you. This means that they’ll be able to hit you directly when they attack.
Meanwhile, the other enemy on the upper right has an expanding aura which indicates that it will do AOE attacks instead.

You’ll also notice a light blue ring beneath your character.
This indicates an area where you can freely move without spending Will. If you move outside of that circle to reposition yourself, you’ll end up spending 1 Will.

Depending on which class you choose, you will have Blindings that allow you to hit multiple enemies at once.
In this example, you can see that his third Blinding allows him to hit two enemies in a straight line. After performing this attack, that Blinding will then go on cooldown.
Once you run out of Will, you’ll no longer be able to perform any actions during your turn.
At this point, you’ll have to wait for the next turn as your enemies perform their respective actions.
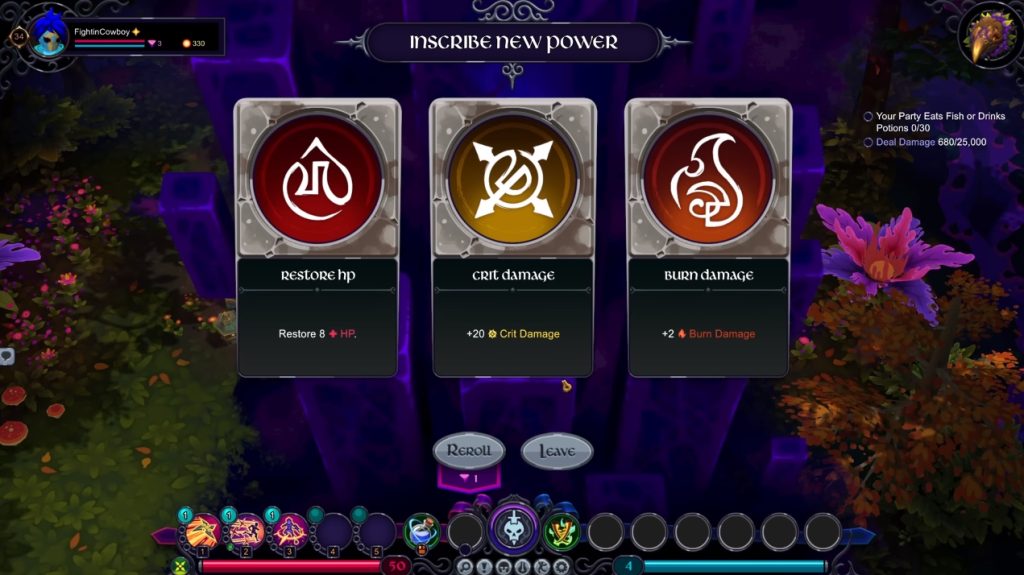
After clearing a combat encounter, a Font of Wisdom will spawn. Here, you’ll be able to select from three options to increase your combat power before you proceed.
ALSO READ: LEGO 2K Drive: How to Unlock Lawnmower