

Guides
Ravenlok: Shattered Mirror Quest Guide
Repair this gigantic broken mirror to gain access to the Greenhouse.
You will stumble upon a large broken mirror at one point in Ravenlok’s story. Interacting with it will start the “Shattered Mirror” quest.
Repairing this mirror will be crucial to completing the game, as it is the only way to reach the Greenhouse.
In this guide, we’ll tell you everything you need to know to fix the mirror and complete its quest.
How to Complete the Shattered Mirror Quest in Ravenlok

This quest will start once you find the broken mirror at the end of the spiraling hedge maze.
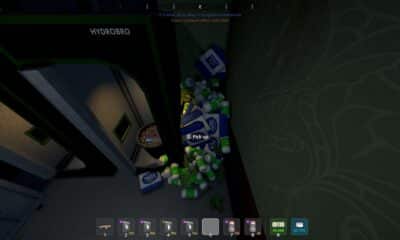
Your first task will be to repair the mirror by finding 5 shards. They can be acquired by just smacking the glass bundles in the area with your sword.

The first shard is directly to the right of the mirror, just hit it with your sword to collect it.

The second one is on the right hedge wall of the labyrinth. It’s the first bundle of glass you will see on this side.

The third is obtained from the glasses on the bottom wall once the labyrinth starts sloping up. It’s directly opposite the shattered mirror, which can be seen from here.

The fourth is found further inside the labyrinth, once you start going down the spiral again. It’s on the right wall.

The fifth and final shard is on the left wall, just a bit south of the previous shard.
Head back to the Shattered Mirror and place the shards to complete the first step. Now you need something to seal these shards in place!
Finding Wax for the Broken Mirror

Head back to the Mirror Plaza and use the Warp Mirror in there to fast travel. You will want to head to the Victorian House.
Now go directly south of the mirror in the Victorian House, then take a right until you’re in an adjacent room.

Interact with the small round table in the center of the room to collect a candle. Its wax should be good enough for sealing the shards in place!
Use the Warp Mirror again to go back to the Mirror Plaza, but be careful. A large swarm of enemies is waiting for you, so be ready for combat.
Take out all of the enemies and take the exit at the top right, entering the spiraling hedge labyrinth again.

Descend through the Ivy Spiral until you reach the Shattered Mirror. Interact with it and choose to use the Candle Wax to fix it.
The quest will instantly complete as soon as you do, and you can now use the mirror to enter the Greenhouse!
ALSO READ: Well of Warm Winds Puzzle Solution – KAKU Ancient Seal


Tips & Tricks to Get Rich in Schedule 1
Rapid fire tips and tricks to help you boost your profits!

How To Get Rid Of Items In Schedule 1
Vanish unwanted items straight into the void with one simple trick!
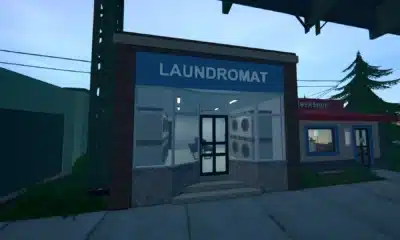

Should You Buy The Laundromat In Schedule 1
Laundering money at a laundromat is a straight-up genius, nobody will ever know!


Should You Buy The Mixing Station Mk2 In Schedule 1?
The upgrade sounds quite appealing, but is it worth shelling out the big bucks for?