104 articles
Last Epoch can flood players with absurd amounts of loot, so it’s a good idea to learn how to create your own loot filter.
You can define dozens of Rules to let the game know what kind of items you want (or don’t want) to see. It’s vital to making the mountains of loot more manageable, as you’ll only see the items you actually want!
So, if you’re eager to start sorting out all the loot the game dumps on you, read on to learn everything you need to make your very own loot filter.
How to Create Your Own Loot Filter
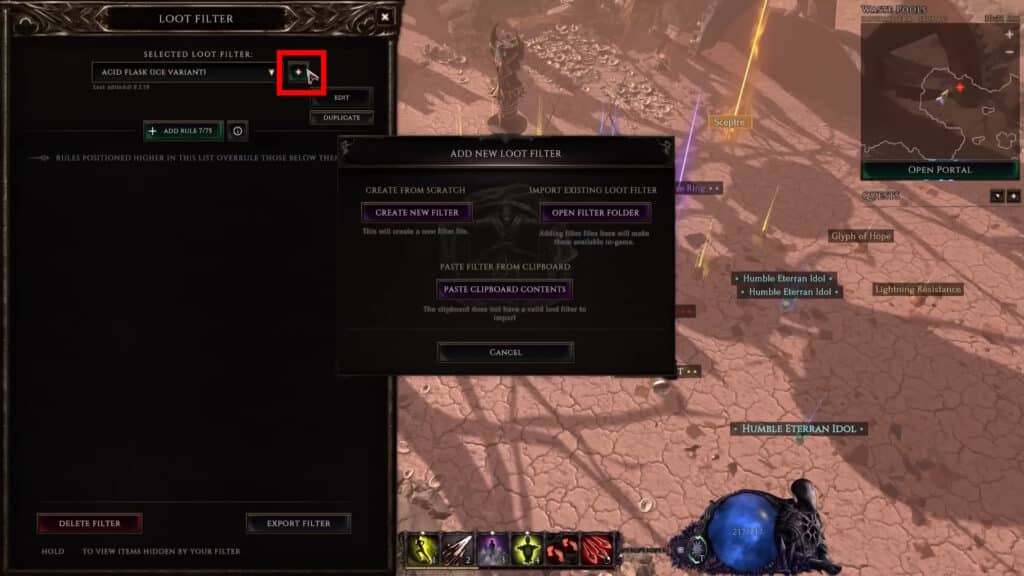
The journey to creating your own loot filter begins by pressing “Shift + F” to bring up the Loot Filter interface. You can do it whenever you wish!
 Everything New In Last Epoch Season 4Mar 29, 2026
 How To Progress Through Endgame In Last Epoch For New And Returning Players (Season 4)Mar 28, 2026
 How To Get A Lot of Corruption in Last Epoch Season 4Mar 28, 2026
Then, click on the “+” sign at the top of the interface and select “Create New Filter”. Of course, you can also import any exported loot filters at this point, as well.
You can name your filter whatever you want, as well as change its icon and color. This is purely just for you to be easier to recognize your filter if you have multiple ones!

Regardless, once you’ve got the basics down, you can start to add Rules. These are the bread and butter of the loot filter, as they let Last Epoch know what items to highlight or hide.
You can have up to 75 Rules in a single loot filter, which is way more than enough for most players!
Regardless, just click on “Add Rule” whenever you wish to, well, add a rule.
How to Add Rules to a Loot Filter
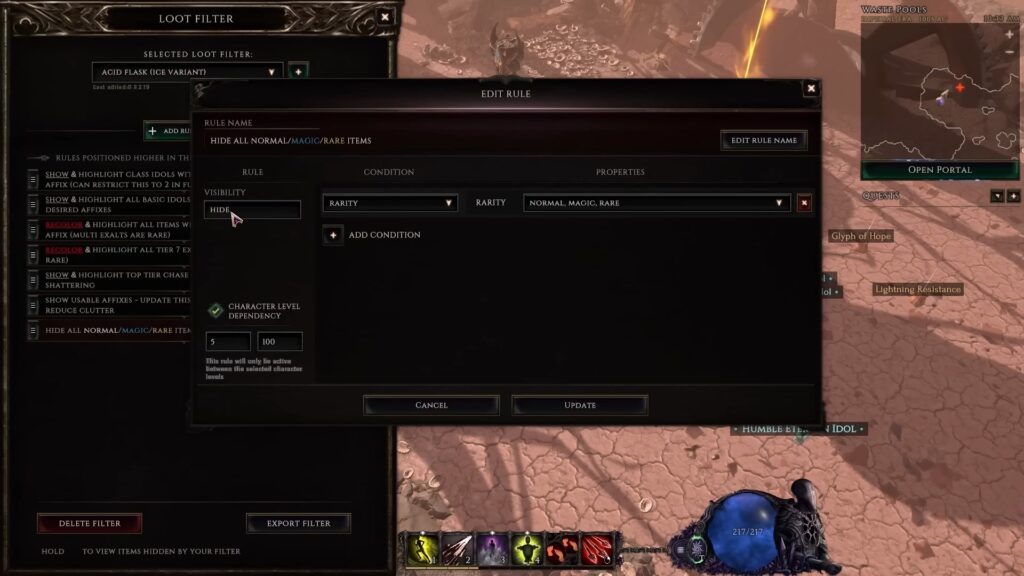
Every Rule you make consists of two main factors: Visibility and Conditions.
First, choose the Visibility you want, which basically lets you define what items to hide or highlight. This will then be applied to any items that meet the Conditions you specify.
These are the Visibility options you have at your disposal:
- Show – Makes sure that loot fitting your Conditions is shown. Mostly used to override “Hide” Rules, ensuring that you don’t miss out on certain items.
- Also lets you tick on the “Emphasize” checkbox, which will make items fitting the Conditions have names in full caps.
- Hide – Loot that fits the Conditions will not be shown to you at all.
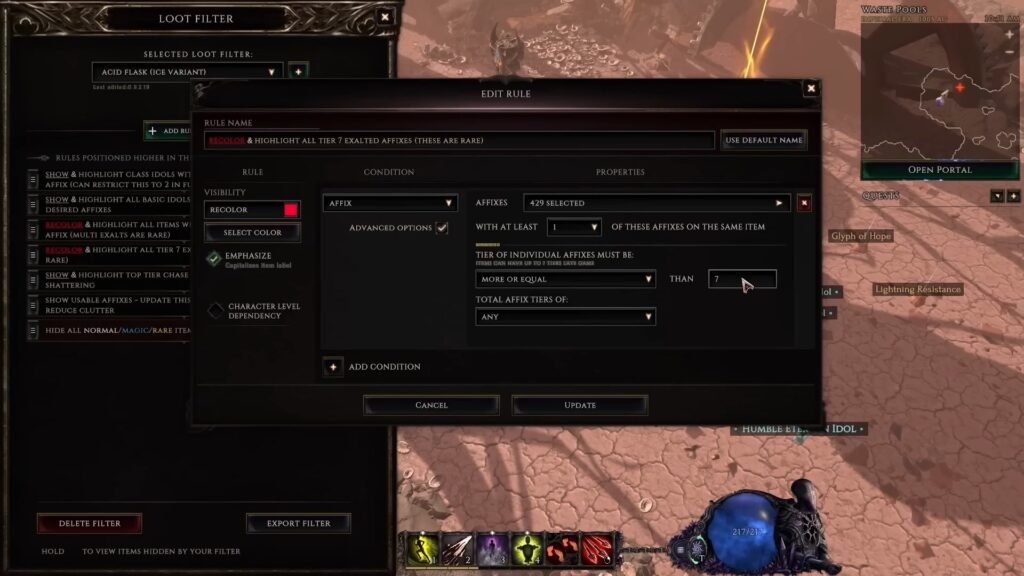
- Recolor – This lets you set a custom appearance to highlight loot that fits the Conditions you specify, helping them stand out.
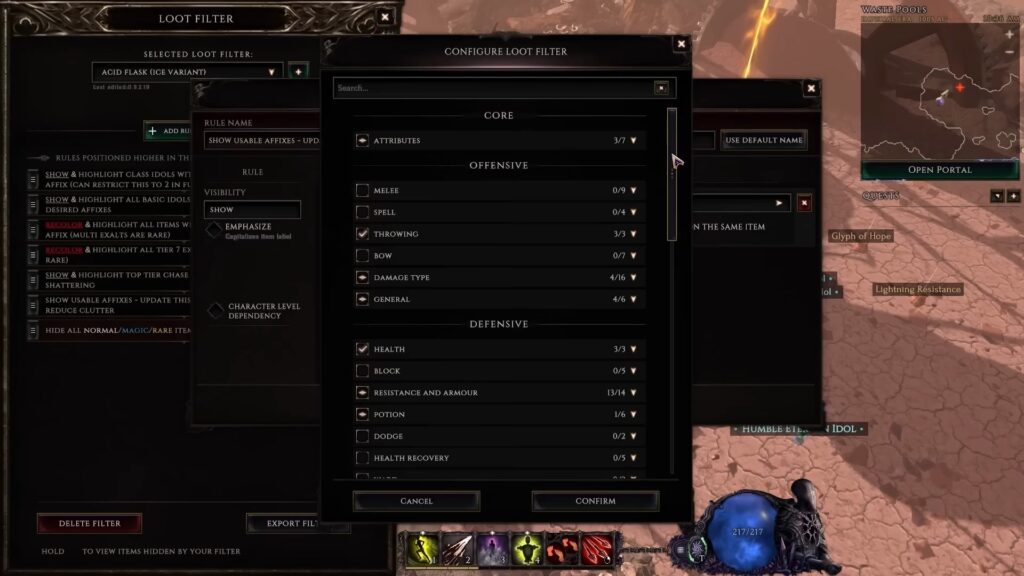
As for the Conditions, these are the ones you can use:
- Affix – Lets you pick which Affixes loot should have. It also allows you to choose which tier of Affixes you want.
- Level – Allows you to filter loot based on its item level.
- Rarity – Allows you to filter loot based on rarity. You can choose rarity levels one by one.
- Item Type – Filters loot based on what type of equipment it is. For example, you can set it to only apply the rule for Swords.
- Class Requirement – Filters items depending on which class they’re for. You can pick multiple classes at once. Great to highlight items for your class, or hide items from other classes!
Lastly, you can tick on the “Character Level Dependency” box on the bottom left. It lets you define a level range for your character, meaning the Rule will only be active while your character is within the defined level range.
Finishing Up!
Once you’re done establishing all the rules you want, it’s a good idea to ensure that you arrange them in order of priority. Rules at the top of the list have priority over the ones below it, keep that in mind.
This is particularly important if you want to use “Show” Rules to override “Hide” Rules. Always make sure that “Show” is higher than “Hide”!
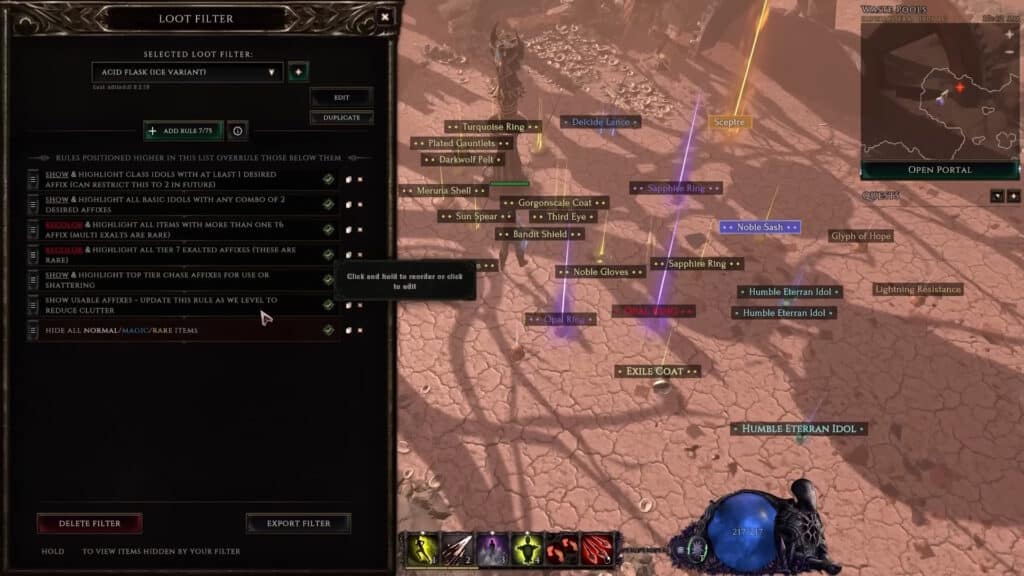
You can also enable and disable rules by clicking the checkbox next to them, duplicate them by clicking the two sheets of paper, or delete them by clicking the red X.
Once you’re all done, though, you can just close the Loot Filter interface by clicking the X at the top right. Your new loot filter should have already been applied, so you’re all ready to go looting!
ALSO READ: Last Epoch: How to Dismantle Items (Rune of Shattering)