104 articles
Whether you’re a new player or simply returning for Season 4 of Last Epoch, you’re likely wondering how to progress through and into the endgame efficiently.
After all, the game is fairly deep and has a lot of content to go through. It can be pretty overwhelming for newbies, while veterans are likely wondering if progression is different at all.
In this guide, I’ll outline the basics you need to cover for progression into and through the endgame.
Play the Campaign and Get All Important Upgrades
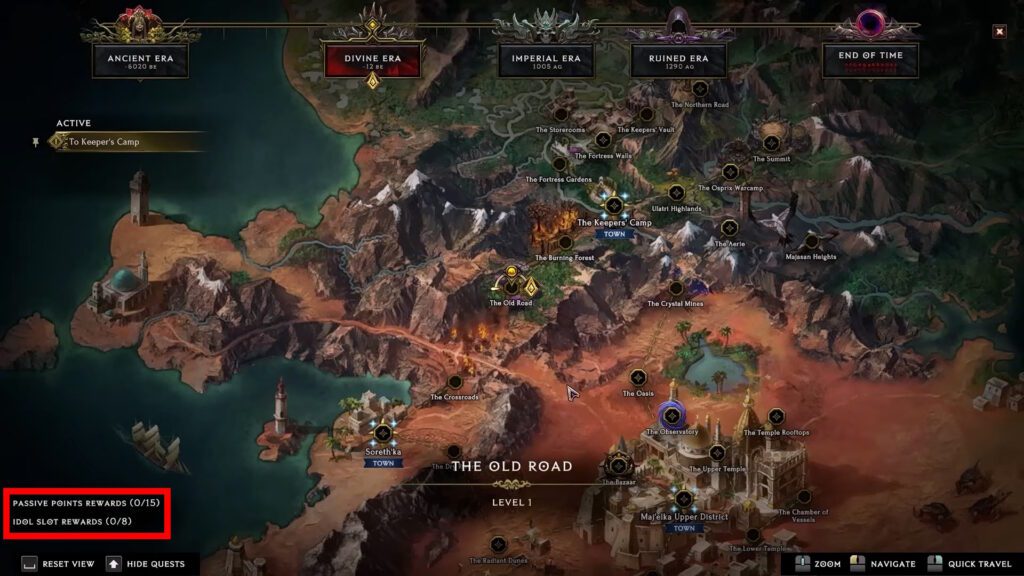
The first thing you should do for the endgame is to play through the main campaign. While that’s obvious on its own, you should also make sure to get all of the Passive Point and Idol Slot rewards along the way.
 Everything New In Last Epoch Season 4Mar 29, 2026
 How To Get A Lot of Corruption in Last Epoch Season 4Mar 28, 2026
 Top Meta Builds in Season 4 Last EpochMar 28, 2026
Just in case, you can track how many Passive Point and Idol Slot rewards you have in the bottom left corner of the world map. Obtaining all of them is extremely important for your character’s power.
Now, you get a fair share of these rewards from the main campaign quests themselves. However, some of them require you to complete side quests as well.
Which Side Quests to Look Out For
To help you get all rewards, here’s a table showing all side quests that give these rewards. This includes their names, unlock chapter, and starting locations:
| Passive Points | Idol Slots | |
| Chapter 1 | Storeroom Saboteurs (The Storeroom) | |
| Chapter 2 | Ezra’s Ledger (The Council Chambers) Evacuation (Last Refuge Outskirts) The Upper District (The Upper District) | |
| Chapter 3 | The Lesser Refuge (The Council Chambers) Lightless Arbor (Lightless Arbor) | An Ancient Hunt (The Council Chambers) Lightless Arbor (Lightless Arbor) |
| Chapter 4 | A Study in Time (The Outcast Camp) The Corrupted Lake (The Corrupted Lake) Soulfire Bastion (Soulfire Bastion) | The Corrupted Lake (The Corrupted Lake) Soulfire Bastion (Soulfire Bastion) |
| Chapter 5 | Hidden Gems (The Majasan Desert) The Sapphire Tablet (The Oracle’s Abode) Temporal Sanctum (The Temporal Sanctum) | The Sapphire Tablet (The Oracle’s Abode) Temporal Sanctum (The Temporal Sanctum) |
| Chapter 6 | Alric’s Revenge (Yulia’s Haven) | |
| Chapter 7 | Liberating the Nomads (The Wengari Fortress) A Heoborean Cure (Heoborea) | |
| Chapter 8 | Liath’s Tower (Liath’s Road) Destroying the Siege Camp (Etendell) | Liath’s Tower (Liath’s Road) |
| Chapter 9 | Desert Treasure (The Radiant Dunes) Oasis Hunt (Maj’elka Upper District) | Arjani, the Ruby Commander (Maj’elka Upper District) Desert Treasure (The Radiant Dunes) Harton’s Idol (Soreth’ka) Too Greedily, Too Deep (The Oasis) |
| Quests in italics give 2 passive points, all others give 1. |
Do note that there are more quests than Passive Point and Idol Slot rewards. That means that you don’t need to do every single one, just enough to reach the caps: 15 Passive Points, 8 Idol Slots.
As such, I highly recommend doing earlier quests over anything else. They’ll allow you to power up faster, after all!
Lastly, as a final tip for the campaign progression, I highly recommend unlocking and joining an Item Faction. We have a guide going into details on how to do this.
The gist of it, though, is that you need to meet Zerrick at Maj’elka Upper District in Chapter 9. You can either get there through natural progression (which I recommend) or by skipping through the Temporal Sanctum dungeon.
Starting the Monolith of Fate
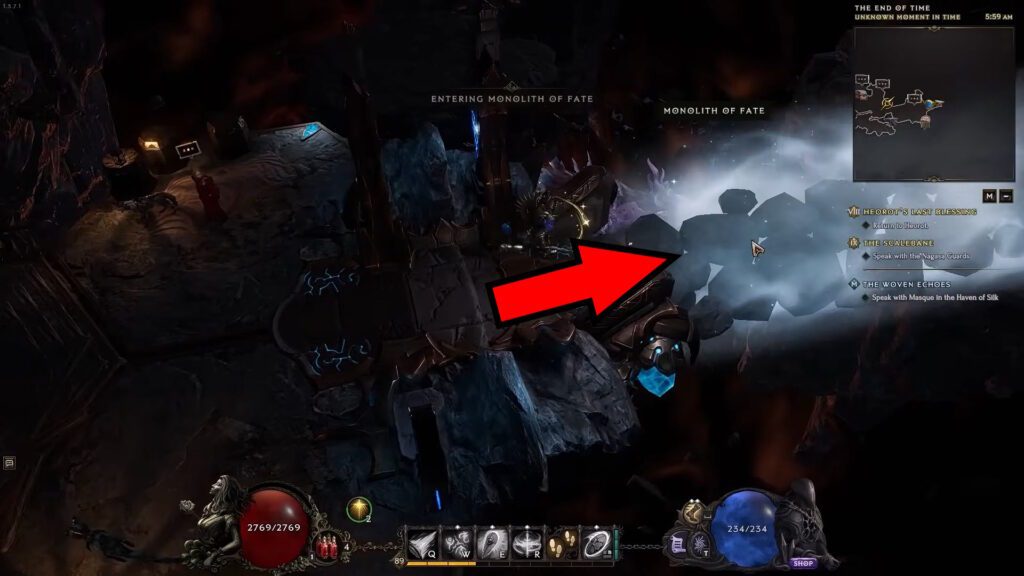
Once you beat the campaign and get all of the key rewards, you’ll be around level 40-50 in the End of Time. At this point, you can start the Monolith of Fate endgame content by taking the portal to the right of the area.
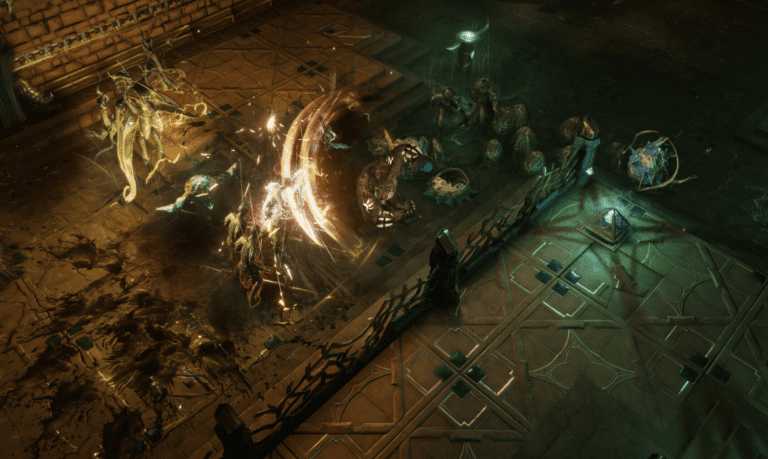
The Monolith of Fate allows you to visit various Timelines, each one consisting of dozens of nodes known as Echoes. These nodes are randomized, including the rewards you get from them.
The main thing to note for progression, however, is Stability. As you complete objectives within Echoes, you’ll gain Stability. The further away from the center of the Timeline, the more challenging the Echo, and the more Stability you gain.
You can see the Stability you’ve accrued at the top center of the screen when viewing the Timeline. You’ll unlock Quest Echoes at set Stability milestones.

Worth noting that sometimes you might find Temporal Keystones as a random drop when doing Echoes.

You can consume those by clicking on the plus sign on the Stability gauge to get an instant boost of Stability!
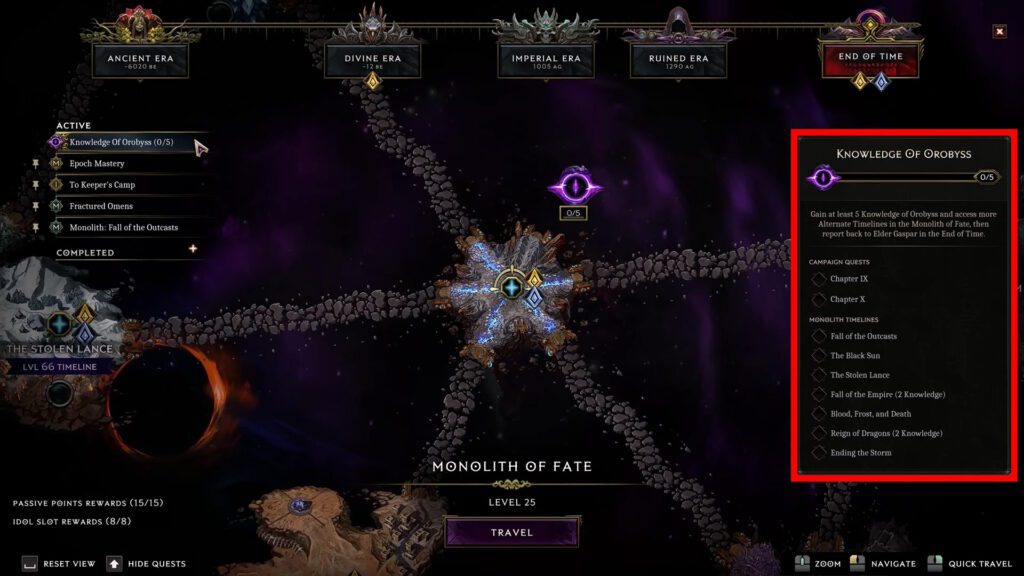
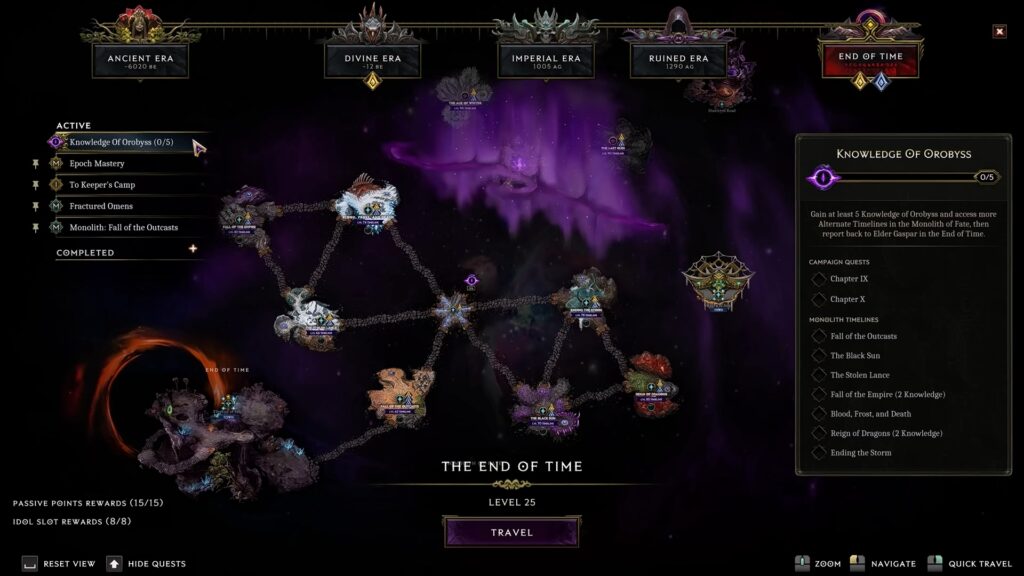
Complete the Quest Echoes in the Timeline to face the Timeline Boss. Defeat that boss to stabilize the Timeline, earning Knowledge of Orobyss in the process. You’ll need 5 of these to gain access to the harder Level 90+ Timelines.
So, the gist of the Monolith of Fate is fairly simple. Enter a Timeline and complete Echoes to obtain Stability. Then use the Stability to complete the Quest Echoes and finish the Timeline while obtaining Knowledge of Orobyss. Rinse and repeat!
Unlocking the Empowered Monolith of Fate Timelines
Once you’ve managed to obtain 5 Knowledge of Orobyss via standard Knowledge of Orobyss, you’ll be able to tackle the Level 90+ Timelines. That is basically your next goal at this point in the endgame.
Completing any of the Level 90+ Timelines will allow you to fight a Harbinger. Defeating at least 1 Harbinger will then unlock the Empowered variant of the Monolith of Fate Timelines.
These Empowered Timelines (also known as Empowered Monos or Empowered Monoliths) are meant as the true endgame of Last Epoch. As such, you’re expected to be around the late 70s or early 80s level-wise before taking them on.
If you’re still in the leveling process, I recommend checking out our guide on how to level up fast. It shows a method that allows you to get loads of Experience through Monoliths.
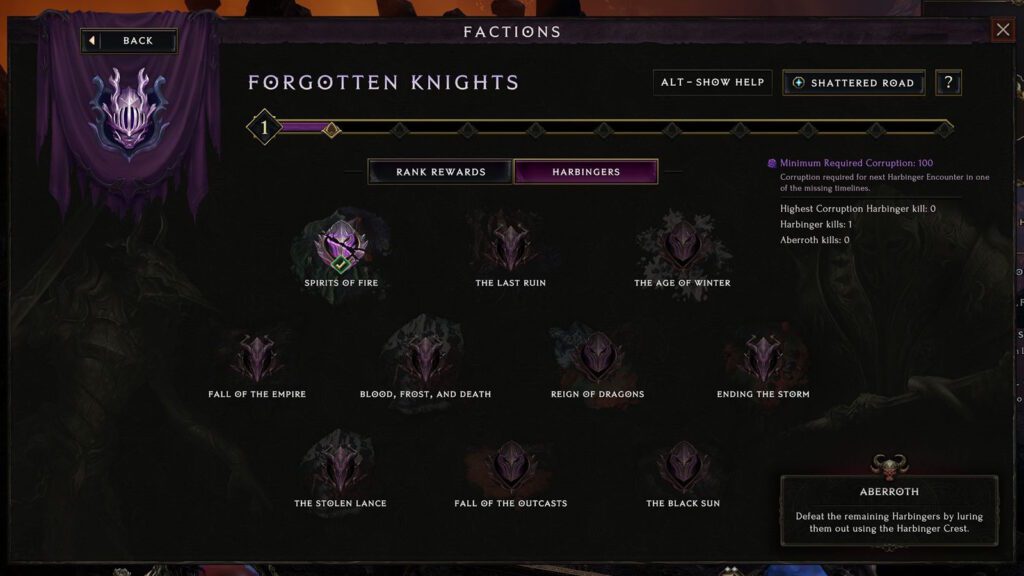
Defeating your first Harbinger will also unlock the Forgotten Knights Endgame Faction. You can progress through their ranks by simply defeating more of the Harbingers. Each Timeline has a different Harbinger, and you can track them through the Forgotten Knights faction screen.
However, Harbingers don’t just spawn all the time! Instead, you’ll need to raise the Corruption levels for the Timelines. The minimum required Corruption is also shown in the Harbingers screen for the Forgotten Knights.
What is Corruption?

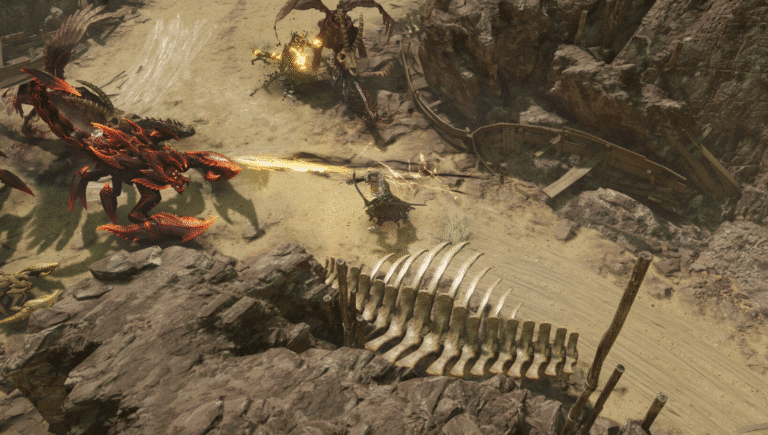
As you go through the Timelines, you’ll sometimes encounter the Echo of a World node. Entering that node will allow you to fight a unique boss called the Shade of Orobyss.

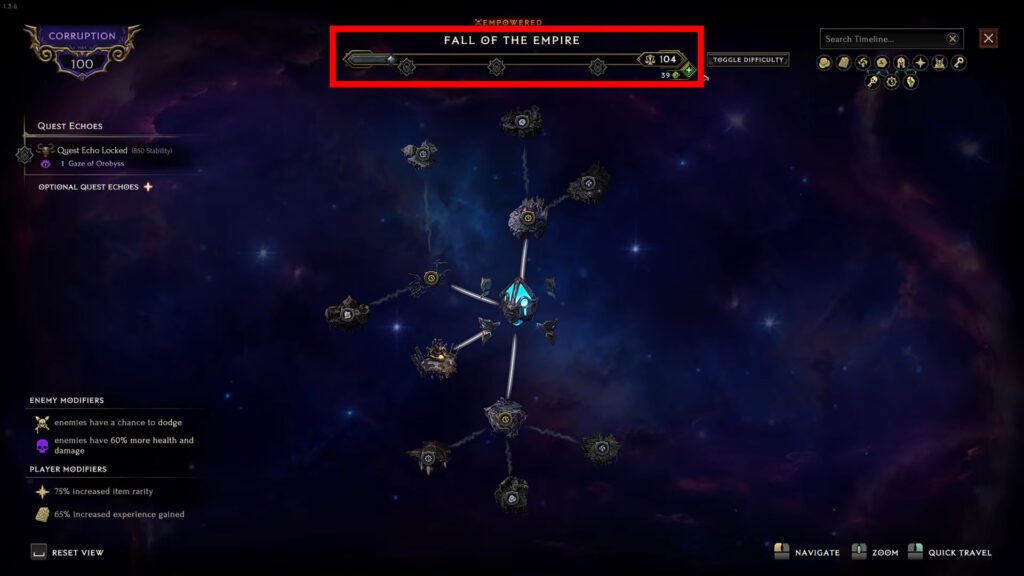
Managing to defeat this unique boss will reset the Timeline while increasing its Corruption. You can then see the current Corruption in the top left corner of the screen when looking at the Timeline.
Corruption is essentially a difficulty modifier for the entire Timeline. The higher the Corruption, the harder the Timeline is. However, you’ll also get better rewards, including rarer items and more Experience.
As I explained in the previous section, you’ll also need to reach specific Corruption milestones to make Harbingers appear at the end of a Timeline. These milestones are every 25 Corruption, maxing out at 300 Corruption for Harbingers.
However, do note that Corruption softcaps at 1000, and you also need 500 to be able to challenge Uber Aberroth. If you want to see all the content, 500 should be your goal.
Regardless, if you wish to hunt down all of the Harbingers, I recommend trying to get at least one timeline to 300 Corruption as soon as possible.
The main reason for that is that Timelines with lower Corruption can catch up quickly. Completing an Echo of a World node will give you bonus Corruption based on whichever Timeline has the highest Corruption currently.
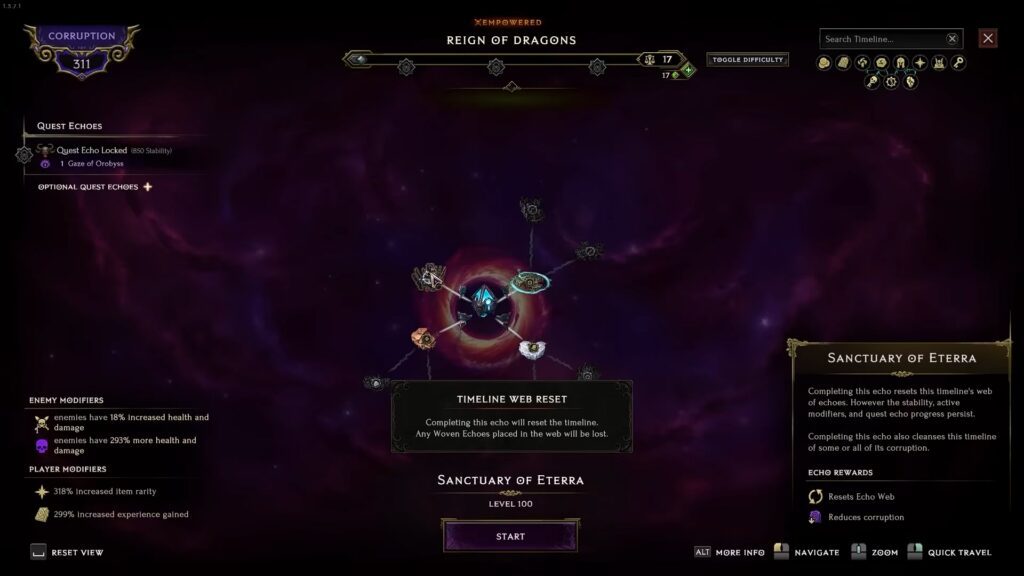
However, if you find the challenge too tough to handle currently, complete a Sanctuary of Eterra instead. This allows you to reset the Timeline while reducing the Corruption, with 3 choices on how much to reduce it.
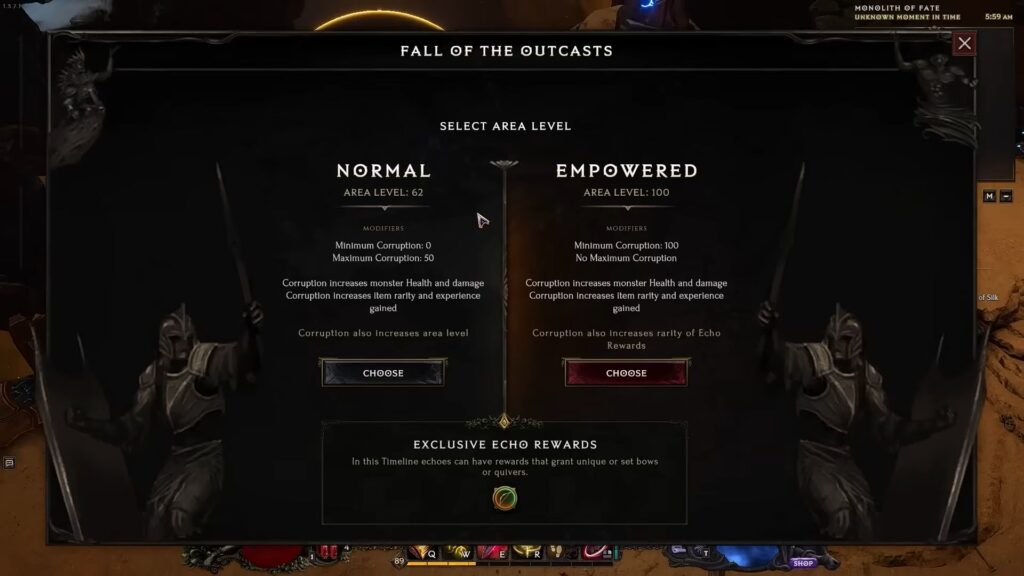
Lastly, it’s worth noting that Empowered Timelines have a minimum of 100 Corruption. Conversely, regular Monoliths have a maximum limit of 50 Corruption.
If you want more details on how to raise Corruption fast, check out our guide on how to get a lot of Corruption.
Wrapping Up
By now, you should have a fairly solid understanding of what you need to do to progress through the endgame in Season 4 of Last Epoch, whether you’re a new player or a returning veteran.
For new players, the gist of it is to play through the campaign doing all Passive Point and Idol Slot rewards side quests. Then, tackle the Monolith of Fate Timelines, which are the main endgame content in this game.
As for veterans, I’m sure you’re all used to the general progression by now, as Season 4 doesn’t drastically change it. The Monolith of Fate is more open now, instead of having a set order for its Timelines, but overall progression is relatively the same.
Either way, now you know how to tackle the endgame content! Are you still undecided on what build to bring into this, though? Check out our list of meta builds and our list of easy and simple builds.