 26 articles
The Finals is a great game, but its cheat detection software can get overeager sometimes, causing issues like the recent wave of TFAV1012 errors.
This error says that there was a “system integrity violation” of some sort, and is mostly related to the game detecting corrupted files or cheats. The game then crashes or closes, preventing you from playing!
In this guide, we’ll go over various potential fixes to this particular error.
How to Fix Error Code TFAV1012
Delete the Game’s Config & Cache
Sometimes, the TFAV1012 error is caused simply due to corrupted cache and config files for the game. How the files get corrupted to begin with is anyone’s guess but deleting them solves the issue!
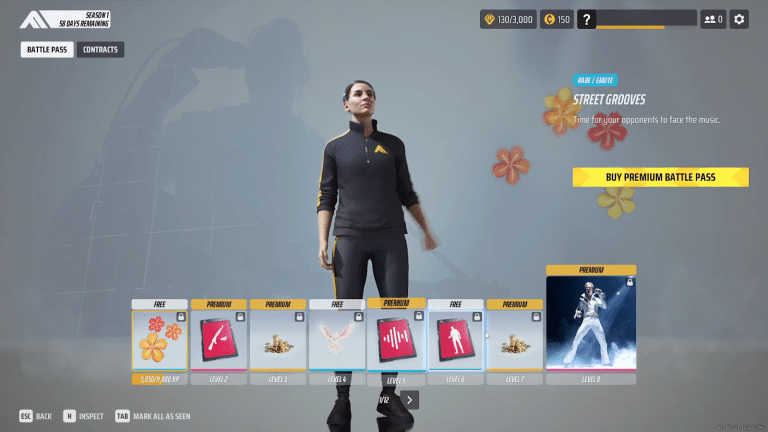
 The Finals: Is the Battle Pass Worth Buying?Jan 17, 2024
 The Finals: Top Players Allegedly Caught CheatingJan 11, 2024
 The Finals: Toxic Gas Complete Guide | How To UseDec 30, 2023
To start, press Windows Key + R to bring up the “Run” window, then paste the following address: %localappdata%\Discovery
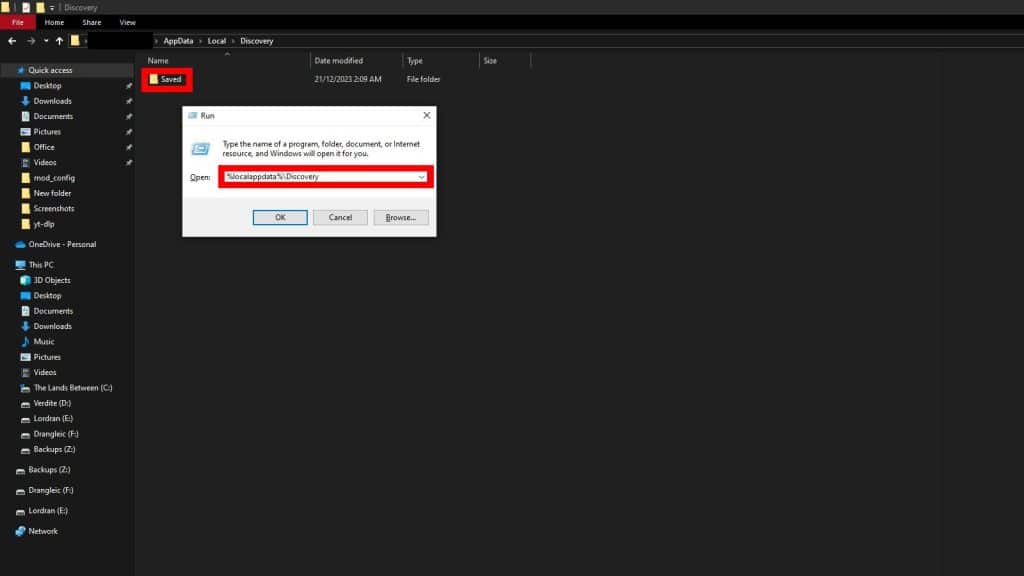
Press Enter and it should open a folder with a single subfolder titled “Saved”. Delete the “Saved” subfolder here.
Don’t worry, you won’t lose your profile in the game! After all, it’s stored on the game’s servers. You will, however, lose any changes you made to the game’s settings.
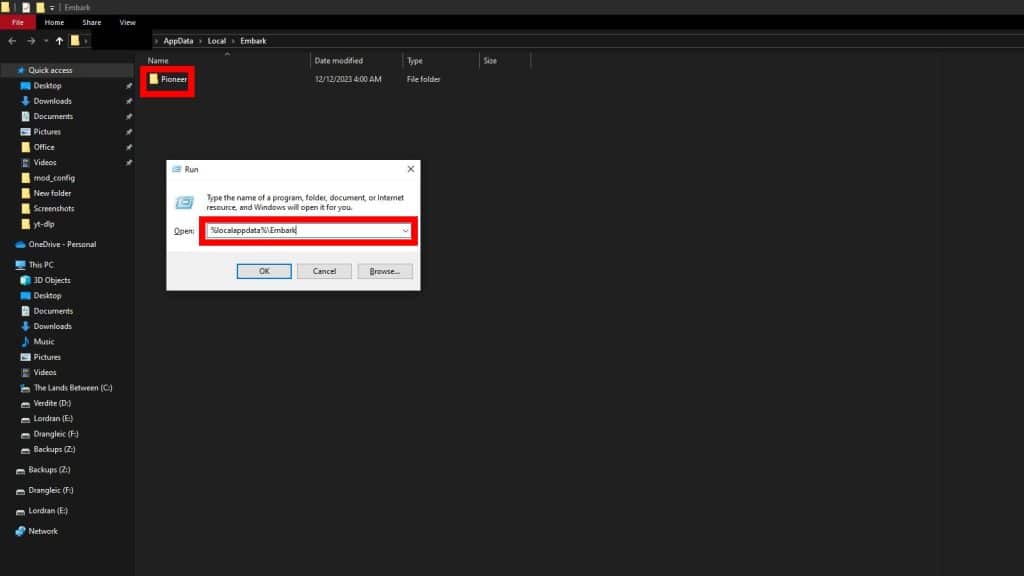
After deleting that folder, press Windows Key + R again paste this second address: %localappdata%\Embark
Press Enter and you will again be inside a folder, this time with a single sub-folder titled “Pioneer”.
Delete the “Pioneer” folder as well and then try to play The Finals. Though, make sure to change your settings again as well!
Hopefully, this fixed any issues with damaged cache or config files and now the game works as intended. If not, read on!
Check For Updates
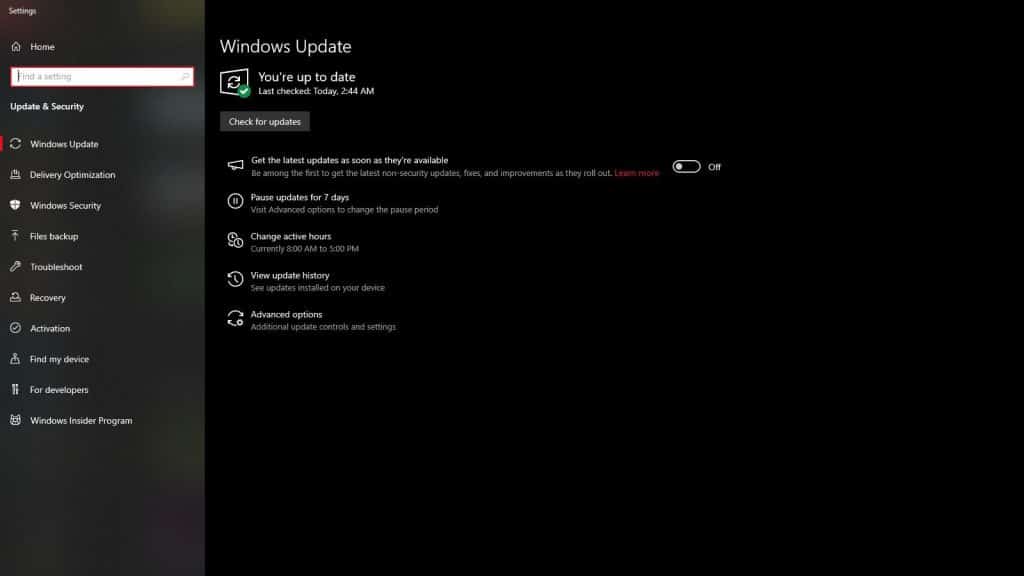
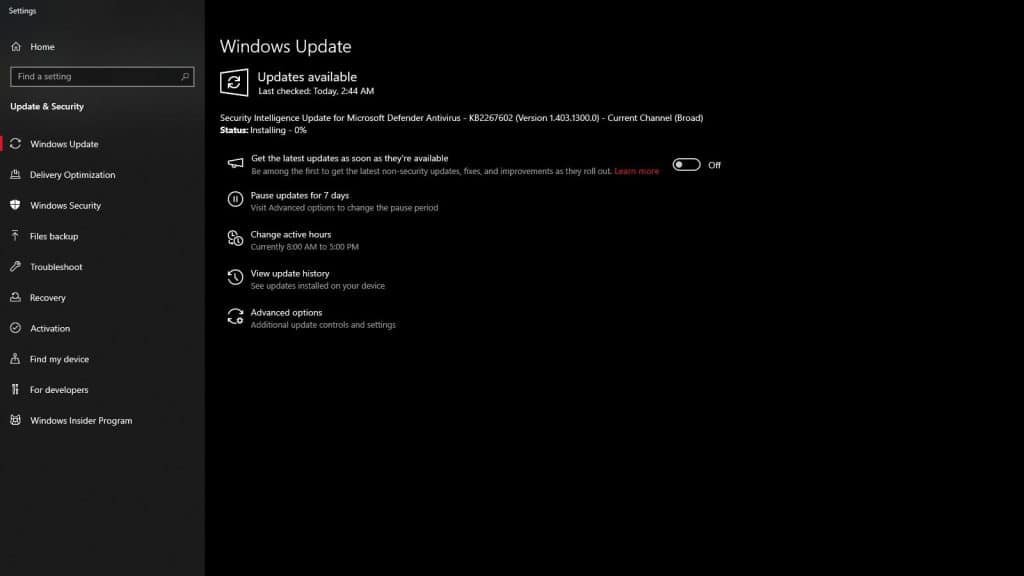
One of the first things you should check is to make sure that your Windows is up to date.
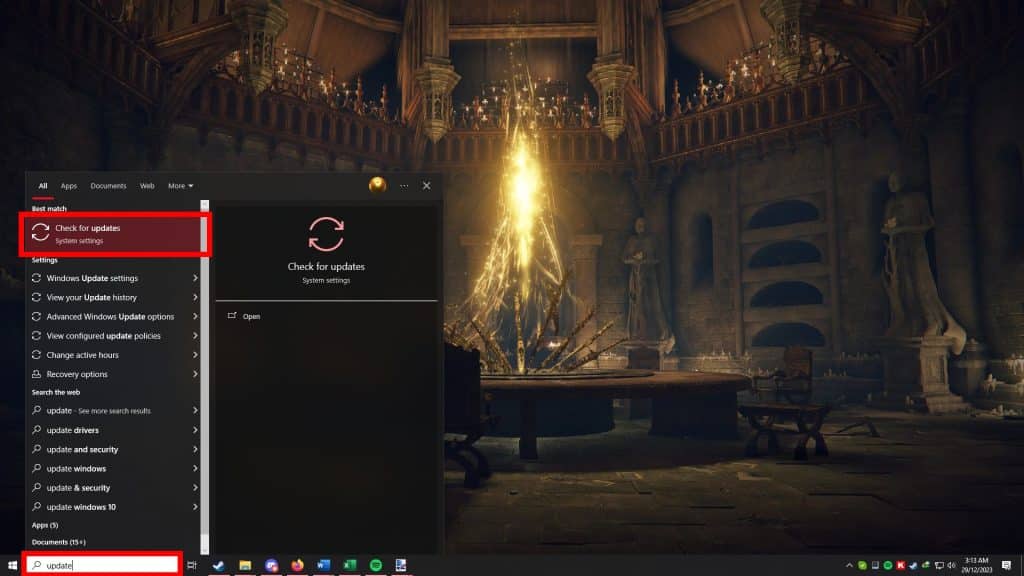
To do so, just type “Update” in the Windows Search bar and click on “Check for Updates”.
This will open the Windows Update settings, which will let you know if everything’s up to date. If it says, “Updates Available”, choose to install the updates and then wait for them to download and install.
If that doesn’t help, or your Windows is already up to date, you should instead update your GPU drivers.
You can download the latest drivers for your GPU from your manufacturer’s website. The links below lead to the official websites for all GPU manufacturers:
Disable NVIDIA Overlay
For some users, the TFAV1012 error is entirely fixed by simply disabling the NVIDIA overlay.
It seems that, for some reason, the game’s anti-cheat detects the overlay as a cheat software, causing the error.
So, those of you with NVIDIA GPUs might wish to disable this overlay, at least for the time being!
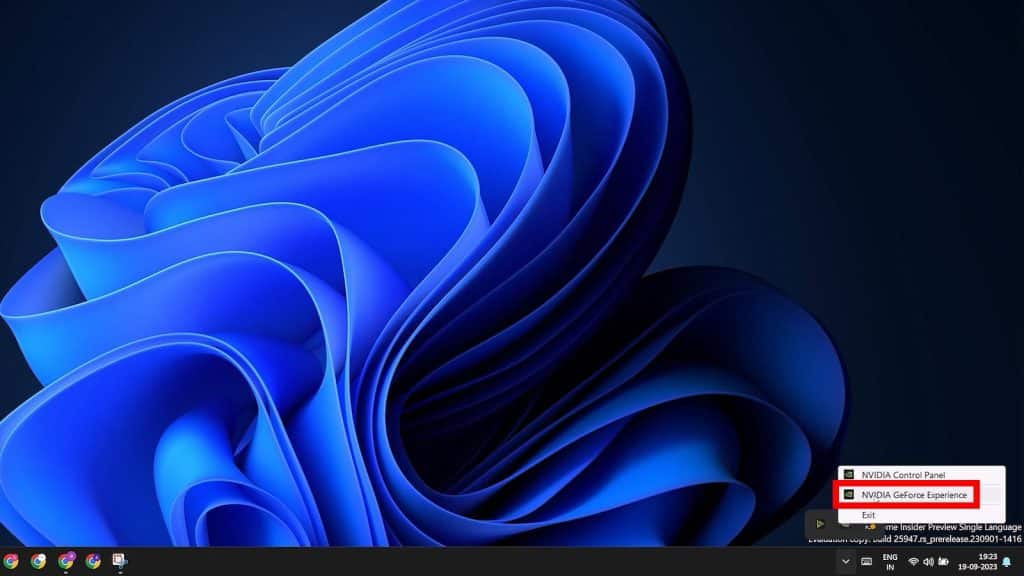
To disable the NVIDIA in-game overlay, look for the NVIDIA GeForce Experience icon. Click on it to open up the NVIDIA GeForce control panel.
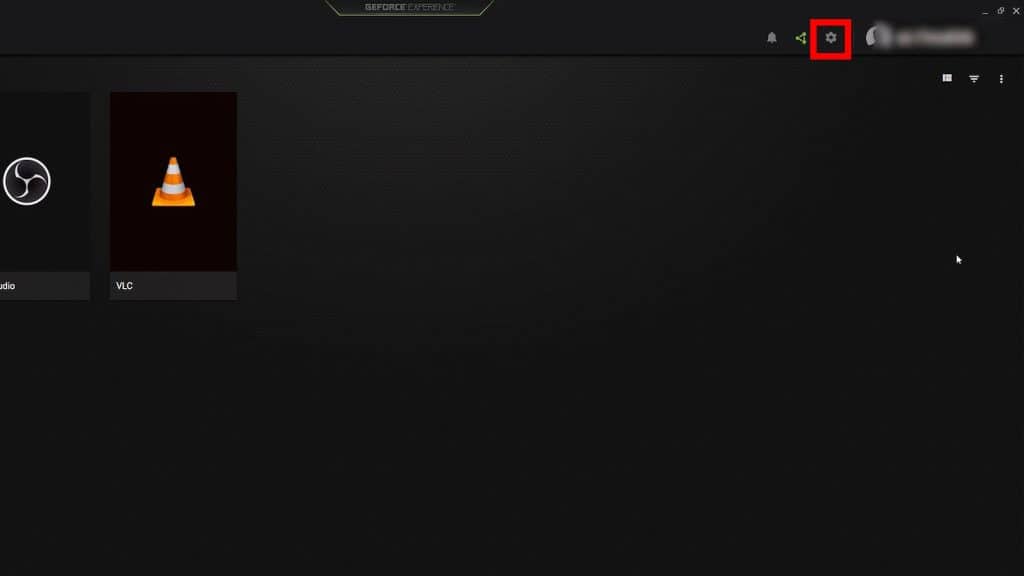
In the control panel, look for the cog-shaped icon on the top-right and click on it to open the Settings.
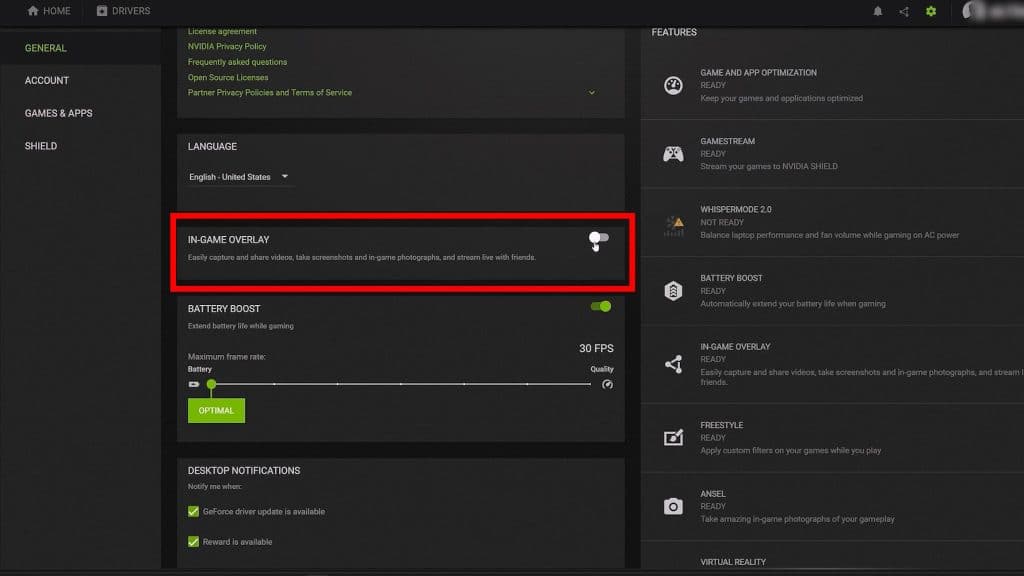
Now, just look for the toggle for “In-Game Overlay” and set it to disabled.
Lastly, try playing The Finals again and the TFAV1012 error should (hopefully) not rear its ugly head again!
Reinstall the Game
The last potential fix we have for you is to simply reinstall the game entirely.
Considering that TFAV1012 is an error related to a failed integrity check, we will err on the side of caution by uninstalling the game entirely instead of verifying files.
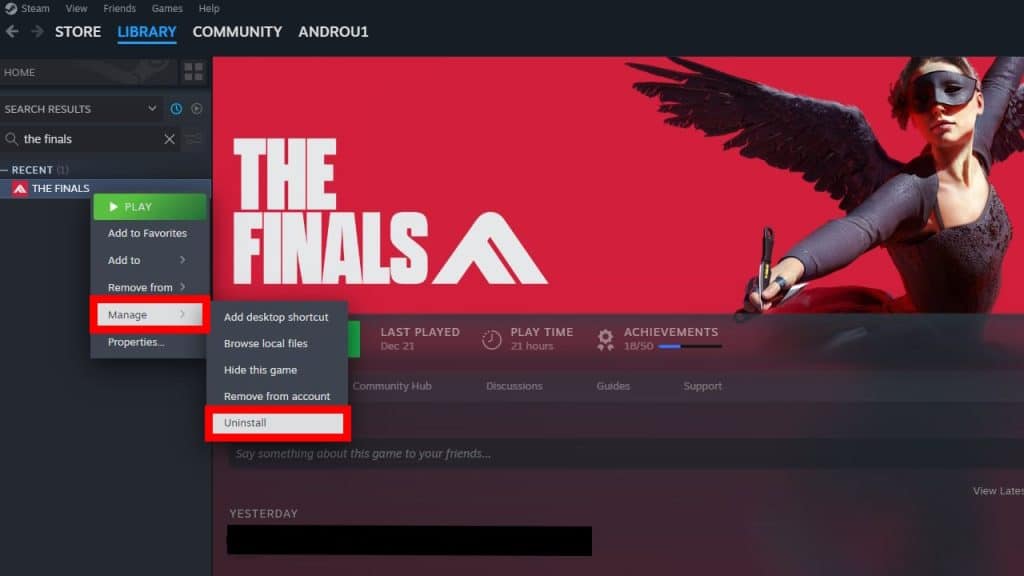
Look for The Finals on Steam and right-click on it, then choose “Uninstall” under the “Manage” sub-menu.
Wait for the game’s files to be deleted, then choose to Install the game again.

Once it installs again, try launching the game and it will hopefully work as intended now!
If even this fails to alleviate or fix the issue, there might be a conflict between your computer and the game.
Some users report that the issue started appearing after changing settings in their BIOS or changing components of their PC.
These cases would be unique to each user, so we sadly can’t provide a “one-size-fits-all” fix for them. You should instead make sure that everything on your computer is in working order, as well.
Though, we hope that at least one of our potential fixes helped you. We hope you can get back to fighting other Contestants in The Finals’ hectic money matches soon!
Up next, why not check this guide on how to fix the “MISSING_ANGELSCRIPT_CALLSTACK Discovery” Error, so you have an idea of what to do if it occurs for you.
ALSO READ: The Finals: Best Competitive Settings Guide | Season 1