



 157 articles
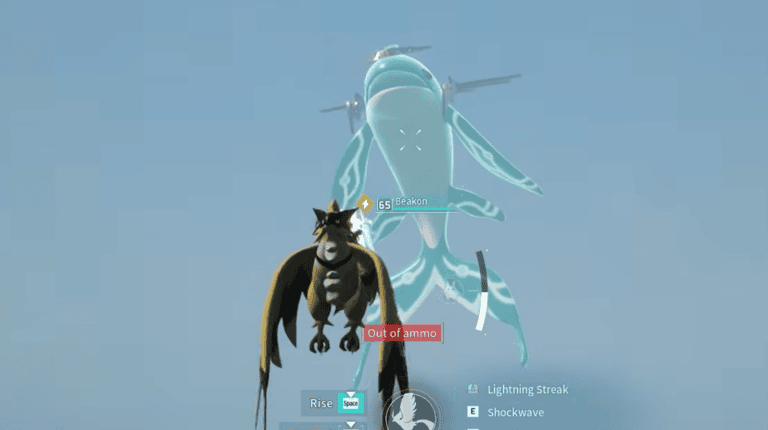
Panthalus is the legendary giant whale Pal introduced in Palworld 1.0 and it is one of the most sought after Pals in the game right now. It is a Water-type flying whale that plays a central role in the main story, and you need it in your active party to access the World Tree, which is the new endgame area added in 1.0.
It does not roam the world as a wild spawn so you cannot simply stumble across it during exploration. Getting it requires completing a multi-step quest chain that starts after defeating Auri, the new tower boss on Sunreach Island. In this guide, I will walk you through every step so you can get Panthalus without wasting time figuring out what to do next.
How to Find & Capture Panthalus
Before you can even think about going after Panthalus, you need to reach level 70 with both yourself and your Pals at minimum. This is a serious endgame quest and going in underleveled will make every step of it significantly harder than it needs to be.
Once you are at the right level, your first objective is to defeat Auri and Shaolong, the new Tower Boss duo found in Sunreach. To get there you first need to defeat Bjorn and Bastigor at the Feybreak Tower. Doing so unlocks the altar that lets you fast travel to Sunreach.
 Best Base Locations in Palworld 1.0 (Early, Mid and Endgame Spots)Jul 11, 2026
 How to Get Shaolong (Flying Dragon) Pal in Palworld 1.0Jul 11, 2026
 Best Team Builds in Palworld 1.0Jul 11, 2026
When it comes to taking down Shaolong specifically, knowing its weaknesses makes the fight a lot more manageable. Shaolong is a Dragon and Water-type Pal which means it is weak to Ice and Electric-type skills.
Build your party around Pals that cover those two types and the fight will go considerably smoother. Some of the strongest options available to you are Frostallion for Ice coverage and Orserk for Electric. Bring both if you have them and you will be well equipped to handle the fight.
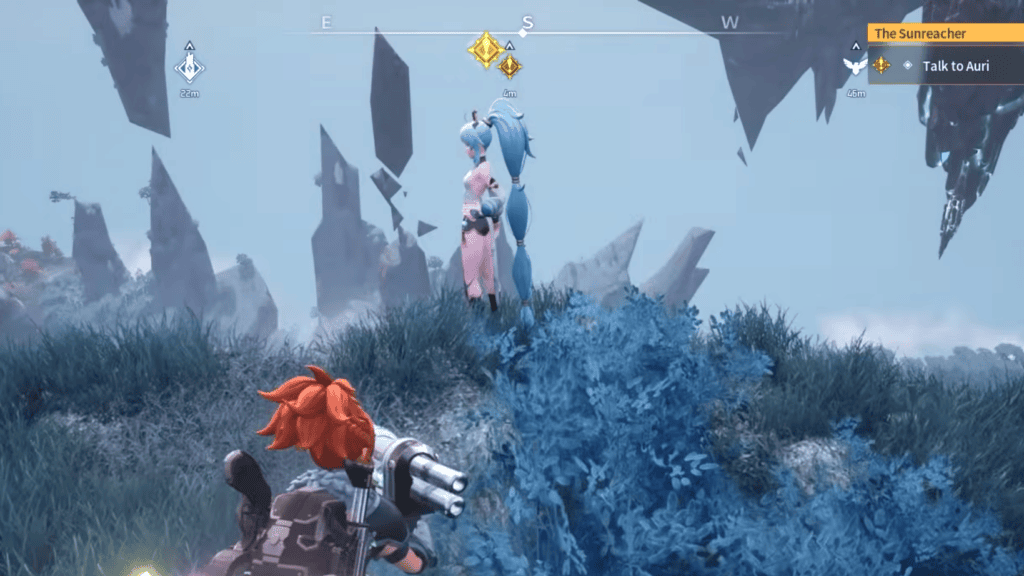
Once you have defeated Auri, do not just move on straight away. Stay and talk to her after the battle. Once the conversation wraps up, “The Sunreacher” quest will be marked as completed.
From there a new quest called “The Calamity” will activate. To progress it you simply need to talk to Auri again. Once the dialogue is finished, The Calamity will be marked as completed and the “Panthalus” quest will finally unlock, kicking off the main chain that leads you to the legendary whale itself.
Collecting Four Echobones
Once the Panthalus quest is active, you will be tasked with collecting four Echobone pieces scattered across the map. Each one is found inside the skull section of giant whale bone fossils spread around different regions.
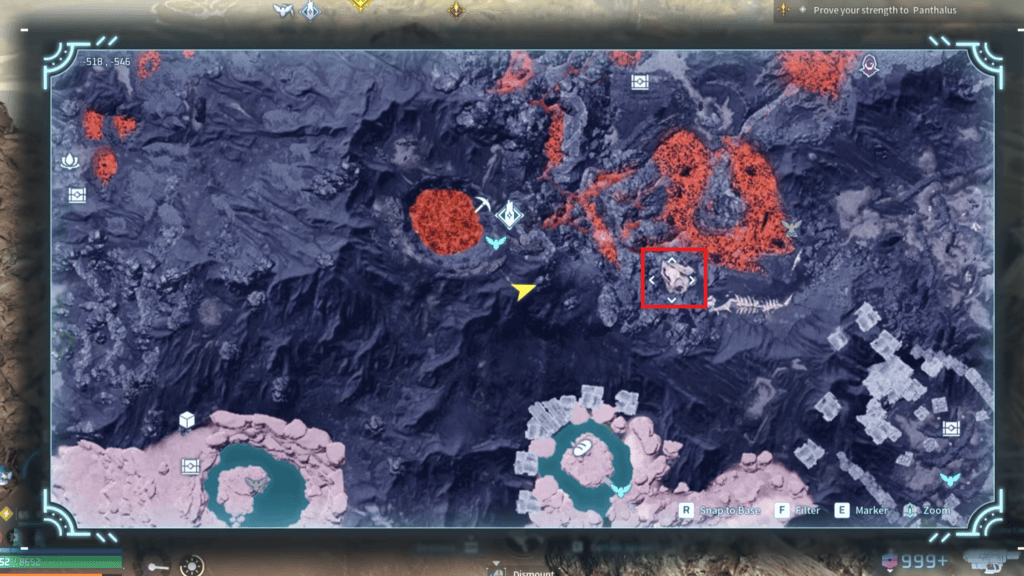
The fossils are hard to miss once you know what you are looking for given their size, but finding all four without help can take a while. I have marked all four locations on the map below so you can head straight to each one without any unnecessary detours.
Echobone Location #1
The first Echobone you need to track down is called the Bubbling Bone. It is found at the head of a whale fossil located near the lava in the volcanic area of the map. The exact coordinates are -516, -549 and I have marked the precise location on the map below.
Echobone Location #2
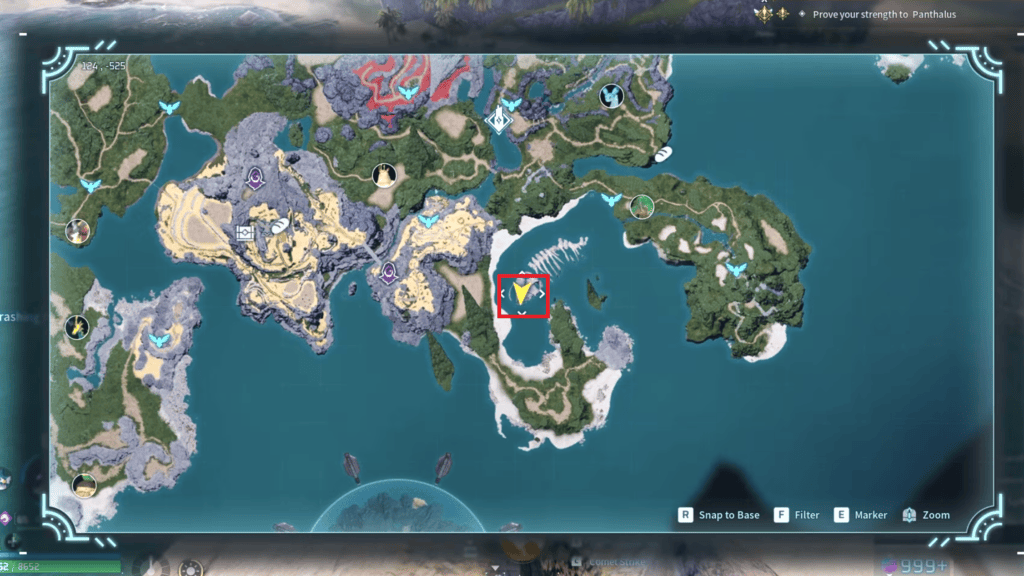
The second Echobone is called the Crashing Waves Bone and it is the easiest of the four to track down. It sits right near the starting area of the game at coordinates 123, -525, inside the skull of the whale fossil there. If you have been playing since launch, you have probably already passed by this fossil without realizing what it was for.
Echobone Location #3
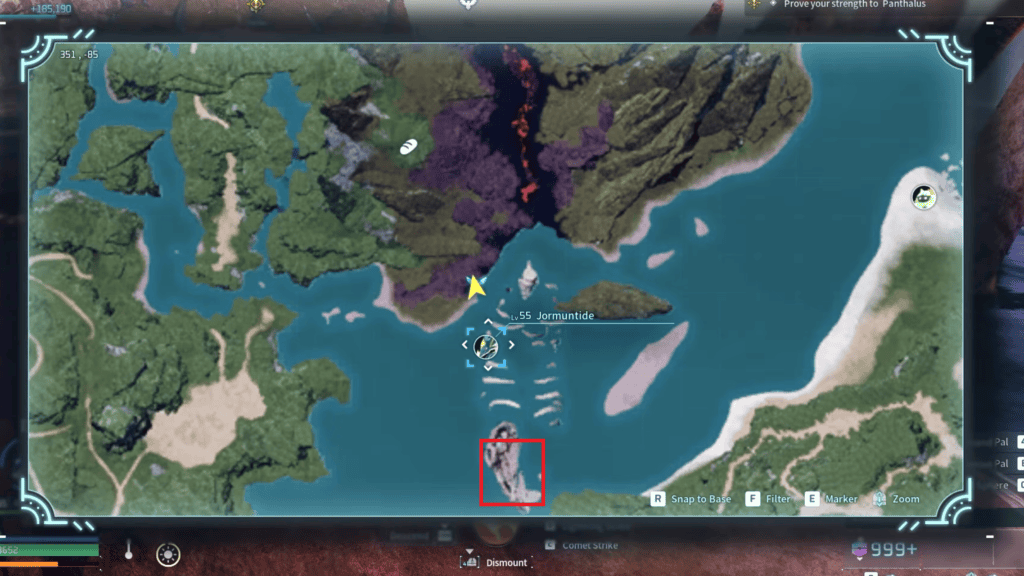
The third Echobone is called the Stillness Bone and it is located near the Jormuntide Alpha boss area. There is a fast travel point at coordinates 351, -85 which drops you right in the middle of the fossil area. From there simply make your way to the skull section of the whale fossil and interact with it to collect the bone. I have marked the exact location on the map below so you know precisely where to look.
Echobone Location #4
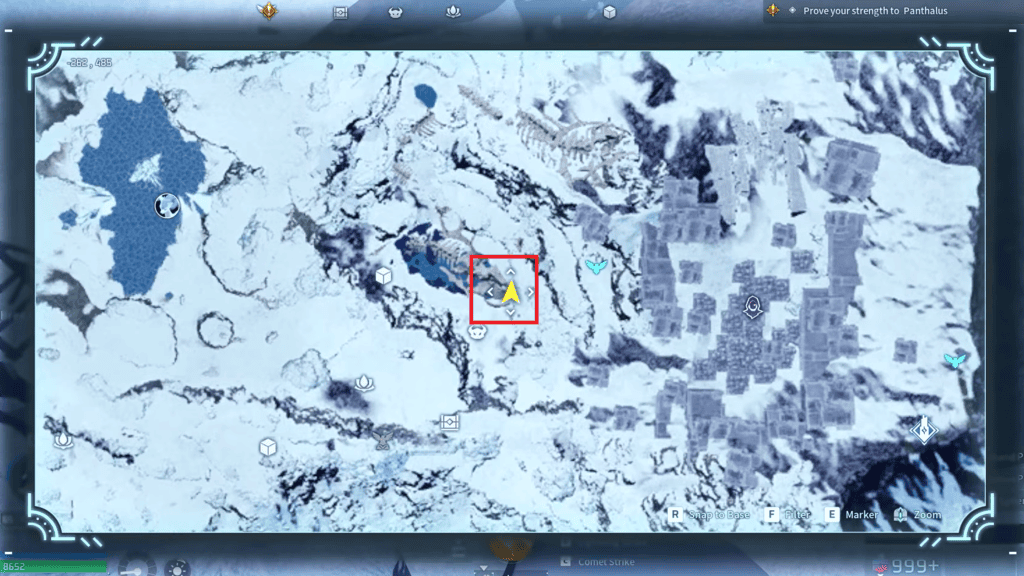
The fourth and final Echobone is called the Sea Breeze Bone and it is found in the Astral Mountains region, specifically in the Forgotten Mineshaft area. The coordinates are -262, 485 and I have marked the exact location on the map below.
Getting the Blurry Schematic
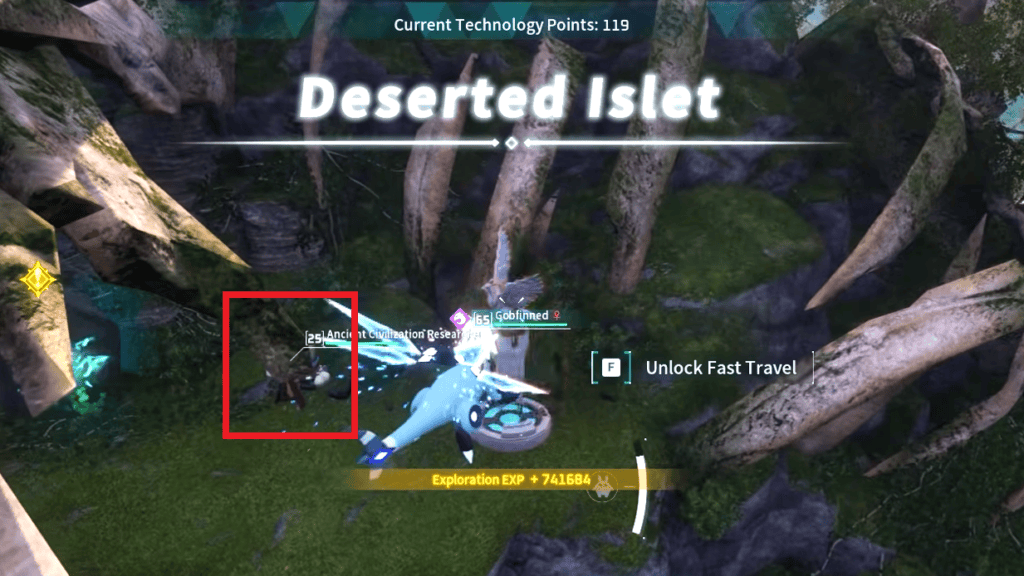
With all four Echobones collected, your next step is to get the Blurry Schematic, which is essentially the crafting recipe you need to put together the Echoing Flute. Head over to the Deserted Islet at coordinates -166, 33. I have marked it on the map below as well so you can set your waypoint before heading out.
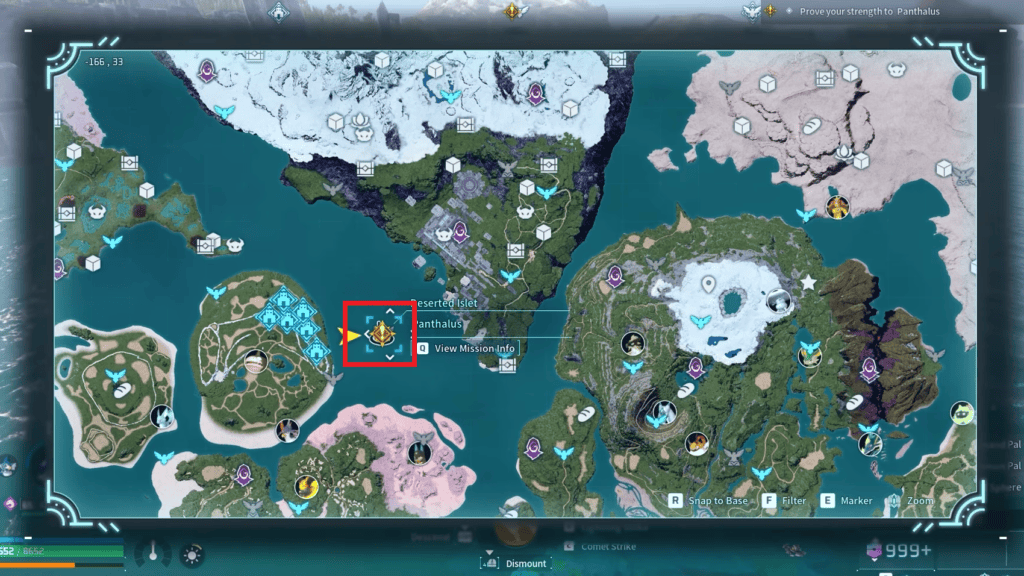
Once you arrive and unlock the fast travel point, look to the left of it and you will find an NPC standing there. This is the Ancient Civilization Researcher. Go ahead and talk to him and select “Yes” throughout the conversation whenever you are prompted.
Once the dialogue wraps up he will hand you the Blurry Schematic. That is the crafting recipe in hand and you are one step closer to summoning Panthalus.
Crafting the Echoing Flute
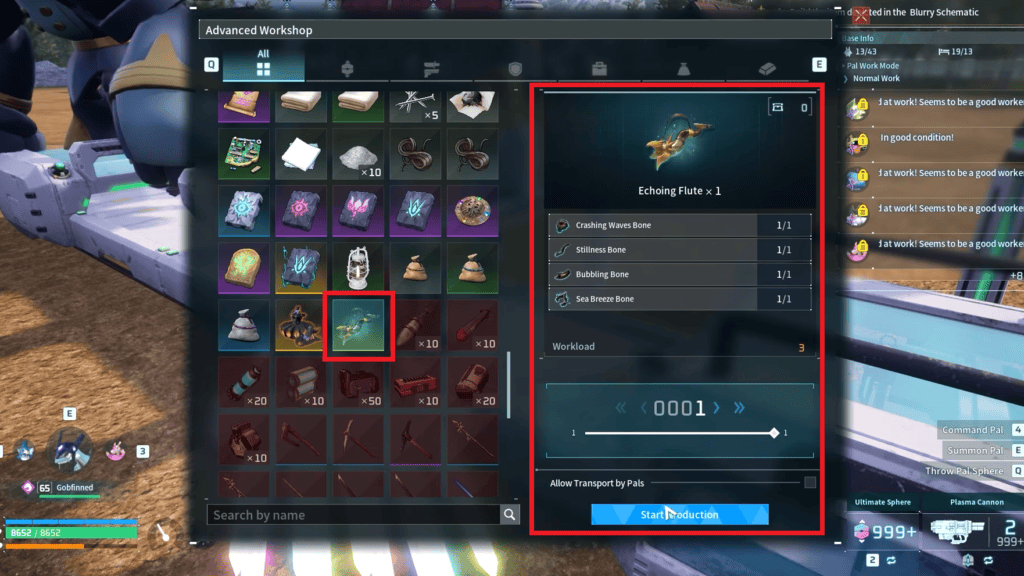
With the Blurry Schematic in hand, head back to your base and open up your Advanced Workshop. Inside you will find the Echoing Flute recipe has been added now that you have the schematic.
Craft it using the four Echobones you collected earlier, the Bubbling Bone, the Crashing Waves Bone, the Stillness Bone, and the Sea Breeze Bone. Once the Echoing Flute is crafted, you are ready for the final step of the quest.
How to Summon Panthalus
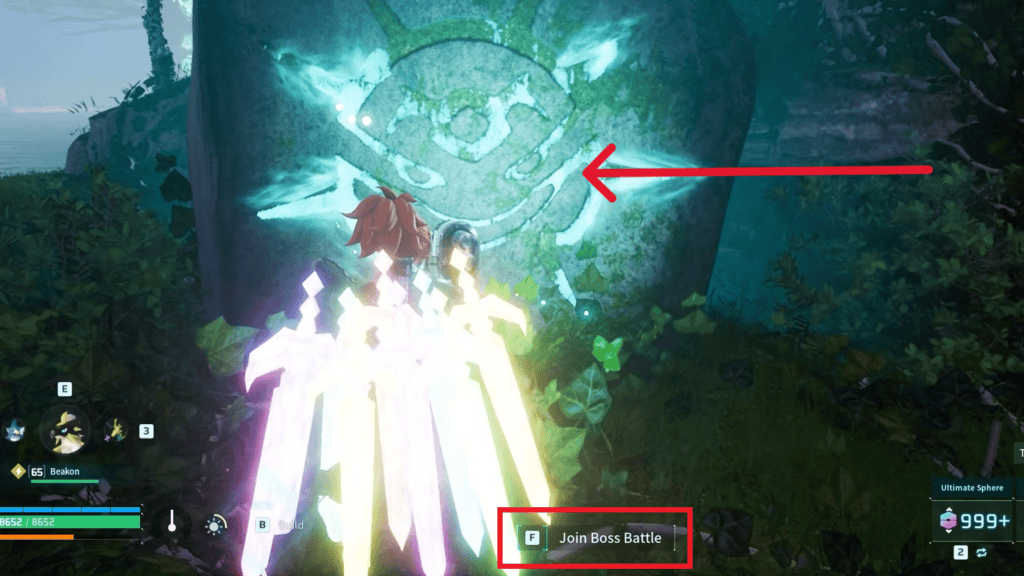
Now that you have the Echoing Flute crafted, it is time to head back to the Deserted Islet and summon Panthalus. Make your way back there using the fast travel point you unlocked earlier. Once you arrive, head to the left of the Ancient Civilization Researcher NPC.
You will find a large rock with a glowing face on it sitting there. Interact with it and your character will play the Echoing Flute, triggering a cutscene of Panthalus awakening from the depths.
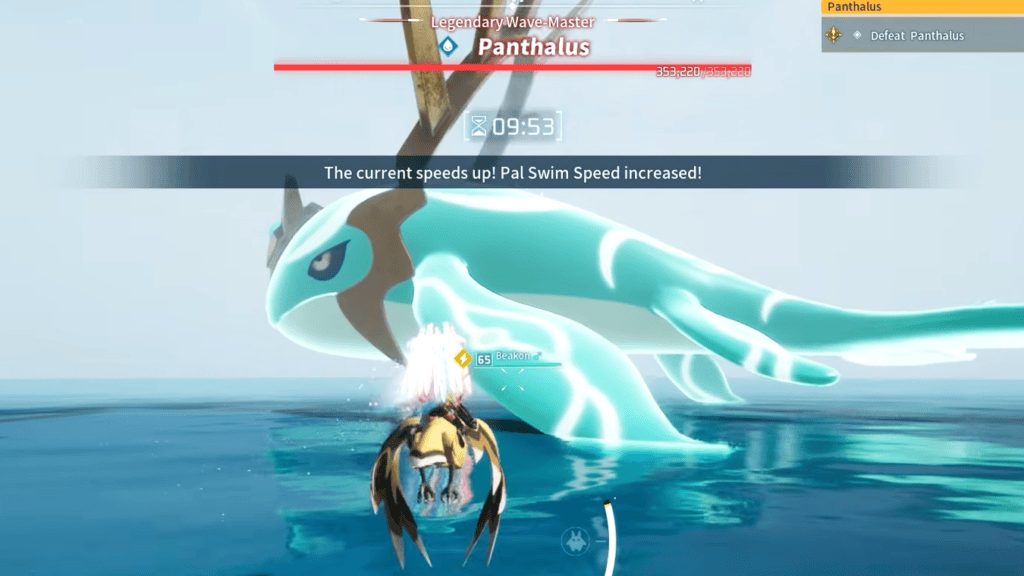
Once the cutscene finishes the boss fight will begin and you will have a ten minute window to bring Panthalus down and catch it. Make sure you are fully prepared before interacting with the rock since the fight starts immediately after.
Tips for Defeating Panthalus
Before you interact with the glowing rock and start the fight, make sure you have the right Pals with you. Panthalus is a Water-type Pal which means Electric-type Pals are your strongest option here.
Beakon and Helzephyr Lux are both solid picks if you have them available. You will also want to bring either a swimming or flying mount for this fight.
A flying mount is the better choice in my opinion since staying airborne makes dodging Panthalus’s attacks significantly easier and keeps you out of range of its more dangerous moves.
Once you have whittled Panthalus down to its last sliver of health, throw any Pal Sphere to capture it. It does not matter which tier of sphere you use here since the capture is guaranteed once its health is low enough.
There is no need to waste your Ultra or Legendary Spheres on this one. Save those for other catches and use whatever you have available. After the catch, speak with the Ancient Civilization Researcher one final time to officially complete the quest.
That’s It
Panthalus is one of the most rewarding Pals to add to your roster in Palworld 1.0. Beyond being a key part of the main story and your ticket into the World Tree, it also functions as a flying mount and patrols your base from the sky, bombing intruders from above when assigned there. The quest chain to get it is involved but every step of it feels purposeful and the payoff at the end is well worth the effort.
If you are still figuring out where to set up your bases while working through all of this, check out my Best Base Locations in Palworld 1.0 guide for the best spots at every stage of the game.



Found another tip?
Share your extra strategy, correction, or question below. Helpful comments can make this guide better for everyone.