


 156 articles
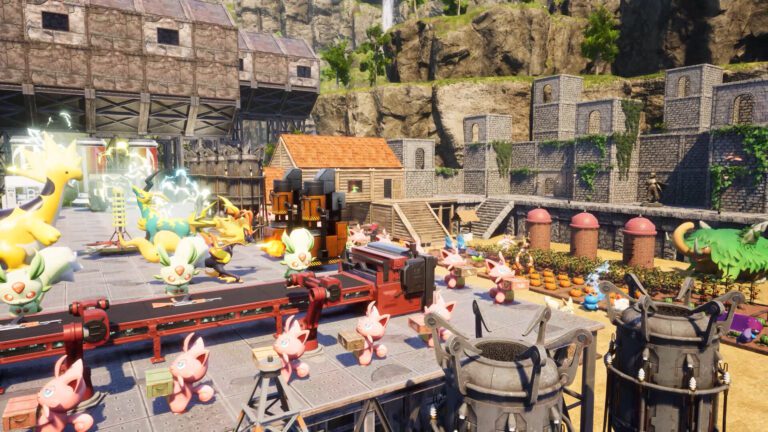
Palworld 1.0 just launched and it brought two new regions, seven new islands, aquatic base building, and a full map overhaul that changed where the best base spots actually are. You can build up to three bases simultaneously, and since relocating costs time and resources, picking the right spots from the start makes a meaningful difference to how smoothly your progression goes.
The general approach that works best is one early base in a safe temperate zone to get your production running, one mid game base focused on ore and coal farming, and one endgame base targeting whatever resource is bottlenecking your crafting. In this guide, I will cover the best locations for each stage so you are not wasting your base slots on spots you will outgrow in a few hours.
Best Locations For Building Your Bases
I will start off with the most accessible early game locations and work my way up from there as you progress through the game. Some of the bases on this list are chosen purely for their resource value and how efficiently they support your progression.
Others are included because they are genuinely cool spots to build in, whether that is the terrain, the view, or a unique environmental feature that makes your base feel like something more than just a resource farm.
 How to Get Shaolong (Flying Dragon) Pal in Palworld 1.0Jul 11, 2026
 Best Team Builds in Palworld 1.0Jul 11, 2026
 How to Get ALL Legendary Pals in Palworld 1.0Jul 11, 2026
Base Spot #01
The first location sits near the Zoe and Grizzbolt’s Tower of the Rayne Syndicate in the Windswept Hills. The exact coordinates are 90, -436 and I have marked it on the map below.
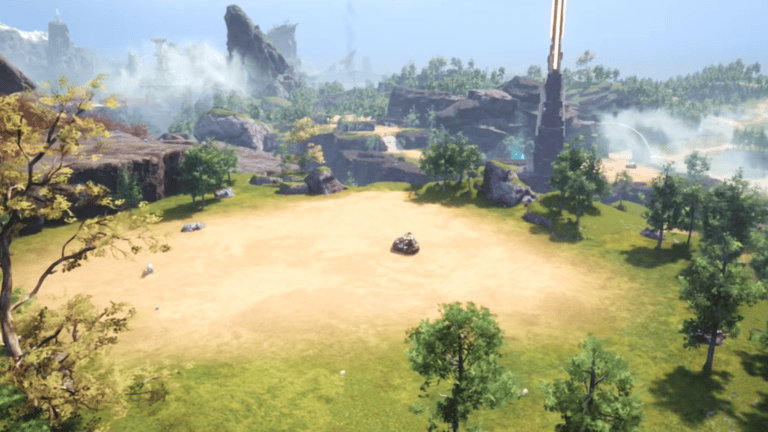
This is one of the cleanest early game spots you can settle in. The terrain is flat which makes laying down your first base structures straightforward without having to work around uneven ground. The surrounding area has a good supply of trees and stone which covers your basic early crafting needs.
There is also a metal node nearby which gives you a head start on ore before you have the technology to automate mining properly. It is not the most resource dense location in the game but for a first base it ticks all the right boxes and gives you a solid foundation to start building from.
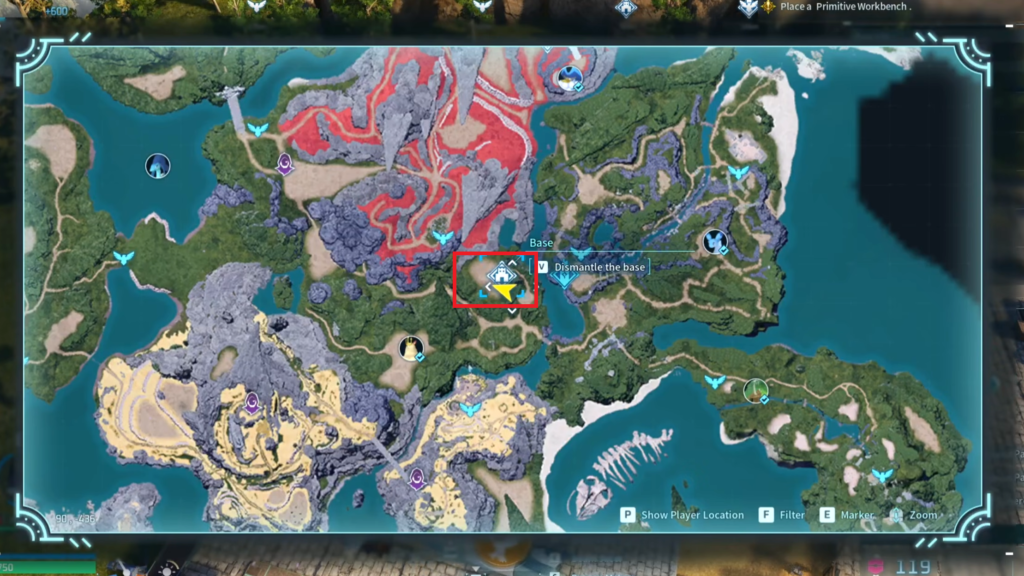
Base Spot #02
The coordinates for this location are 7, -515 and I have marked it on the map below. The main reason this spot makes the list is the metal nodes. There are a significant number of them clustered in this area, making it one of the best dedicated metal farming locations you can access in the early to mid game.
Once you have Pals assigned to mining here you will have a near constant supply of metal coming in without ever having to worry about running dry.
The terrain is also flat and open which makes setting up your base structures cleanly without any awkward height differences or obstacles getting in the way. If metal has been your main bottleneck, moving one of your base slots here will sort that out almost immediately.
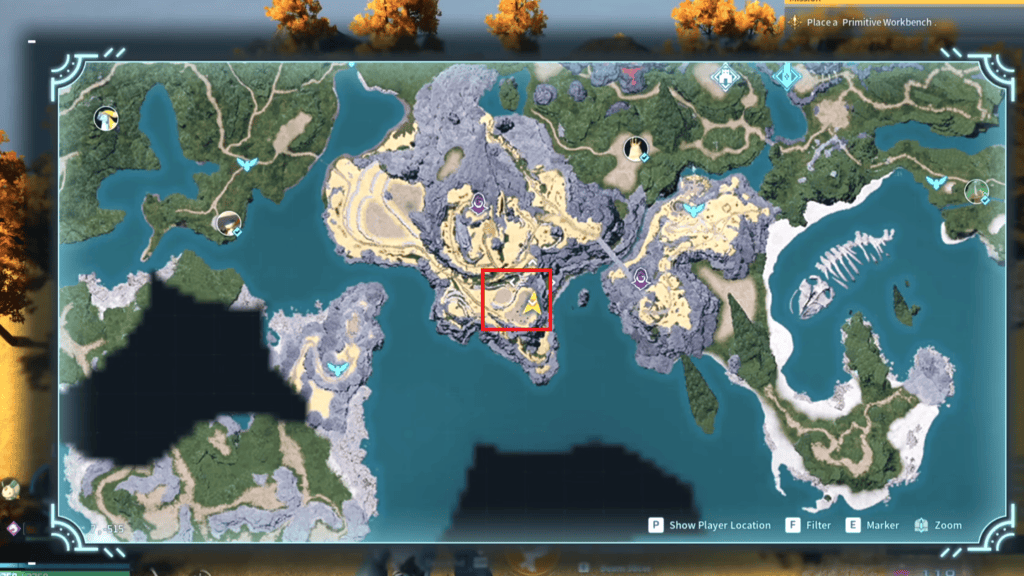
Base Spot #03
The coordinates for this location are 407, -320 and I have marked it on the map below. This spot stands out primarily because of how much open flat space it gives you to work with.
If you have been feeling cramped at your previous base locations, this is where you can finally spread out and build something properly without constantly running into terrain limitations.
The surrounding area has a healthy supply of trees and stones for your basic crafting needs, and there are two metal nodes nearby to keep your ore supply ticking over.
What makes this location particularly useful though is the water Pal population in the area. Water Pals spawn here in good numbers, which means farming Pal Fluids is genuinely easy from this base without having to travel far.
Pal Fluids are a resource that becomes increasingly important as you push into mid game crafting, so having a base that doubles as an easy farm spot for them is a nice bonus on top of everything else this location offers.
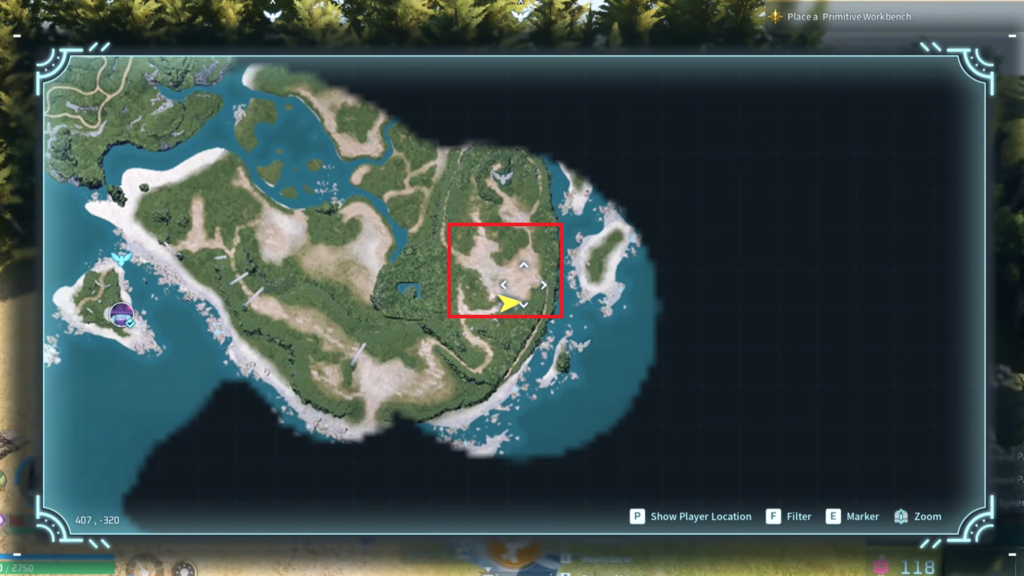
Base Spot #04
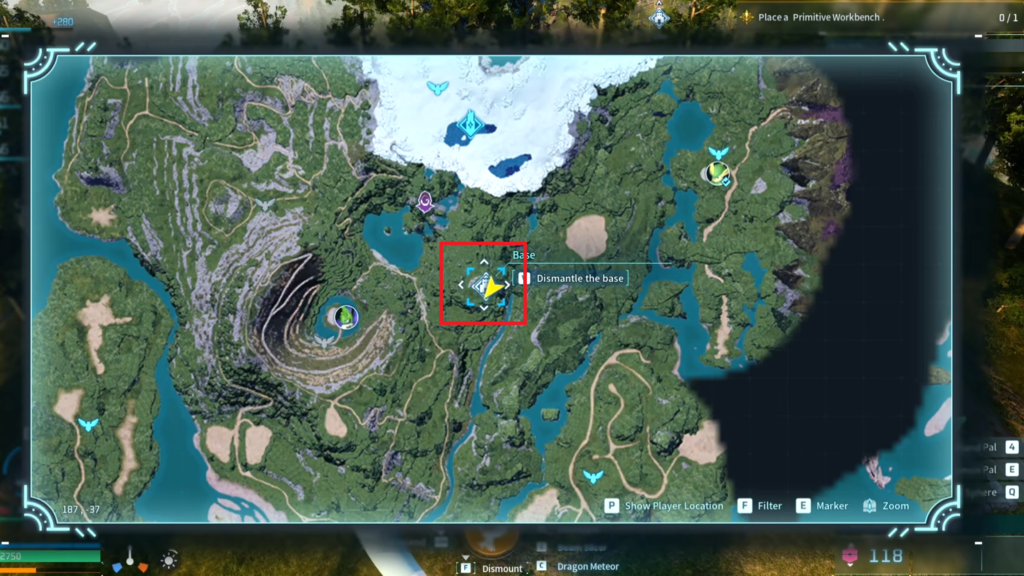
Head over to coordinates 187, -37 for this one and check the map below for the exact spot. This location earns its place on the list purely for its resource density. The area is packed with both coal and metal nodes, making it one of the best dedicated farming bases for those two materials in the mid game.
Once you have a solid team of mining Pals set up here, you will have a consistent supply of both resources coming in without much effort on your end.
Coal in particular becomes a significant bottleneck as you push into more advanced crafting, so having a base sitting on top of a cluster of nodes makes a noticeable difference to how smoothly your production runs.
The one thing worth knowing before you commit to this spot is that the terrain is not as generous as some of the other locations on this list. The area sits at a higher elevation and the buildable space is more limited and less flat compared to other spots I mentioned above.
You will need to be a bit more deliberate with how you lay out your structures to make the most of the space available. It is a trade off worth making though given how resource rich the location is.
Base Spot #05
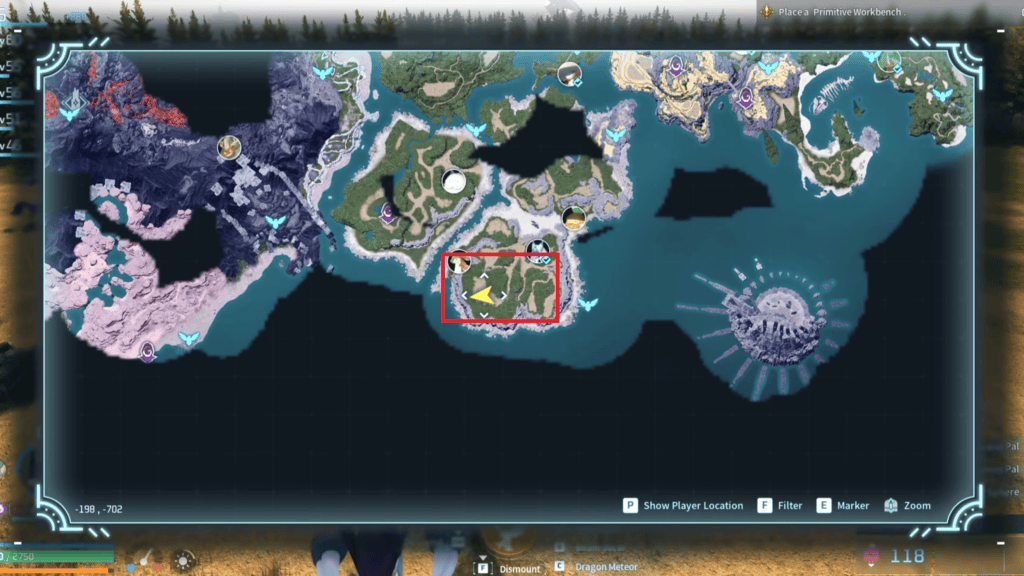
If open space is what you are after, the spot at -198, -702 is hard to beat. I have marked its location on the map below. This location is one of the largest flat buildable areas in the game and gives you the kind of room that most other spots simply cannot match.
If you have been wanting to build a sprawling base with dedicated production zones, separate storage areas, and room to expand without constantly hitting the boundaries of what the terrain allows, this is the spot to do it.
The sheer amount of usable flat land here makes it ideal for players who want to set up a proper long term base rather than a cramped functional one. Beyond the space itself, the area also has metal nodes, trees, and stones nearby so your basic resource needs are covered without having to travel far.
There are also a decent number of Pals roaming around the area, which gives you plenty of catching opportunities if you need to fill out your base workforce or are hunting for specific Pals to add to your collection.
It is not the most resource dense location on this list but as a home base that you can genuinely build something impressive in, it is one of the best spots in the game.
Base Spot #06
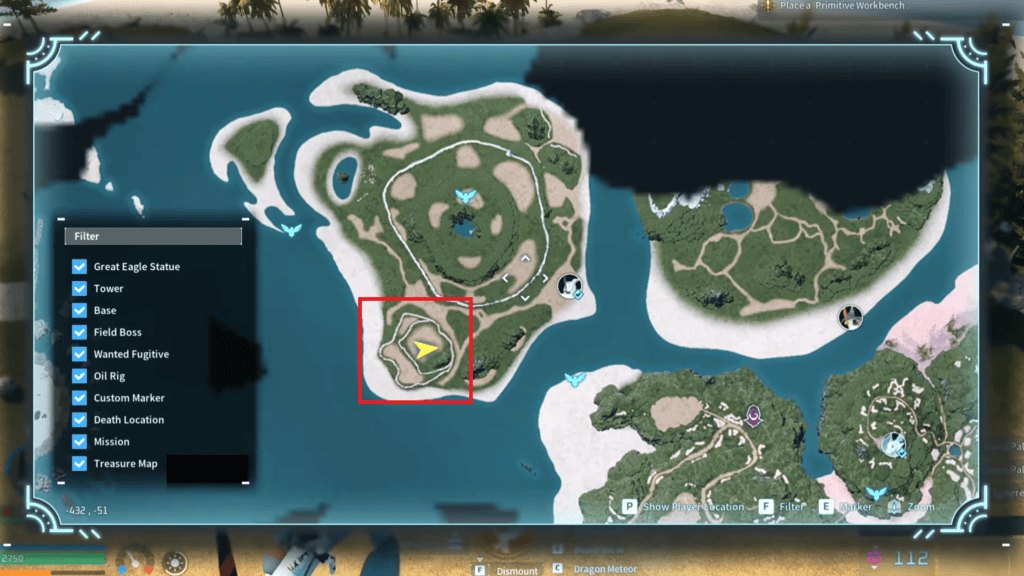
Next up is the spot at -432, -51, which I have marked on the map below. On the resource side of things, this location has a decent number of metal nodes along with trees and stones nearby to keep your basic production running smoothly. It is not the most resource rich spot on this list but it holds its own well enough to function as a solid all-round base.
What really sets this location apart though is the natural defense it provides. The entire area is surrounded by ledges on all sides, which creates a naturally fortified position that makes it significantly harder for raid enemies to reach your base.
Ground-based raids in particular struggle with the terrain here, and in some cases the pathing AI simply cannot navigate the ledges effectively enough to reach your structures.
For players who have been consistently losing Pals and buildings to raids, setting up here takes a lot of that pressure off without having to invest heavily in defensive structures.
On top of the practical benefits, the spot also looks genuinely impressive once you have a base built there. The elevated position surrounded by natural ledges gives it a real fortress feel that most flat open locations just cannot replicate.
If you want a base that is both functional and visually satisfying to come back to, this one delivers on both fronts.
Base Spot #07
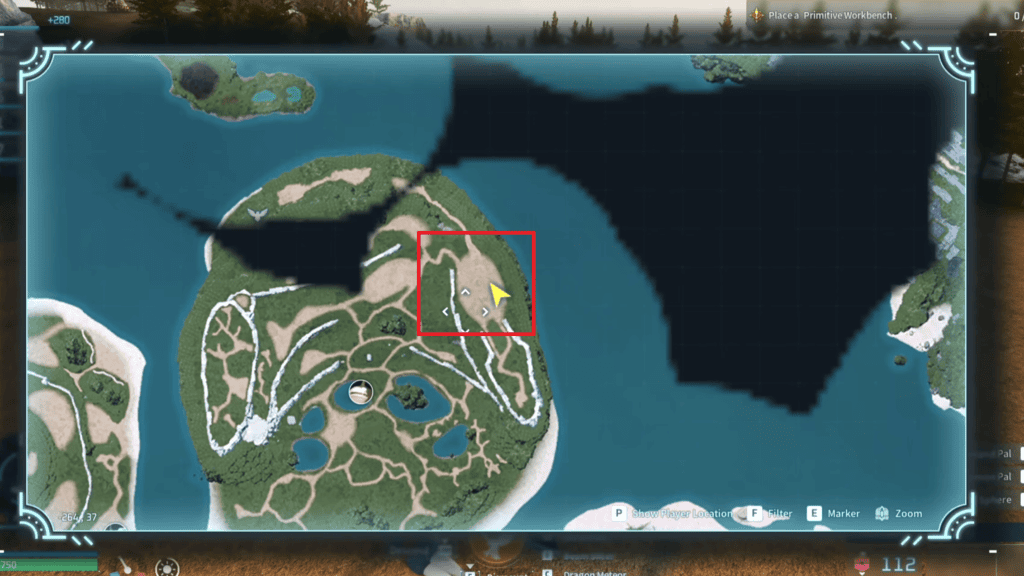
The area at -264, 37 is another excellent option if you are looking for space to build something substantial. I have marked it on the map below. Much like the 5th spot I mentioned above, this location gives you a generous amount of flat open terrain to work with.
The difference here is the layout, which feels a bit more contained and structured, making it slightly easier to plan out a well-organized base without the sprawl getting out of hand.
All the essential resources are available in the area including metal nodes, trees, and stones, so you will not need to go far for anything basic once your base is up and running.
The one thing to be aware of before you settle here is that the area starts off occupied by Syndicate Thugs. They will need to be cleared out before you can start building comfortably.
Once they are dealt with though, the land is completely yours and you will have one of the more spacious and well-resourced mid game base locations available to you in the game.
Base Spot #08
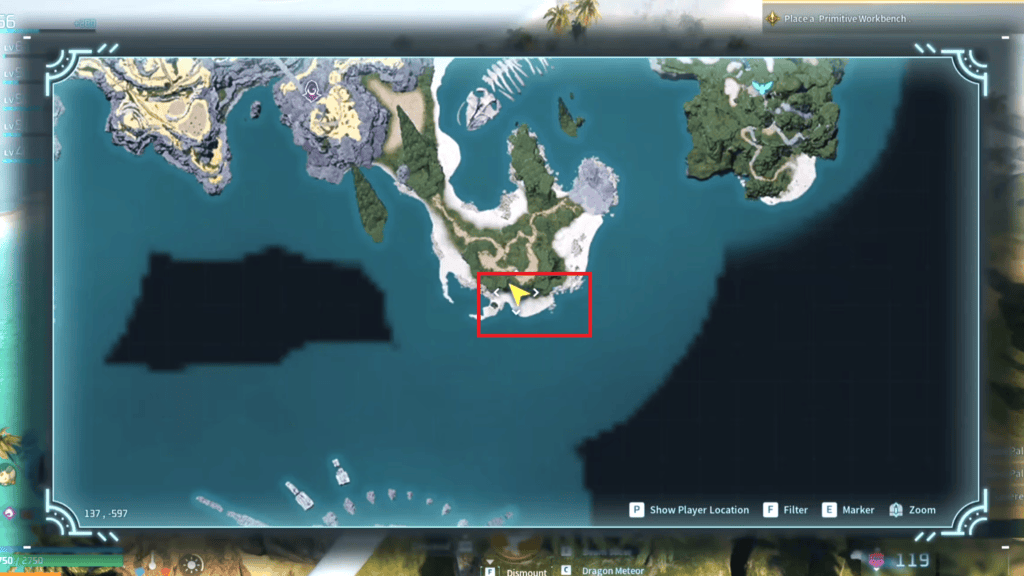
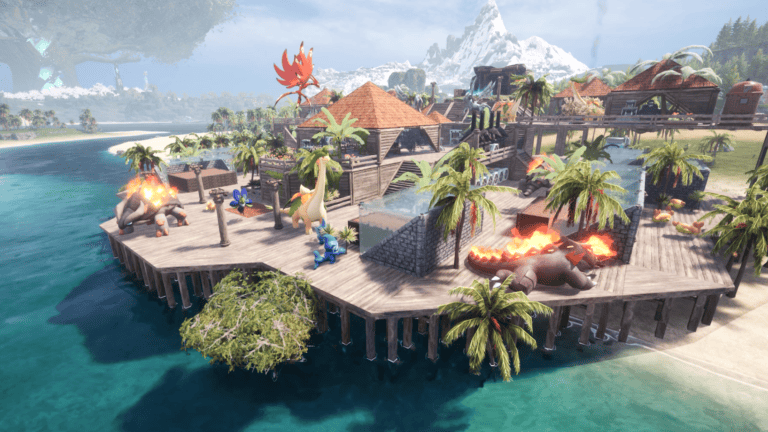
With the addition of the Aquatic Construction Kit in Palworld 1.0, building an offshore base is now a genuine option and it opens up a whole new category of base locations that were simply not possible before. One of the best spots to take advantage of this is at coordinates 137, -597, which I have marked on the map below.
The location itself has all the essential resources you need nearby including metal, trees, and stones, so your production does not suffer just because you are building over water. What makes this spot particularly appealing is the freedom it gives you to keep expanding outward into the water as your base grows.
Rather than being limited by the natural boundaries of the land, you can keep pushing your base further offshore and build something that genuinely looks unlike anything you could put together on solid ground.
There is also a practical benefit to building offshore here. Water based bases are naturally harder for raid enemies to reach since ground based pathing simply does not work over open water.
Combined with the visual appeal of having a base sitting out on the water, this location is one of the more unique and rewarding spots to settle in Palworld 1.0 if you want something that stands out from the typical land-based setups.
Base Spot #09
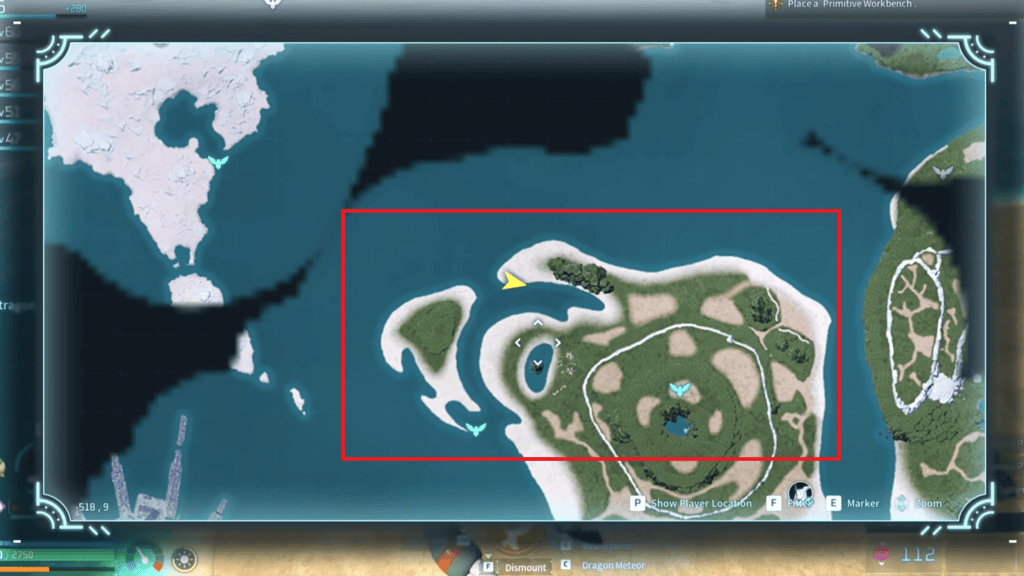
The spot at -518, 9 is another excellent offshore base location worth considering and I have marked it on the map below. This one is a bit different from the previous offshore location in terms of what it offers. The resource availability here is thinner compared to most of the other spots on this list, so it is not the ideal choice if you are purely chasing farming efficiency.
What it does offer instead is one of the more visually striking settings you can build in. The combination of the surrounding environment and the water creates a genuinely beautiful backdrop that makes the effort of setting up here feel worth it even without the resource density of other locations.
What also makes this spot particularly interesting is the flexibility it gives you with your base layout. You are not limited to building purely offshore or purely on land here. The terrain allows you to blend both, setting up part of your base on solid ground and extending the rest out over the water.
If you want a base that looks genuinely impressive and feels unique to come back to, this is one of the better spots in the game for achieving that.
Base Spot #10
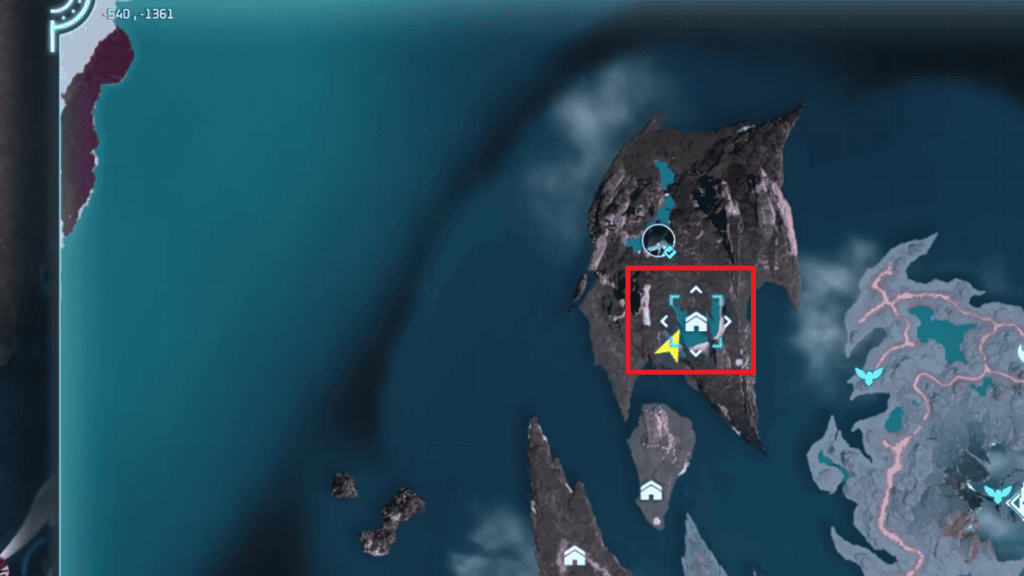
This spot is located in the new Sunreach region at coordinates -540, -1361 and I have marked it on the map below. This one is on the list purely for how stunning it looks and there is no shame in admitting that sometimes a base location earns its place on aesthetics alone.
The area features a body of water sitting in the middle, completely surrounded by tall cliff walls on all sides. The natural enclosure creates an almost arena-like setting that looks genuinely breathtaking, especially once you have a base built into it and structures rising up alongside the cliff faces.
From a practical standpoint the cliff walls also provide natural protection from raids since the enclosed terrain makes it difficult for enemies to path in effectively. So while this spot is primarily chosen for its visual appeal, it does come with some defensive benefits as a bonus.
Building here is an investment in creating something that looks incredible rather than purely optimizing for resource output, and Palworld 1.0 gives you enough tools and freedom to make that a completely valid choice. If you have ever wanted a base that looks like it belongs in a cinematic, this is the spot to do it.
That’s It
These are some of the best base locations worth checking out in Palworld 1.0. Whether you are picking a spot purely for resource efficiency, natural raid protection, or just because it looks incredible, the game gives you the creative freedom to build however you want and that is genuinely one of the best things about it.
A base is nothing without the right Pals running it. If you are not sure which Pals to assign to which jobs, check out our Base Pals Tier List to find the best workers for every role in your base.




Found another tip?
Share your extra strategy, correction, or question below. Helpful comments can make this guide better for everyone.