

Guides
Throne & Liberty: Kaiser Crimson Boss Guide | How to Skip All Mechanics
Let’s take down the Twisted Laboratory’s final boss, together!
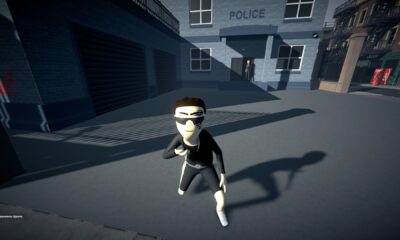
Kaiser Crimson is the final boss of the Twisted Laboratory in Throne & Liberty and has some unique mechanics to deal with, like most other bosses.
This boss primarily focuses on making most of the arena inhospitable. You’ll need to deal with the mechanics just right to create a safe zone, otherwise you’re going to be bleeding to death the whole fight! That said, there are also ways to potentially skip its mechanics.
Read on and we’ll tell you how to deal with all of this boss’ mechanics and even how to skip them when possible.
Kaiser Crimson Boss Guide | Throne & Liberty
Skipping Mechanics

Before we start the Kaise Crimson boss guide for Throne & Liberty properly, we want to note about how to “skip” the mechanics. Truthfully, all you need to do is to have 2 healers. If the healers are efficient, they can keep everyone healed and safe for the whole fight. Essentially, you just need to outheal the damage done by the boss. It’s as simple as it sounds, really!
However, we still recommend learning the mechanics and doing them as much as possible. It is ultimately easier, and you should only attempt the 2-healer skipping method if you’re queueing up into random parties. It can help if you’re unsure that others know the mechanics.
With that said, let’s go over the main mechanics of this fight and how to deal with them.
Purple Orb, Purple Orb!

Shortly after the fight starts, Kaiser Crimson will blink toward the player furthest away from him and mark them with up to 4 purple orbs. The number of purple orbs defines how many players should be inside the purple circle surrounding the marked player. For example, 4 orbs above the player’s head means that 3 other players must get close to them.
Communication can trivialize this mechanic. The marked player should count the orbs and announce it in chat to make things easier. It’s also a good idea to have one player always be the one standing furthest away from Kaiser Crimson. Essentially, give them the role of baiting and dealing with the purple orb marks to simplify the fight.
Darkslayer’s Memory and Bleed

Once enough players approach the marked player, the purple orbs will transform into a large crystal known as the Darkslayer’s Memory. This crystal will have a small circle surrounding it, denoting a safe area for you and your party.

At the same time, Kaiser Crimson will cast a huge red area-of-effect attack. This attack will inflict a bleed effect on anyone outside of the Darkslayer’s Memory area, signaled by the large red drop above players’ heads. As you might guess, the bleed effect deals high damage over time. You can cleanse the effect by simply entering the Darkslayer’s Memory safe zone.
As we also mentioned before, you can essentially skip the bleed mechanic entirely with 2 healers. Make sure that healers can outheal the bleed damage and your party will be fine. This is particularly helpful for melee characters, as they’ll be able to stick to Kaiser Crimson without having to worry about running to the Darkslayer’s Memory.
Red Orbs

Shortly after the previous attacks, Kaiser Crimson will teleport to the middle of the arena. He will then cast a red orb over 2 players’ heads, marking them. These red orbs will detonate into a strong area-of-effect attack after a while. Worth noting that Kaiser Crimson will mark 3 players instead of 2 once he’s below 50% HP.
To deal with this mechanic, the marked players should quickly run away from their teammates. They should also be away from the Darkslayer’s Memory safe zone. The red orb detonation will deal some damage and also stun the afflicted players.

After this, Kaiser Crimson will cover the entire arena’s floor in red circles. These detonate after a while to deal some damage and stun anyone hit. Carefully position yourself between the red circles to avoid them.
Breaking the Darkslayer’s Memory

Next up, Kaiser Crimson will disappear and start targeting the player furthest away from the center of the arena. This player and 2 others should quickly rush to the Darkslayer’s Memory safe zone.
Kaiser Crimson will throw a projectile at the furthest player, which will then bounce to two other nearby players. Then, the projectile will bounce toward the Darkslayer’s Memory, breaking it in the process.

Lastly, Kaiser Crimson will do an arena-wide area-of-effect attack. If you properly broke the Darkslayer’s Memory, he will have a cone-shaped safe area behind him. Just there to completely avoid all damage. That said, the damage from the attack should be survivable in the current version of the game, especially if you have two healers.
So there you have it, that’s the end of our boss guide for Kaiser Crimson and his mechanics in Throne & Liberty. At this point, the pattern just loops until you manage to defeat him. Just persevere a bit longer and you’ll win!
Do you also want to take down the boss in the Doomrot Grove? Well, we can help out with that, too! Check out our guide on the Norn Bercant boss and her mechanics.


Last Epoch 1.2 – Tips & Tricks | Tombs of the Erased
Starting the new season as a returning player or completely new one? Here are some tips for you!


Runescape Dragonwilds –Top 10 Tips & Tricks
Here are a few tips and tricks for the new Runescape Dragonwilds game!

Tips & Tricks to Get Rich in Schedule 1
Rapid fire tips and tricks to help you boost your profits!

How To Get Rid Of Items In Schedule 1
Vanish unwanted items straight into the void with one simple trick!