



 158 articles
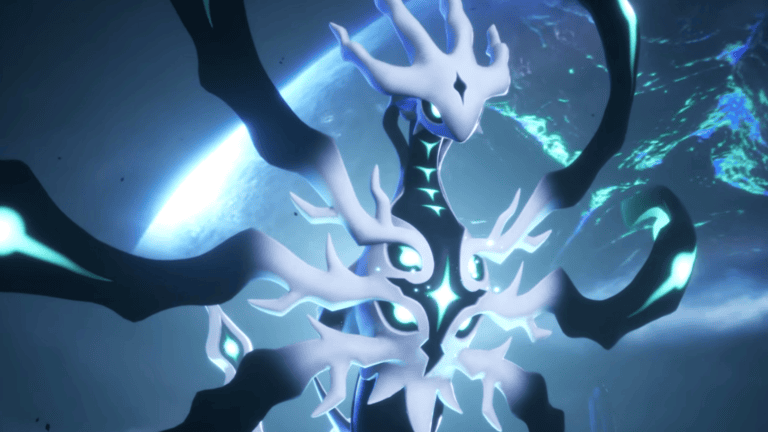
Zenara and Astralym are the final boss of Palworld 1.0 and they sit at the very end of a long endgame chain locked deep inside the World Tree. Zenara is the human character who fuses with Astralym, a level 80 boss-exclusive Pal with no elemental weaknesses, to create the hardest fight in the entire game.
One important thing to know going in is that Astralym cannot be caught. Defeating the fight adds it to your Paldex but you cannot own or deploy it. Getting to this fight is a multi-step process that starts with completing the Panthalus quest and getting access to the World Tree. In this guide, I will walk you through every requirement so you can get to the fight and take it down.
How to Reach Zenara & Astralym Final Boss Fight
Before you can even enter the Zenara and Astralym boss room, you need to collect all eight Key Spheres. Each one drops from a Tower Boss scattered across the map, and you need every single one before the final door will open.
If you have been playing since Early Access, there is a good chance you already have seven of them. The eighth is the new one added in 1.0 and requires taking on the brand new Sunreach tower boss.
 Where to Find Panthalus in Palworld 1.0Jul 11, 2026
 Best Base Locations in Palworld 1.0 (Early, Mid and Endgame Spots)Jul 11, 2026
 How to Get Shaolong (Flying Dragon) Pal in Palworld 1.0Jul 11, 2026
Below are all eight Tower Bosses listed in the recommended order to tackle them based on level progression. You can approach them in any order you want, but this is the natural route most players will follow.
- Zoe and Grizzbolt – Level 10
- Lily and Lyleen – Level 20
- Axel and Orzerk – Level 30
- Marcus and Faleris – Level 40
- Victor and Shadowbeak – Level 50
- Saya and Selyne – Level 55
- Bjorn and Bastigor – Level 60
- Auri and Shaolong – Level 68
Defeating Auri and Shaolong
Auri and Shaolong are the new Tower Boss duo added in 1.0 and they are found in the Sunreach region on the new floating islands. When you first arrive at their tower you will find a tornado blocking the entrance.
Fly directly into the whirlwind and it will carry you up to an NPC called the Sunreach Citizen waiting at the top. Talk to him and he will task you with disabling six defense systems scattered across the island before you can access the tower and take on the boss.
Disable All Six Defense Systems
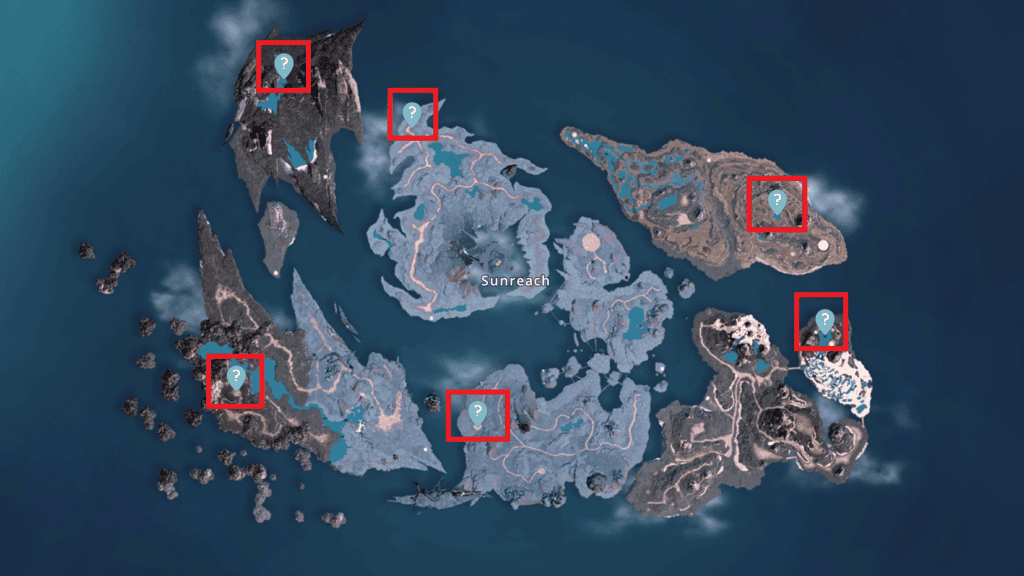
The defense systems are not hard to locate once you know what to look for. Each one has a large blue beam shooting up from it into the sky which makes them visible from a good distance away. Once you find one, head inside and interact with the terminal to disable it.
Repeat this for all six and the tornado blocking the tower entrance will clear, giving you access to the fight. If you are struggling to track down any of the six locations, I have marked all of them on the map below.
Tips For Defeating Shaolong
The recommended level for both you and your Pals heading into this fight is 70. Shaolong is a Dragon and Water-type Pal which means Ice and Electric-type skills are what you want to be hitting it with.
Build your party around Pals that cover those two types and the fight becomes a lot more manageable. Frostallion for Ice and Orserk for Electric are both strong picks if you have them available.
One thing worth knowing before you head in is that Shaolong will flood the entire arena at certain points during the fight, leaving you with very little ground to stand on. Make sure you have a flying Pal in your party so you can get up into the air and keep attacking without being limited by the rising water level.
For gear, if you are at level 70 you should be able to craft and equip the Ancient Armor and Ancient Helm before heading in. Both are solid choices for this fight and give you enough defensive stats to survive what Shaolong throws at you.
On the weapon side, stick to longer range options. The Mechanical Bow, Combat SMG, and Heavy Assault Rifle are all good picks and let you deal consistent damage without needing to get too close to the boss.

Capturing Panthalus
Once you have defeated all eight Tower Bosses and collected every Key Sphere, the next step is capturing Panthalus. Panthalus is a legendary whale Pal that is required to access the World Tree, and getting it involves a multi-step quest chain of its own.
I have a dedicated guide covering the entire Panthalus questline in detail, so check that out if you want the full breakdown. Below is a quick summary of the steps involved to keep things moving here.
Collect Four Echobones
The first thing you need to do as part of the Panthalus questline is collect four Echobones scattered across different regions of the map. Each one is found inside the skull section of a giant whale fossil and they are spread across four separate locations. The coordinates for all four are listed below so you can track them down without any unnecessary detours.
- Bubbling Bone
- Coordinates: -516, -549.
- Crashing Waves Bone
- Coordinates: 123, -525.
- Stillness Bone
- Coordinates: 351, -85.
- Sea Breeze Bone
- Coordinates: -262, 485.
Crafting the Echoing Flute
Once you have all four Echobones, head to the Deserted Islet at coordinates -166, 33. There you will find the Ancient Civilization Researcher. Talk to him and he will hand you the Blurry Schematic. This is the crafting recipe you need for the next step.
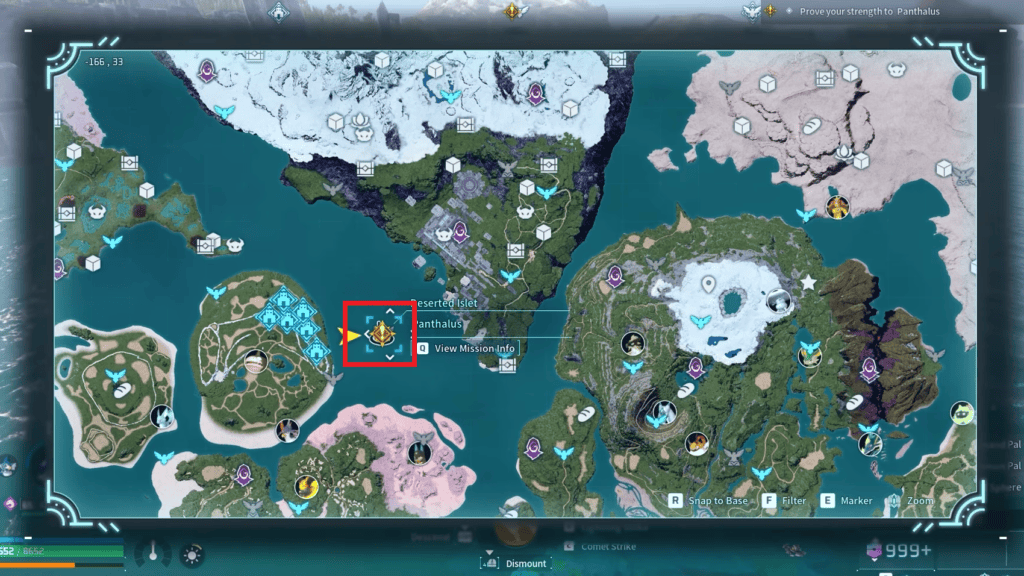
Take the Blurry Schematic back to your base and open your Advanced Workshop. The Echoing Flute recipe will now be available. Craft it using all four Echobones you collected earlier. Once it is done, you are ready for the final step of the Panthalus questline.
Panthalus Boss Fight
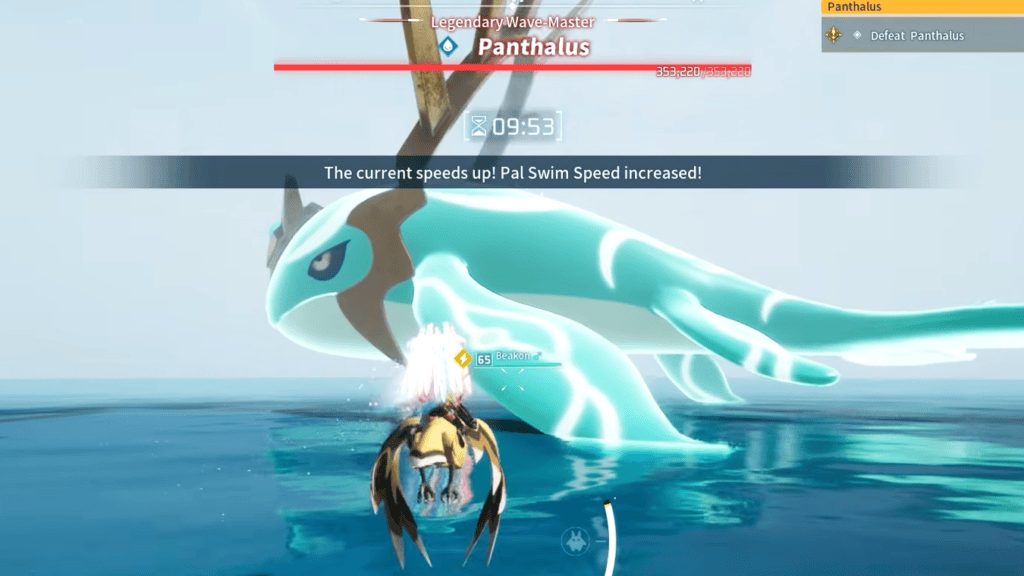
After crafting the Echoing Flute, head back to the Deserted Islet. To the left of the Ancient Civilization Researcher you will find a large rock with a glowing face on it. Interact with it and your character will play the Echoing Flute, summoning Panthalus and starting the boss fight.
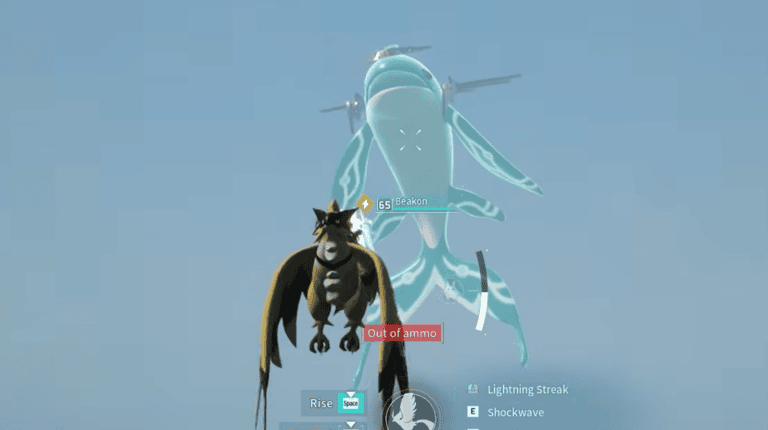
Panthalus is a Water-type Pal, so build your party around Electric-type attackers to make the fight go smoothly. Beakon and Helzephyr Lux are two of the stronger options if you have either of them in your roster.
A flying mount is also worth bringing along. Moving around in the air makes avoiding Panthalus’s attacks a lot less stressful and gives you more freedom to keep the damage going without getting caught out.
When the health bar is nearly empty, toss any Pal Sphere you have on hand. The catch is guaranteed at that point so there is no need to waste a high tier sphere on it. Once Panthalus is yours, go back and talk to the Ancient Civilization Researcher one more time to wrap up the questline and move on to the World Tree.
Entering The World Tree
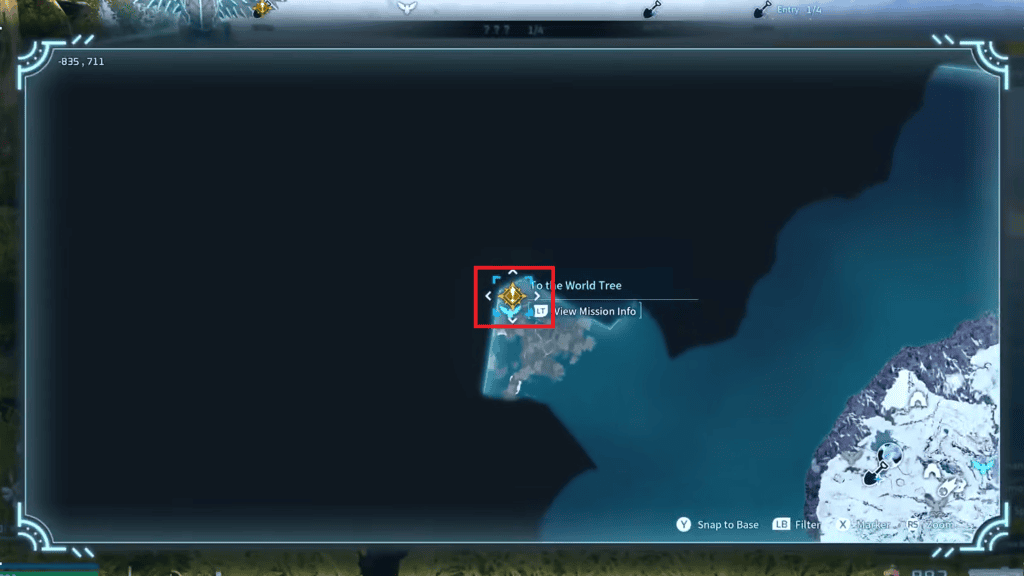
With Panthalus in your party, you can finally make your way into the World Tree. Head to the Altar sitting at the base of the World Tree at coordinates -835, 711. I have marked its exact location on the map below as well. Once you arrive, interact with the Altar and Panthalus will carry you inside the World Tree, opening up the new endgame area for the first time.
Opening The Seal
Once you step inside the World Tree, an entirely new map opens up in front of you. Take your time exploring it as there is a lot to discover and it is genuinely worth seeing before pushing straight to the boss.
When you are ready to head towards the fight, make your way to the coordinates -1993, 1350 which I have marked on the map below.
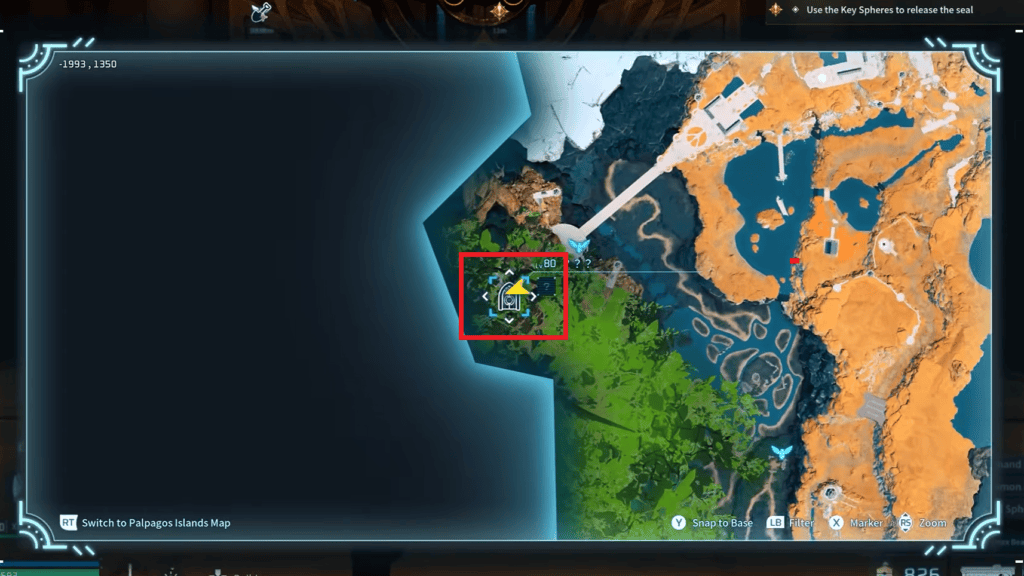
At this location you will find a sealed barrier blocking the path forward. Interact with the seal and it will prompt you to search the surrounding area for something.
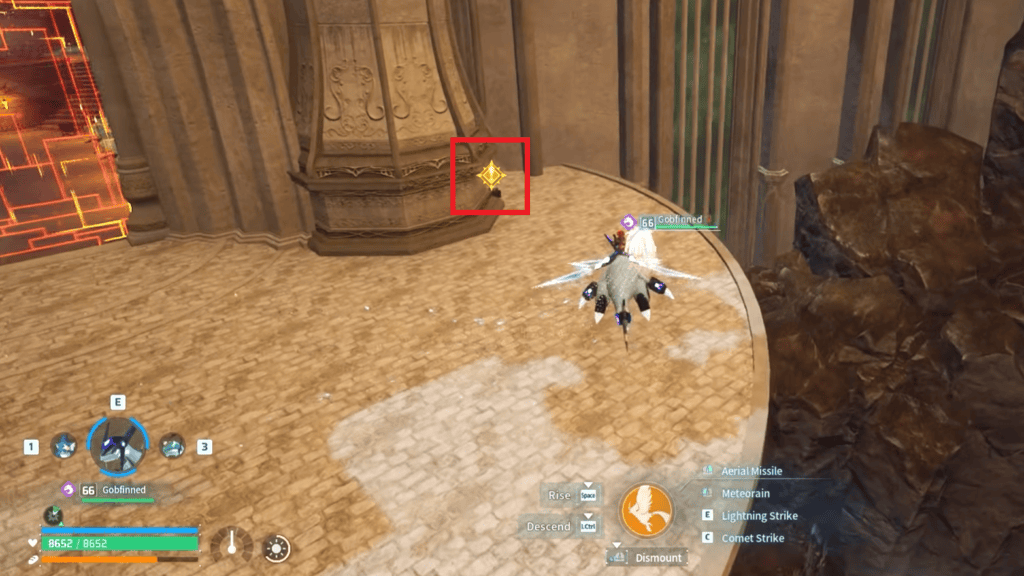
Head to the right of the seal and look around the pillar nearby. You will find a glowing object sitting there. Interact with it to proceed. I have marked its exact position in the image below as well so you know precisely what you are looking for.
Defeating Three Alpha Bosses
With the glowing object interacted with, three level 78 Alpha Boss fights will unlock inside the World Tree. The three bosses you need to take down are Silvance, multiple Shadow versions of various Pals, and Dandilord.
None of them are particularly complicated fights if you are at the recommended level. Just bring your strongest Pals and you should get through all three without too much trouble.
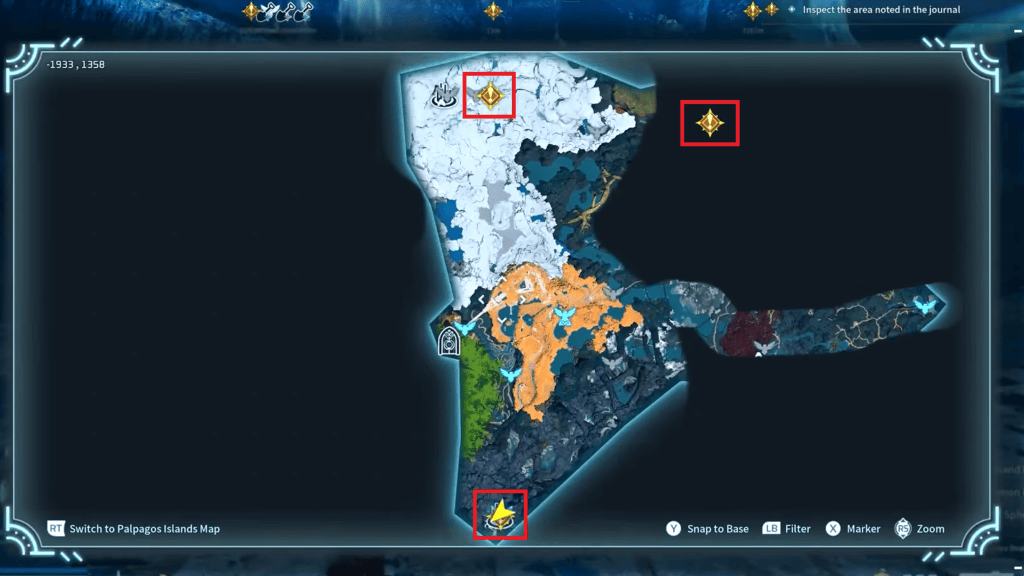
The game will mark the location of each boss on your map as quest markers, so tracking them down is straightforward. In case any of them are unclear though, I have also marked all three locations on the map below.
Starting The Zenara and Astralym Boss Fight
After clearing all three Alpha Boss fights, each one drops a key item that together unlock the seal you interacted with earlier. Head back to coordinates -1993, 1350 and interact with the seal again. It will now open up and let you through.
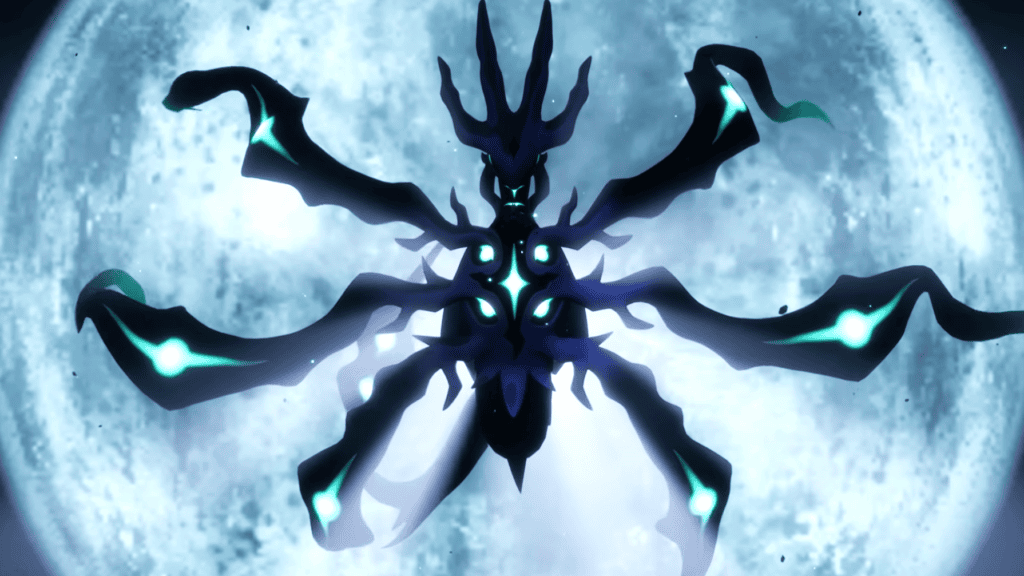
Once you are past the seal, go straight ahead and climb the stairs in front of you. At the top you will find a giant door. Interact with it to enter the boss arena. Before the fight begins, a cutscene will play showing Zenara and Astralym together. It is genuinely one of the cooler cutscenes in the game. Once it finishes, the final boss fight begins.
Tips For Defeating Zenara and Astralym
Zenara and Astralym is the hardest fight in Palworld and 80 is the ideal level you want to be at, for both yourself and your Pals before stepping into that arena. Do not go in underleveled. The fight will punish you hard for it.
Astralym has no elemental type and no elemental weakness which means there is no counter pick to exploit here. Forget about trying to find a type advantage and instead focus on bringing your absolute strongest combat Pals. High stats, powerful Active Skills, and strong Passive Skills are what matter in this fight.
The arena is constantly filled with overlapping attacks throughout the fight. Lasers, projectiles, tornadoes, and falling objects all hit at the same time and standing still for even a moment is a fast way to get wiped.
Stay mobile at all times and make full use of the dodge mechanic while aiming. A flying mount is also strongly recommended here. Astralym moves around the arena a lot and staying airborne makes keeping up with it significantly easier while also giving you more room to avoid its large area attacks.
For gear, you need endgame equipment before heading in. The Heat Resistant Ancient Armor, Cold Resistant Ancient Armor, and Lightweight Ancient Armor are all solid choices. For weapons, the Beam Launcher is your best option for burst damage. The Plasma Rifle is a strong alternative if you prefer sustained damage output over burst.
That’s It
That covers everything you need to do to reach and defeat Zenara and Astralym in Palworld 1.0. It is a long road to get there between collecting all eight Key Spheres, completing the Panthalus questline and clearing the World Tree Alpha bosses, but the final fight is genuinely one of the best boss encounters the game has to offer and worth every step of the journey to get there.



Found another tip?
Share your extra strategy, correction, or question below. Helpful comments can make this guide better for everyone.