20 articles
The Joint Plugs are one of the more involved mechanics in Resident Evil Requiem‘s basement section. The first one is easy to get but tracking down the other two is not as simple as following a straight path. They double as keys that power doors and generators throughout the Care Center basement, which means you will be swapping them in and out of different sockets as you explore and losing track of one is easier than it sounds.
In this guide, I will show you where all three Joint Plugs are and how to manage them so you can rescue Emily and get out of the basement without spending more time than you need to.
All Three Joint Plugs Locations
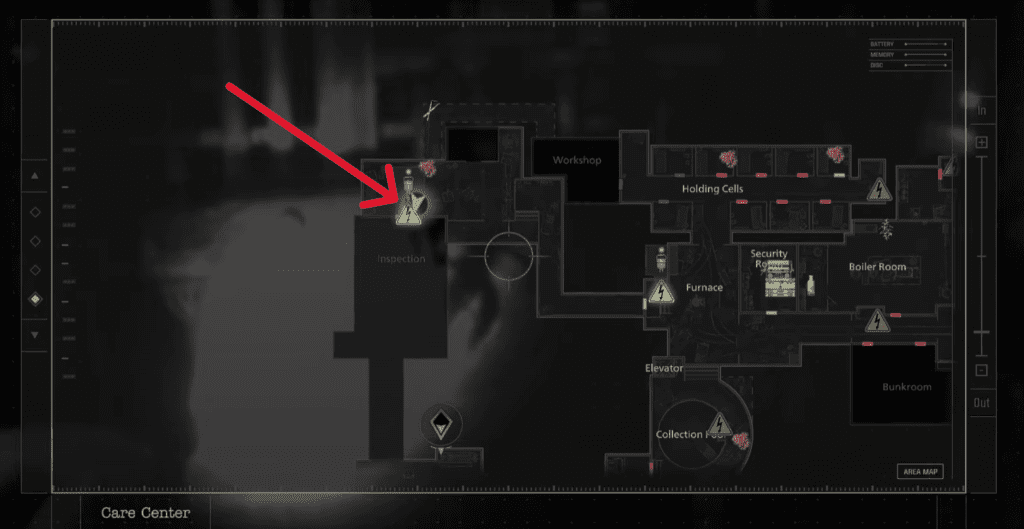
To proceed further with the story and rescue Emily, you need three Joint Plugs to power up the Holding Cells. But the panel only has one Joint Plug to start with. What you want to do here is pick up the first Joint Plug and then make your way to the Boiler Room. Follow the path that I have marked on the map below.
Once you get there, use the Joint Plug you have to open up the door. Get inside the room and interact with the wooden box with yellow paint to move it away. This will reveal an opening in the fence. Squeeze through it and move straight. You will find a Square Socket Wrench and an empty bottle. Pick up both and then use the empty bottle to bait the boss. After doing that, go back the way you came and make sure to grab the Joint Plug on your way out.
 Resident Evil Requiem: The Final Puzzle Complete GuideMar 4, 2026
 Collect All Detonator Parts in Resident Evil RequiemMar 3, 2026
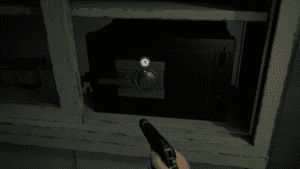 Resident Evil Requiem: Examination Room Safe Code Location & Safe OpenMar 3, 2026
Getting the Second Joint Plug
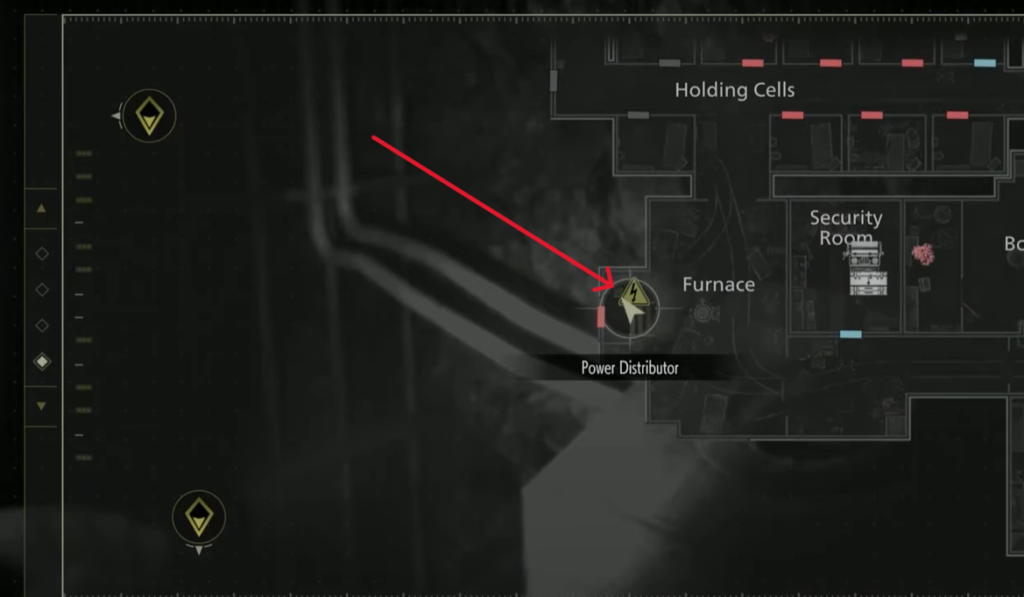
Once you are clear of the Boiler Room, head to the Furnace and use the Joint Plug in the power distributor to open up the locked door. I have marked the location you need to go to on the map below.
Keep moving straight and deal with the zombies as you encounter them. You will reach a room with a forklift and the second Joint Plug. You will have to come back here again for the forklift but for now, grab the Joint Plug and then go back the way you came.
Getting the Forklift Key
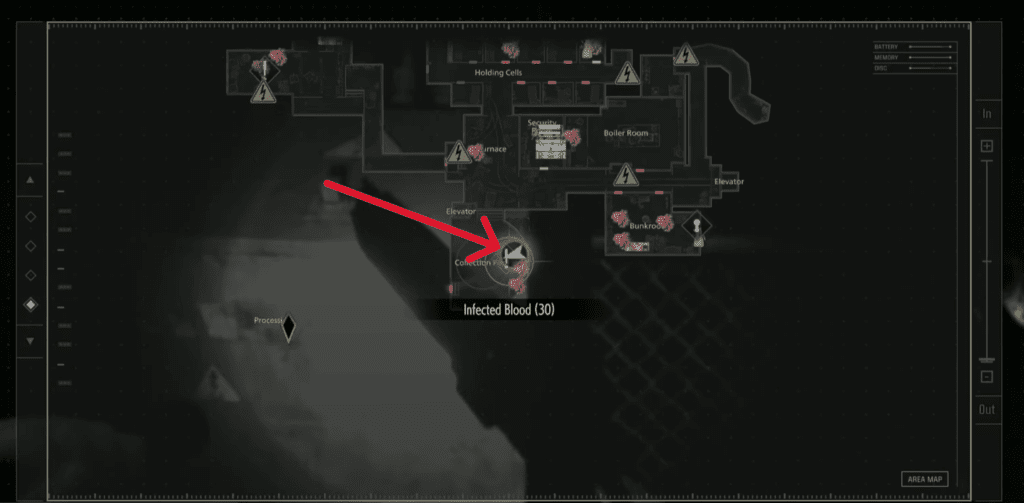
Now that you have two Joint Plugs, make your way to the Collection Pool. Here, you will find a power distributor which requires the Square Socket Wrench to unlock. Use it to unlock it and then put both Joint Plugs you have to open up the locked door. I have marked the location of the power distributor below.
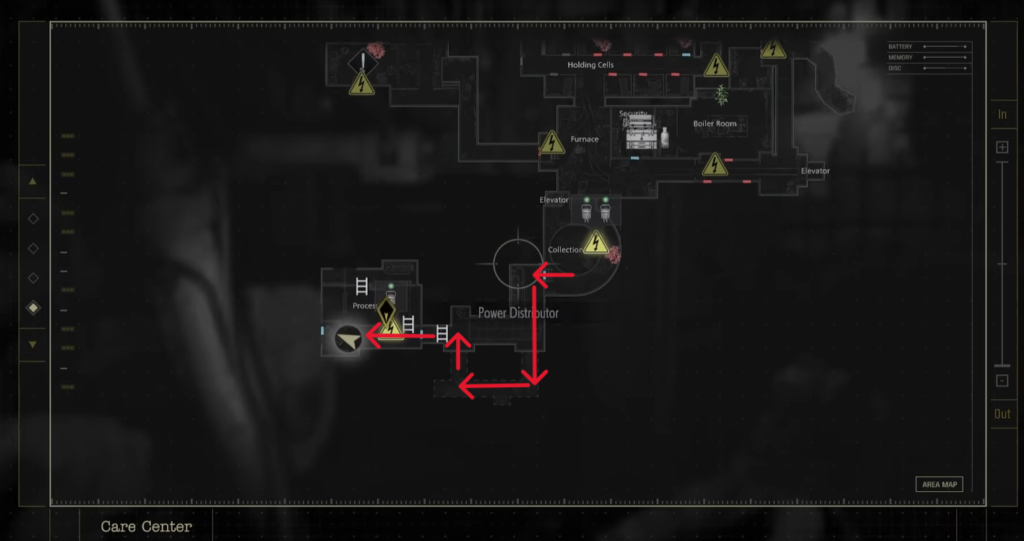
Once the door is open, head on in and make your way to the Processing room. I have marked the path you need to take down below. Make sure to use the ventilation shaft as the normal path will collapse.
When you get there, grab the Forklift Key from near the dead body. You can use it on the forklift nearby to reveal a room which has a couple of items and the Hip Pouch (permanent inventory upgrade). Make sure to grab them. In this room, you will also find the third Joint Plug but do not pick it up now as you will get locked. For now, go back the way you came to the Collection Pool.
Getting the Third Joint Plug
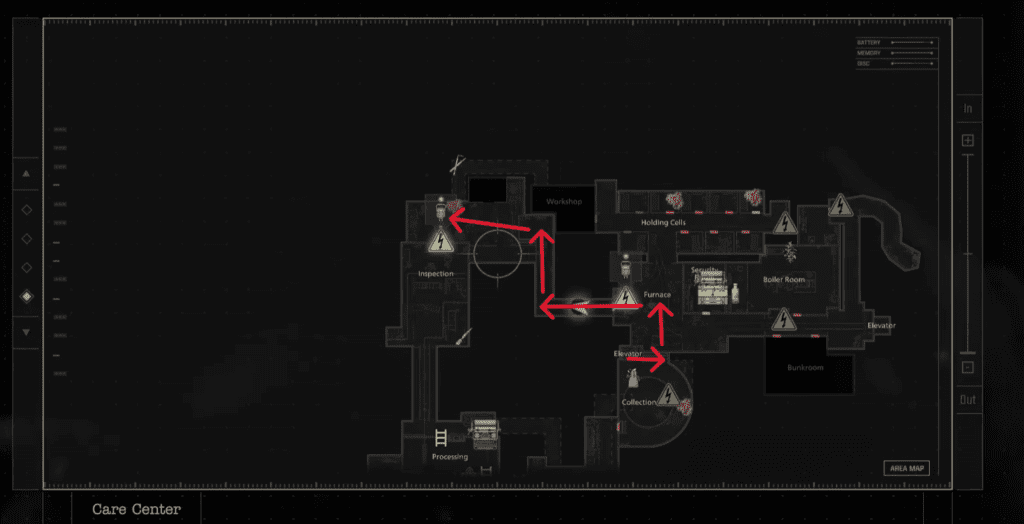
Make your way back to the room where you got the second Joint Plug. I have marked it in the image below in case you forgot.
On your way, you will encounter the boss again. It is pretty hard to deal with it in the dark so the method that I found the easiest was to shoot the boss so it starts following you. Once it does, go back to the Furnace and the boss will get burned trying to reach you and will go back into hiding. This will make it safe to go back in.
Once you reach the forklift, use the Forklift Key and put the Joint Plug back into the power distributor to unlock the Inspection room. When you enter this room, the hanging bodies will start moving. Look for an opening and follow the bodies. On your left, you will find a box that you can push. After pushing it, go back to the beginning of the room and interact with the lever. This will change the direction that the hanging bodies will move in.
Now once more, look for an opening and keep following the bodies. Some of the bodies are actually hanging zombies which will grab you if you get too close to them so keep an eye out for that. As you follow them, you will reach the Processing room. Watch the video below in case of confusion.
In the Processing room, interact with the wheel in the middle to drain the water down below. Once drained, use the ladder to get down. But before doing that, make sure you have some ammo and that your health is full as you will need to fight a couple of zombies. I also recommend saving your game here as there is a typewriter near the wheel.
As soon as you get down, the processing will commence. In simpler words, the grinders will start turning and the platform below you will move towards it. Stay away from the grinders by remaining on the opposite end. The zombies lying around will get up and try to grab you, shoot them to keep yourself safe.
Once the process is complete, the ladder on the opposite side of where you came from will get down. Use it to get up and grab the Joint Plug. After that, go back to the other side and go through the ventilation shaft near the save game typewriter. An animation will occur and you will end up on the bottom floor of the Collection Pool. Use the elevator to get back up.
After getting out of the elevator, follow the path I have marked below to get the Joint Plug you used to get into the Inspection room back.
Once you get it back, you will now have all three Joint Plugs in your inventory at once. Now head back to the Holding Cells and slot all three Joint Plugs into the power distributor.
That’s It!
That covers every Joint Plug location and how to manage them through the Care Center basement. It is one of the more drawn out sections of Resident Evil Requiem but knowing the route ahead of time cuts out a lot of random searching and confusion which makes it feel even longer than it needs to be.
With all three Joint Plugs slotted in, the Holding Cells are powered and Grace can finally reach Emily, which sets the stage for everything that follows in the second half of the game. If you are looking for something to work towards after finishing the story, check out our guide on how to get infinite ammo and other unlockables.