 4 articles
Back 4 Blood developers released a DLC just days ago called Tunnels of Terror which features a whole new area with new unlockable skins, new cards, new Legendary weapons, a new difficulty setting, and a whole lot more.
Alongside these new features come new secrets hidden in various locations waiting for players to uncover. In this guide, we’re going to talk about those secrets and where you can find them.
All Secret Locations in Back 4 Blood Tunnels of Terror
There are a total of 7 secrets in the new expansion, all of which are scattered throughout seven different locations. Let’s have a look at all of them:
Secret #1: 300 Below
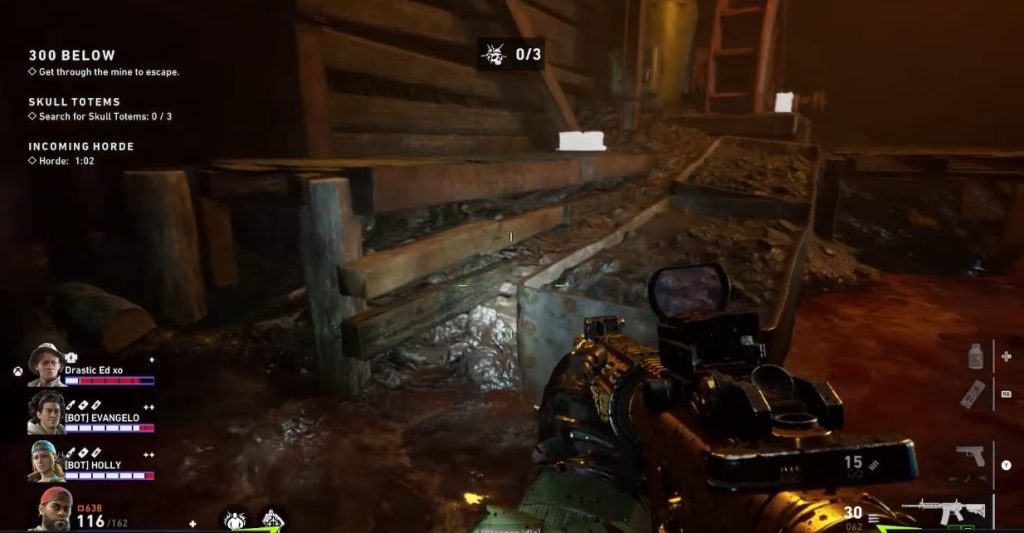
From the elevator shaft, turn back and head straight until you come across a passage to the left. Enter that small passage and go straight all the way until you come across a room with huge gears in it. From there, simply head to the left side, and you should be able to find the first secret just hidden beneath a box filled with dirt.
 Back 4 Blood: All New Cards GuideSep 1, 2022
 Back 4 Blood: Prophet Dan Abilities Overview | Dan GuideSep 1, 2022
 Back 4 Blood: ALL Legendary Weapons Guide | Which Weapon is The BestMay 4, 2022
Secret #2: Caustic Cesspool
From the starting area, you want to get your way across. To do so, follow the path to the left then turn right until you come across a broken bridge. Simply jump over it to get to the other side, then turn left and go right until you see the end of a sewer pipe.
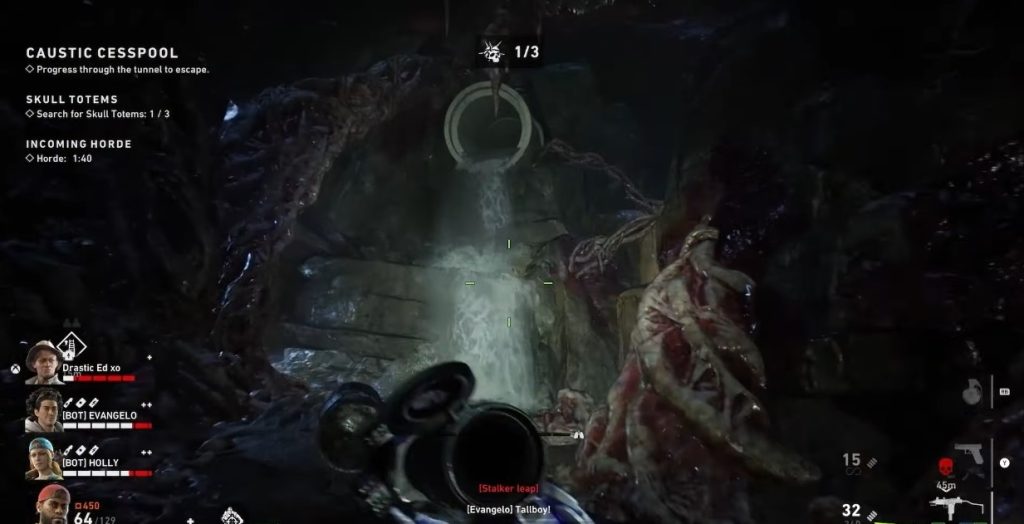
Just below that pipe is the 2nd secret. To get to it, slide down the water then turn left and jump up until you find yourself on a ledge. Crouch in order to get through the path, and you’ll then be able to find the second secret at the end.
Secret #3: Bloodstream
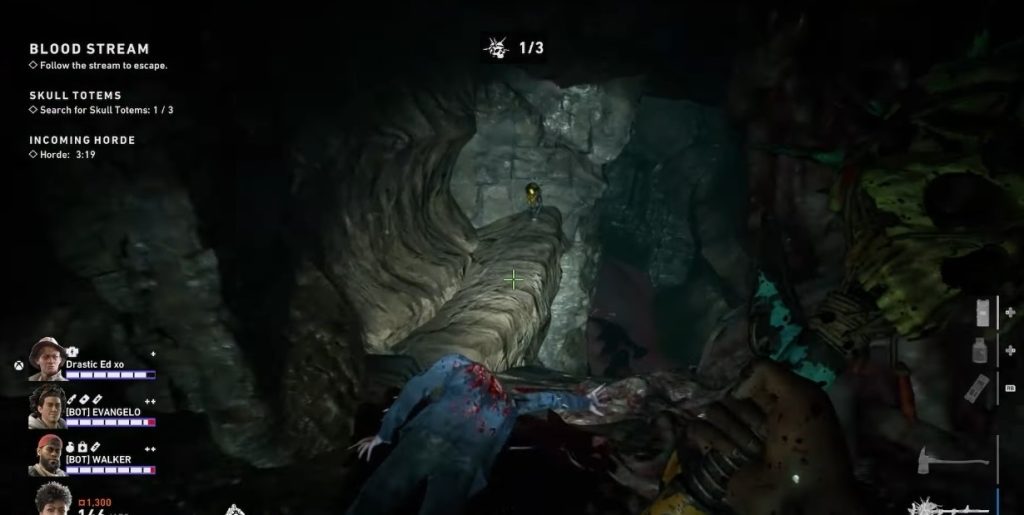
For this level, you’ll want to go down an area with a green glow by sliding down on where the water flows. From there, go left, jump on some ledges, then turn right until you find the third secret at the end of another ledge.
Secret #4: The Nursery
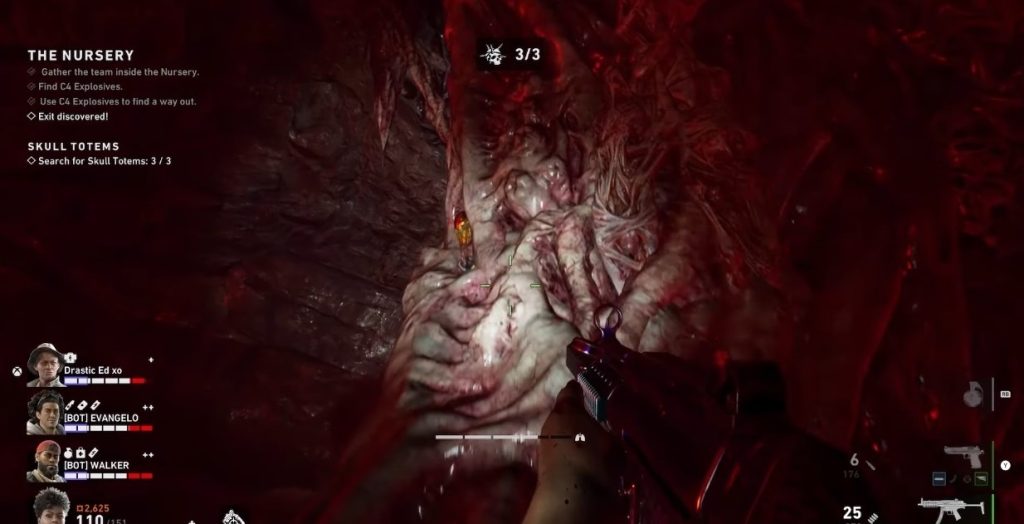
In the room with the red glowing heart, climb on one of the roots on the left until you see the fourth secret at the edge.
Secret #5: Brood Lair

This one is a bit long and complicated. From the level’s starting area, head outside and strafe to the left. You’ll be able to see the fifth secret just above a rock formation. However, getting to it is a bit tricky.
To start, turn to the left then go straight, turn right, head straight forward, then turn left, go straight, turn left, continue straight, then turn left until you come across a huge open door.
Enter the door, go straight, then turn right and go all the way up. Follow the path until you come across a platform you can jump on. Simply jump on that platform, then jump onto the next platform which is where the fifth secret is located.
Secret #6: Sunken Passages
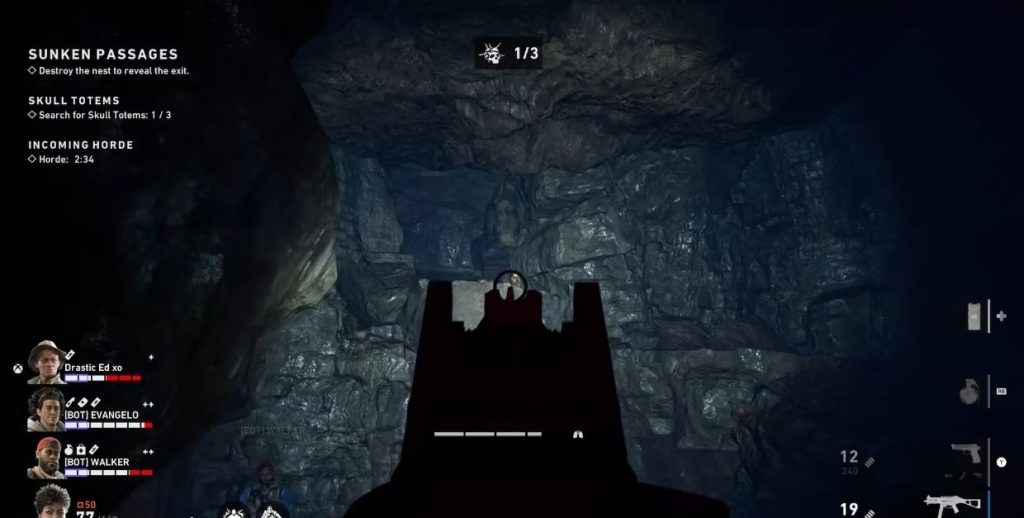
You’ll want to start from the nest which is the objective of this level. However, instead of destroying it, head to the left until you come across a small passage. Enter the passage then make your way through the ledges until you get to the other side.
Turn right until you come across an open space, then turn left, and you should be able to see the sixth secret at the top of a ledge. Simply take the path upward on the right and hop up on the ledge to get to the secret’s location.
Secret #7: The Cut
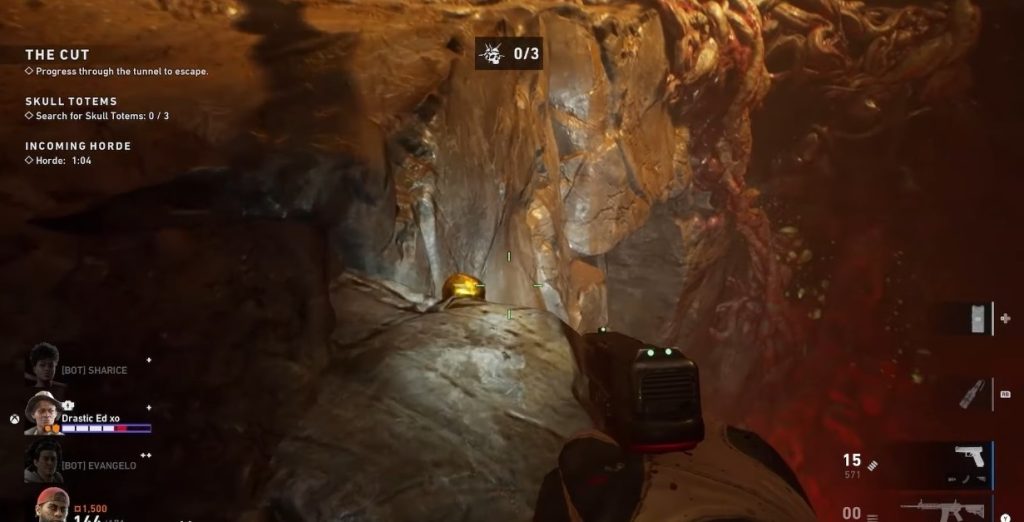
On this level, you’ll want to make your way to the big open area with large branches. From there, follow the path of the large branch in front of you, then at the end, turn left until you come across a small cave.
Enter the cave then follow the path to the right until you come across another big open area with a massive hole. The last secret is actually just hidden on the very edge of the cliff. What you want to do is get close to the edge as possible and point your cursor down until you can find it.
ALSO READ: Elden Ring: How to Get 12 Spell Slots | Memory Stone Locations