 19 articles
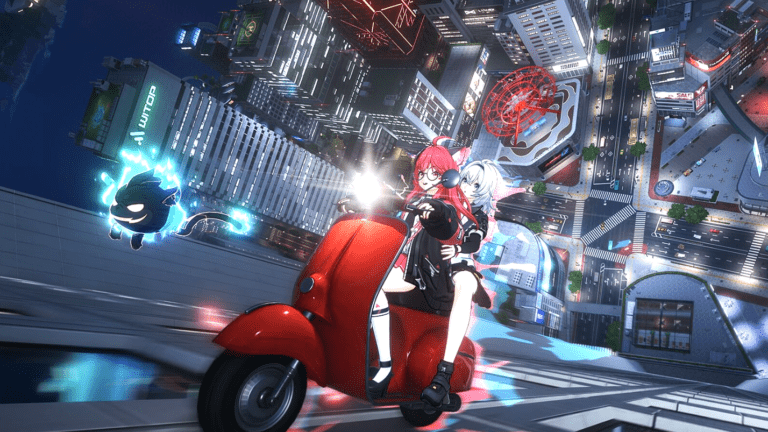
Neverness to Everness drops a lot on you very quickly. Within the first few hours you are dealing with combat, the Hunter Level system, Character Pixels, City Stamina, the Tycoon mode, a café to manage, cars to buy and a gacha banner to pull on. It is a lot to absorb at once and the game is not always the clearest about what you should actually be prioritizing first.
In this guide, I will walk you through everything you need to prioritize on day one so your first session sets you up properly rather than leaving you scrambling to catch up later.
Complete Starting Guide
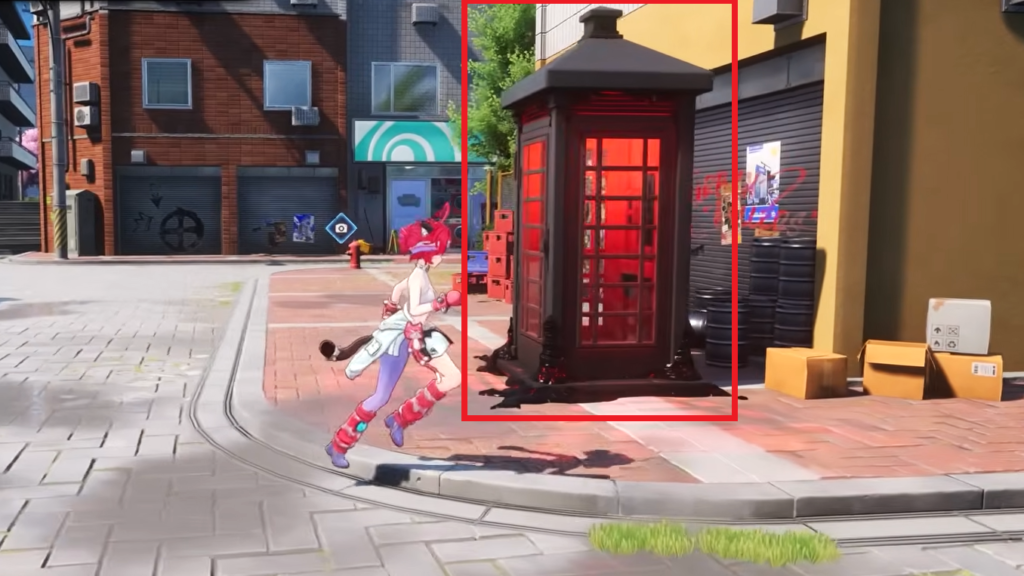
Let’s start with one of the most basic things you will come across while exploring the city. Wertheimer Towers and ReroRero Phone Booths are scattered all across Hethereau and you should be activating every single one you come across. Each one you activate rewards you with Hunter EXP. On top of that, they also work as fast travel points on your map. This makes getting around the city significantly faster as you progress and saves you a lot of time running between objectives.
Don’t Waste Your Free S Rank Character Selectors
NTE gives you a free S rank selector after completing 50 pulls on the Standard Banner, and there is currently a second one available on top of that as well. Before you use either of them though, make sure you complete all 90 pulls on the Standard Banner first.
 How to Get the Porsche 918 Spyder in Neverness to EvernessJun 4, 2026
 NTE: Is Lacrimosa Good? Full Build Guide (Teams, Weapons, Skills)Jun 3, 2026
 Safe Locations to get Tons of Fons in Neverness to EvernessMay 14, 2026
The reason for this is that you do not want to select a character and then pull that same one as a duplicate from the banner shortly after. It is an easy mistake to make and a frustrating one. The good news is that the selectors do not expire, so there is no rush to use them.
Pull first, see what you naturally land, and then make your selection based on what your roster actually needs. If you want a full breakdown of who to pick, check out my dedicated guide on the best free S rank characters to choose in NTE.
Character Pixels
Character Pixels are your primary stamina resource in NTE and one of the most important things to stay on top of from day one. They are required whenever you want to farm upgrade materials or run content to improve your characters. The cap sits at 240 and they regenerate at a rate of 1 every 6 minutes, which works out to a full 240 over 24 hours.
This means that if you ever hit the cap and leave it sitting there, you are actively wasting regeneration. As soon as you unlock Character Pixels, spend some of them straight away so the regeneration timer kicks in and you are never sitting at a full cap for longer than necessary.
Progress Main Story
Your main focus early on should be pushing through the main story as consistently as possible. Almost every major system in the game is locked behind story progression and you will keep running into walls trying to engage with various parts of NTE until you have cleared enough of it. New areas of the map, character unlocks, city features, Tycoon systems and higher difficulty content all open up as you push the story forward.
City Stamina
As you progress through the main story you will unlock the City Tycoon system, which opens up a whole separate side of NTE built around managing and developing your life in Hethereau. Most activities within the City Tycoon require City Stamina to participate in.
Unlike Character Pixels which regenerate steadily over time, City Stamina works differently. It resets to full once every week rather than trickling back gradually. The maximum amount of City Stamina you can hold at any one time is not fixed either. It scales upward as your Tycoon Level increases.
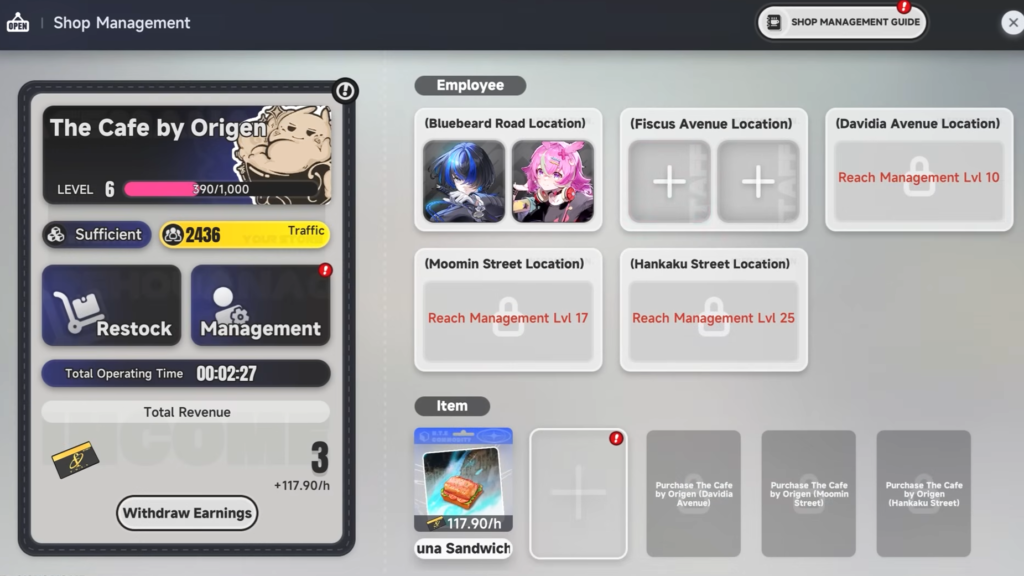
Setting Up The Cafe
Once you reach the point where you can buy a car, pick up the first one available for 50,000 Fons. From there, do a couple of races to push your Tycoon Level up until you hit at least Level 4. This is the point where the Cafe system unlocks and it is one of the more important systems to get set up early since it generates passive Fons income over time. You can access it directly through the City Tycoon interface.
You can own up to five cafes simultaneously but at the start you only have access to one. The rest unlock as your Management Level increases over time. To get your first cafe running, you need to assign two employees to it and then select a food item to serve. Once that is done you can restock it for either 24 or 72 hours depending on how often you plan to log in and manage it.
As you push your Management Level higher you will unlock better and more profitable food items. Always make sure you have the highest profit food item selected in each of your cafes at all times to maximize your passive income. When your second cafe slot unlocks, go through the same process again. Assign two employees and select your best available food item and let it run.
Cafe Management
Inside the Management tab your main goal is to push your cafe’s popularity as high as possible since a higher popularity rating directly increases your earnings over time. The way to do this is by furnishing your cafe with the best “Tables & Chairs“, “Decor“ and “Walls“ that you can currently afford. Each of these categories contributes to your overall popularity score so it is worth investing in them.
Gameplay Loop
To summarize the cafe system, the routine is straightforward once everything is set up. Always have the highest profit food item selected across all your cafes and keep them restocked at all times since an empty cafe generates no income. As you unlock new cafe slots, assign two employees and select your best food item straight away.
On the renovation side, upgrade your Tables and Chairs, Decor and Walls whenever you have the Fons available since better renovations push your popularity higher and increase your earnings. Stay on top of all of that and the cafe will quietly generate a steady stream of Fons in the background without much active effort required.
The Witch’s House
Throughout the map you will occasionally spot glowing red ravens. Upon getting close to one you will automatically collect it and receive an Oracle Stone in return. These Oracle Stones can then be taken to Blackbird at the Witch’s House and traded in through the Oracle menu. Doing so increases your level at the Witch’s House and rewards you with various items and Hunter EXP.

Character Encounters
One thing you should make a habit of doing every day is completing all the available character Encounters. These are special scenes and unique dialogue exchanges that give you a deeper look into each character’s personality and story.
Completing them increases your bond level with that character, and pushing that bond level higher unlocks special rewards. They are genuinely worth experiencing beyond just the progression anyway. You can find them marked on the map, like the ones I have highlighted in the image below.

Gifting Characters
Another way to increase your bond level with your characters is by gifting them various items. The rarer the item you give the more bond value you get out of it. So it is worth saving your higher quality gifts for characters you are actively trying to push the bond level on. You can give out a total of 10 gifts per day with a maximum of 3 gifts per individual character.

Wrapping Up
That covers everything you need to focus on during your first day in Neverness to Everness. It is a lot to take in at once but once you get into a consistent routine with your daily tasks, character encounters, cafe management and story progression, everything starts to flow naturally. The early hours you put in set the foundation for the rest of your account so it is worth doing things right from the start.
If you are looking to stock up on pulling currency while you settle into the game, check out my guide on all the ways to get free summons in NTE so you are never leaving any pulls on the table.