

Game Tips
How to Increase FPS in Ready or Not | Optimization Guide
Ready or Not optimization guide – make it run as smoothly as possible
If you’re already familiar with Ready or Not, we don’t have to explain why this game is often referred to as the most realistic tactical, first-person shooter on the market at the moment. With adrenaline-pumping firefights and insane realism, players dive headlong into the world of a SWAT operator.
To match this realism, you want to optimize your game accordingly for the best possible gaming experience. That is why today, we’re bringing you the ultimate optimization guide for Ready or Not. Let’s begin!

DirectX 11 vs DirectX 12
Jumping straight to the point, upon launching your game for the first time, you will see a pop-up window asking you whether you want to play your game using DirectX 11 or 12. This depends on your gaming rig, however, most players use the default DirectX 11 option.
Note that DirectX 11 will give you slightly better performance but this too varies from system to system.

Settings
Now that you have successfully launched the game, you want to head over to the options menu. This is located on the left side of your screen in the game’s main menu.

Open this and click on “Graphics” on top of the screen. Here you have Basic and Advanced graphic options. We will explain each one.
Basic Graphics Settings
On the basic graphics settings screen there are only a few options you can choose from to make your game look the part. First off, the Graphics Preset option is in this case set to Epic. This, however, can vary according to your system configuration and capabilities. Make sure to know what you have to be able to set the overall quality of the game accordingly.
Screen mode should always be set to fullscreen (playing in window mode will get you banned from GamesFuze), and the Resolution is adjusted to 1560×1440 in this case.
The resolution scale must be set to 100% at all times!
More field of view means lower FPS, in theory. This is down to personal preference so feel free to play around with it. ADS zoom is something you wish to enable as it will help your game quite a bit.
Lastly, Night Vision Goggles Screen Effect is another personal preference option and you can see which option best suits you.

Advanced Graphics Settings
If you switch to the advanced graphics settings, you will see a lot of different options you can choose from. Let’s start from the top and make our way down.
Please remember that the settings in the advanced section mostly depend on the rig that you use. Some PCs for example cannot bear the requirements the Epic settings have and as such should be adjusted accordingly.
Texture Quality, as well as Shadow Quality, depends on how much VRAM your PC has. See the table below for detailed info:
| 2 GB of VRAM | Low |
| 4 GB of VRAM | Medium |
| 6 GB of VRAM | High |
| 8GB of VRAM or more | Epic |
Remember that the ideal Shadow Quality setting is Medium for all configurations to make sure your game runs as smoothly as possible.
If you happen to be losing frames while playing, set the Post Process Quality down to Low. Otherwise, keep it at Epic. For a good increase in performance, you can also set Anti-Aliasing Quality to Low. This will pixelate the corners and edges.
VFX Quality, often referred to as motion blur setting, can be set to Medium for the best performance overall. View Distance is something you want to keep at either High or Epic as it helps you understand what is going on around you.

Frame Limit should be disabled at all times unless you are recording your screen. The same goes for Motion Blur as it will cost you a few frames having it enabled.
VSync and Bounce Light are both set to be disabled for maximum performance enhancement.
Lastly, Enable World Decals is something you want to leave enabled for more realism and an overall more immersive experience.

Optiwand Options has a lot to do with peeking doors and other similar game mechanics. What we like to do for the best performance is to leave it disabled and limit it to 100% as indicated in the screenshot above.
AMD vs. Nvidia
The next two options, the AMD FSR2 Quality and Nvidia DLSS Quality depend entirely on which graphics card you have. If you have AMD for example, set AMD FSR2 to Quality and vice versa.
The last 4 highlighted options are for those using Nvidia only. Set the Nvidia Reflex Low Latency to enabled followed by the same settings in the next 3 options.
With this, you have optimized your game for the best possible gaming experience. Please remember that many of these settings depend on how much RAM, VRAM, and CPU you have. If you have any questions, feel free to contact us!
ALSO READ: Ready or Not: Best Loadouts to Use


Tips & Tricks to Get Rich in Schedule 1
Rapid fire tips and tricks to help you boost your profits!

How To Get Rid Of Items In Schedule 1
Vanish unwanted items straight into the void with one simple trick!
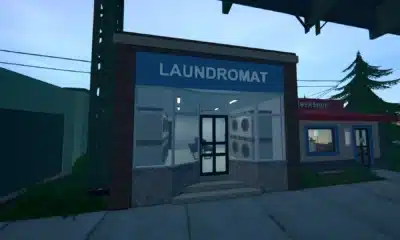

Should You Buy The Laundromat In Schedule 1
Laundering money at a laundromat is a straight-up genius, nobody will ever know!
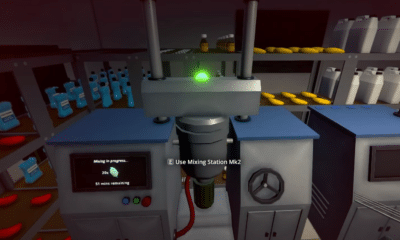

Should You Buy The Mixing Station Mk2 In Schedule 1?
The upgrade sounds quite appealing, but is it worth shelling out the big bucks for?