Locations
Honkai Star Rail: All Sage’s Statue Locations | Murmuring Woods Puzzle
Set all of the 7 Sage’s Statues to their right state and get some fantastic rewards!
There’s a large puzzle in the “Murmuring Woods” Grove of Epiphany area in Honkai: Star Rail 3.1 that requires you to find all of the Sage’s Statue locations and set them to the right state.
This puzzle itself only unlocks once you obtain all of the 20 Nymphs hidden in the area. Do that and you’ll get an item detailing every Sage’s Statue and their correct state. With that information in hand, it’s time to go all over the “Murmuring Woods” breaking and rebuilding the Sage’s Statues as the hints describe!
If you need help with this fairly obtuse puzzle, though, read on! We’ll tell you the location and proper state for every single Sage’s Statue.
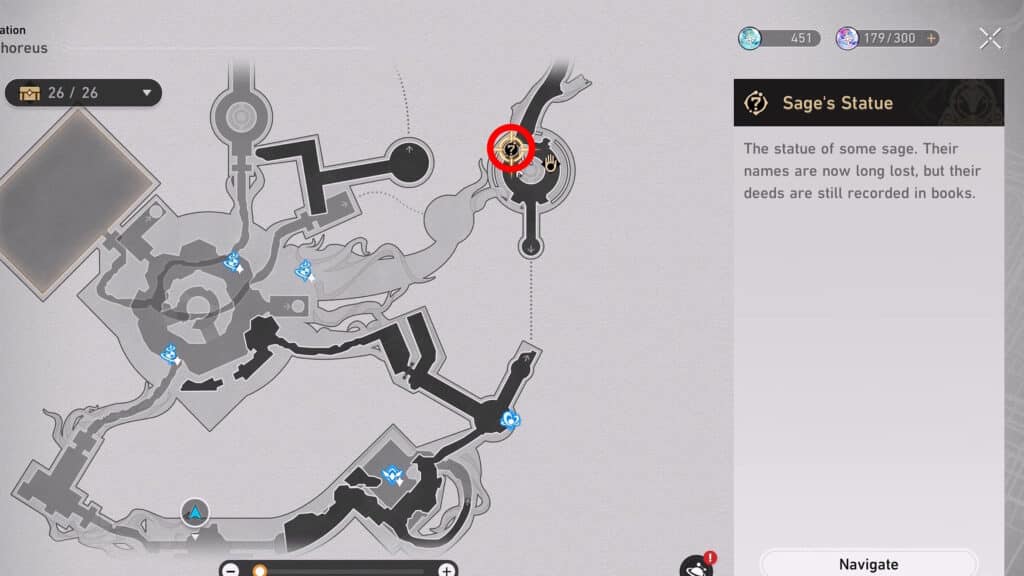
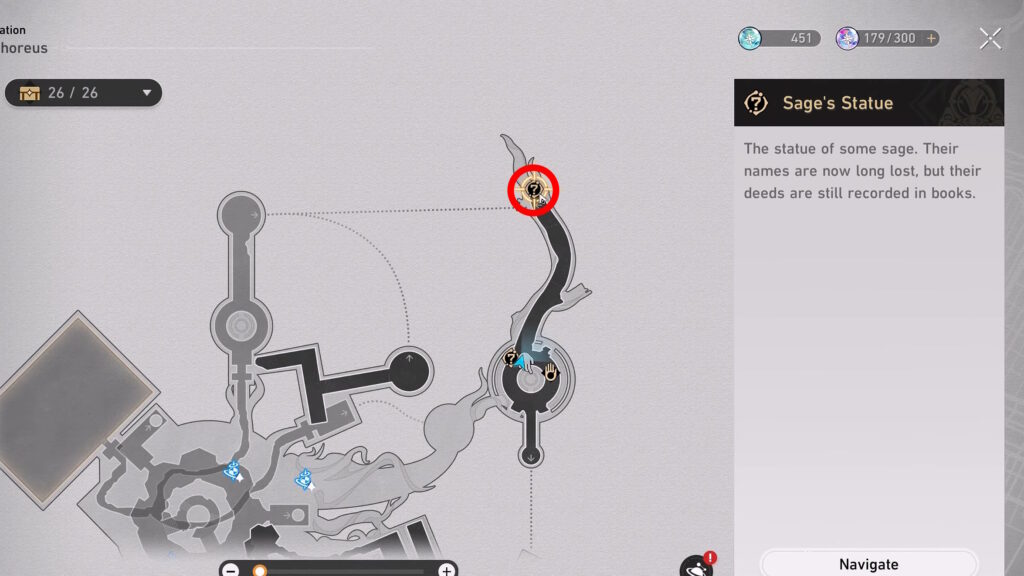
All Sage’s Statue Locations for the “Murmuring Woods” Grove of Epiphany Puzzle | Honkai: Star Rail 3.1
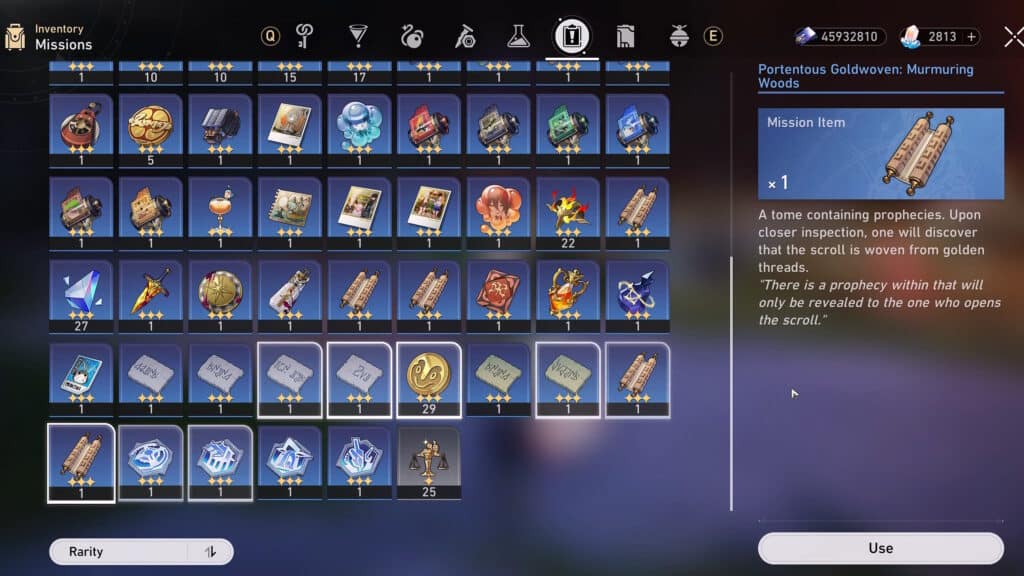
Now, we mentioned this in our introduction, but as a reminder: you can only do the Sage’s Statue puzzle if you already collected all 20 Nymphs in the “Murmuring Woods” Grove of Epiphany area. Collect them and give them to the area’s Garmentmaker to receive the “Portentous Goldwoven: Murmuring Woods” item which clues you in on the puzzle.
To simplify the very obtuse clue, you need to find 7 Sage’s Statues spread all over the “Murmuring Woods” Grove of Epiphany. Then, you’ll have make sure that they’re all in the right state, be it broken or intact. The scroll itself hints at each Sage’s Statue intended state.
So, now that we know what to do, let us tell you the location and proper state for every single Sage’s Statue!
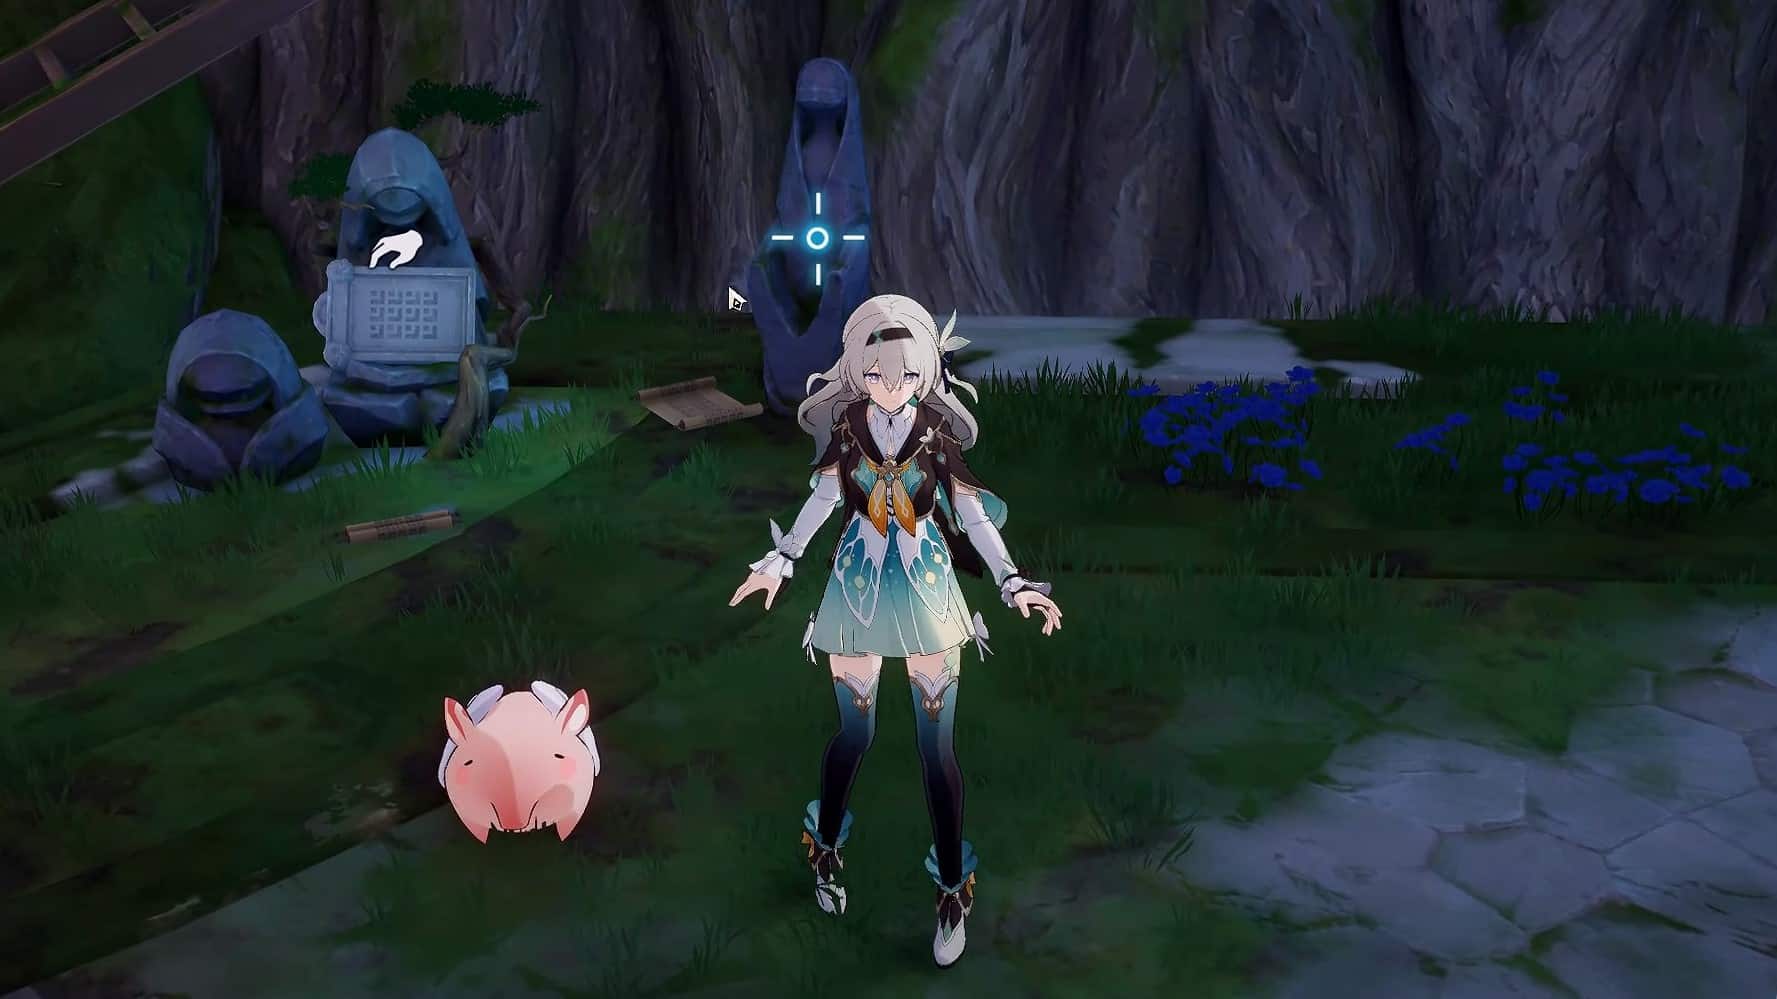
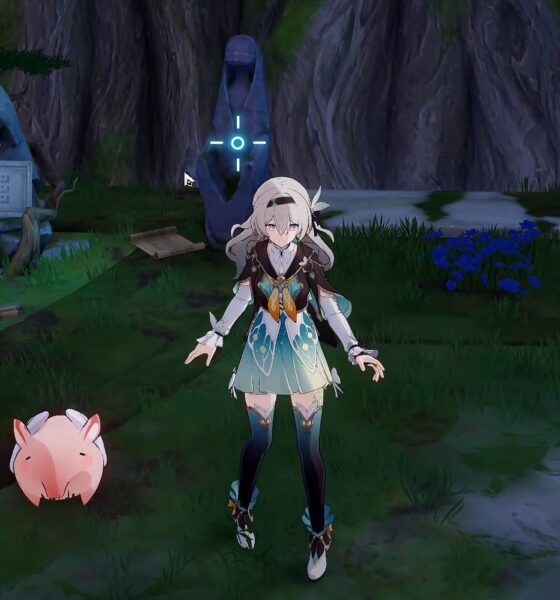
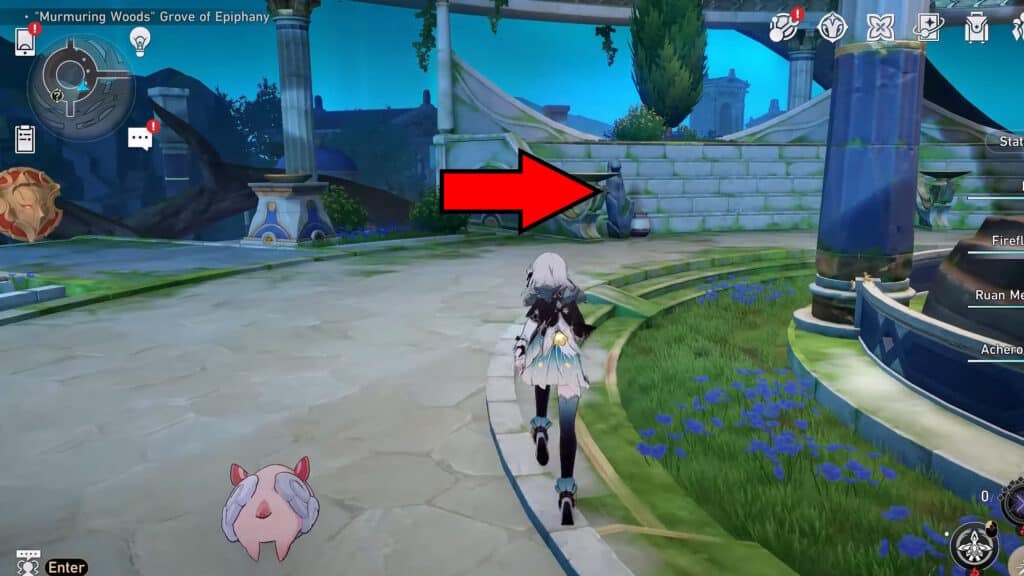
Library of Philia – Intact
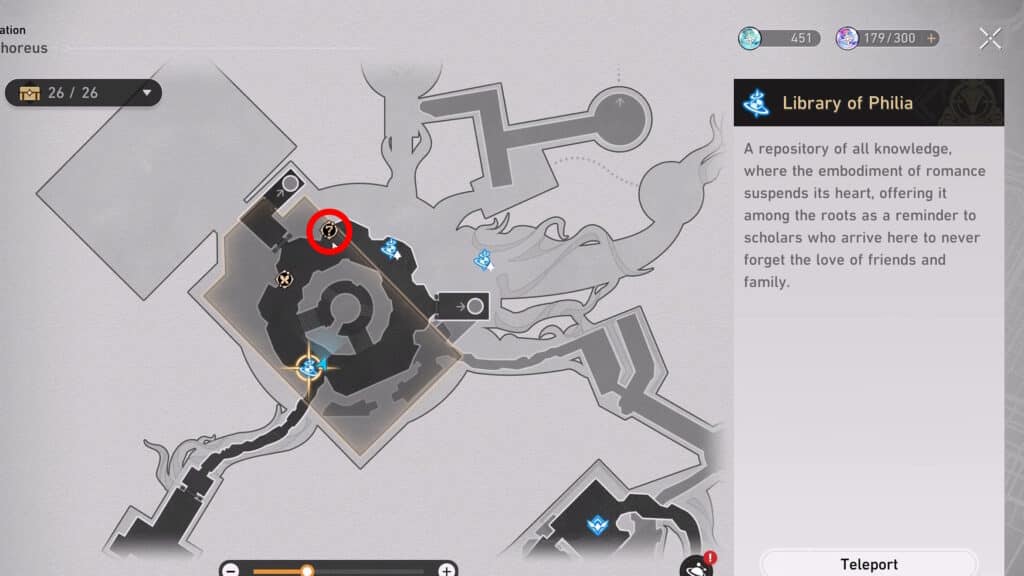
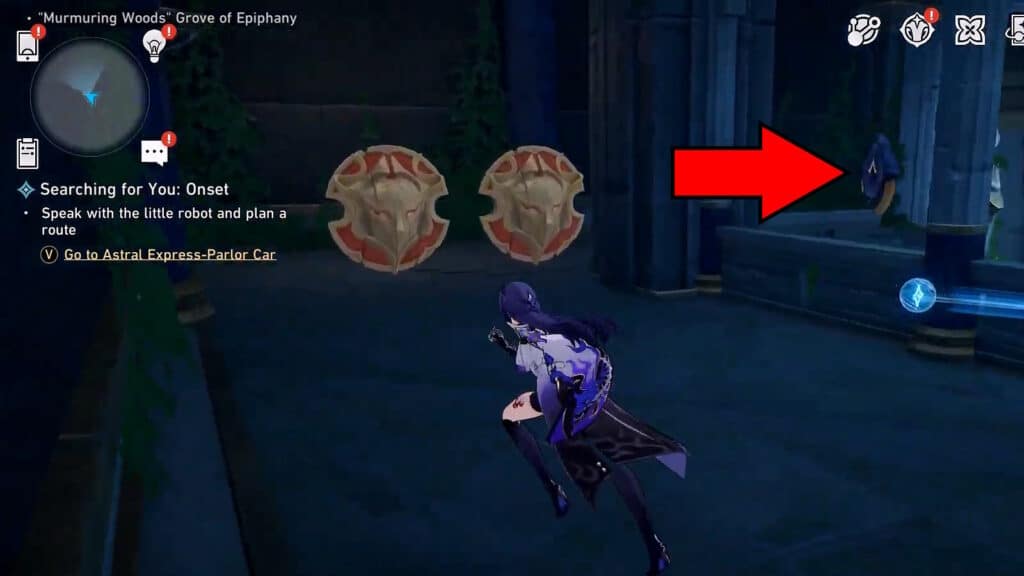
For our first Sage’s Statue, we’ll go north from the “Library of Philia” Space Anchor.
The Sage’s Statue here should be intact. To ensure that it’s in the proper state, we highly recommend breaking it yourself and then repairing it. This also applies to all of the other “intact” Sage’s Statues in this guide, so keep that in mind!
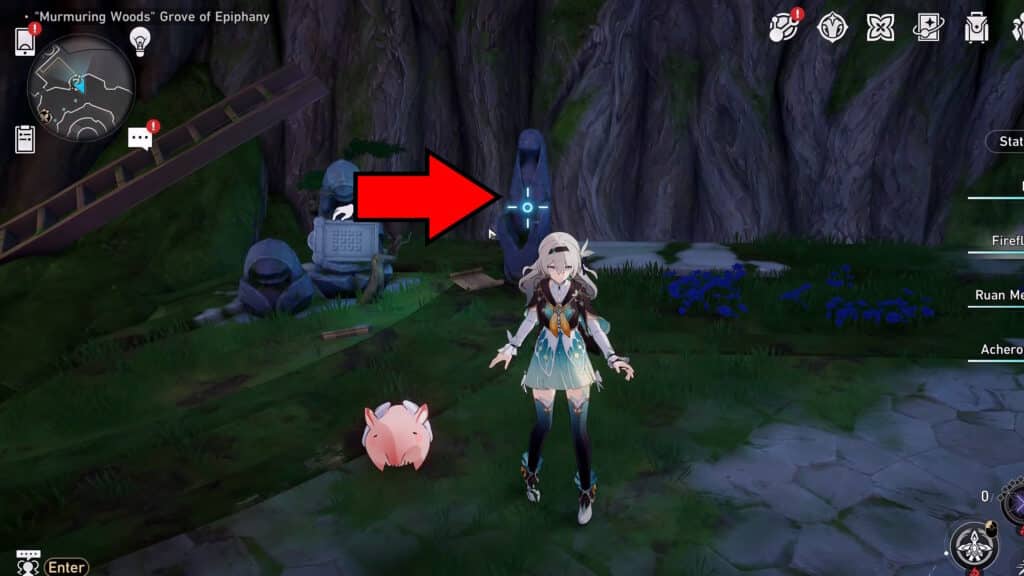
Luminary Throne – Intact
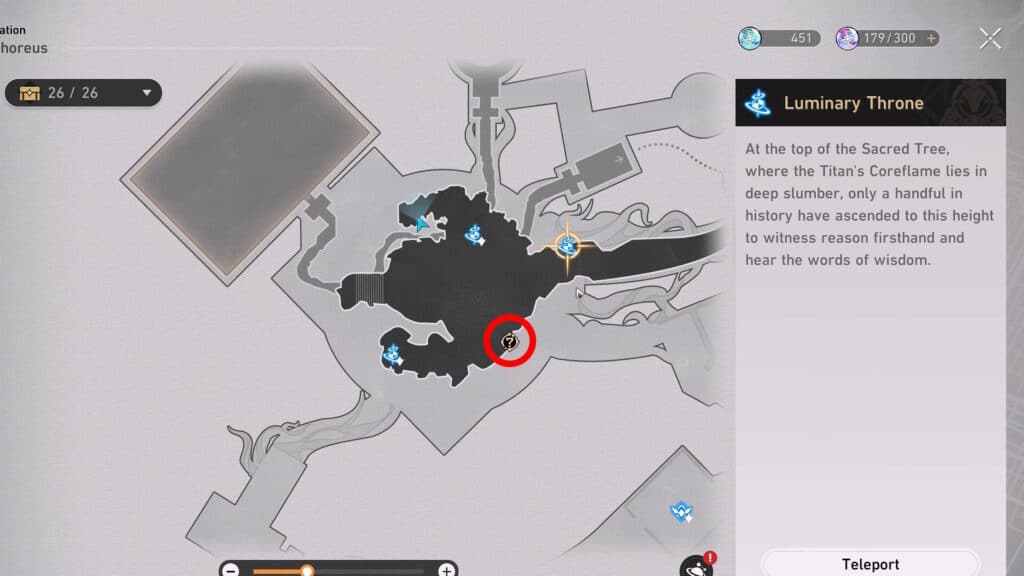
Next up, go to the “Luminary Throne” Space Anchor.
Go directly southwest from the Space Anchor to find this Sage’s Statue. Just like before, break it and rebuild it to ensure that it’s 100% “intact.” Funny how that works, huh?
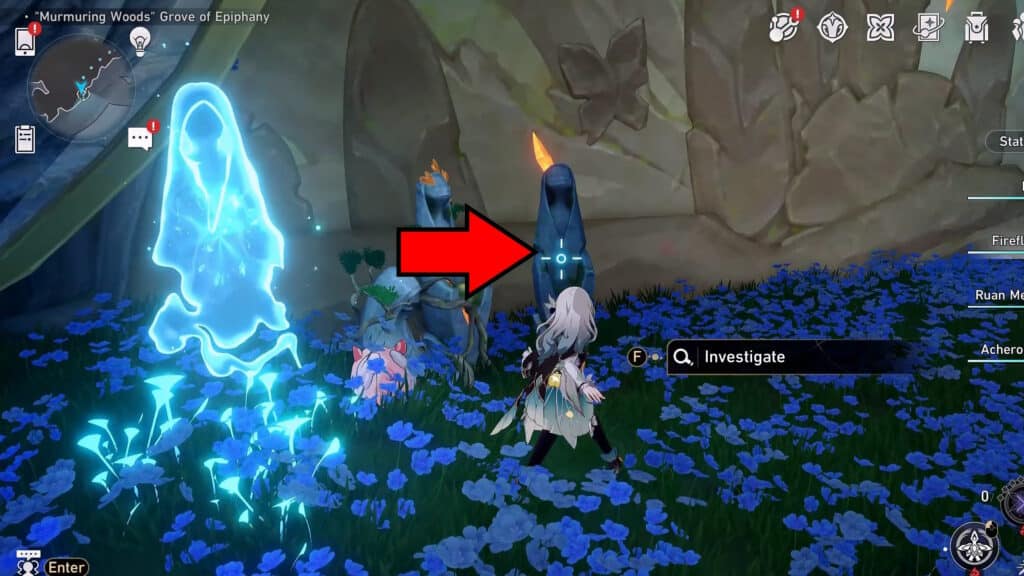
Serene Court of Learning – Intact
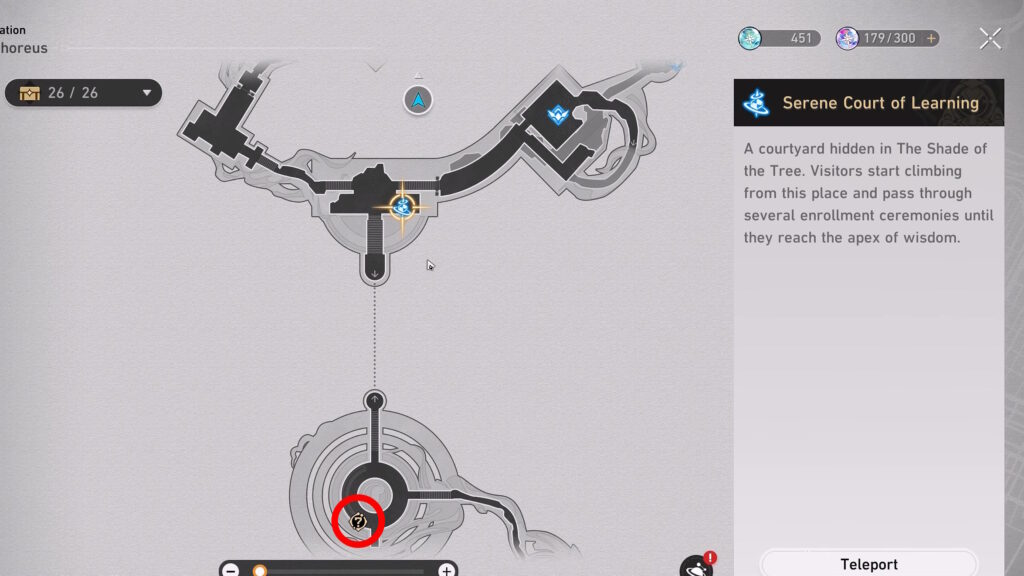
Moving on, our third Sage’s Statue is directly south of the “Serene Court of Learning” Space Anchor. Use the Hidden Passage directly south of the Space Anchor.
Go up the stairs and reach the opposite end of the circular area to find the Sage’s Statue. Break and rebuild, as before.
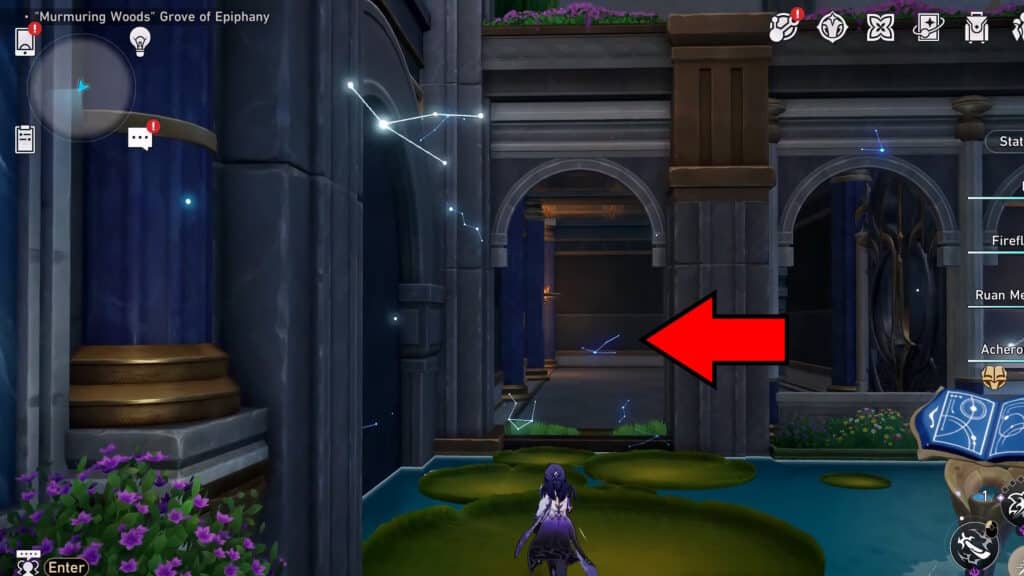
Calyx (Golden) Bud of Treasures – 1 Intact and 1 Broken
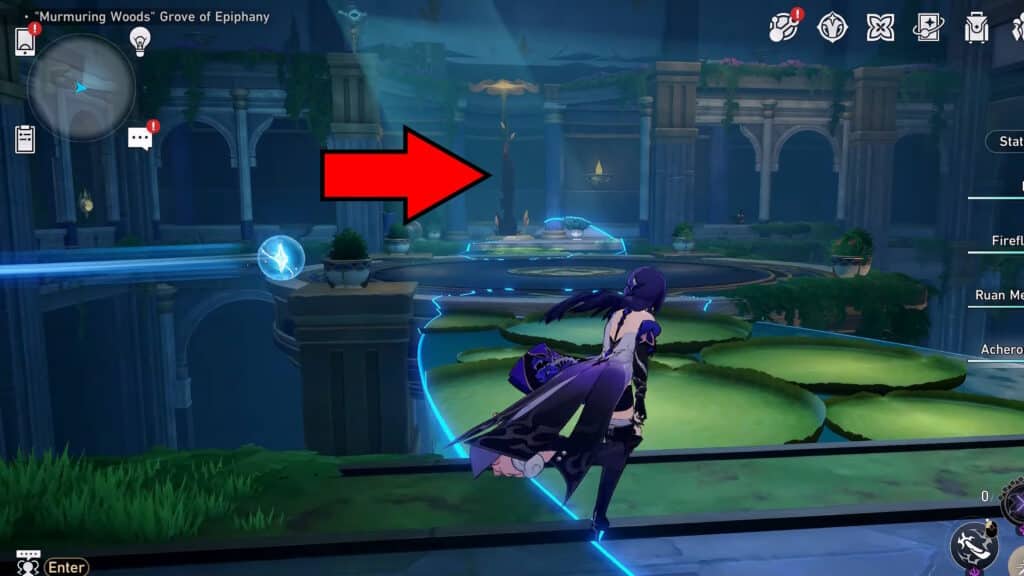
This time you’ll want to warp to the “Calyx (Golden): Bud of Treasures” in the southeastern part of the area. It’s closer than any of the Space Anchors, so it’s easier! There are also two different Sage’s Statues here, so we’ll get both one after another. Go directly north from the Calyx and use the Hidden Passage to reach the section with the first statue.

After using the Hidden Passage, continue north to reach the Sage’s Statue. Rebuild it so that it’s fully intact.
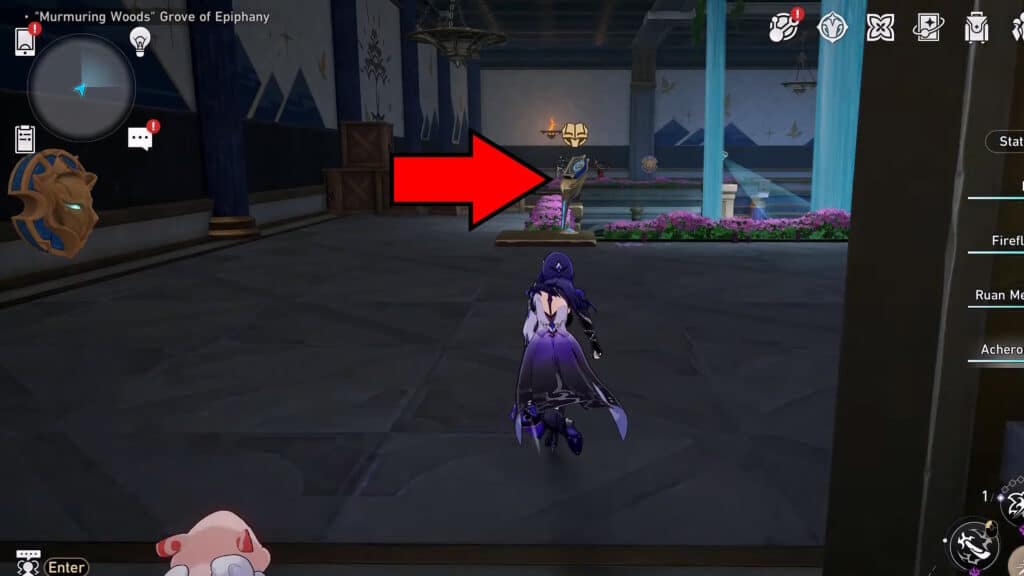
Right after you rebuild that Sage’s Statue, follow the path north and reach the end. That’s where the second Sage’s Statue here is. There are a lot of enemies down the path, though, so be careful about that!
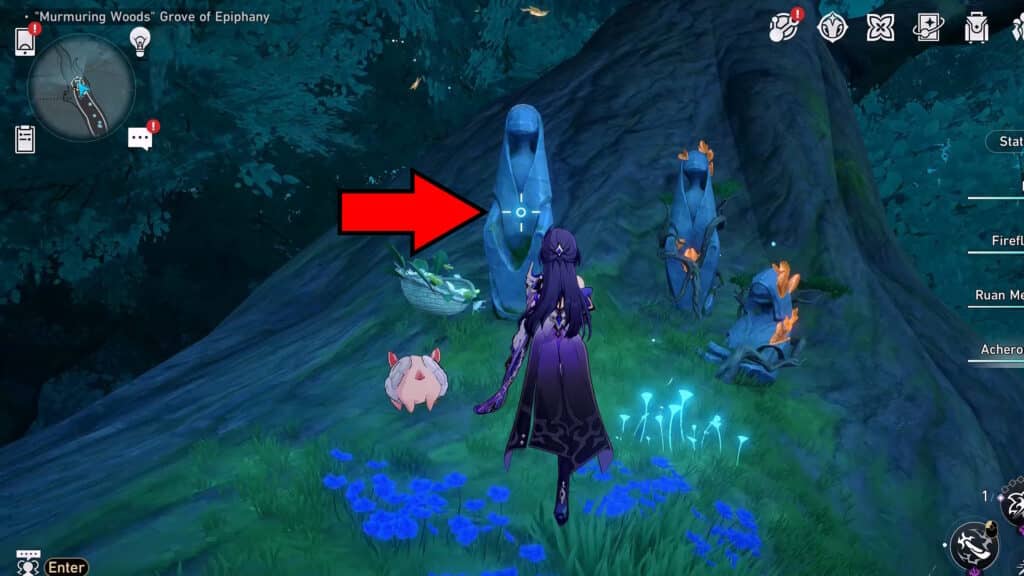
This is the first statue you need to break. Give it a solid smack with any character’s field attack to break it.
That’s the 5th out of 7 Sage’s Statues locations for the “Murmuring Woods” Grove of Epiphany puzzle in Honkai: Star Rail 3.1. There’s only 2 more left, and they’re thankfully close to each other too!
Dome of Devotion – Broken
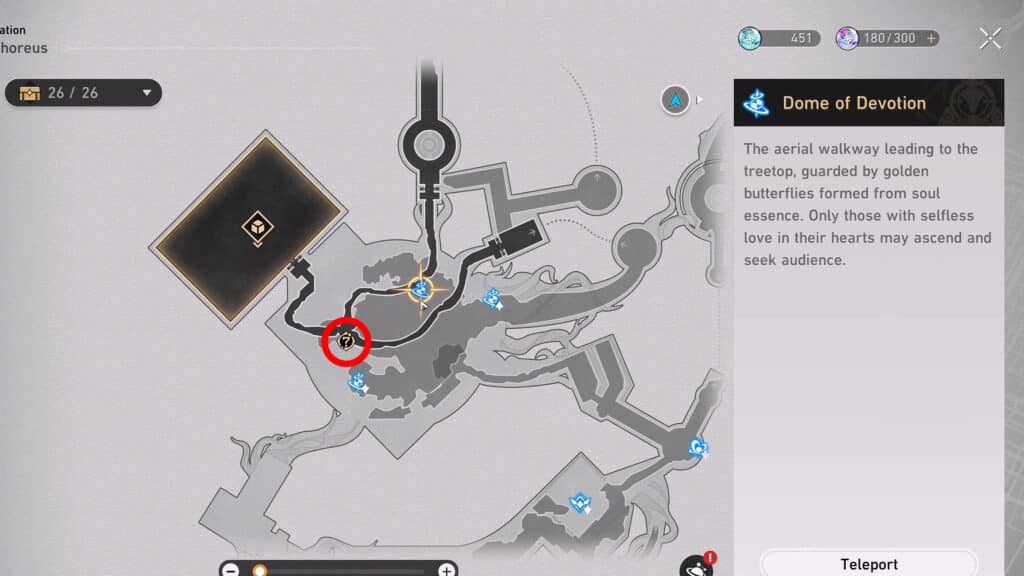
For our penultimate Sage’s Statue, go southwest from the “Dome of Devotion” Space Anchor. This is in the northern part of the area.
You’ll find the Sage’s Statue in the section where the road splits into 3. Give it a solid smack!
Dome of Devotion Puzzle Room – Broken
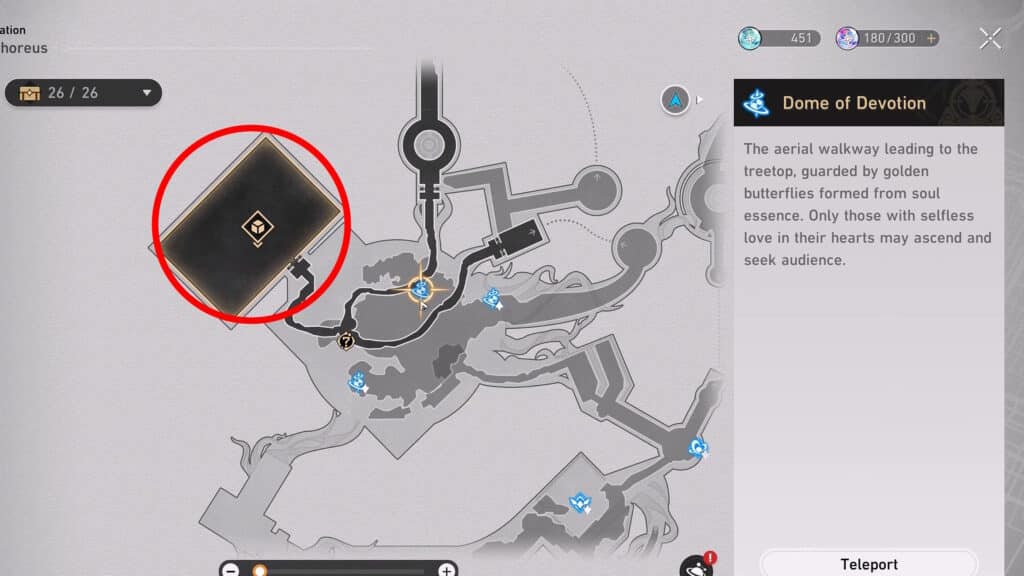
The final Sage’s Statue is also potentially the trickiest one to get, as it’s at the bottom of the puzzle room west of the “Dome of Devotion” Space Anchor.
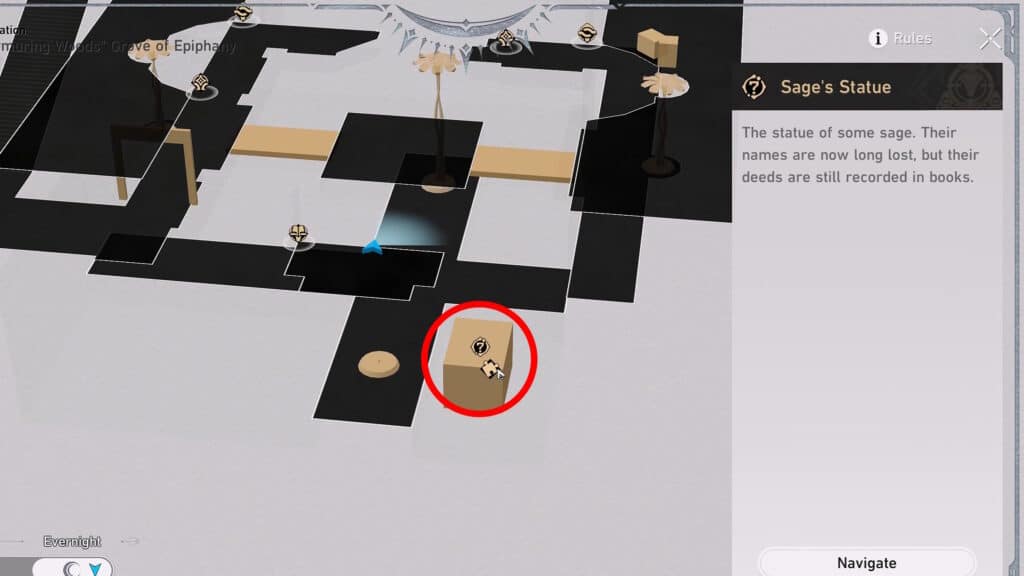
Now, as we mentioned, you need to make your way to the very bottom of the puzzle room itself. If you’ve already completed the room’s puzzle, you can just use the Hidden Passage by the entrance and ride the flower it takes you to. This will instantly let you reach the bottom.

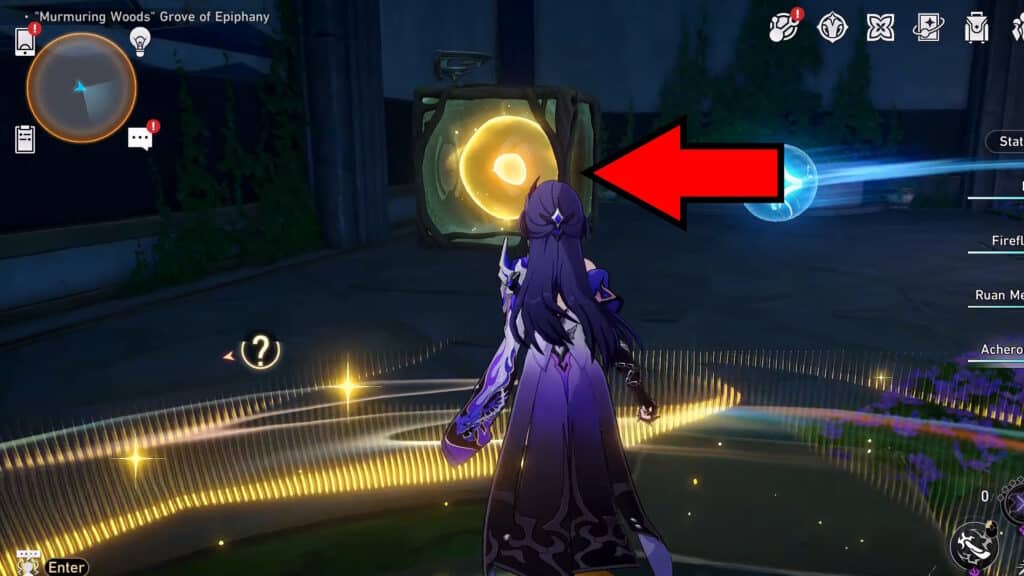
If you haven’t done so yet, though, you’ll need to solve the puzzle to break the crates surrounding the Sage’s Statue. To start, interact with the device to your left as you enter the room to “perform a miracle.”
This will reveal a path next to the device. Follow it to reach the upper floor.
Once you reach the upper floor, you’ll find another device. Perform yet another “miracle” to change the time in the room again.
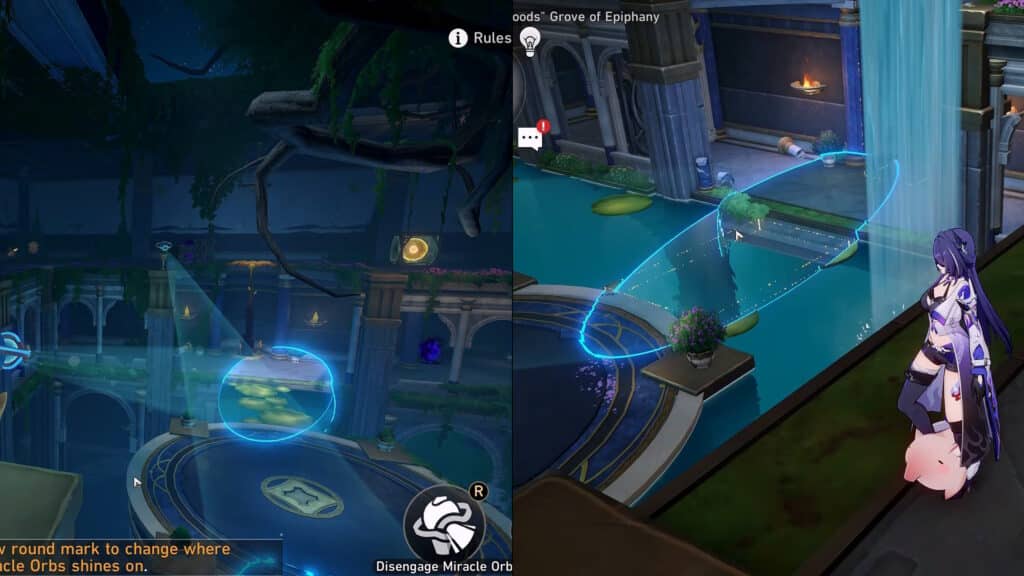
Then, use both Miracle Orbs on this upper floor and point them to the middle of the room. Point them both to the bridges, connecting the midsection to the rest of the room.
Dome of Devotion Puzzle Room Halfway Point
With that done, use the shrine pedestal next to the flower elevator to enhance the prayer effects. Then get on the flower and ride it down.
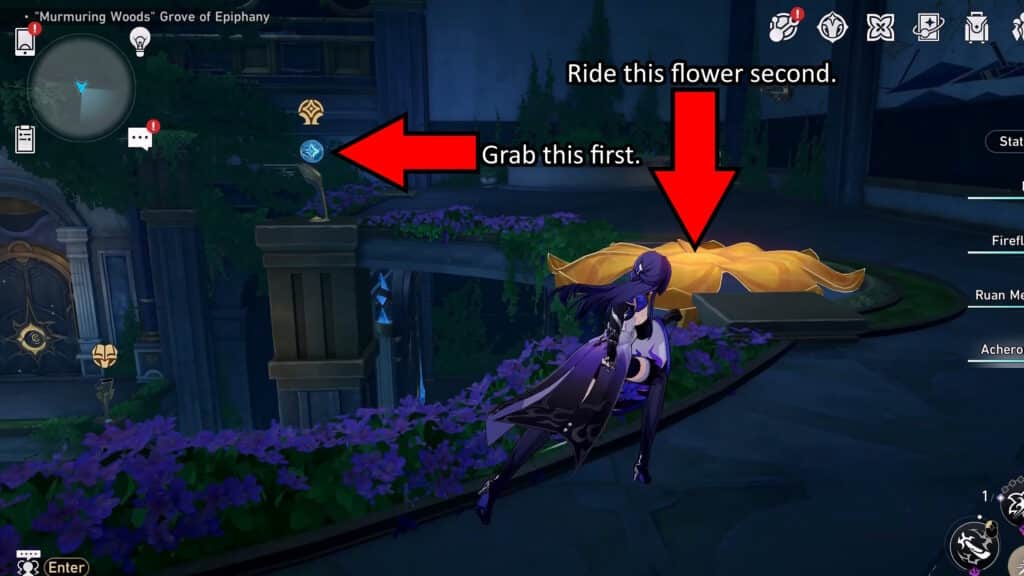
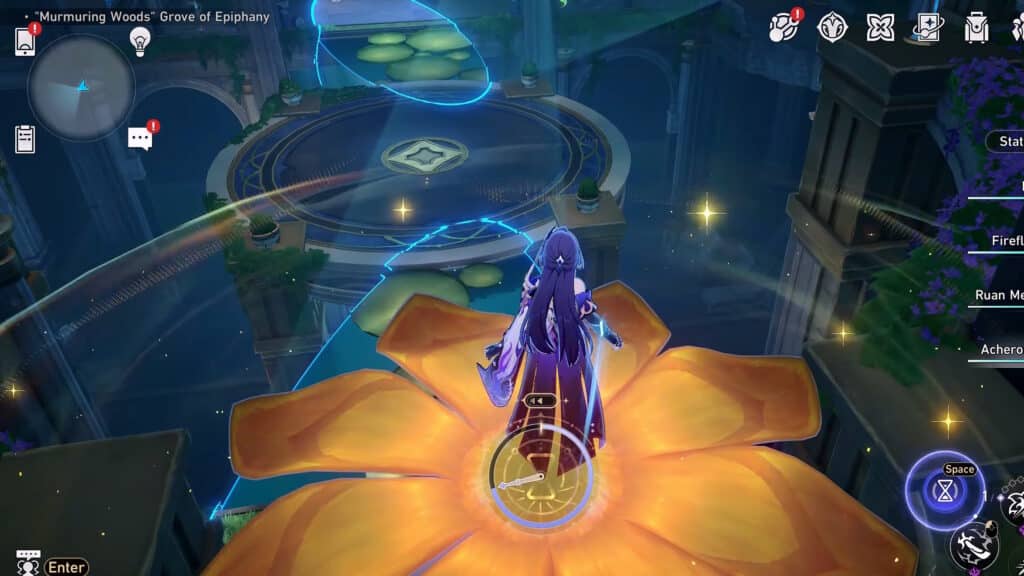
After riding the flower down, turn left and you should notice a Prophecy Tablet puzzle. Approach it and solve its “Bursting Bloom” puzzle to make a large flower spawn on the opposite side of the room.
Now that you’ve solved the Prophecy Tablet and spawned a huge flower, cross the lotus bridge to approach the flower. Interact with it to make it get down to your level, then get on top of it and ride it to the top floor.
Once you’re at the top, you should notice a crate with a golden orb. Give it a solid smack on the rightmost side and the orb will roll forward, falling off the edge. It will land right on top of the crates at the bottom of the room, finally revealing the Sage’s Statue!
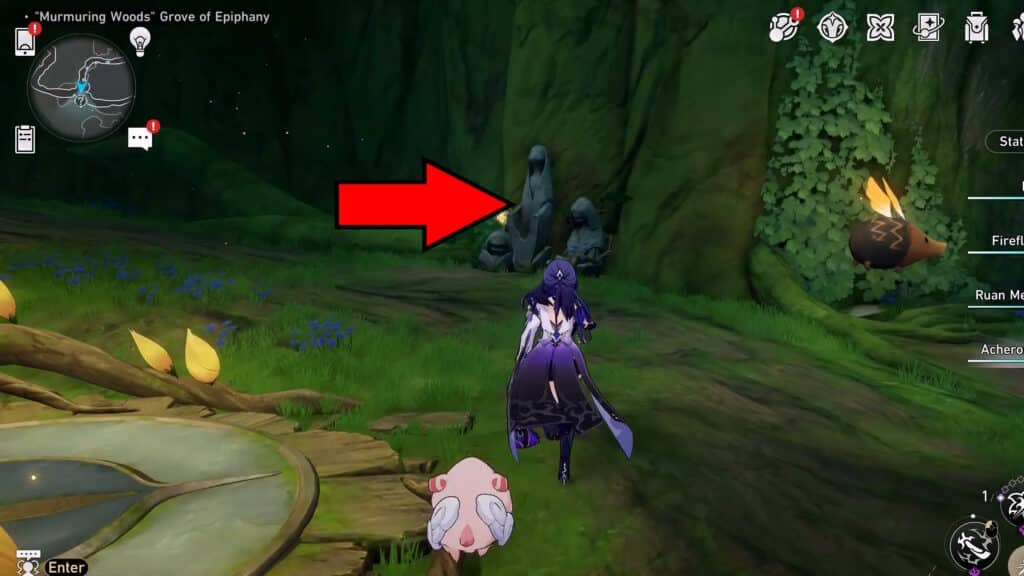
Get back on the flower elevator and ride it down.
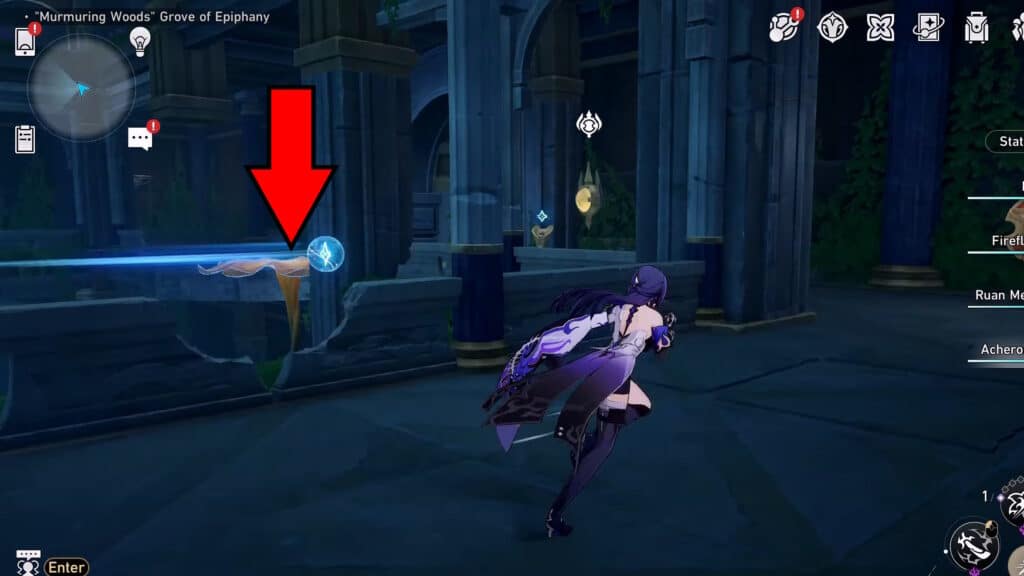
Then turn to your right and follow the path to reach another flower elevator, as shown by the arrow in the screenshot above. Ride that flower to reach the bottom of the room.

Lastly, just go forward and to your left when you reach the golden orb. The Sage’s Statue will be right next to it. Use a character with a ranged field attack to break it, such as the Harmony Trailblazer.
If you’ve followed our guide thoroughly up until now, your Trailblazer will mention that all the statues are in the right state. It’s time to get the rewards!
Claiming the Rewards – “Murmuring Woods” Sage’s Statue Locations Puzzle | Honkai: Star Rail 3.1

At long last, it’s time to get your reward! Return to the Garmentmaker north of the “Library of Philia” Space Anchor.
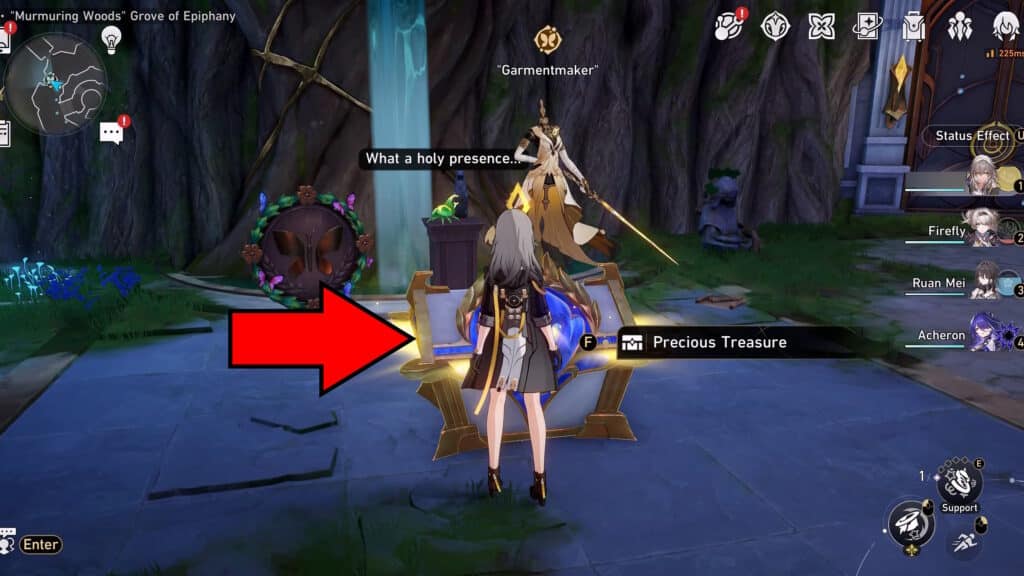
You should notice a Precious Chest in front of the Garmentmaker as soon as you get there. Open it up to claim the following rewards:
- Poet’s Dill Wreath – Part of the “Poet of Mourning Collapse” Relic set.
- Anthem Slate from the Murmuring Forest (I)
- Anthem Slate from the Murmuring Forest (II)
- “Chirping Secret: Lattice of Wisdom” Achievement
Now, the use of the Anthem Slates isn’t currently known. However, they hint at a deeper secret, so there might still be more to do… either way, though, that’s all of the Sage’s Statue locations required for the “Murmuring Woods” puzzle in Honkai: Star Rail 3.1.
This isn’t the only puzzle in the “Murmuring Woods” Grove of Epiphany area, however. For more, check out our guide on all the Golden Scapegoat puzzles in this area!


The First Berserker Khazan: Tips & Tricks Everyone Should Know
These tips and tricks will help make the game a tad less punishing.


Assassin’s Creed Shadows: Best Naoe Mastery Skills
Get the right skills to make Naoe a true master assassin.


How To Check Food Buff Time In Monster Hunter Wilds
Been wondering how much time your food effect will last? It’s easy to check!


Wuthering Waves: Should You Pull for Phoebe?
The kind-hearted Acolyte of the Order of the Deep joins the ever-growing roster of Resonators!