32 articles
At one point in Star Wars Jedi: Survivor’s story, you will get access to a cantina.
You can recruit a variety of characters to join you there, with a total of 11 recruitable groups of NPCs. Some of them will also unlock content or help you out in some ways.
In this guide, we’ll tell you where to find every one of these characters to have them join you! Doing so will also get you the Max Capacity achievement.
How to Recruit All Recruitable Characters in Star Wars Jedi: Survivor
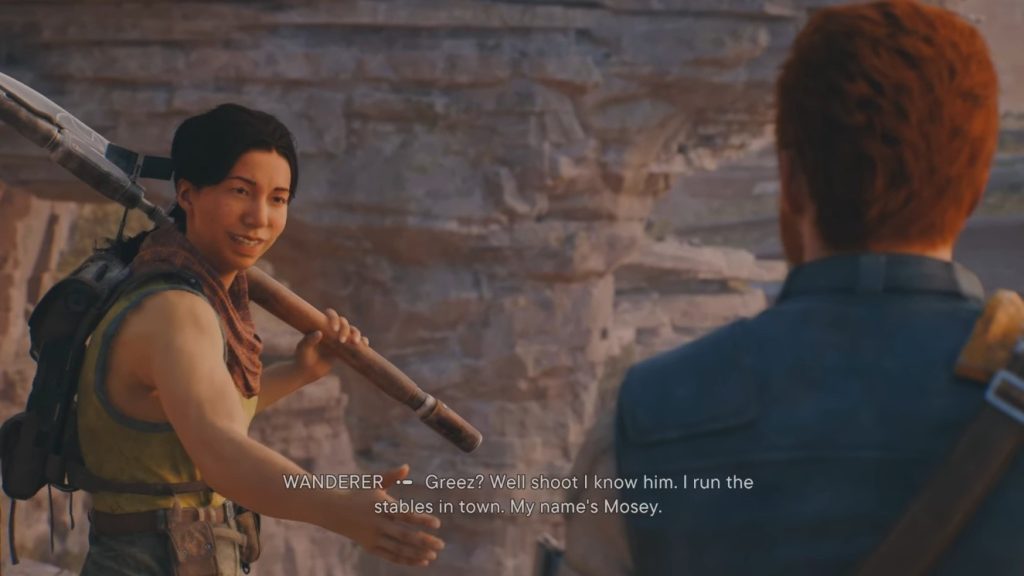
Your first pair of recruits will be Mosey and Turgle.
 Star Wars Jedi Survivor: How to Get the Pyloon’s Saloon ChestMay 6, 2023
 How to Get Alignment Control Center Treasure in Star Wars Jedi SurvivorMay 6, 2023
 Star Wars Jedi Survivor: Where to Find Undercut Hair LocationMay 5, 2023
These two will join you as part of the story in Chapter 2 of the game, so you don’t really need to do anything in particular for them.
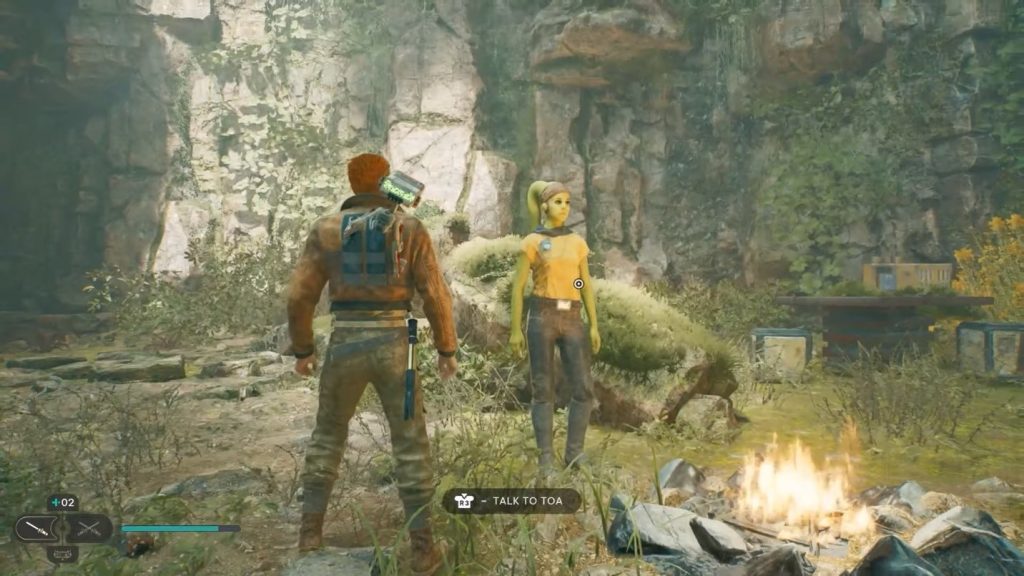
Next, you can recruit Toa who’s available from Chapter 2. You will find her in the Basalt Rift region of planet Koboh.
You will find her on your way to the Forest Array. Complete her side quest to have her join your cantina.
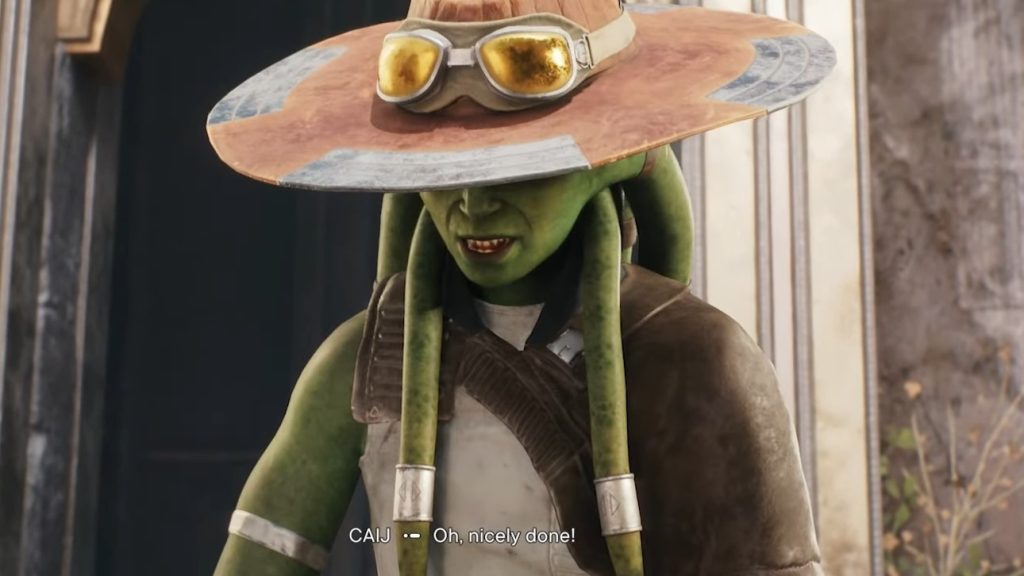
Your next recruit will be Caij during Chapter 3. She will automatically join you when you reach the Stone Spires region in Koboh, so just progress the story until that point.
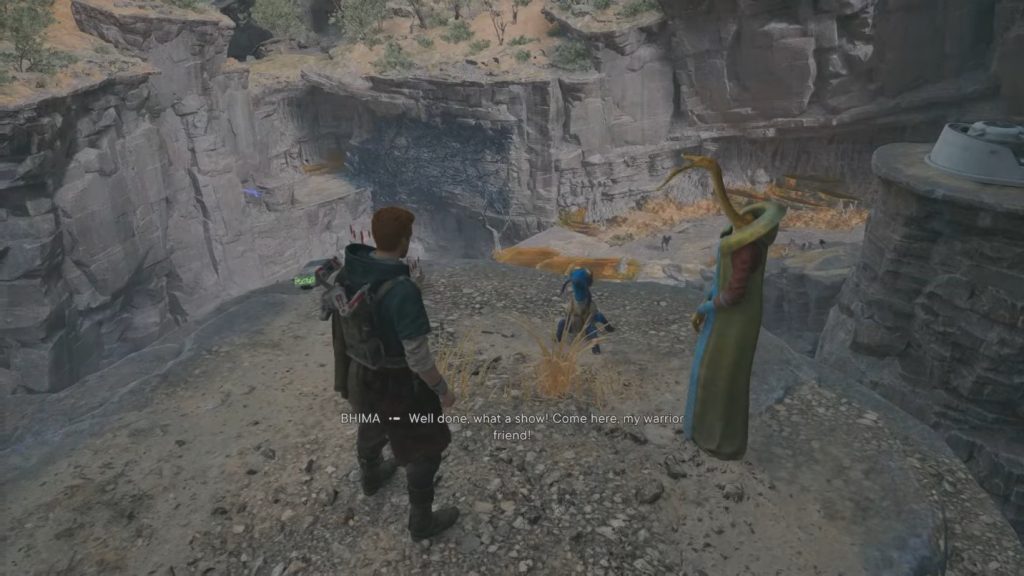
Next up are Bhima and Tulli, another pair that will join at the same time. They can be found near the end of Chapter 3.
They are close to the Boiling Bluff Meditation Point around the Devastated Settlement region. Kill the Mogu in the area and speak with Bhima and Tulli to have them join your cantina.
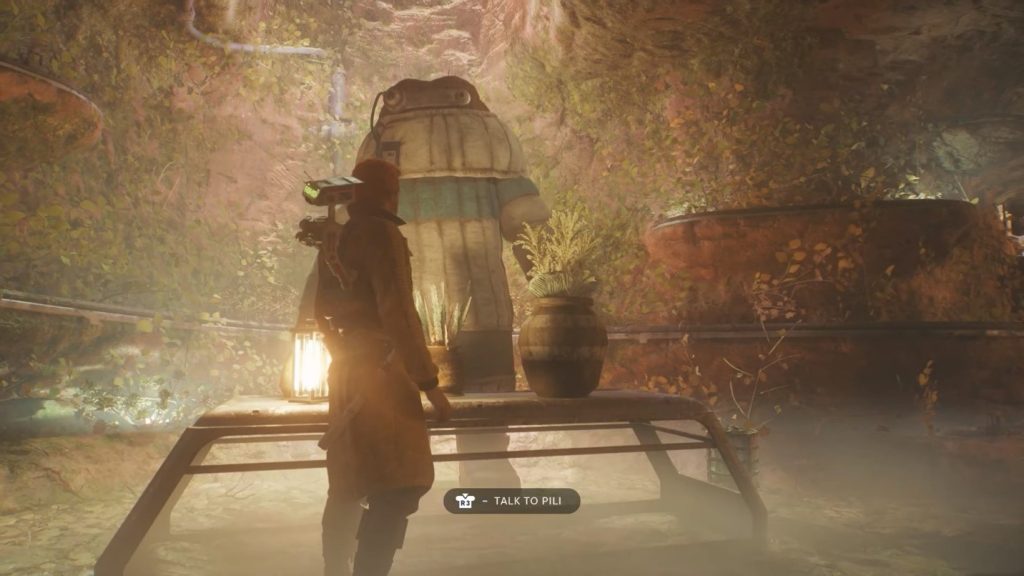
Pili Walde will be the first recruit you can get once you reach Jedha in Chapter 4.
You will come across a room with ivy growing on its walls during this chapter, which is where you will find the gardener Pili.
She will join automatically once you speak with her.
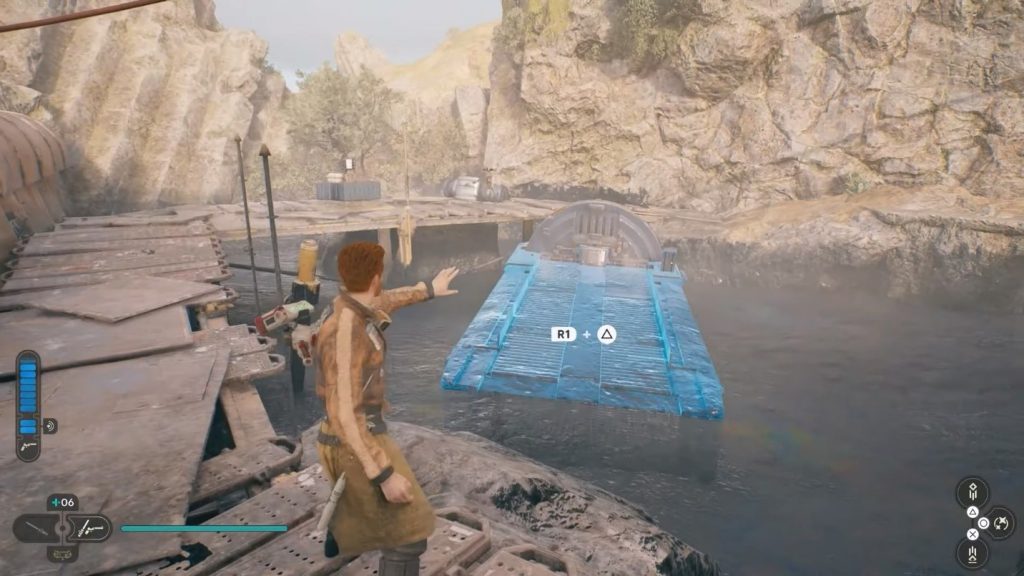
After Chapter 4, you should have the Force Lift ability. You can now recruit the Pit Droid back in Koboh!
Go to the Gorge Crash Site area and look for a ship stuck inside a tar pit. Use your Force Lift ability to pull it out then speak with the Pit Droid to have him join you.
Recruits in Chapter 5 and Beyond
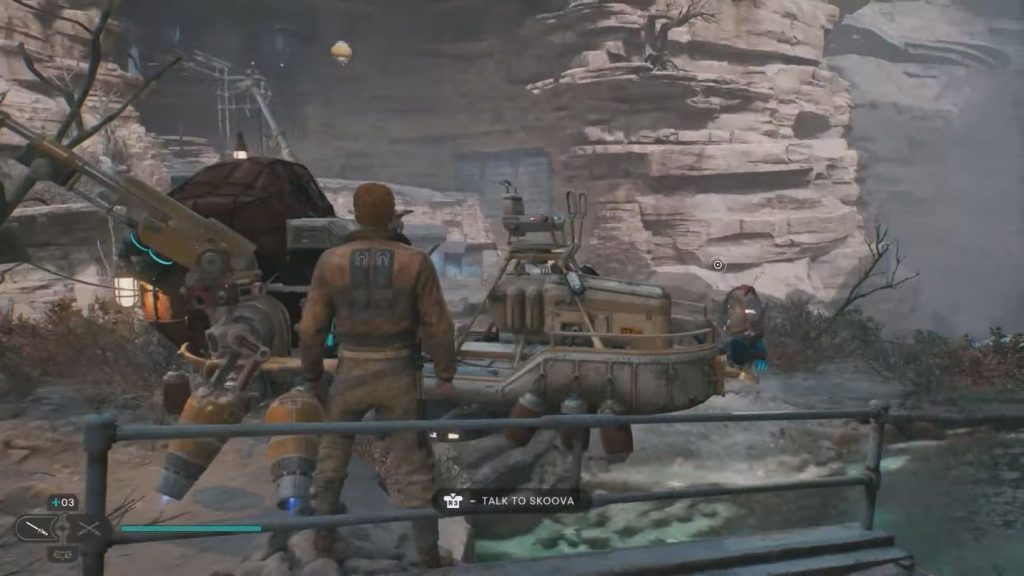
Your first new buddy once you get to Chapter 5 will be Skoova who is in the Foothill Falls on Koboh.
He’s chilling and fishing on his boat. Just approach him and ask him to join. Keep in mind that he’s necessary to find all the fish in the game!
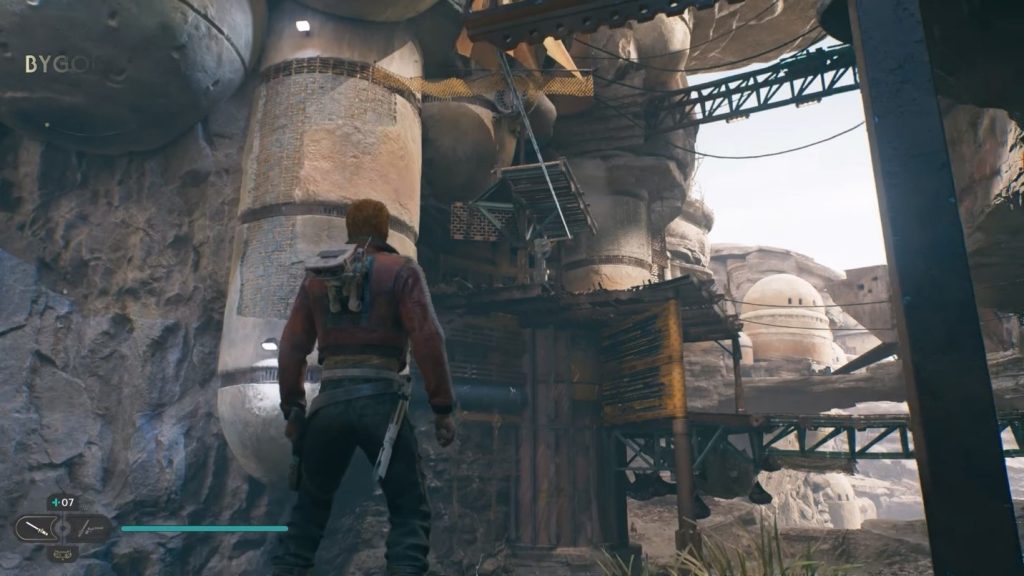
Next up is Jawa in the Bygone Settlement of Koboh. You can only meet them once you have the Air Dash and Upgraded Ascencion Cable abilities.
Go to the Bygone Settlement Meditation Point on Koboh and look for a metal sheet on a wall. Wall run across it and complete the platforming challenge; Jawa is waiting for you at the end.
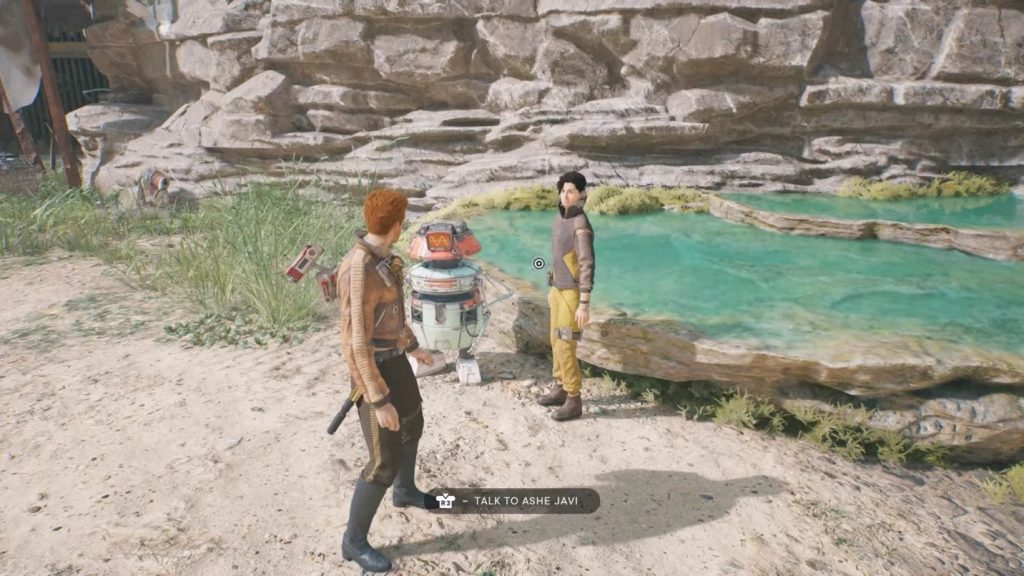
Now recruit another pair: Ashe Javi and DD-EC. They’re in the Harvest Ridge region of Koboh.
You can find them smack dab in the middle of the region near the red, blocked path. Just speak with Ashe Javi and they’ll join you.
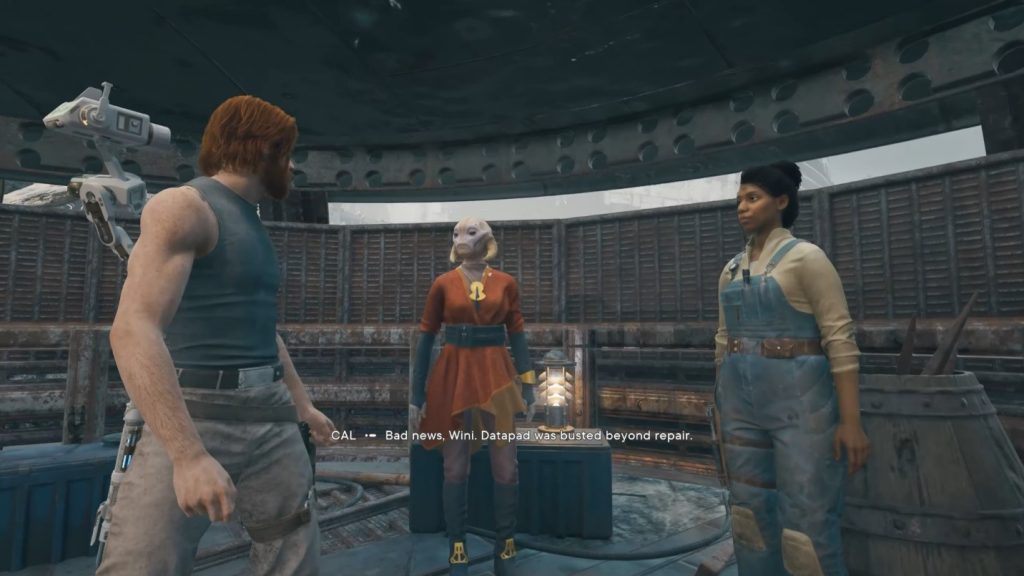
The next set of recruits also come as a pair, Zygg Soza and Wini Eres. You can find them near the Viscid Bog Meditation Point on Koboh.
Go there and look for a tent, then speak with them. They’ll ask you to retrieve something for them first though which you can find on a rocky spire next to the tent.
Lift the nearby platform to reach it, then just bring the item back to them.
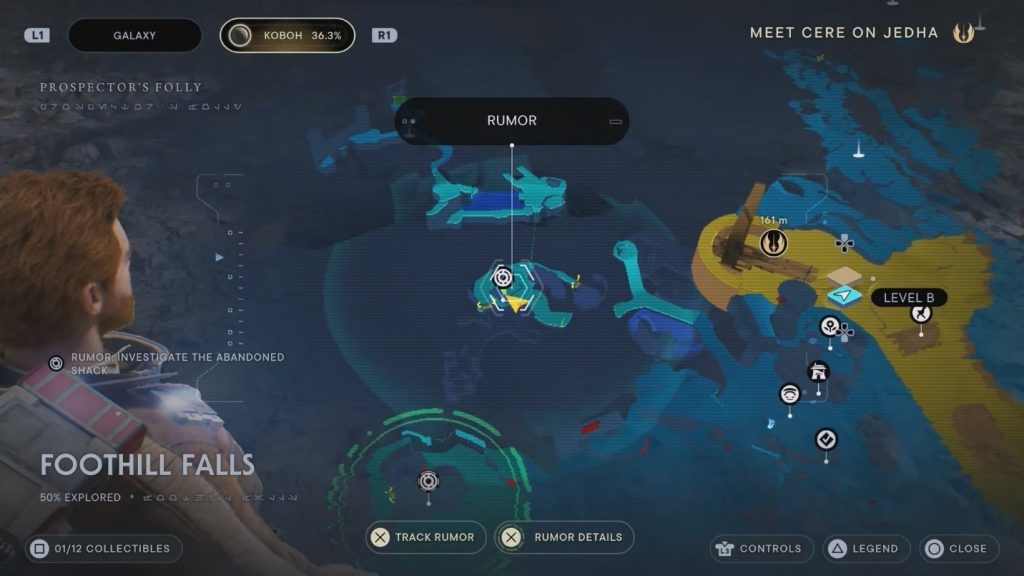
Your last recruit will be T-1N8 who’s also found in the Foothill Falls region of Koboh.
They’re inside the basement of the shack leading toward the Phon’Qi Caverns. You can use the nearby Relter to reach the shack, then use Force Pull to open the trap door and you’ll find T-1N8 inside.
If you followed this guide in order, recruiting T-1N8 will get you the Max Capacity achievement for having a full cantina!
ALSO READ: How to Get a Trash Can Profile Picture in Honkai: Star Rail