21 articles
Biomods in Subnautica 2 are a way for you to upgrade yourself with various abilities, so it’s a good idea to try to get all of them.
These can provide you with new abilities, such as passively producing edible algae or the ability to become invisible when not moving. They’re quite useful for exploration and dealing with the aquatic life you encounter!
In this guide, I’ll tell you everything you need to unlock all of the Biomods.
Get the BioScanner First
Before you start hunting down the Biomods, know that every single one of them will require you to have the Bioscanner.
 Subnautica 2: Ending Guide (Alien Ruins)May 20, 2026
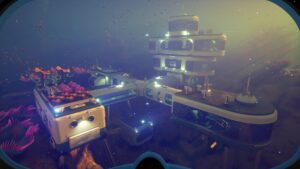 Best Base Locations in Subnautica 2May 17, 2026
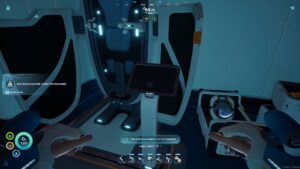 Subnautica 2: All Inventory Expansion Upgrade LocationsMay 17, 2026
This is a fairly late-game item, found at the Cicada Wreck near the Blackbox Iso Signal. If you’re confused by that, the Blackbox Iso Signal is a location given to you later in the game’s story.
Regardless, you can reach that Cicada Wreck by going about 1800m east of the starting Lifepod location.You’ll know you’re close once you’re in the green-ish biome near the Alien Ruins.
Using the Alien Ruins as a reference point, go further southeast until you find the wreckage hanging off the edge of a cliff. Use the Repair Tool on the hatch at the bottom to open it and enter the wreck.
You’ll find the Bioscanner on the floor of the wreck as soon as you go in. The next video shows how to reach the wreck and find the Bioscanner itself.
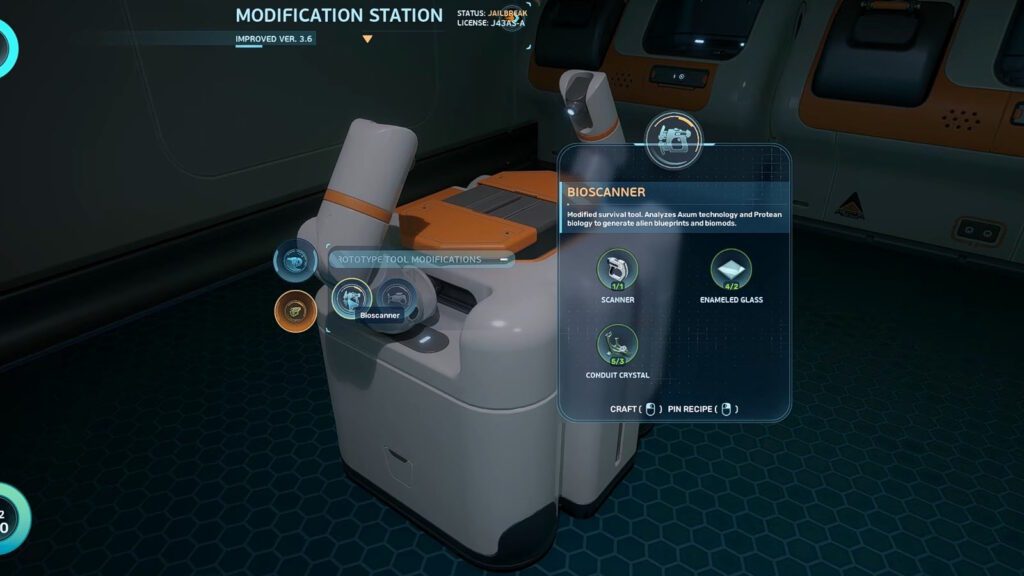
Scan the Bioscanner and you’ll unlock it as a crafting recipe. You can now make it as an upgrade for your Scanner at a Modification Station using the following materials:
- Scanner x1
- Enameled Glass x2 – Made by combining Glass with Creature Enamel from Enamel Husks.
- Conduit Crystal x3 – Obtained by breaking the Crystals around the Alien Ruins with the Sonic Resonator.
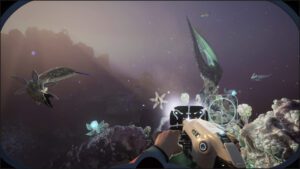
Once you have the Bioscanner, you’re ready to start unlocking all of the Biomods in the game! The process for them all is thankfully simple, requiring you to just Bioscan specific creatures. So, let’s go over them all now.
All Biomods and Where to Find Them
Active Biomods
The Active Biomods are the ones that give you an actual new ability. The starting Dash is a good example, as it allows you to quickly move in one direction on a whim!
As of this writing, you can only equip a single Active Biomod at a time. There also seems to be no plans to increase this limit at all, as there are no slots left in the Biolab interface.
Regardless, here’s the list of all the Active Biomods and which creatures you need to scan for them:
| Biomod | Effect | Creature to Scan | Creature Image |
| Dash | Quick burst of speed in one direction. | None, unlocked from the start. | N/A |
| Pathfinder | Release a trail of particles when moving. | None, unlocked from the start. | N/A |
| Sonic Echo | Emit a sonar pulse that highlights nearby resources. | Collector Leviathan, found in the trench between the starting area and the Alien Ruins. | 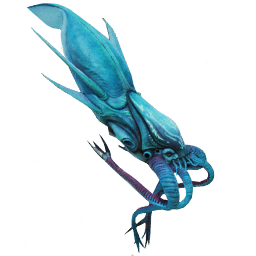 |
| Electric Discharge | Emit a strong electric shock to fend off medium and large predators. | Electric Geordie, a small electric fish found deep underwater east of the Alien Ruins. | 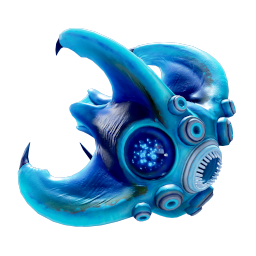 |
| Chum Cloud | Release bait around you to distract predators. | Toxic Sponge, the blue cylindrical sponges that emit spores inside caves near the Lifepod. | 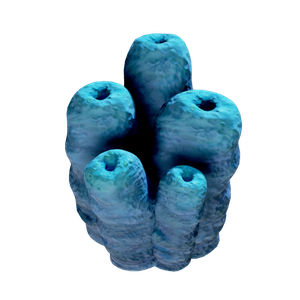 |
| Houndgar, a fish that looks like a drill and is primarily found around the Alien Ruins. | 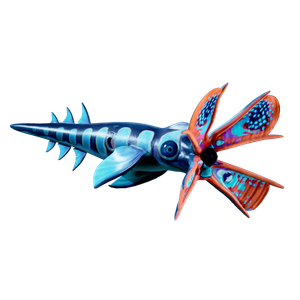 |
Passive Biomods
Unlike the Active Biomods, the Passive Biomods don’t require any input from you to use them. You just need to equip them at the Biolab, and their effects are active. That’s why they are passive!
Currently, you can only have 1 Passive Biomod at a time. However, the interface for the Biolab does show that the developers are considering allowing up to 6 Passive Biomods at a time. We’ll have to wait and see if and when those extra slots get unlocked, though.
With that said, here’s the list of all the Passive Biomods and how to get them:
| Biomod | Effect | Creature to Scan | Creature Image |
| Sea Skimmer | Swim faster when close to underwater surfaces or the seafloor. | None, unlocked from the start. | N/A |
| Oxygen Control | Reduce Oxygen consumption when not moving. | None, unlocked from the start. | N/A |
| Bioluminescence | Glow in the dark. | Sandspear, creatures that hide under the seafloor near the Lifepod. |  |
| Electric Geordie, a small electric fish found deep underwater east of the Alien Ruins. | | ||
| Camouflage | Hide from predators when not moving. | Bullethead, pointy creatures that are found by the large trench east of the Lifepod. |  |
| Water Retention | Doubles how much Water you get from all sources. | Coral Crab, a large crab covered in coral found in the hot areas east of the Lifepod. | 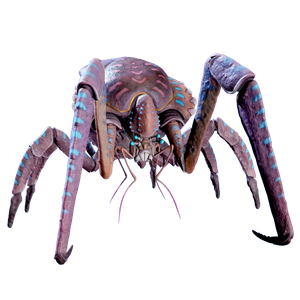 |
| Homing Sense | Marks nearby bases that have electrical power with a lightning icon. | Surge Jelly, electric jellyfish found near the Lifepod. | 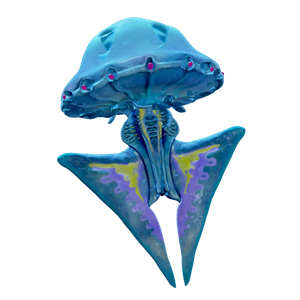 |
| Hammerhead, large hardheaded fish found near the Lifepod. | 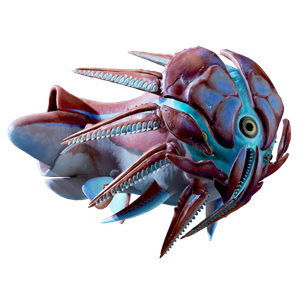 | ||
| Threat Sense | Alarm that notifies you when there’s a threat nearby. | Hoverthorn, small thin and long fish found near the Alien Ruins. | 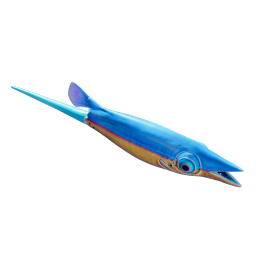 |
| Dermal Garden | Generates an Algae Block that provides 5 Food every 3 minutes. | Needler Mango, black and red eel-like creatures found near the Alien Ruins. | 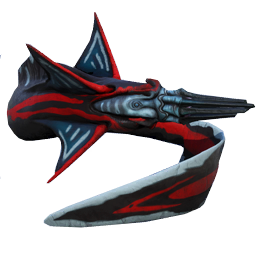 |
| Slow Metabolism | Reduces how fast your Food gauge empties. | Nibbler Mango, blue and yellow shark-like fish near the Lifepod. | 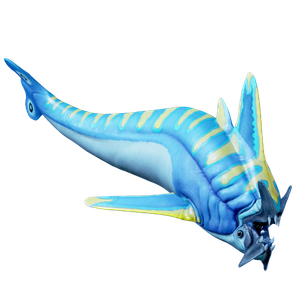 |
| Water Secretion | Generates a Filtered Water Pocket that provides 30 Water every 3 minutes. | Water Slug, slug-like creatures found by the seafloor near the Lifepod. |  |
Wrapping Up
In short, how to get all of the Biomods in Subnautica 2 is fairly straightforward. You mainly just need to get the Bioscanner, which is the biggest roadblock. Then, scan specific creatures with it to unlock the Biomod at your Biolab.
Nonetheless, I hope this guide helped you on your quest to get all of these Biomods! For more help, do you happen to need Necrolei Cysts and Strong Acid? Check out our guide on how to get them!