 29 articles
If you want to become a healer in New World: Aeternum Season 10 but don’t know where to start, our healing guide for dummies is for you!
Our guide will go over all of the basics you need to know about. What weapons to pick, which skills to focus on, what Attributes and Perks to get, and more! All of that to help you become the backbone of your team. Because let’s be honest, no party is complete without a healer.
Now, read on and let’s dive right into it.
Beginner Friendly Healing and Healer Build Guide | New World: Aeternum – Season 10
Weapon of Choice
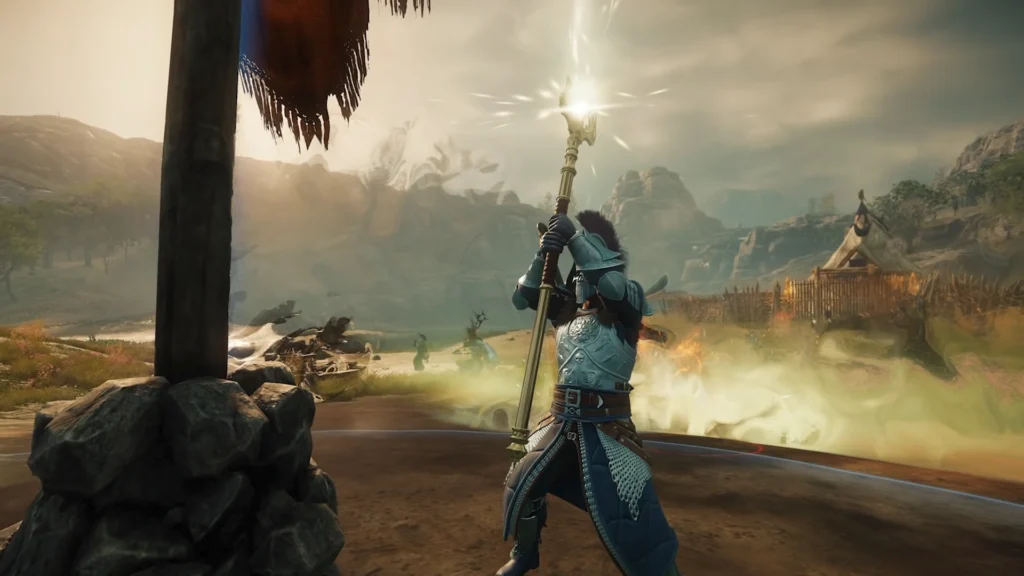
When it comes to weapons, Healer builds are very limited. Their only primary weapon of choice is the Life Staff, which is the only healing weapon type in the entire game!
 Level 70 Gear Guide – What EVERY New World Player Should Do Next in Season 10Oct 25, 2025
 Best Solo Class for New World Season 10Oct 23, 2025
What’s more, the Life Staff is limited to using Focus (FOC) primarily as its Attribute. It can also scale with Intelligence (INT). However, higher INT does not increase healing output, it only affects damage.
So, that means you’ll be 100% focused on Focus whenever you play as a Healer. This leaves you with two secondary weapons to choose from: Flail & Shield or Void Gauntlets. They both also enhance your supportive role, at least!
The Flail can Empower and Fortify your allies, while also allowing you to create extra bursts of healing. You’ll also be able to cleanse Crowd Control effects on yourself and your allies.
Void Gauntlets, on the other hand, are a bit more offense-oriented. They do still allow you to Empower allies, but they also allow you to Rend enemies to reduce their defenses.
If you’re just starting out, we highly recommend just trying both of them out as a secondary weapon to your Life Staff. No better way to see what you like better than by trying it out firsthand, after all.
If you want to be a bit more advanced, you should also consider who you’ll be playing with, if you have a set group.
If you have a tank who already uses the Flail, pick Void Gauntlets. If you’re with another healer who uses Void Gauntlets, pick the Flail. This would give the party more versatility, which is always a good thing!
Attributes

As we’ve mentioned before, Focus is your main Attribute as a healer. So, we highly recommend investing the majority of your Attribute points into it. You’ll want to reach 350 Focus at Level 70.
For your second most important Attribute, you’ll want to level up Constitution. This makes you a bit more resilient, so it helps out more when you’re new to the game. Getting it to 100 as soon as possible is a good idea.
As for the remaining points, you’ll want to dump them into your secondary weapon’s main stat. That is Strength for the Flail or Intelligence for the Void Gauntlets. This will help you get some extra damage and utility out of them.
Later on, as you start to feel more confident, you can lower your Constitution to 50 and your Focus to 300.
This will give you some extra points to help reach the 250 breakpoint on your secondary weapon’s main Attribute. You do sacrifice some healing output, but you gain utility and versatility in exchange.
Recommended Skill Tree Setups
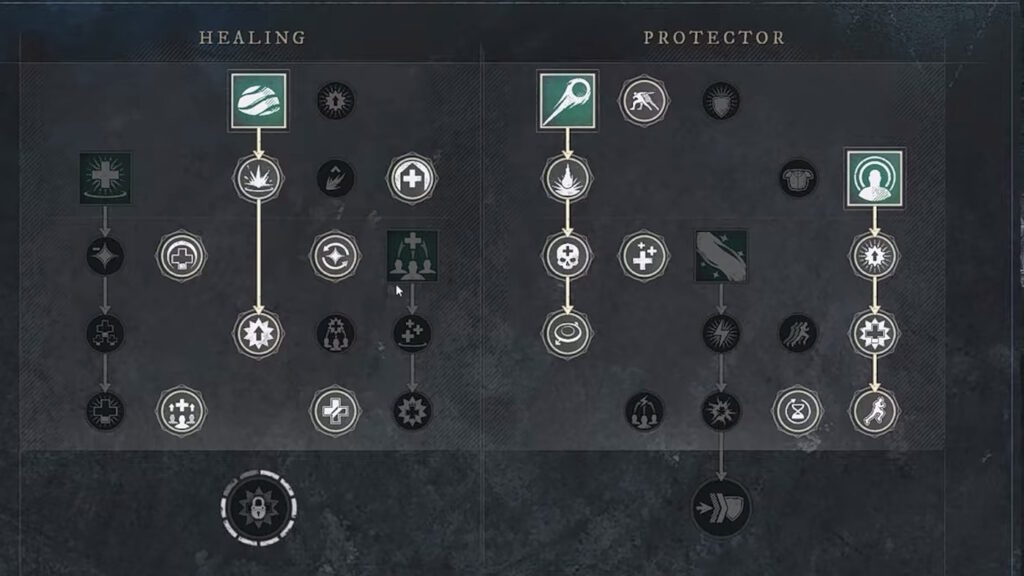
When it comes to your Skill Trees for the Life Staff, there are a few setups you can try. The most general one is shown above, as an example of what to pick up.
This setup works in the vast majority of situations, but it does have a bit of a focus on AoE healing for melee classes. That means that it can falter a bit in situations where your party is split up or attacking enemies from range, for example.

In those instances, we recommend the setup shown above instead. It trades away the AoE heals from Beacon for Splash of Light. This ability heals everyone in your group within a 25m radius, so it’s great for parties with a lot of ranged characters!
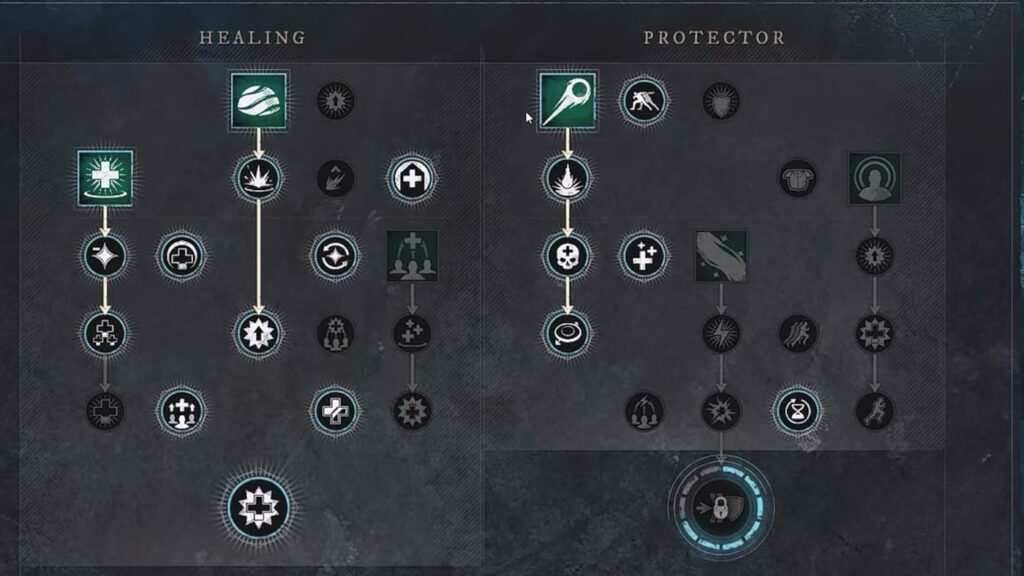
Lastly, you can also focus on single-target healing. For that, you’ll give up Beacon/Splash of Light in favor of Divine Embrace. This is a highly powerful single-target heal, so it’s ideal in situations where keeping the tank alive is your priority.
Aside from those specific changes, though, the baseline remains. Sacred Ground allows you to place an AoE healing radius wherever you want. Orb of Protection lets you heal and fortify allies, while also damaging enemies. Keeping both and fully upgrading them is a must.
Gearing Recommendations
When it comes to gearing up as a Healer, your main goal is to remain within the Light weight category. To achieve that, you’ll want to use a Medium-weight chestpiece while keeping everything else Light-weight.
The main reason for this is just a bit of minmaxing. It’s what you can get away with while both staying Light and also getting as much defense as possible!
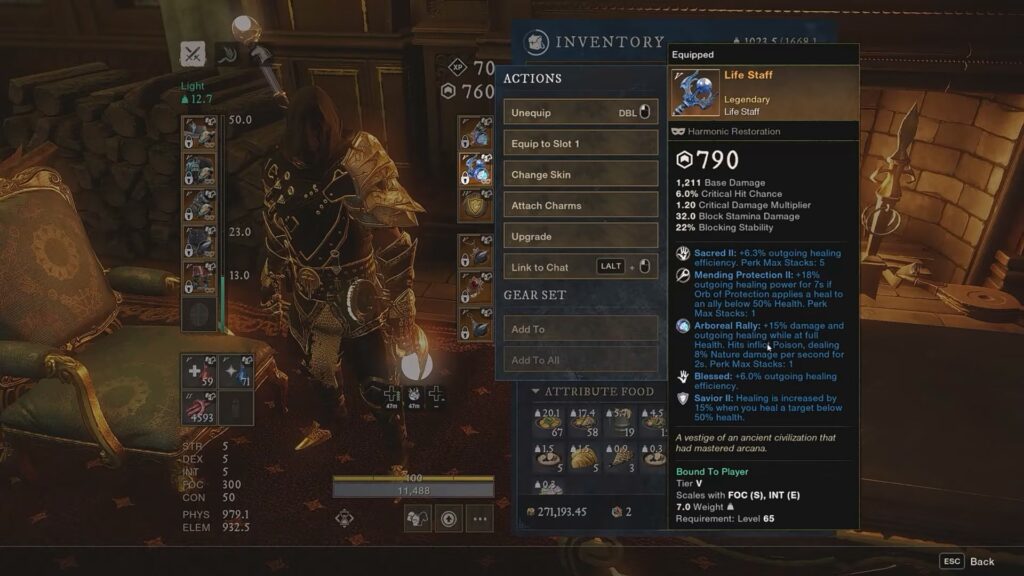
That aside, Perks are the main thing you need to pay attention to. We go over them a bit more in detail in our Season 10 gearing guide, if you want to check that out.
But, for now, here’s a list of the Perks you should get as a healer. This is ordered more or less from highest priority to lowest priority, so focus on the topmost ones first:
- Sacred II – 5 Stacks
- Savior II.
- Healing Breeze II (Ring Only)
- Mending Protection II – Ideally on the Life Staff for a stronger effect.
- Refreshment II (Earring Only)
- Slash Condition II / Thrust Conditioning II – As many as possible, they’re the most common damage types.
- Slash Protection II / Thrust Protection II (Amulet Only)
- Elemental Ward IV / Physical Ward IV (Gems) – As many as possible.
- Enchanted Ward II – As many as possible.
- Lifestealer’s Draught II.
- Mortal Aggression II.
- Vital Synergy II.
- Keen II / Vicious II – If your gear has Offense Charm sockets, these are your best bets.
- Keenly Fortified II.
- Keenly Empowered II.
- Sundering Stacks II.
We know this is a lot of Perks to keep in mind, but just get what you can out of these as you’re gearing up! They’re focused on improving your healing and survivability first and foremost.
Artifacts to Get
Lastly, we want to briefly talk about the Artifacts you’ll want to get. These are more of an endgame goal for you to get, serving as the “capstone” for your gear. They all have very strong, unique Perks that make them worth the grind!
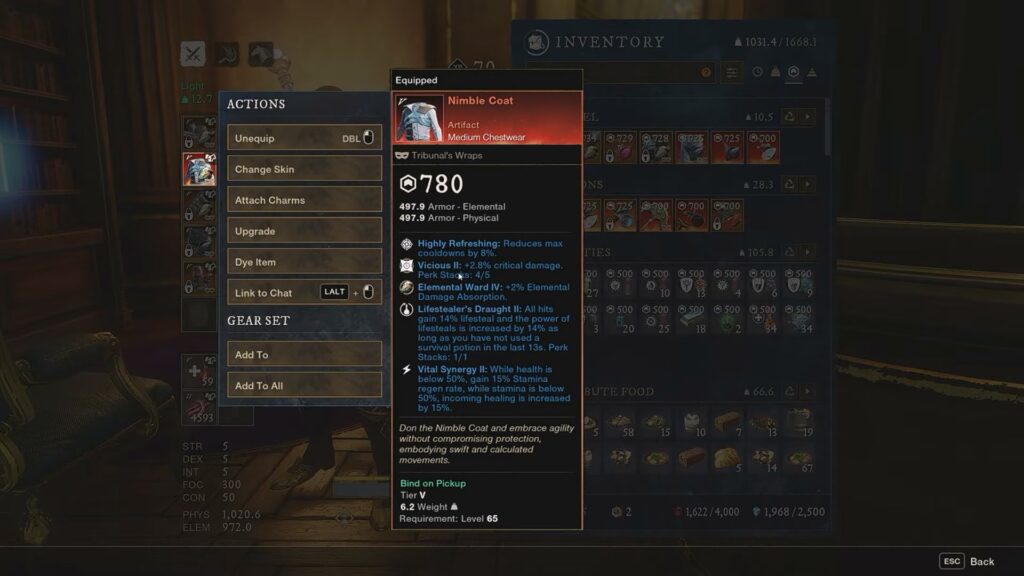
First of all is the Nimble Coat. You can get this one randomly from the PvP Rewards Track. Its unique Perk reduces all of your max cooldowns by 8%, allowing you to use skills much more freely.
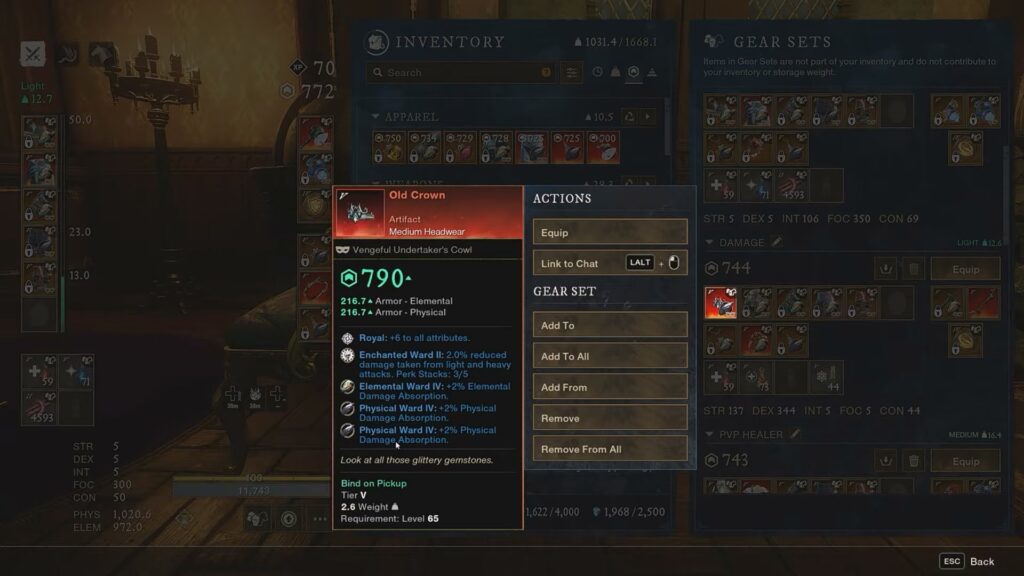
The second is the Old Crown, which you can also get from the PvP Rewards Track. This one’s pretty simple, it gives you +6 to all of your Attributes. It also has 3 Gem slots, allowing you to stack a lot of physical and elemental Wards!
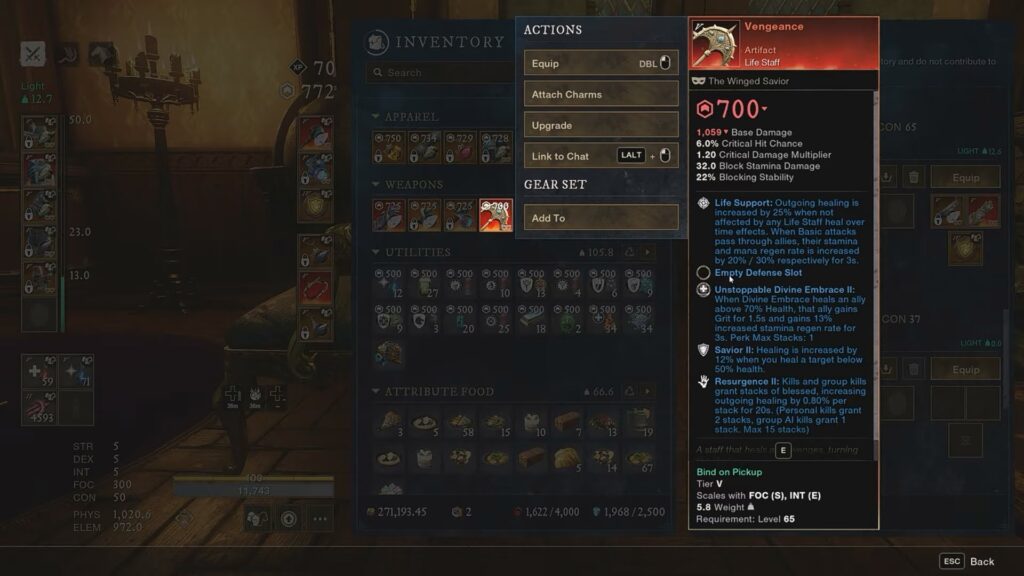
For our third, we have the Vengeance Life Staff. You can get it by crafting Hero’s Artifact Caches – Max Gear Score. It’s not a must-have, as a Legendary Life Staff can be as good or even better. However, it’s still pretty good!
Its unique passive increases all outgoing healing by 25% when you aren’t affected by any Life Staff healing-over-time. It also allows your basic attacks to increase Stamina and Mana regen for allies.
With all of that said, that’s the end of our little Healing guide for dummies in New World: Aeternum Season 10. We hope this helps you on your path to becoming the best Healer out there!