31 articles
New World: Aeternum Season 10 is here! This new season is getting stellar reviews with the customization changes. With the new season comes new gear, new quests, and new goals. In this guide, I will walk you through a chest run that will allow you to get high-tier gear fast.
Preparing
Potions
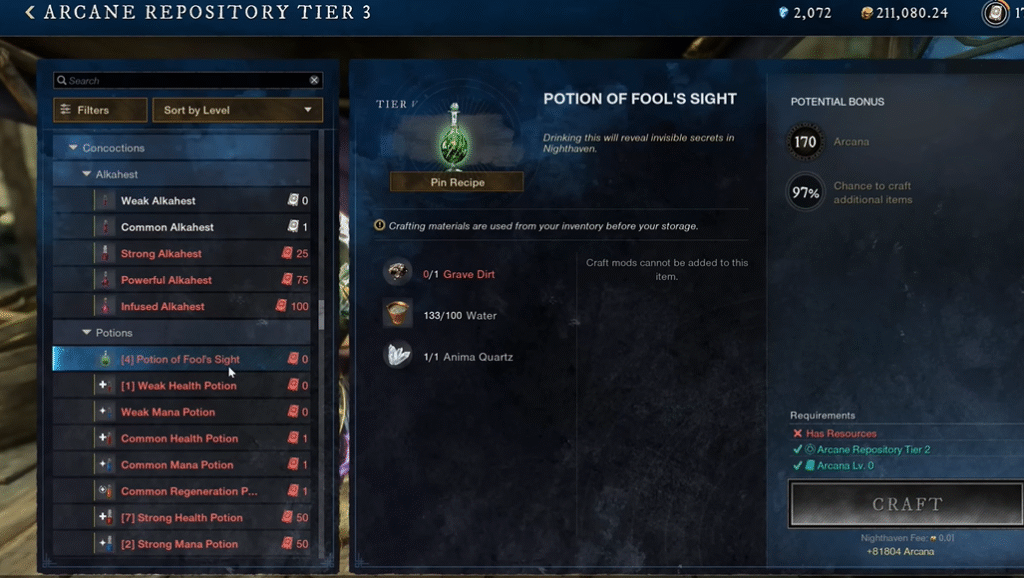
Before you start, you need to ensure you have a Potion of Fool’s Sight ready for Nighthaven Runs. This is not an option; you must have this potion to succeed.
You may either craft or buy this potion. To craft it, you will go to the Aana Station and scroll until you find the Potion of Fool’s Sight. Crafting this potion will actually give you two. You will have to have:
- 1 Grave Dirt
- 100 Water
- 1 Quartz
Gear
It is in your best interest to wear medium armor with some extra Constitution. If you wear light armor, you will more than likely get one-shot quickly. So prepare accordingly. And if you’re wondering what changes have been made to the gear this season, check out our guide here!
 Best Solo Class for New World Season 10Oct 23, 2025
 New World Aeternum: Seasonal World Leveling Guide for PvP ServerJan 23, 2025
 New World Aeternum: Best Iron Ore FarmsOct 23, 2024
Attacks
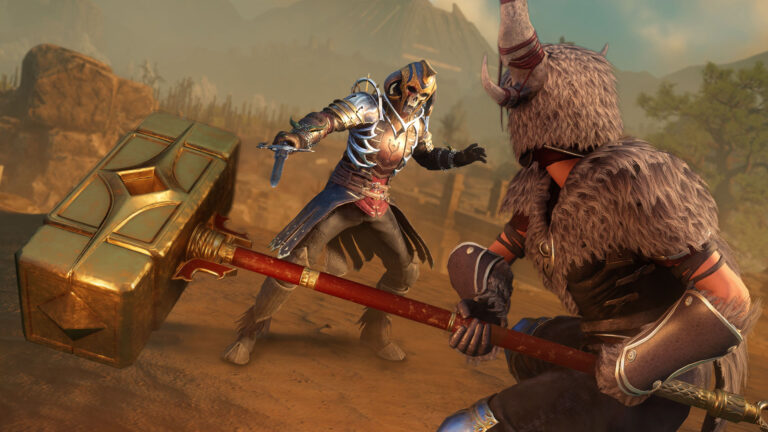
You are going to have to fight some bots in this run. However, sometimes it’s better to run by them and circle back to the loot near them. To avoid these heavy-hitting attacks, you should use Berserk or any anti-stagger ability to escape.
Stuck?
A tip for your journey: if you get stuck or fall, just open your Game Menu and click Unstuck. This will teleport you back into a safe area, without losing any progress. This is extremely useful and should be taken advantage of throughout your run.
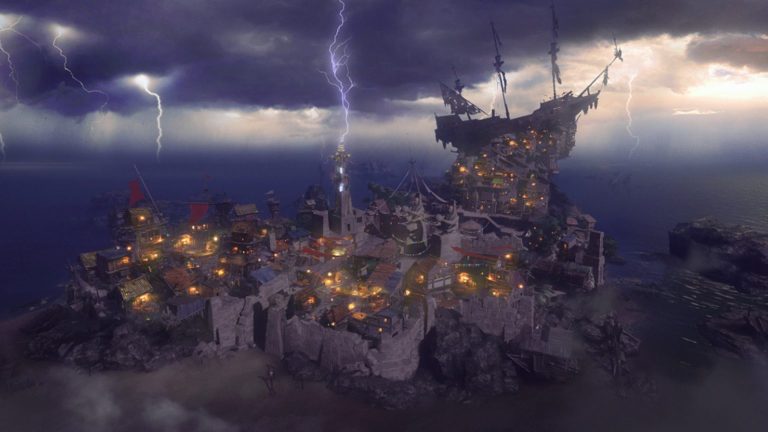
Nightbreak Roost
You are going to want to make your way to the Nightbreak Roost. To do this, fast-travel to the Church of Divinity in Nighthaven. You will then get on your mount and make your way to the Roost. This is slightly north east of your location.

First Area
Once there, pop your Potion of Fool’s Sight. It lasts thirty minutes, which should be plenty of time to finish the run.
You will see two floating bridges and a platform beside the second. Cross these, but when you get to the second, you can go left and open the two Elite Ancient Chests on the platform. There are no enemies in this first area, so this is easy loot.
Second Area
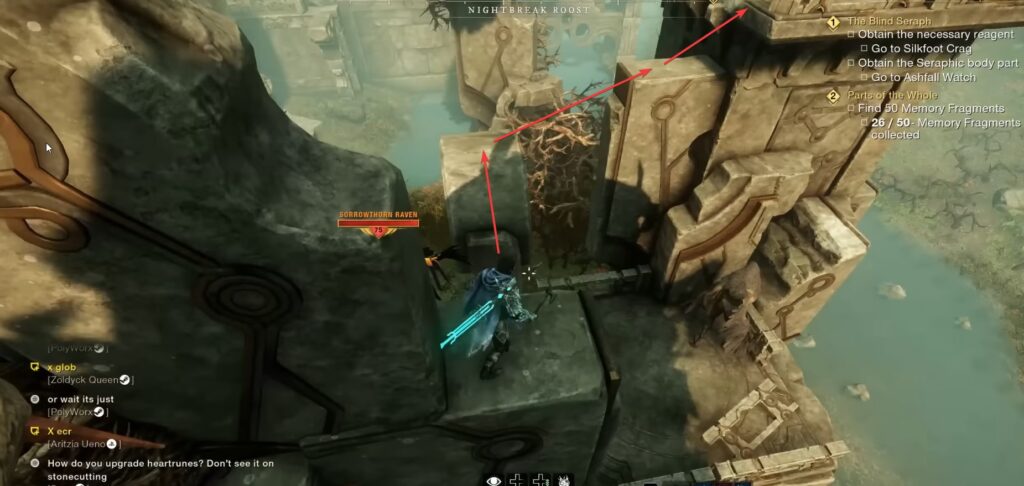
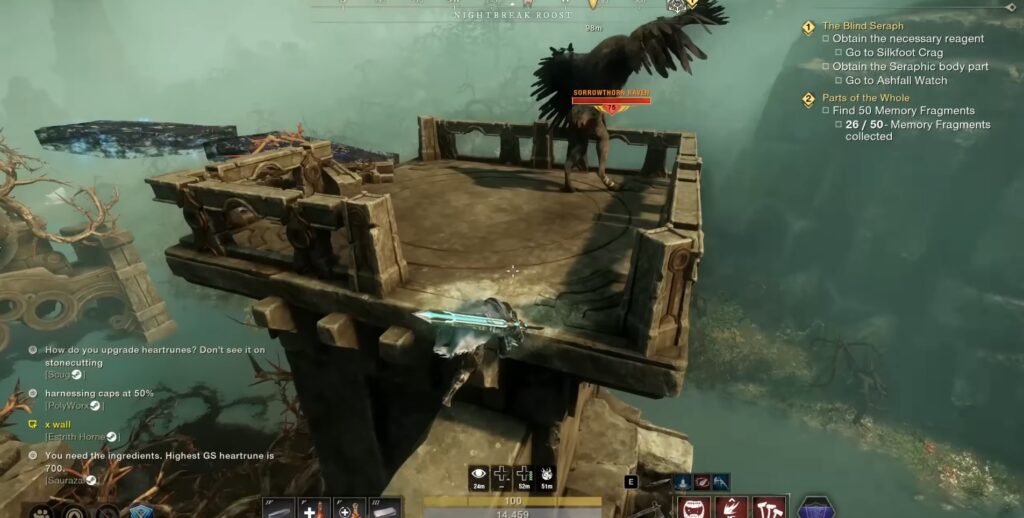
Drop off the platform and ride straight ahead until you see a crow. Other crows are surrounding the Sorrowthorn Raven, but they do not require you to fight them. However, you must fight the Sorrorthorn Raven in front of the crow’s nest, as it is necessary to move on.
You can kite this enemy by using the pillar, as he can be a little tough in 1v1 combat. A chest will now spawn on that same platform you defeated the crow on, which you can loot.
Third Area
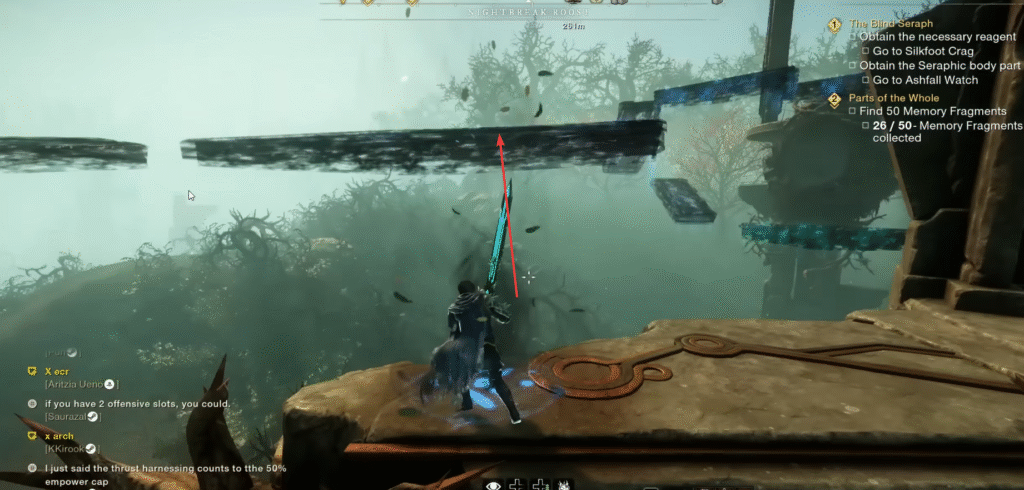
If you look up, you will see those same floating bridges; jump on the first one. Then, turn to your right and jump on the pillar with a crow beside it and a circle cut out in the middle below.
You do not need to fight the crow as it is trying to throw you off the path. The jump is tough, so it may take a couple of times to land.
There is a crow straight across, similar to the one you just fought. You should run by it as it can come close to one-shotting you. As you run by, you will notice a chest beside some more floating bridges. Don’t open this yet, just perform the jumps up to a platform with two Elite Ancient Chests.
At some point, the crow should de-agro. And when this happens, you can jump down to the chest you ran by and loot it. As well as the supply cache a couple of paces away.
Fourth Area
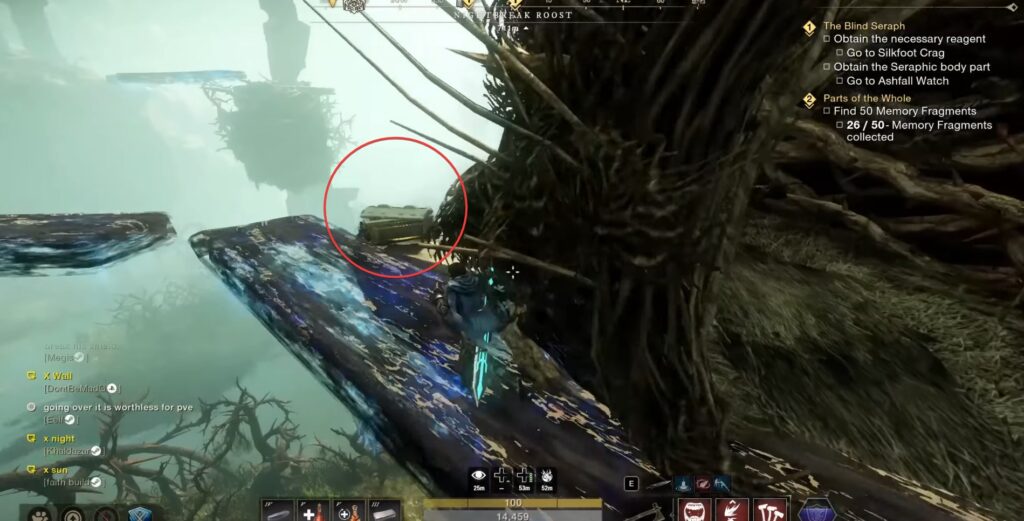
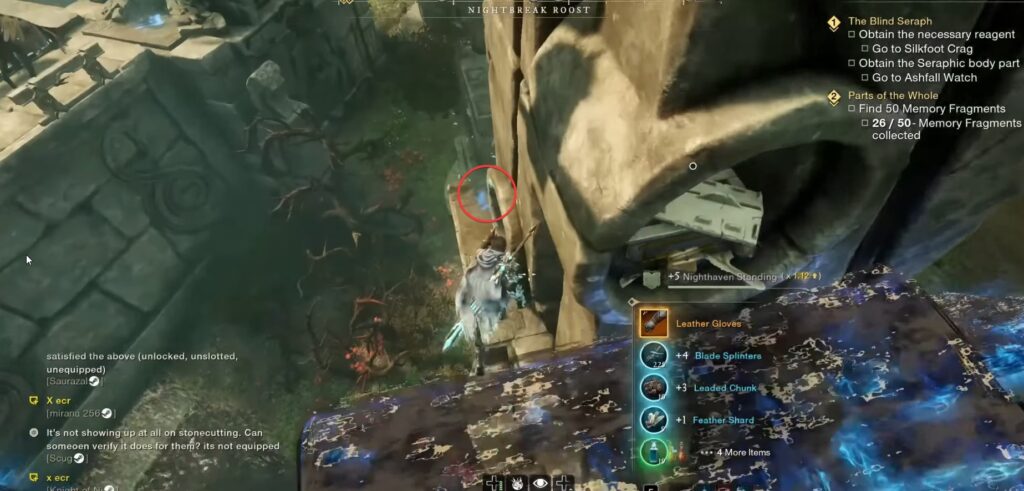
On that same platform, there is an area where you will see a cyclone of air. It tries to trick you and make you think you need to go straight, but really, you need to use the jump pad to get onto the floating bridge on your right.
You’ll continue on these bridges until you come across a crow’s nest. Next to it, almost right after you pass it, there will be another Elite Chest waiting for you.
Right after you loot this chest, you’ll come to a crossroads where you can either go left or right. Go right and loot the chest inside that crow’s nest. You should want to grab ALL of this loot as it is completely free and without a fight.
Fifth Area
There is a stone pillar if you drop down from the nest. You will see a Sorrowthorn Raven below, but you just need to jump across to the other pillar. You’re parkour skills need to be on point to make this jump. It is not necessary to fight the crow below, as long as you don’t fall or miss the jump.
You will then climb up to another platform, where you will need to wait for your stamina to regenerate. You can either fight the raven or just fight it long enough to regain your stamina and then move on to the bridges.
Follow these bridges that come next to a crow’s nest. If you look down and to the left at the end of the path, you will see another crow. Again, not necessary to fight, as you will be jumping to the right onto a stone pillar connected to that same crow’s nest.
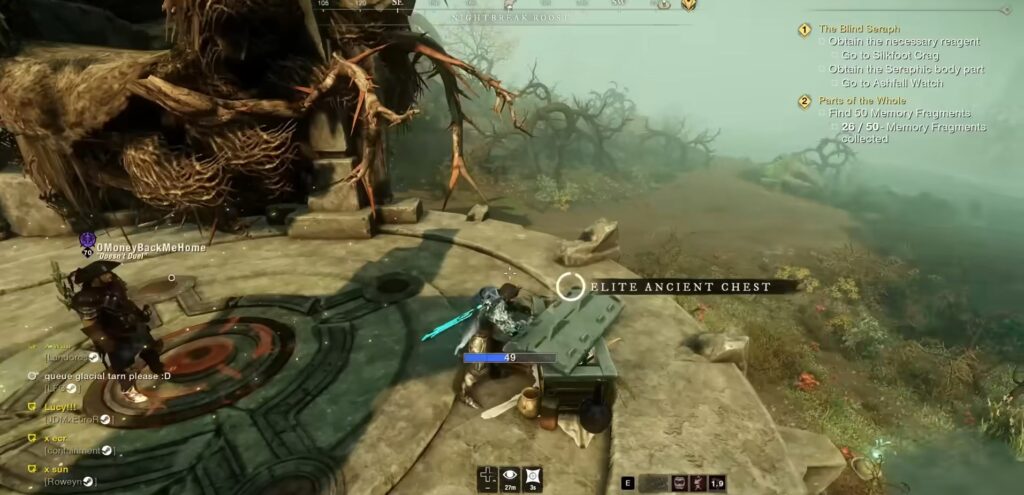
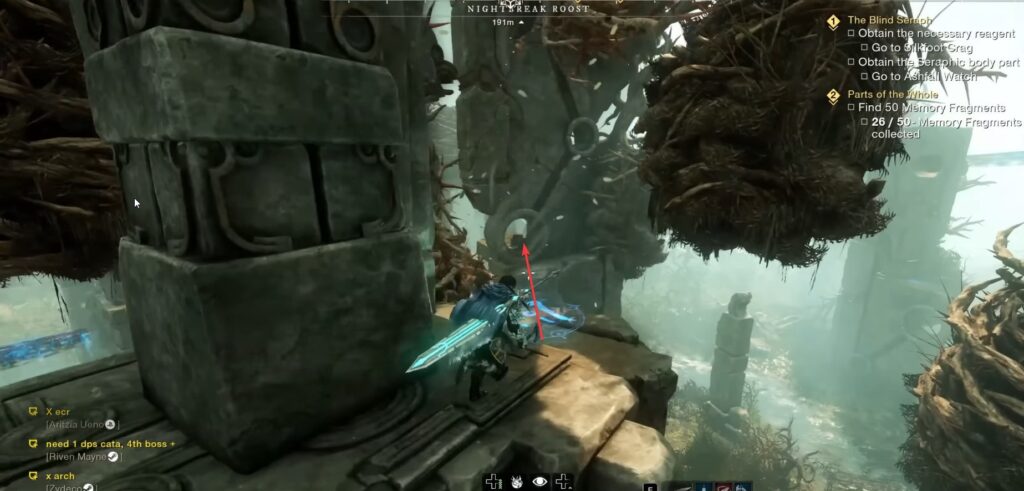
At this stone pillar, look down and you will see more bridges. You can jump/fall onto them. Now, follow the path up until you come across a big stone tower with a circle cut out of it. It is here that you will find another Elite Ancient Chest.
Sixth Area
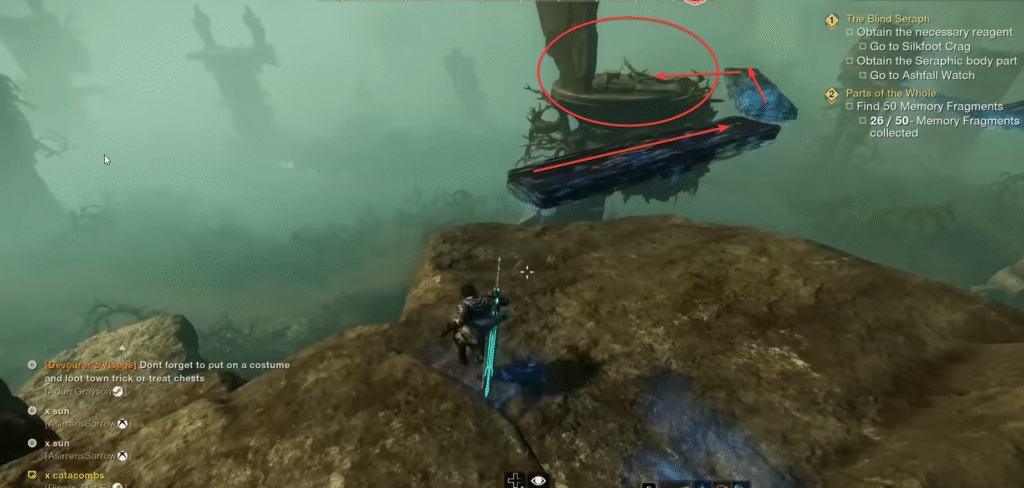
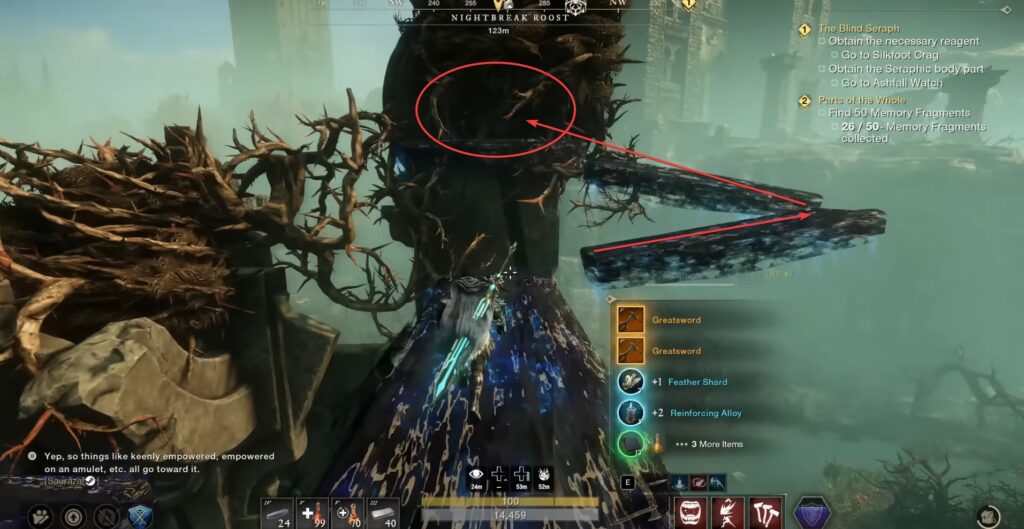
After the previous chest, walk down to the end of the floating bridge you are standing on. If you look down to the right, there is a small platform that you drop down onto with a circle cut out in the side of the stone pillar. On this pillar, you will see a blue jump pad.
This next step is a little funky. Using this blue jump spot, jump onto the stone sticking out to the right and above you. Then turn and jump back down onto the platform that is between the one you are on and the blue jump pad. This is a supply crate with free and extra loot.
You will jump back down to that same blue jump spot and back onto that same stone sticking out. Run behind this platform, and you will see a blue jump pad that has an arrow pointing across. Use this to launch yourself straight across.
With the pillar you land on, there will be the same blue jump pad with an arrow. Perform the same process as before, and jump straight across. There will be a supply crate with some loot you can open.
Seventh Area
Go through the circle that the previous supply crate was sitting in. On the other side is a blue jump pad. Face south and use it, as it will launch you up onto yet another platform. Walk to the left until you see a stone pillar with a small circle on it. You will crawl through this to the other side.
Keep crawling right until you get to an area where you can stand. You will jump on the stone platform in front of you and climb some rubble until you find a supply crate.

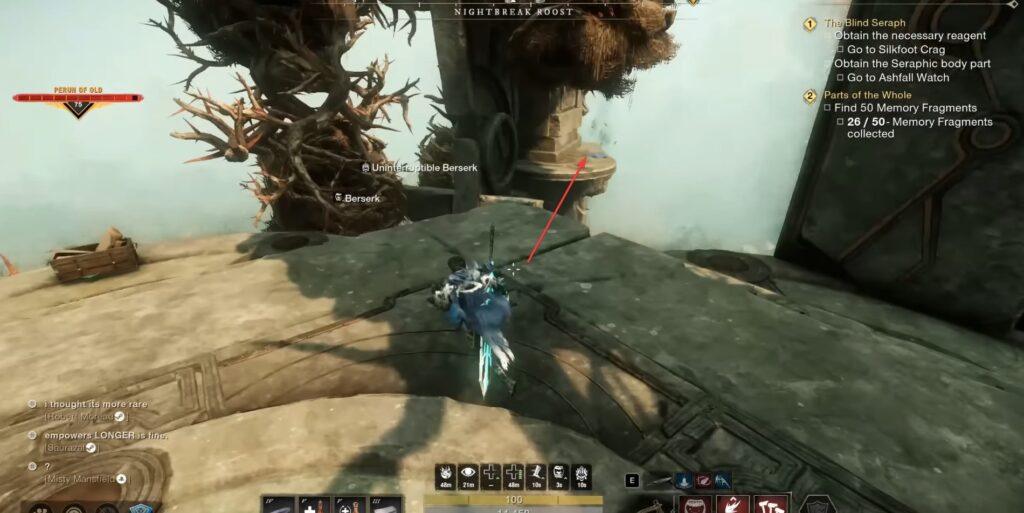
Eighth Area
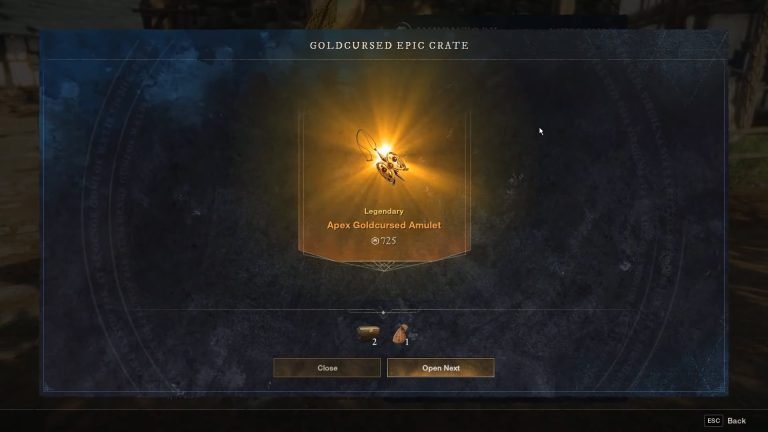
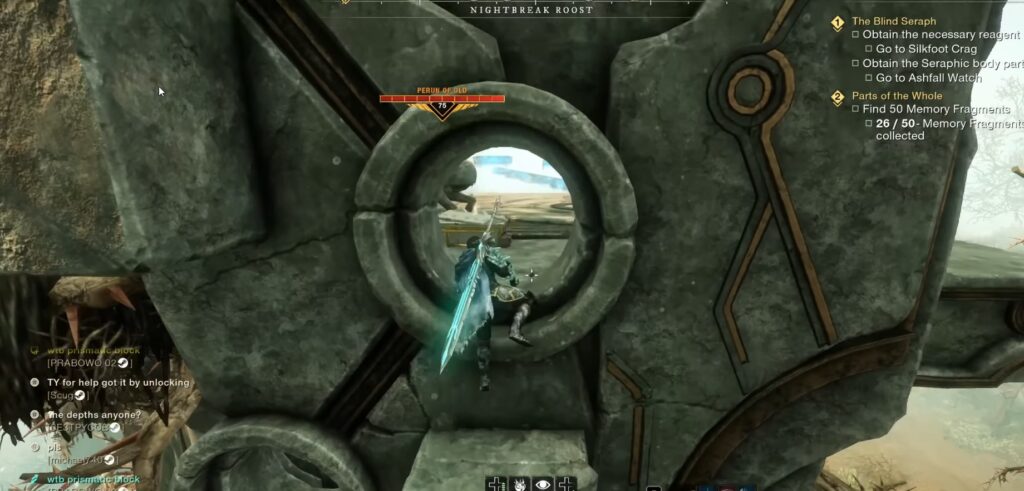
Jump up the stone steps above that supply crate. On the second step, jump through the circle adjacent. There is a boss right through here. But be aware, this boss is very hard to do solo. And if you die, you will lose your potion buff.
If you’re feeling brave, you can try to grab all three of the chests, and I suggest doing so. You can use Stone Form or another defensive move to try to loot near the boss, Perun of Old.
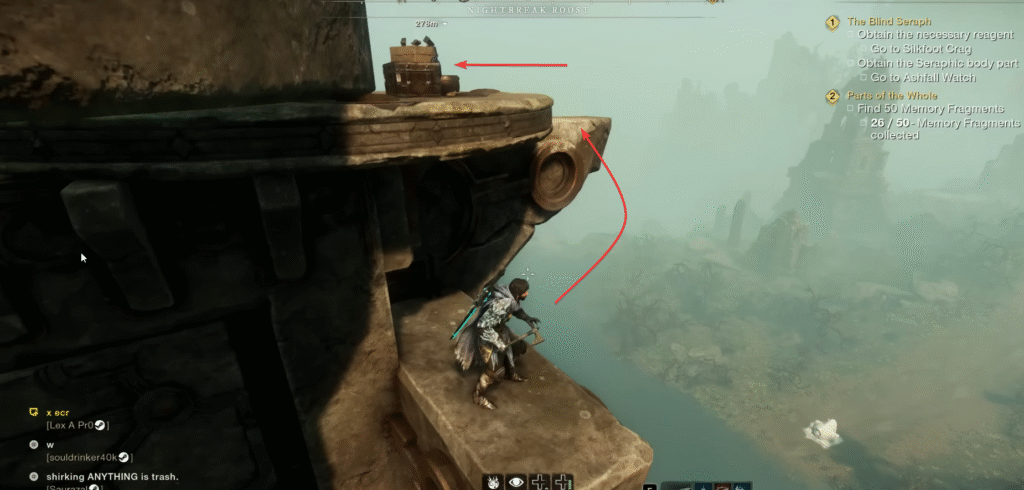
Facing where you came in, turn to your right, and you will see a big tower with vines and branches coming out. Jump on the stones connected to it and follow it up the tower. Keep climbing all the way to the top until you encounter a supply crate.
Final Area
Jump back into the boss area and pop Berserk. You will then go to the southwest corner of the arena and jump onto a platform across from your current one.
This can be a hard jump to make, so be careful, as you will have to restart the path again to get back up here.
There will be a blue jump pad that you take to a stone step. Then you will jump to your right and up to catch the side of another stone. When you lift yourself, you can loot a supply crate.
And just past it, there will be the final Elite Ancient Chest waiting for you.
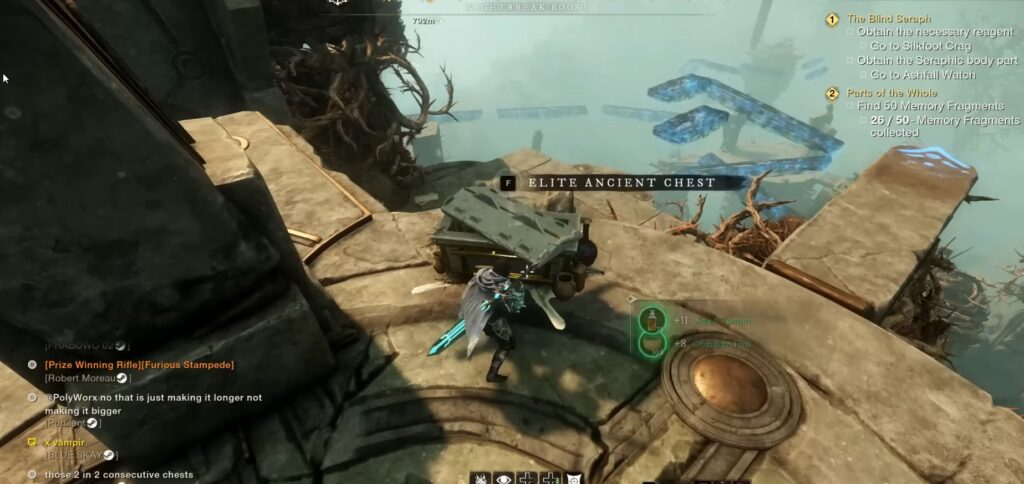
If you are really feeling ambitious, you can jump down, where the blue arrow points, and grab another chest there. But it is extremely mob-heavy. It is completely optional.
Final Tips
That is the complete Season 10 mandatory chest run. You are absolutely able to complete this solo; the only area you may run into trouble is the Boss area.
This loot is great for this season and will get you started on the right track. While you have to be good at parkour to get it, there are usually failsafes for if you fail a jump.
This season of New World looks like it’s going to be the best one yet. I hope to see you in there, looting, exploring, and fighting all the mobs you can.
[content-egg-block template=offers_grid cols_xs=2 cols_md=4 hide=description color color_mode=dark]