 31 articles
If you’re diving into New World: Aeternum Season 10 and prefer to take a lonely path, the right solo class can make all the difference. No matter what activities you’re farming, some builds simply perform better than others when it comes to survivability and damage. In this guide, we’ll break down the best solo class setup for Season 10 that will let you thrive without relying on others.
Weapon Artifacts
I recommend the weapon artifact, Serenity. You can get this from the PvP Artifact line. It can give you up to a 20% fortify stack. This is a great tanking option that will really make you bulky.
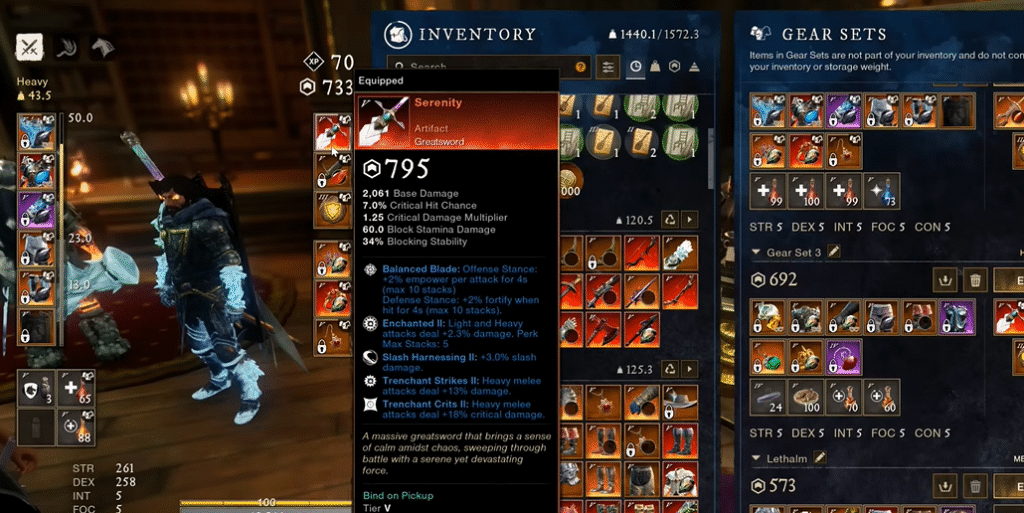
Here is what the Serenity setup should look like:
- Slash Harnessing perk: Gives more slash damage (percentages depend on your gear score).
- Enchanted perk: Light and Heavy attacks deal extra damage (percentages depend on your gear score).
The more damage you do, the more healing you will do. This is phenomenal for PvE and/or if you’re running without a healer.
 Best Season 10 Chest Run To Gear Up Fast In New World AeternumOct 22, 2025
 New World Aeternum: Seasonal World Leveling Guide for PvP ServerJan 23, 2025
 New World Aeternum: Best Iron Ore FarmsOct 23, 2024
On your sword, you should have slotted:
- A Gem slot.
- Rend: Like Sundering Stack or Trenchant Rend.
- Three offensive charm slots that will boost Serenity’s damage.
Heartrune
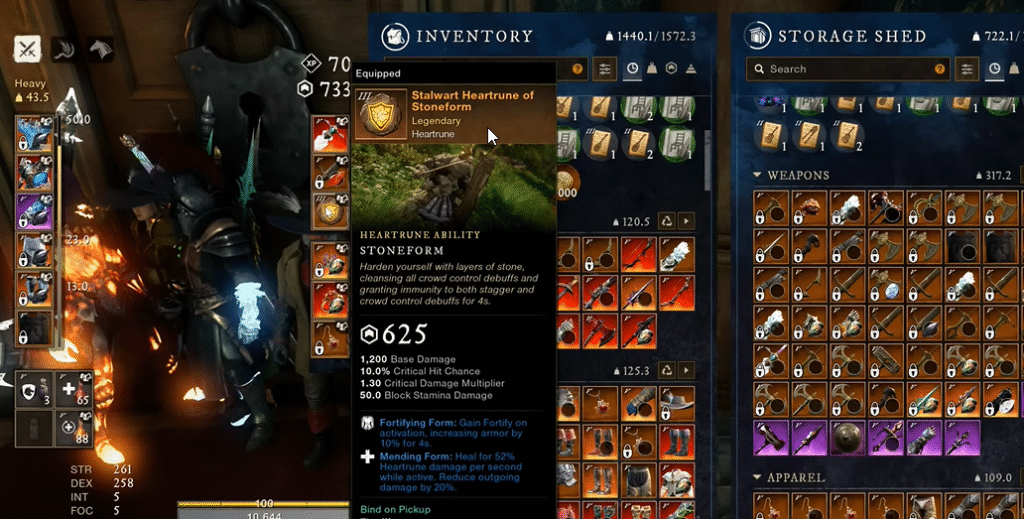
Heartrunes are charged during battle, while either dealing or taking damage. There are three legendary versions of a Heartrune: Stalwart (defense and healing), Brutal (aggressive playstyle), and Greater (extra stats).
For your Heartrune ability, Stalwart Heartrune of Stoneform is the best for this build. It gives healing and Fortify, increasing your armor and healing for about half the damage you are outputting. This will turn your character into stone and make you immune to stagger and other forms of crowd control debuffs.
This ability is a great defensive tool and a MUST for solo players. It can be used to escape battle quickly or avoid damage dumps.
Jewelry
Your jewelry should match your build. Here is a full breakdown of what to run with this build.
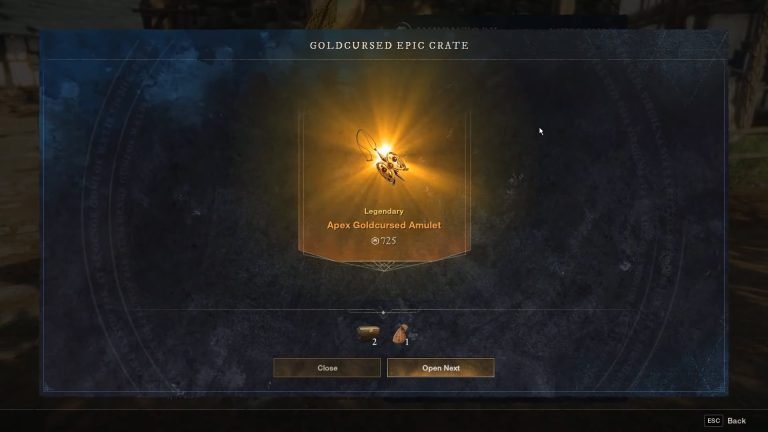
Amulet
The Lifering Amulet – a great option due to its gem slot, Health, and Divine bonus. The Divine bonus increases a percentage of the amount of healing you are doing. The Health provides a stat boost to your base health.
- I prefer this amulet over newer ones this season because it can prepare me for all damage types. The new content you’ll be experiencing features a wide range of damage types, making it extremely challenging to build around just one type. So, by just increasing my health, I can ensure I stay alive during battle, no matter the type of damage incoming.

Ring
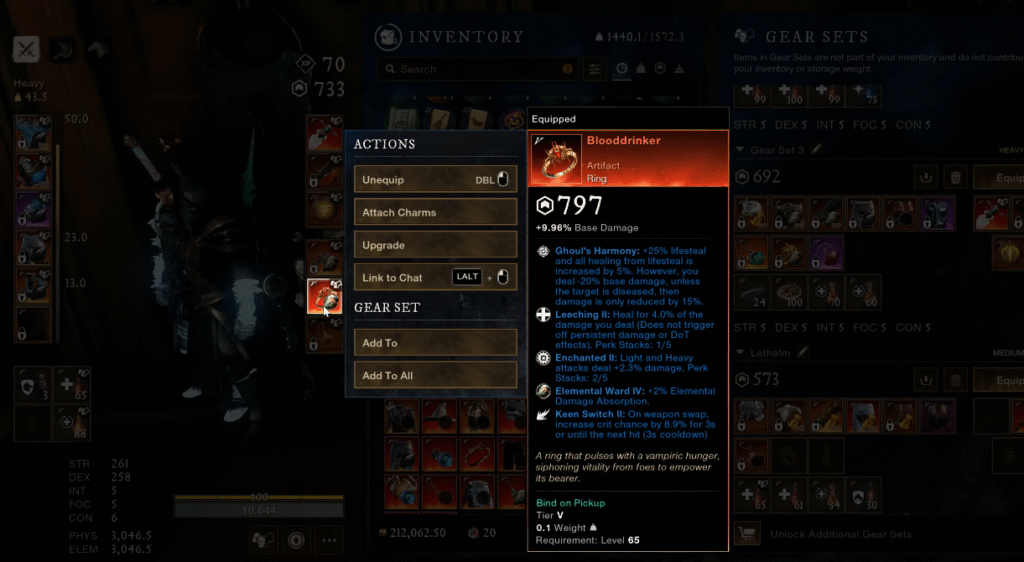
The Blooddrinker with Leeching and Enchanted. This is completely necessary. Leeching heals for a percentage of the damage you deal, stacking up to five times.
Enchanted is the same as the perk on your Artifact, letting you deal extra damage. So, the more damage you deal, the more you heal.

Earring
I use the Exemplary Earring. This is up to you, but you want four perks and one offensive charm. Ideally, it should have these:
- Healing Heart perk that links to your Heartrune. This increases your healing while you use your Heartrune form. Combining this with the Stalwart form will almost heal your whole HP in a dungeon.
- Despised for taunted enemies or Beloved if you are playing solo. Despised gives you a damage boost to taunted enemies. Beloved is great when playing solo because you generate less threat but deal more damage than Despised, to taunted enemies. Remember, each percentage of boost is based on your gear score.
- Either Fortifying Toast, Refreshing Toast, or Empowering Toast. This is essential to your gameplay, as it will reduce the amount of time between uses of consumables like potions.

Gems, Charms, & Perks on Gear
Gems
When it comes to gems, I recommend Turquoise with the effects of Hardened. I prefer this to other gems that give damage reduction, because those are only good for one damage type. The Hardened gem effect gives you increased armor.
- Add Punishing Rune Glass for 1% added melee damage to all melee weapons.

Perks
You only want one to two perks on your gear. These all really optimize your tankiness, healing, and damage. Here are the ones you should prioritize:
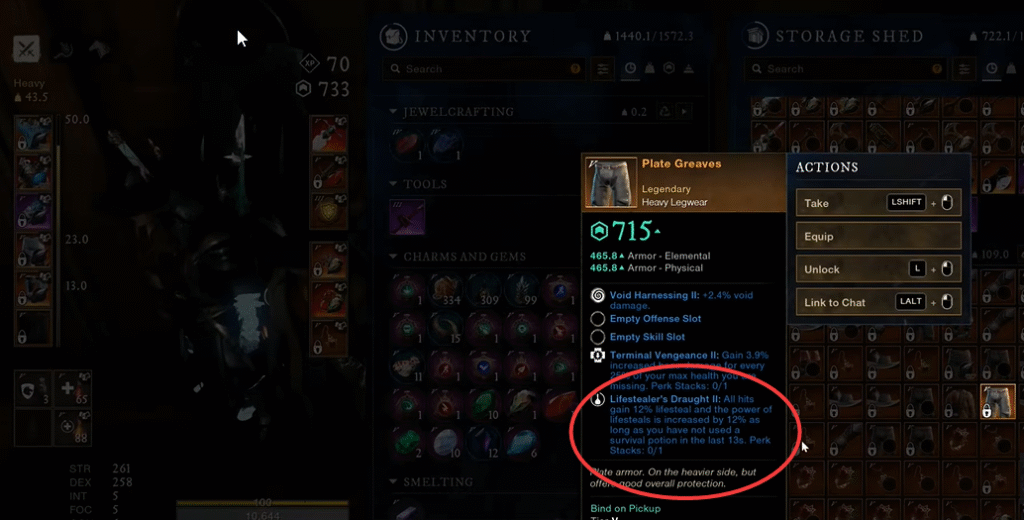
- Lifestealer’s Draught: Hits gain lifesteal. And the power of that lifesteal is also increased if you haven’t used a survival potion in the past 13 seconds.
- Vital Synergy: When your health is below 50% you will gain a 15% stamina regeneration rate. And when your stamina is below 50% your healing will be increased by 15%.
- Mortal Aggression: Your hits grant lifesteal. And on a kill, you will gain a percentage of your max health, stampina, fortify, and empower.
- Sacrificial Empowerment: This is the best perk to have on ALL of your gear. This gives more base damage but decreases your armor when below 50% HP. This shouldn’t be a worry because you won’t be below that for more than a second, as you can pop a potion or your Heartrune.


You want to ensure you have a gem slot on every single armor piece.
Charms
When it comes to charms, several good ones for this build, as they increase your survivability and tankiness:
- 5x Leeching – You want this on every gear piece, thus stacking it five times. As you do damage, this heals you.
- Enchanted Ward – This reduces light and heavy damage incoming.
- Slash Harnessing – This is if you are running solo, as it gives you an increase in slash damage.
Armor Artifact
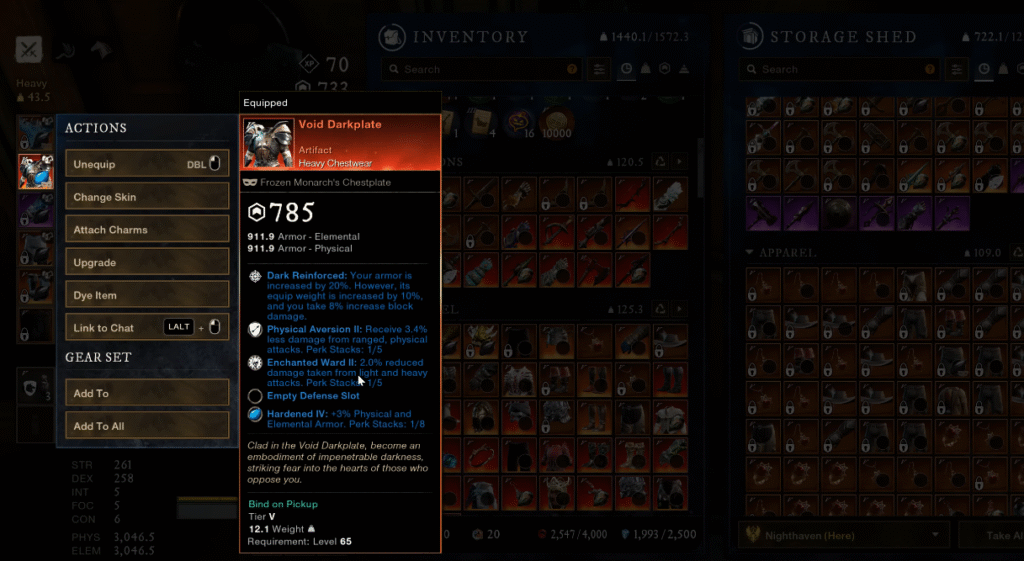
For your armor Artifact, you should want a Void Darkplate, as it increases your armor by 20%. This will stack GREATLY with Serenity’s fortify and Fortifying Toast on your earring. This will give you an additional 20%. Here are the two non-negotiable charms you need to take this even higher:

- Keenly Fortified: Fits in a defense slot on your gear and gives bonus Fortify on critical hits.

- Keenly Empowered: Fits in an offensive slot on your gear and gains extra Empower on critical hits.
Consumable
Consumables only strengthen you and allow you to be at max power during battle. Here is what you should be running:

- Honing Stone: Provides 5% increase in weapon damage for 30 minutes.

- Coating: Gives a flat increase in damage.

- Ward Potion: Gives a flat decrease in damage.

- Health Potion: Restores a flat rate of health.

- Regeneration Potion: Restores health over a fixed period.
For food, I would bring in the +48 versions and an Energizing Hearty Meal. This gives you mana regeneration for 40 minutes. Also, Desert Sunrise is critical as it reduces the duration of damage-over-time attacks.


Attributes
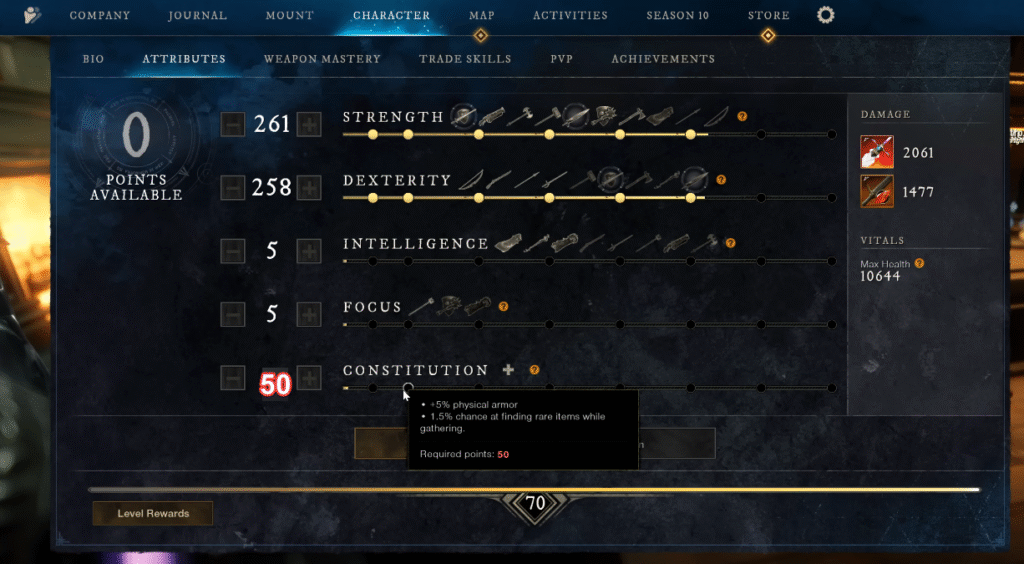
If you run this build, you need to adjust your attributes as some things are more important than others. You want:
- Nothing below 250 for strength. But you want to evenly split your points between strength and dexterity.
- 50 Constitution
- Harder Content:
- 100 Constitution
- 200 Constitution MAX for the hardest content.
Weapon Tree
This season has brought changes to your weapon trees, specifically the Greatsword. What you used to run isn’t the meta anymore… especially with this build.
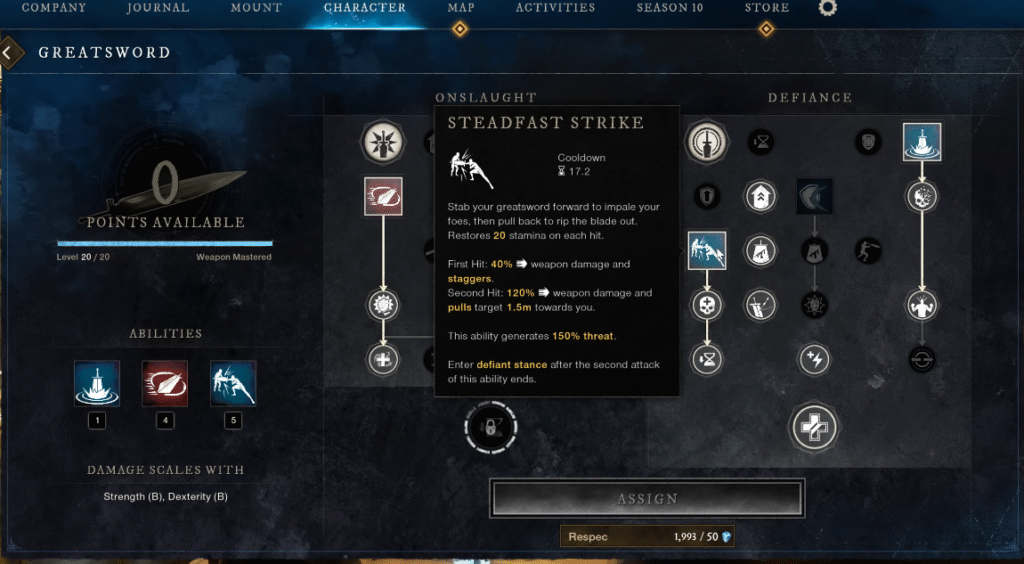
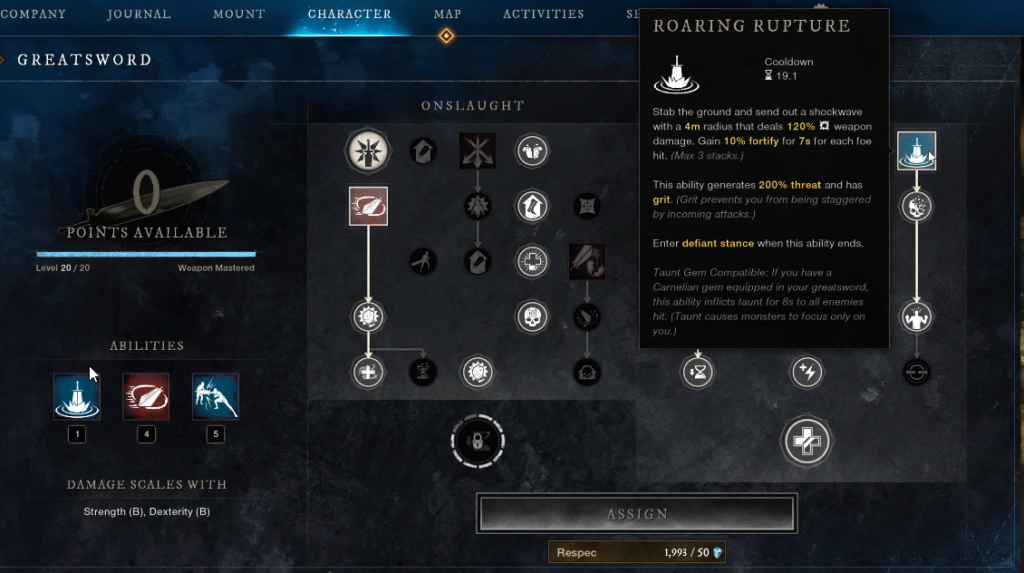
For the Greatsword, you need to run:
- Roaring Rupture: Generates threat without a taunt gem.
- Steadfast Strike: Also generates threat without a taunt gem.
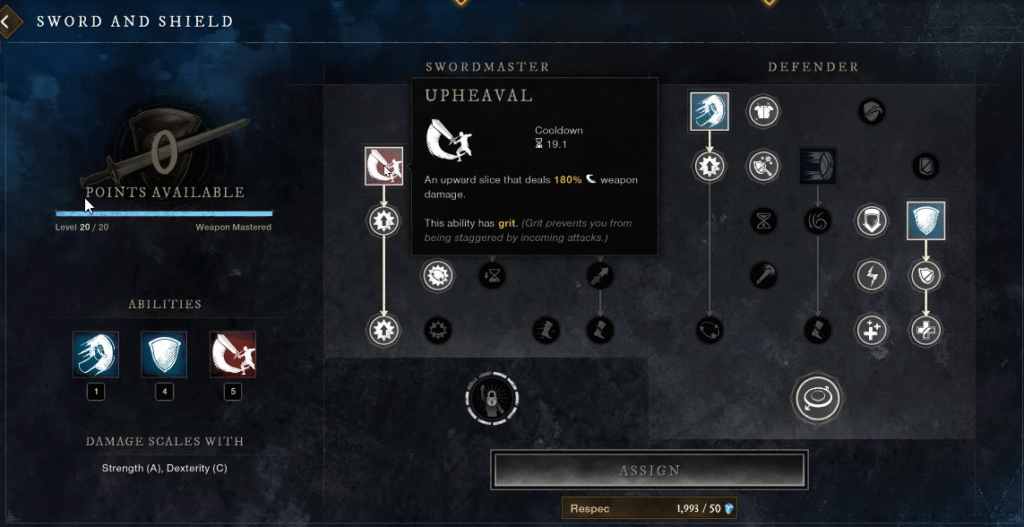
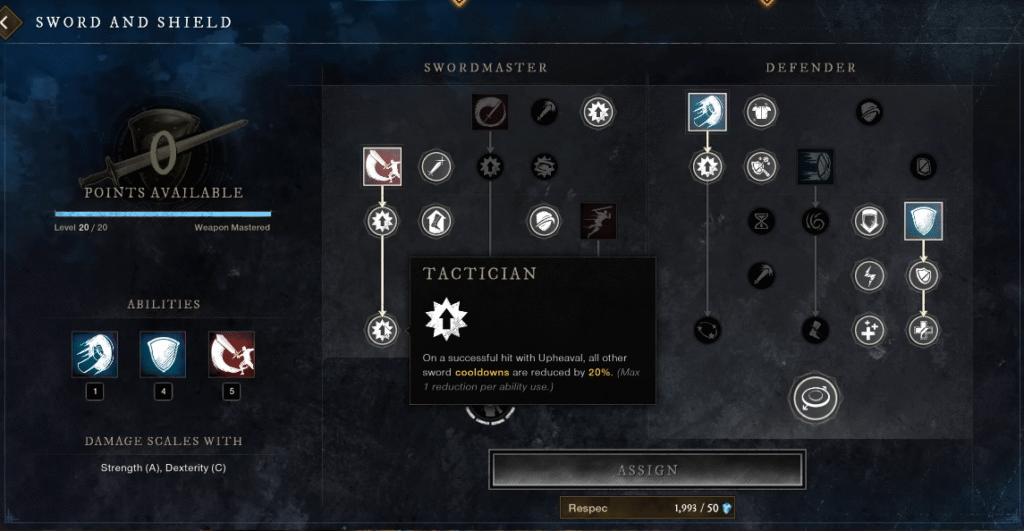
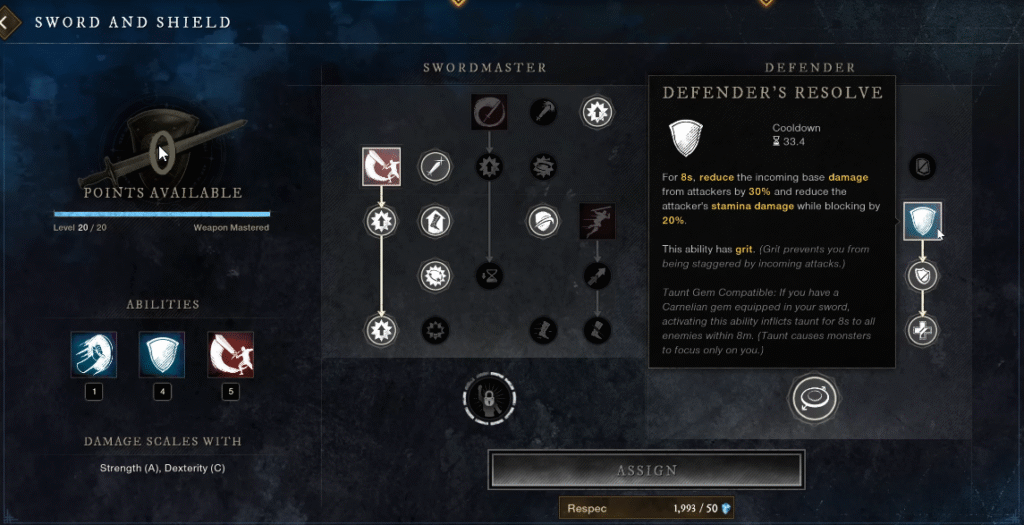
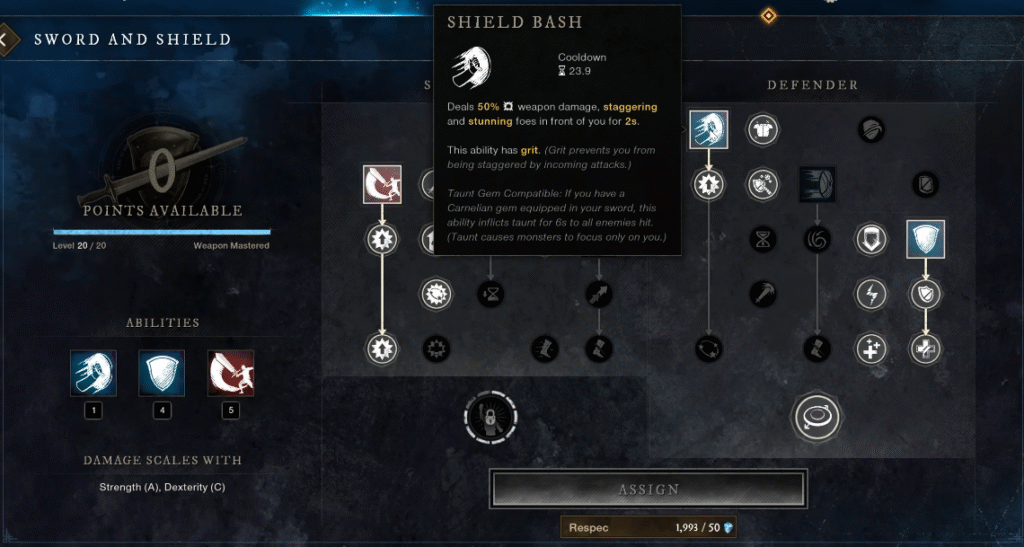
For your Sword and Shield, you should run:
- Upheaval: Unlocks a path to Upheaval, which gives us a major cooldown reduction on other sword abilities.
- Shield Bash: Deals damage while stunning and staggering enemies.
- Defender’s Resolve: Reduces incoming damage and the attacker’s stamina.
And that is the full guide for the Season 10 solo build that will absolutely have you running through dungeons like it’s nothing. With this setup, you’ll be able to fight bosses and heavy mob areas with no problem, all while staying healthy and tanky. This build gives you the perfect balance of power and survivability to conquer Aeternum.