

Guides
Honkai Star Rail: All 3.1 Golden Scapegoat Puzzle Solutions
How do you solve all of the Golden Scapegoat puzzles? Here is how!
Honkai Star Rail just released its 3.1 update, which includes a bit of new content and some banners to pull if you have the means to do so. As always, there are new collectibles and extra challenges to discover and complete, and in this guide, we will try to very quickly go through the solution for each of the Golden Scapegoat puzzles of the update.
All 3.1 Golden Scapegoat Puzzle Solutions
In the latest update, there are now six additional Golden Scapegoat puzzles to solve. There are three for each of the locations that will be covered in this guide, so we will go through it by zone.
All you need to do is follow the exact directions stated in each section. No need to overcomplicate anything, just follow along and the puzzles will be done in no time. With all of that said, we will be starting off with ones at the Murmuring Woods Grove of Epiphany.
“Murmuring Woods” Grove of Epiphany Puzzle #1
In F1 of this zone, you will find the puzzle in the highlighted part of the map image below. It is hard to miss, as it is literally out in the open for you to interact with. Once you begin the puzzle follow these steps first:
- Step #1 – Right
- Step #2 – Down
- Step #3 – Up
- Step #4 – Right
This will then spawn your past self. To complete the rest of it, just do these following steps in the exact order specified:
- Step #1 – Right
- Step #2 – Up
- Step #3 – Down
- Step #4 – Up again
Your past self should be on top of the button by now, and you will be free to touch the finish line and end this first puzzle. You can now proceed to the next one.

“Murmuring Woods” Grove of Epiphany Puzzle #2
Next, this puzzle can be found at B1 of the zone, and it might require a bit of platforming and other relatively simple puzzles to make your way there. Refer to the map image below to see where it is. Once you start the puzzle, you have to do these steps in order:
- Step #1 – Right
- Step #2 – Left
- Step #3 – Left again
- Step #4 – Left again
- Step #5 – Right
- Step #6 – Left
This will then spawn your past self. Once it is out, you must follow the next set of steps to get it to the button and free up the path to the altar:
- Step #1 – Right
- Step #2 – Down
- Step #3 – Right
- Step #4 – Down
- Step #5 – Right
- Step #6 – Left
- Step #7 – Right
Your past self should now be dropped onto the yellow button below, allowing you to head straight for the altar and end this puzzle. Claim your rewards and proceed to the 3rd and last for this region!

“Murmuring Woods” Grove of Epiphany Puzzle #3
This last one can be found at F3 of the zone, and it can be found right beside a flower. Once you make it to the highlighted part of the map below, you can start the puzzle and follow these steps:
- Step #1 – Right
- Step #2 – Right again
- Step #3 – Left
- Step #4 – Right
- Step #5 – Right again
- Step #6 – Right again
This will then spawn your past self, and to get them to the button, you must follow these exact steps:
- Step #1 – Left
- Step #2 – Right
- Step #3 – Left
- Step #4 – Left again
- Step #5 – Left again
- Step #6 – Left one last time
As you take your last step, the dark version of yourself will touch the button at the same time. This will drop you right on top of the altar at the end, essentially completing the puzzle without further input at this point.
This is the last puzzle of this zone. The next set of three will be taking place at an entirely different region, which is…

“Sanctum of Prophecy” Janusopolis Puzzle #1
The first puzzle at the “Sanctum of Prophecy” Janusopolis location is at the B2 floor of this zone, and it can be found just past a door that you can unlock with a prophecy tablet outside. Once the door has been unlocked, go ahead and start the puzzle and follow these steps:
- Step #1 – Left
- Step #2 – Left again
- Step #3 – Left again
- Step #4 – Right
- Step #5 – Right again
- Step #6 – Right again
- Step #7 – Right again
- Step #8 – Right one last time
- Step #9 – Left
- Step #10 – Left again
After the last step to the left, the dark version of your past self will spawn. You should now follow these steps to get this puzzle done:
- Step #1 – Right
- Step #2 – Up
- Step #3 – Down
- Step #4 – Up
- Step #5 – Down
- Step #6 – Up
- Step #7 – Right
- Step #8 – Right again
- Step #9 – Left
- Step #10 – Left one last time
After the final step, your past self will now be on the blue button, which opens up the path to the altar. You can now continue moving left to touch it and finish the puzzle. Move on to the next puzzle!

“Sanctum of Prophecy” Janusopolis Puzzle #2
This next one is also at the B2 part of this zone, and the exact location is highlighted in the map image below. Upon reaching ti and starting the puzzle, you should now follow the steps as shown here:
- Step #1 – Right
- Step #2 – Right again
- Step #3 – Down
- Step #4 – Left
- Step #5 – Left again
- Step #6 – Left again
- Step #7 – Left one last time
This will then spawn the dark version of your past self. To get them to where they need to be and unlock the altar at the end, follow these steps exactly:
- Step #1 – Right
- Step #2 – Right again
- Step #3 – Down
- Step #4 – Right
- Step #5 – Right again
- Step #6 – Up
- Step #7 – Left (Your clone will stop moving)
- Step #8 – Up
- Step #9 – Right
- Step #10 – Right
Once your clone stops moving, they should be on top of theyellow bridge. By following the steps above, you will end up on the yellow button, which will drop the clone on top of the blue one. This will open up the path to the altar, letting you finish this puzzle. Now you can go to the last one!

“Sanctum of Prophecy” Janusopolis Puzzle #3
Finally, this last one can be found at the F1 part of the zone, so just refer to the map image below to see where it is. This is incredibly quick and small, so just follow these steps and you will be done in no time:
- Step #1 – Right
- Step #2 – Right again
- Step #3 – Up
- Step #4 – Left
This will spawn the past version of yourself, and with how small the puzzle it, you just need to do the following:
- Step #1 – Right
- Step #2 – Up
- Step #3 – Right
- Step #4 – Left
- Step #5 – Up
- Step #6 – Right until the end
Basically, once your dark clone stops moving, you just go up and all the way to the right to touch the altar. Congratulations, you should now be done with the puzzle, and that also wraps up all the Golden Scapegoat puzzles added with this update!

Once you are done with these puzzles, there are a few more to discover and complete in this 3.1 version of the game. While you are here, consider checking out our guide on all of the Sage’s Statue locations in the Murmuring Woods Grove of Epiphany zone to find some more new rewards to sink your teeth into!


Tips & Tricks to Get Rich in Schedule 1
Rapid fire tips and tricks to help you boost your profits!

How To Get Rid Of Items In Schedule 1
Vanish unwanted items straight into the void with one simple trick!
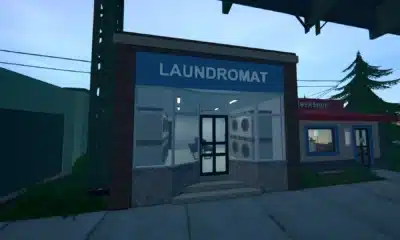

Should You Buy The Laundromat In Schedule 1
Laundering money at a laundromat is a straight-up genius, nobody will ever know!
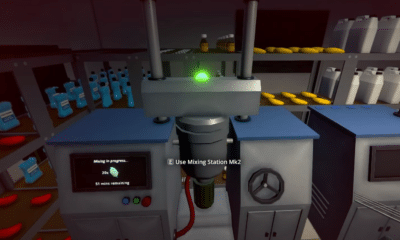

Should You Buy The Mixing Station Mk2 In Schedule 1?
The upgrade sounds quite appealing, but is it worth shelling out the big bucks for?