 27 articles
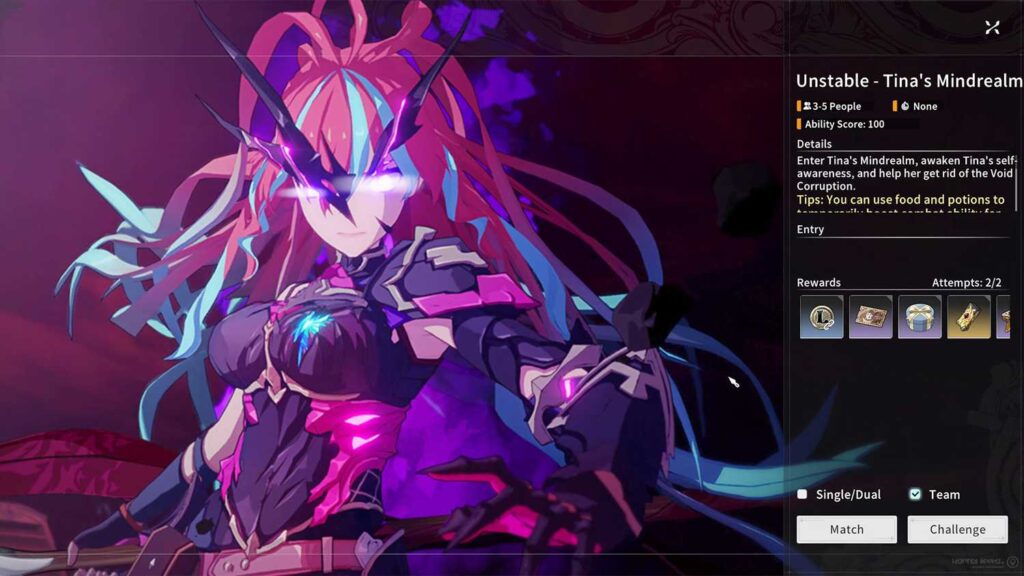
Tina’s Mindrealm can be a pretty tough dungeon to complete in Blue Protocol: Star Resonance, especially once you try it on the Hard difficulty.
While the dungeon itself is extremely simple, the final boss within is definitely not a joke. She has many tricky mechanics that can easily wipe out an unprepared party! Do not underestimate Tina if you wish to emerge victorious.
In this guide, we’ll tell you what you need to know to beat Tina and her mindrealm on the Hard difficulty.
Tina’s Mindrealm Complete Hard Dungeon Guide | Blue Protocol: Star Resonance
When it comes to the dungeon itself, Tina’s Mindrealm is extremely straightforward on Hard difficulty.
 Blue Protocol Star Resonance: Luno Farming GuideOct 17, 2025
 Kanamia Trial (Hard) Guide in Blue Protocol: Star ResonanceOct 17, 2025
 Treasure Map Blind Box Quest in Blue Protocol: Star ResonanceOct 16, 2025
For this one, you just need to follow the blue arrows while killing all the enemies along the way. It really is just that simple! There are no gimmicks on Hard difficulty here. It’s unlike the Goblin Lair, which did have some tricks.
Really, there are only two things to keep in mind here: make sure you have your Phantom Dash ability already, and make sure not to pull more enemies than your party can take.
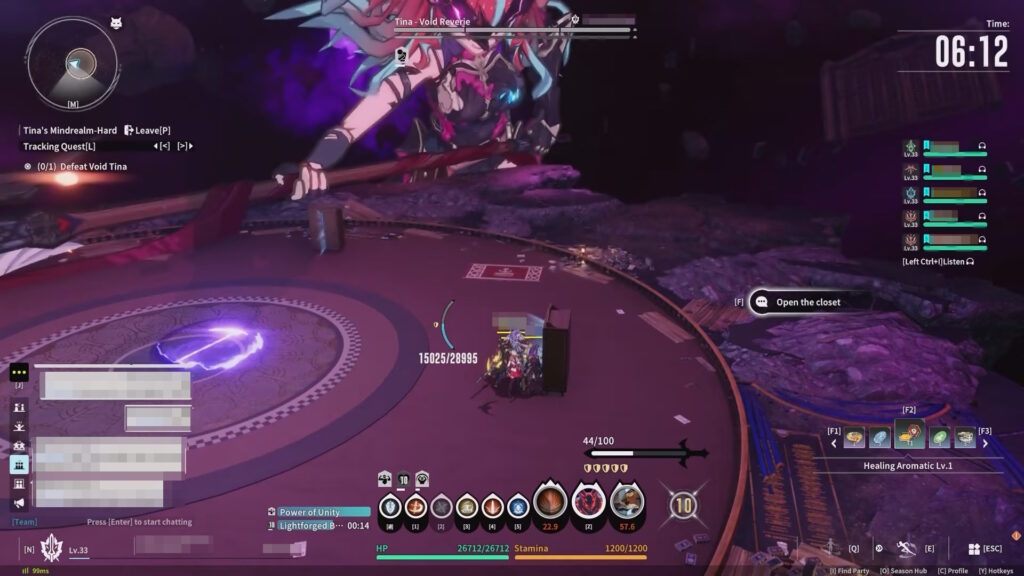
Besides that, you just need to go through the linear dungeon, killing all mobs until you reach the dungeon’s boss: Tina – Void Reverie!
Now, Tina is definitely no joke, and she has some tough mechanics to keep track of. So, let’s talk about those next.
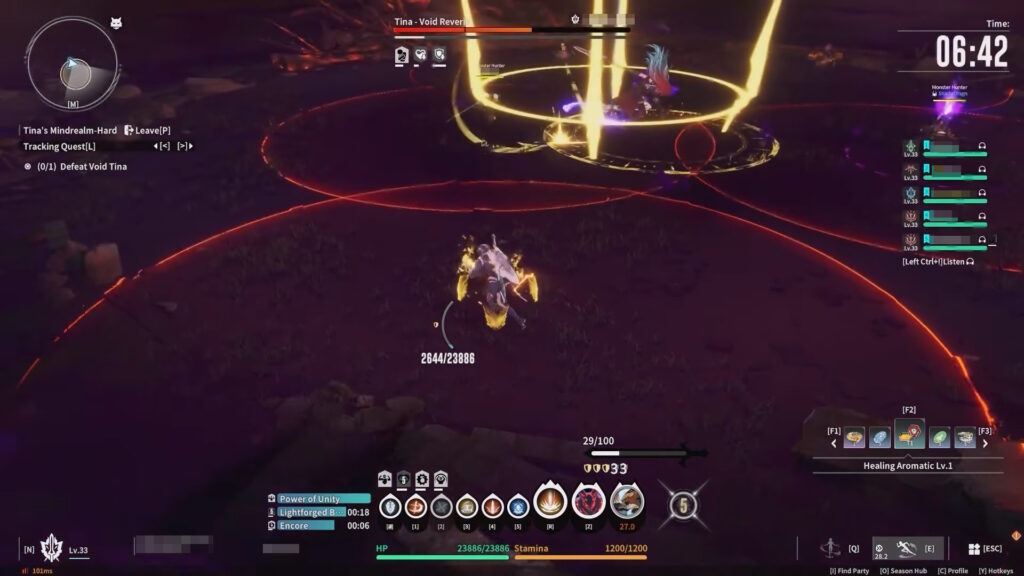
Tina – Void Reverie | Main Boss Mechanics
Void Sigil and Void Purify
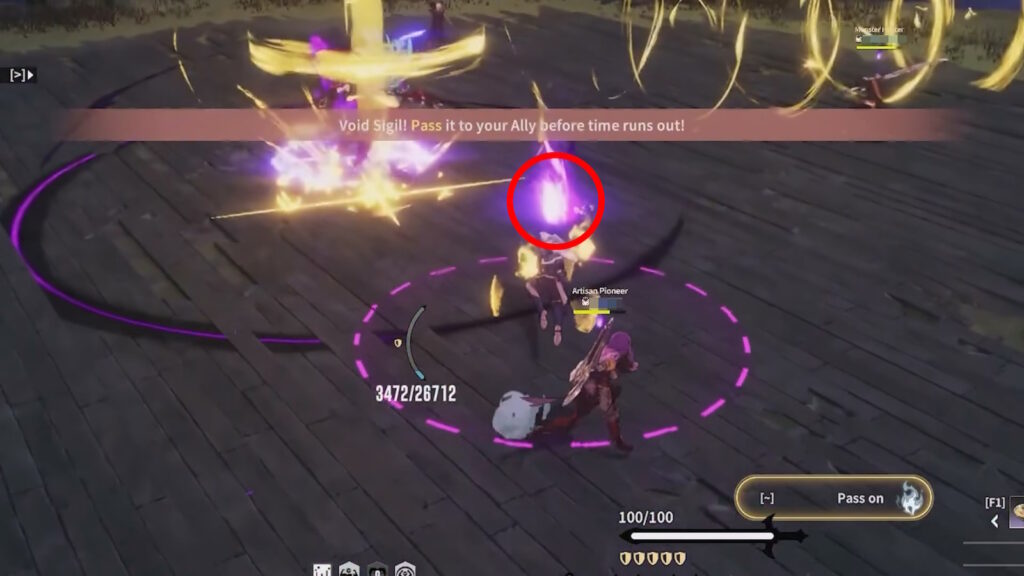
The first and most dangerous mechanic is the Void Sigil. Tina will do this often during the fight, marking one player in the party with a purple flame. You can see an example above.
When this happens, there will also be a 30-second timer for the Void Sigil. Once the timer finishes, the flame will detonate and instantly kill the player who was marked.
To avoid this, the player with the purple flame needs to interact with another player. Doing so will pass the Void Sigil to the other player, while also resetting the denotation timer. Everyone in the party has to be conscious of passing it around before the 30 seconds pass to prevent it from going off!
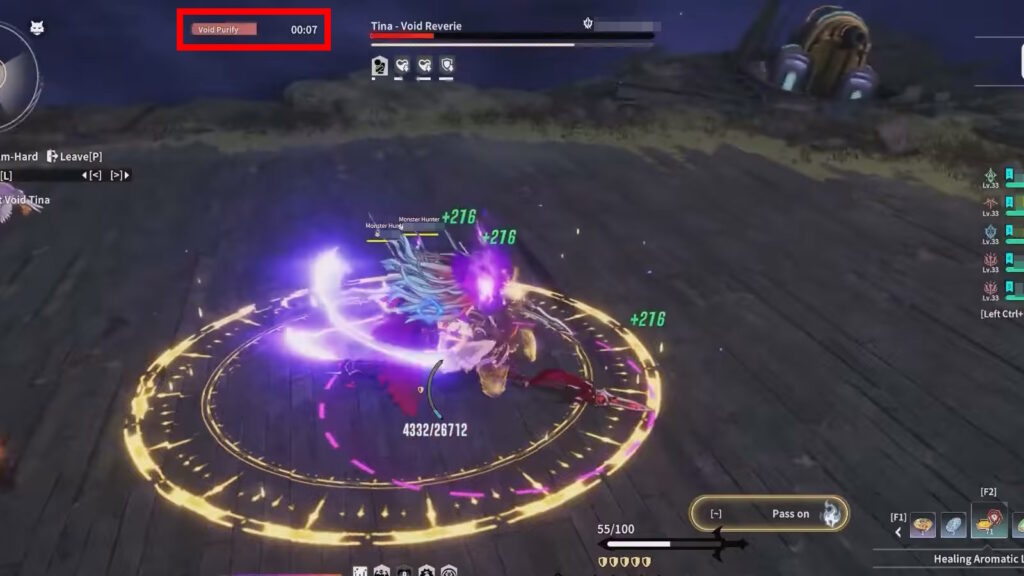
Tied to the Void Sigil, Tina will also prepare the Void Purify attack. This is notably shown to the left of her health bar with a 15-second timer.
Once that timer is up, Tina will instantly start doing the Void Purify attack. This can, however, be delayed if she’s prevented from doing so. For example, staggering her or triggering the next phase. However, she’ll instantly go back to doing Void Purify as soon as she’s able to.
Void Purify itself is an extremely strong attack targeted at whichever player has the Void Sigil. Only Tank classes can really survive it, as the rest do not have enough damage mitigation.
So, the idea with Void Purify is to pass the Void Sigil to a tank in the party right before the Void Purify timer ends. The Tank should then prepare to mitigate the damage to survive, such as by using Aegis Ward as a Shield Knight.
If the Tank manages to successfully survive Void Purify, the Void Sigil will also be canceled out for the time being!
Note: It is also possible to survive Void Purify by using an Ultimate. However, doing so will not remove the Void Sigil mechanic. Keep that in mind.
Lance Slash

This mechanic usually happens right after Tina uses Void Purify. She’ll jump to the center of the arena, summoning 8 arena-wide pizza-slice-shaped cuts.
However, 2 of the 8 cuts will disappear after a very brief moment. To avoid the mechanic, you just need to move into one of the cuts that disappear!
This one can be tricky, as it can be hard to spot which slice disappeared on time. However, they seem to always be on opposite ends, and they rotate. So, if you’re in a safe one, the next safe spot will be to your left or right.
Tina will repeat these slices 4 times before returning to her normal attacks.
Reverie Megamorph
This mechanic can happen right after the Lance Slash mechanic. The screen will go dark for a second. Once vision returns, it will reveal a gigantic Tina and 4 closets.
At this point, Tina will start to slowly swipe her lance on the arena from her right to her left. Being hit by the lance at all during this swipe will instantly kill you, making this mechanic a potential wipe.
To avoid the attack, you’ll want to face toward Tina. Then, run to the closet directly to your right. Use it to teleport to the opposite closet, avoiding Tina’s sweeping attack.
Now, do keep in mind that Tina’s attack is very slow here! Don’t use the closet too early. If you do, you’ll teleport into the attack. Instead, stand in front of the closet and wait until Tina is about halfway across the arena.
After the first sweep, Tina will reposition herself and do a second sweep. To avoid it, you just need to repeat the same steps you did for the first one!
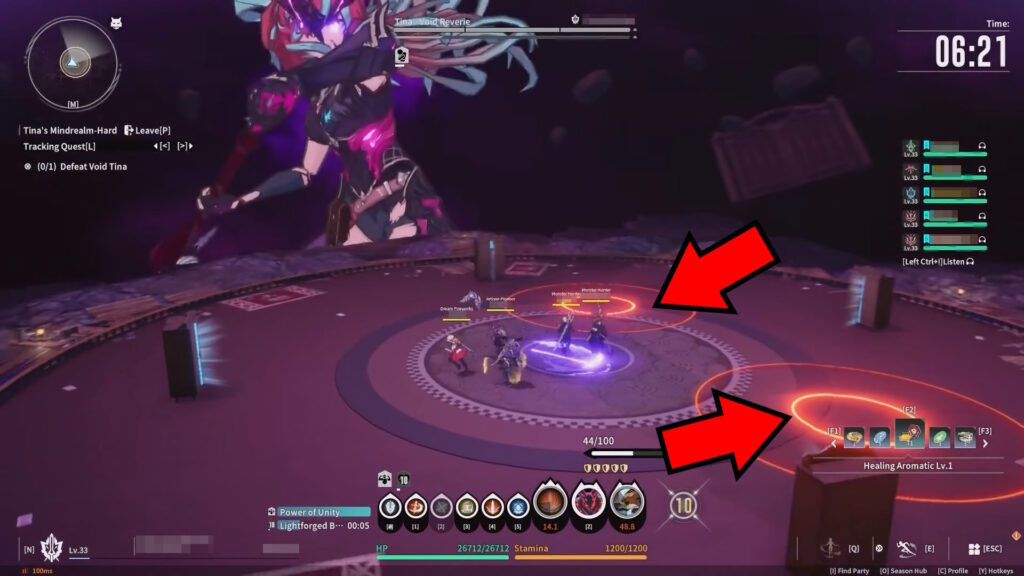
Aside from that, look out for the orange circles that spawn in this phase. These detonate, stunning any player inside. The stun is very long, so it nearly guarantees that Tina will be able to hit you with her lance.
Also, as a note, don’t bother trying to attack Tina at all during this phase. Just focus on surviving, as you’ll deal little to no damage to her.
Void Phantoms
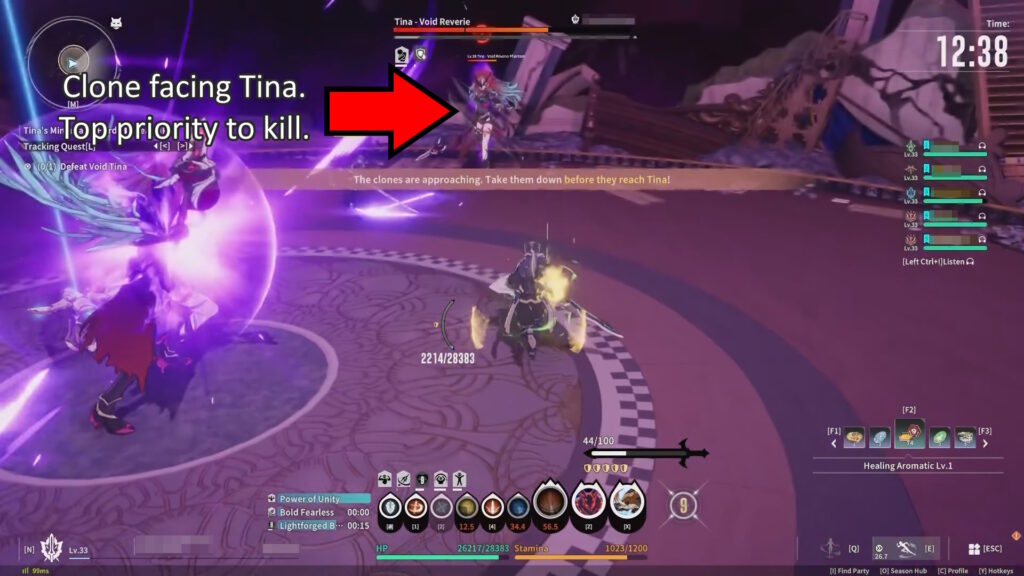
The next important mechanic happens when Tina reaches around 66% and 33% HP. At that point, she’ll use a portal to summon 3 phantoms that look like her.
As soon as she does this, look around and find the phantom that’s facing her. This one will start walking towards Tina first, so make it your priority target!
Your goal here is to defeat all 3 of the Void Phantoms before they reach Tina. If they reach Tina, they’ll give her a substantial attack buff on her next attack.
Do note that Tina herself will also be attacking in the meantime. Watch out for the pizza-slice-shaped orange bars on the ground to avoid her attacks.
Also note that the Void Phantoms will explode shortly after they’re defeated. Move away from them to avoid taking damage from the explosion!
A good way to deal with this mechanic is for your party to split up if everyone has good DPS. Focus on the front-facing Void Phantom first, of course, but it’s definitely easier if the party can rush down all 3 phantoms at once instead of doing it one by one.
If at least one Void Phantom reached Tina, the Tank and Support players should go on the defensive. Buff the party for the upcoming attack.
After all the Void Phantoms disappear (either because you defeated them or because Tina absorbed them), Tina will do a follow-up attack. She’ll jump and slam the arena, doing an unavoidable arena-wide attack. No, you can’t Phantom Dash through it, sadly.
The strength of this attack depends on how many Void Phantoms Tina absorbed. It can very easily wipe the party if you didn’t defeat all 3 phantoms. So, make sure to rush them down.
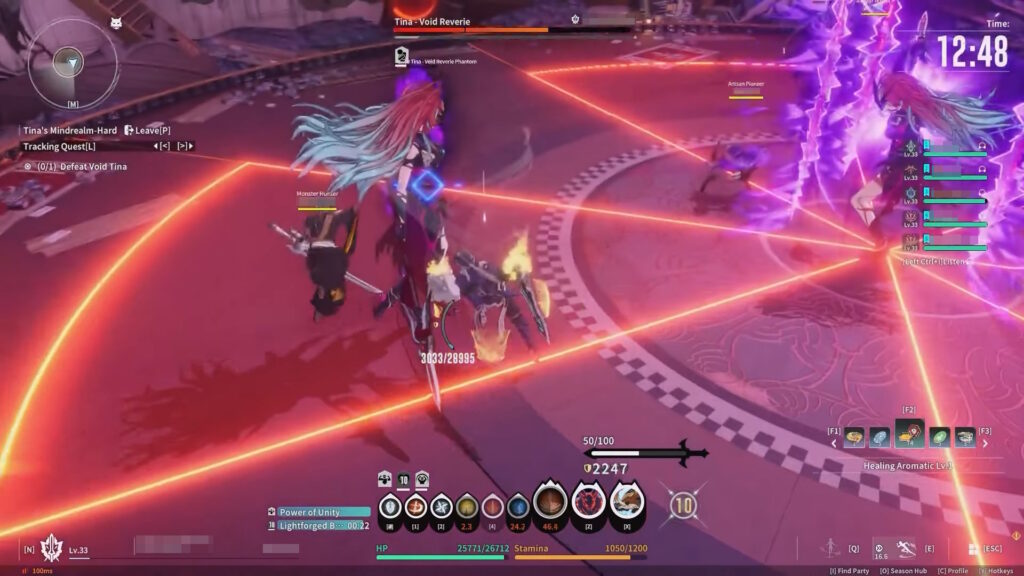
Targeted Slash
The last main mechanic to keep in mind for dealing with Tina! For this one, Tina will briefly cover the arena in darkness and orange targeting circles will appear below every player.
After a short period, Tina will attack every player one by one. Her attack will have a sizeable area of effect, matching the targeting circles.
Now, the most dangerous part of this attack is the fact that it’s an AoE. Players that are grouped together will take damage from Tina’s multiple attacks!
To avoid this one, all players should spread out and avoid each other. This nearly guarantees that they only take one hit from Tina’s attack, which is survivable even for squishier classes.
That said, we do also recommend Healers to quickly replenish everyone’s HP as soon as this mechanic starts. Surviving Tina’s individual attacks becomes trivial for every class at full HP.
So, there you have it. That’s all you need to know to complete the Tina’s Mindrealm Chaotic Realm on Hard difficulty in Blue Protocol: Star Resonance. Now, go give Tina a piece of your mind!