 27 articles
The Goblin Lair is the first Chaotic Realm dungeon you can go through in Blue Protocol: Star Resonance.
Fitting of being the first dungeon, it’s also a fairly straightforward one. Nonetheless, this is also one of the best sources of rarer Gauntlets and Earrings in the game! It’s a great place to farm gear, if you need those.
In this guide, we’ll tell you every notable mechanic you need to know about for this dungeon and its boss.
Goblin Lair Dungeon Guide | Blue Protocol: Star Resonance
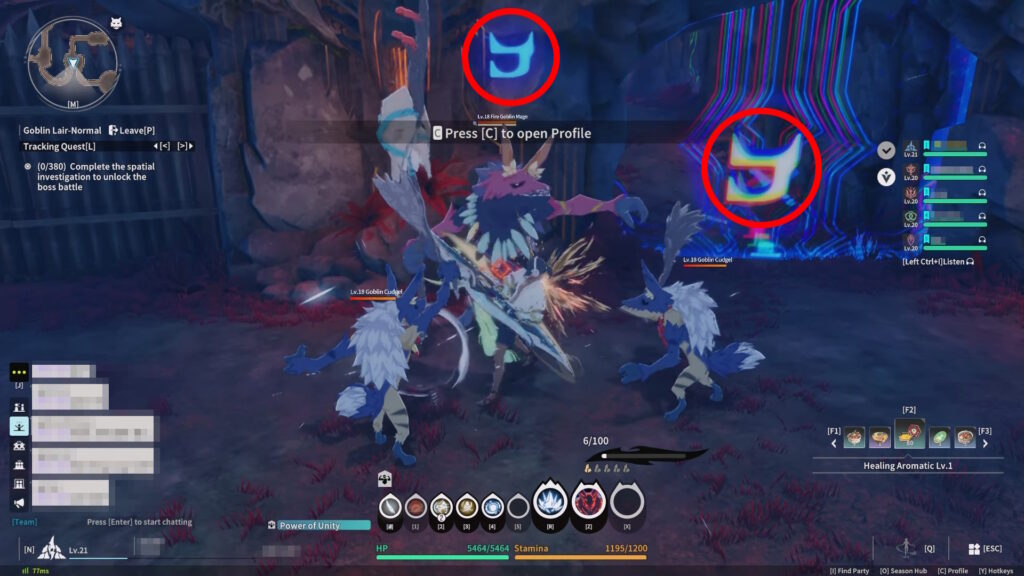
The overall progression through this dungeon is pretty simple. Notice when you reach the first room with enemies that both the strongest enemy and one of the doors share a symbol.
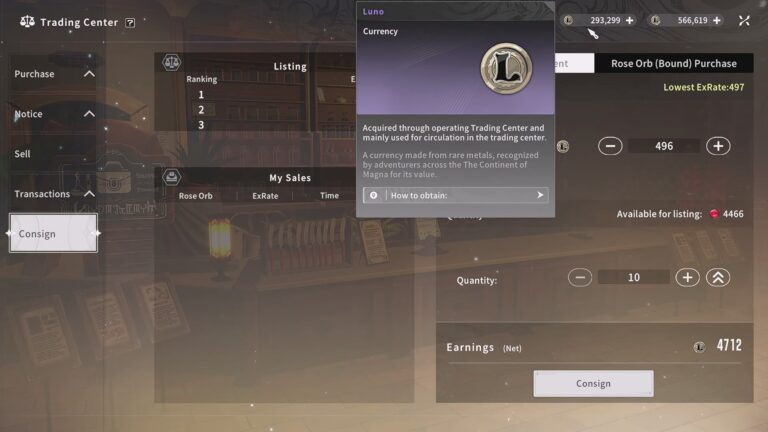
 Blue Protocol Star Resonance: Luno Farming GuideOct 17, 2025
 Kanamia Trial (Hard) Guide in Blue Protocol: Star ResonanceOct 17, 2025
 Treasure Map Blind Box Quest in Blue Protocol: Star ResonanceOct 16, 2025
What that means is that you need to defeat the enemy with the symbol to open the marked door. Thankfully, there’s only ever one enemy and door with symbols, making the dungeon very linear.
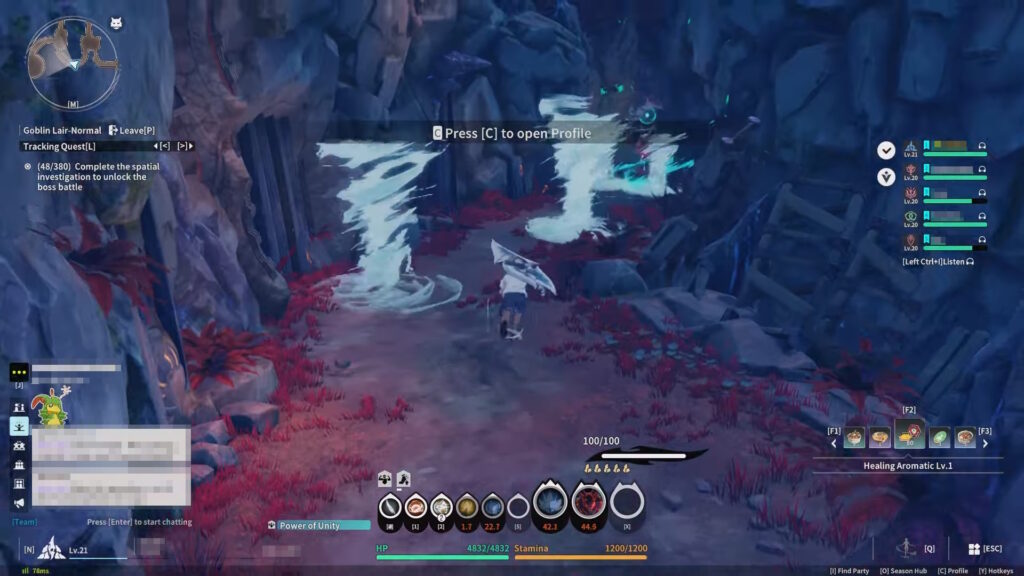
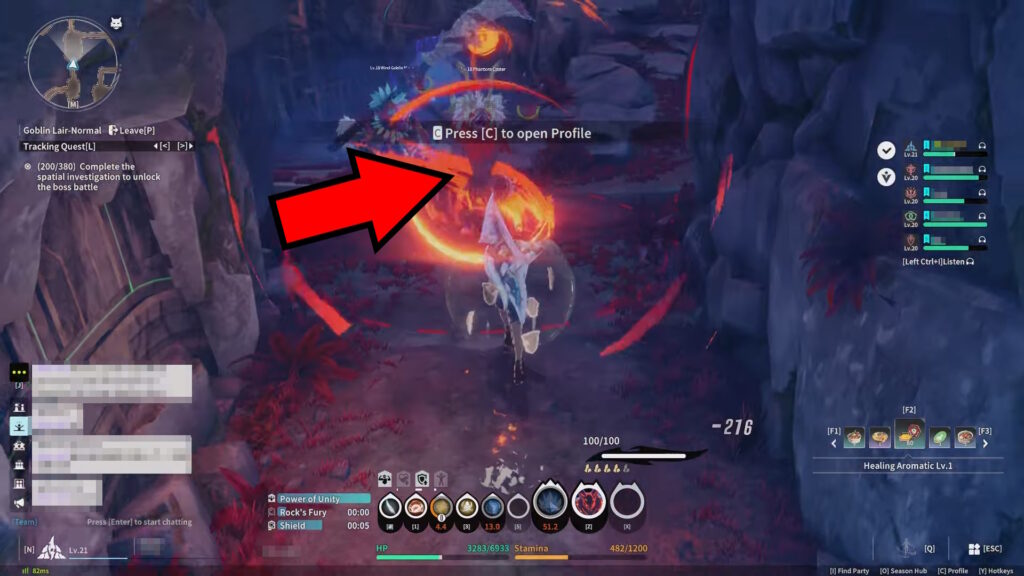
That said, there are some sets of traps that you’ll encounter on your path, as well! The first one is a set of tornadoes, shown above.
Use your Phantom Dash to dodge them and reach the opposite end of the hall. Then, give a quick smack to the Phantom Caster Goblin that was causing the tornadoes to get rid of them.
After that, you’ll reach a similar trap with a fire-breathing Goblin. Once again, you’ll need to use your Phantom Dash to avoid the hazard and reach the Goblin causing it. Hit it to remove the fire.
Lastly, you’ll reach a room with some falling boulders. As before, use Phantom Dash to dodge them and hit the Goblin that triggered the hazard.
If you’re playing on Master difficulty, this same overall layout is still what you should expect. However, you’ll also need to gather 1200 Survey Points in the dungeon within 9 minutes.

A good way to kickstart that is to aggro all enemies in the first two rooms. Pull them all together and use the pedestal to turn them into Void enemies. This will strengthen them, but also yield more Survey Points upon their defeat.
Note that doing this efficiently will also allow you to skip a room with enemies later in the dungeon! It’s highly recommended in Master difficulty.
Either way, you’ll eventually reach the boss, Shuro Barot… so let’s talk about its mechanics!
Shuro Barot | Boss Mechanics
Anti-Tank Attack
The first notable boss mechanic is a special heavy attack that it does sporadically against a single target. In the vast majority of cases, that one target is the party’s tank.
The tell for this attack is a red circle around the targeted player. To avoid it, the targeted player has to do a Phantom Dash right as the attack comes out. Dodge it perfectly to stay on your feet!
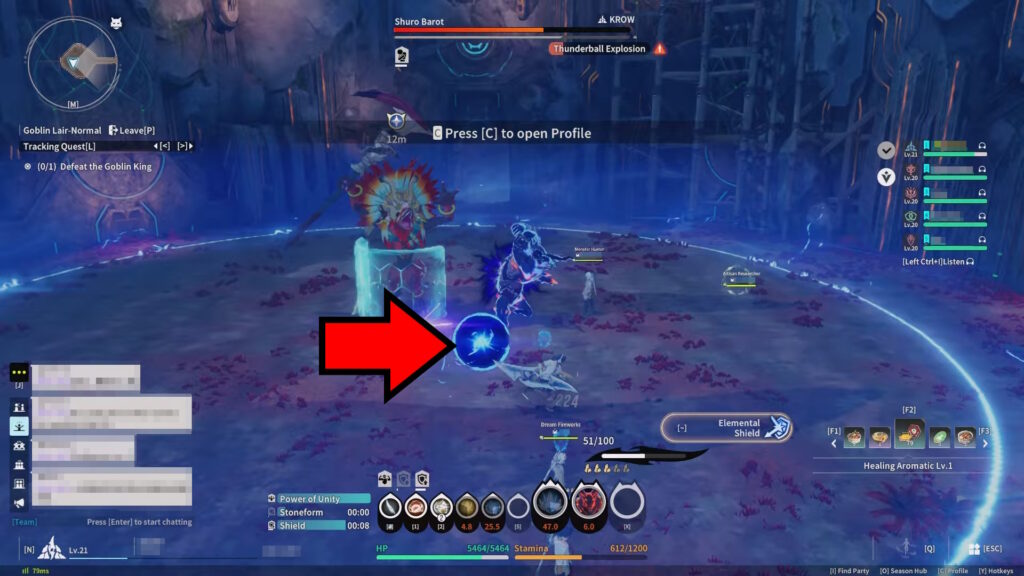
Elemental Shield Goblins
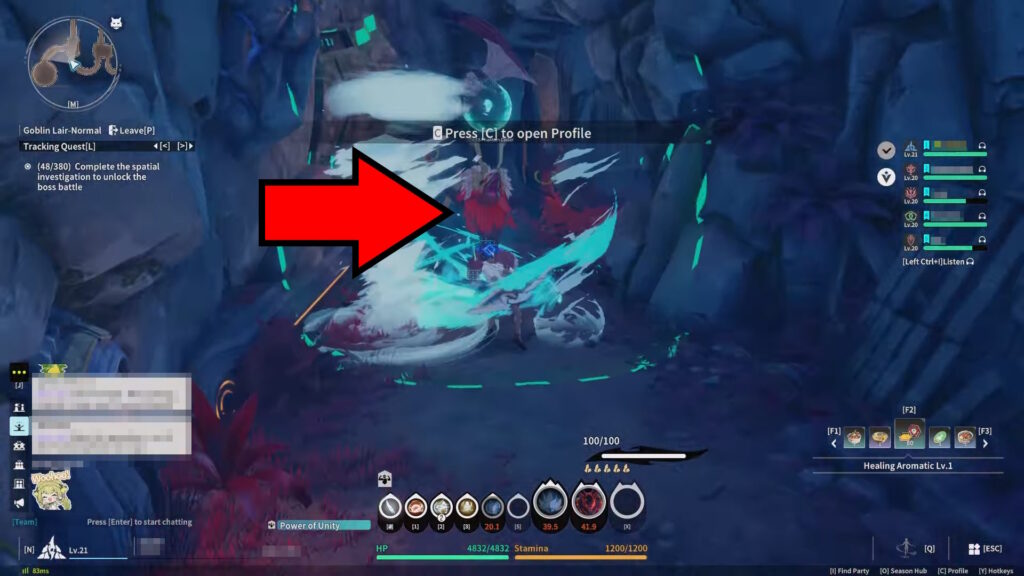
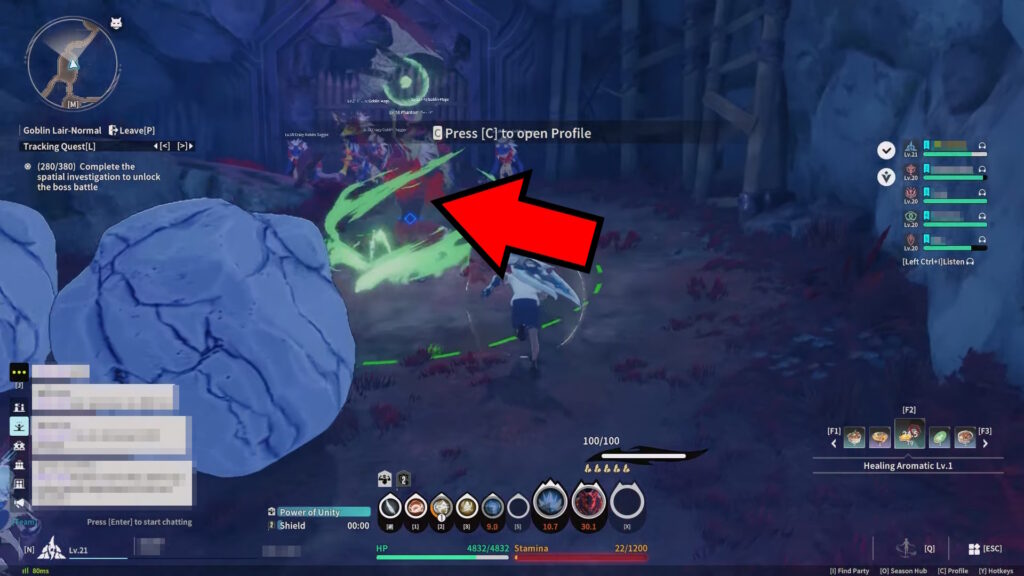
Later on in the fight, Shuro Barot will summon a large group of Goblins all over the arena. Two of these Goblins will have a large elemental shield above them, as shown in the example above.
Players need to coordinate to quickly take out these Goblins and pick up the elemental shields they drop. They’ll be needed for the next mechanic!

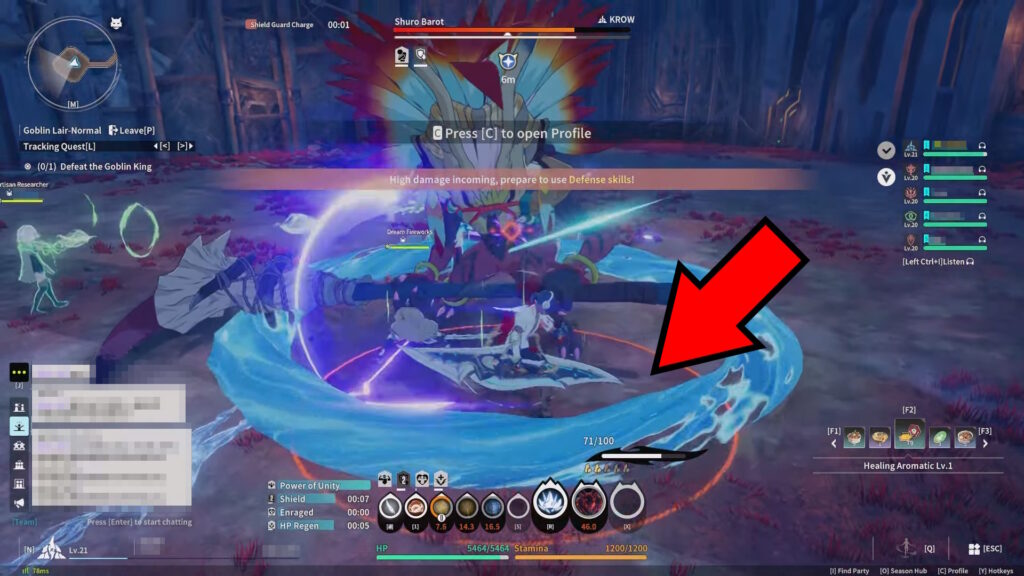
After a while, the Goblins will come into action by doing a charging attack, telegraphed by red lines on the ground. If your party successfully defeated the two shield Goblins, there will be a safe gap. Just stand in it to avoid the attack fully.
If your party failed to take down the two Goblins, there won’t be a safe gap. You can attempt getting to the edge of the arena instead, but that can stop being viable later in the fight. Alternatively, use any damage mitigation you have!
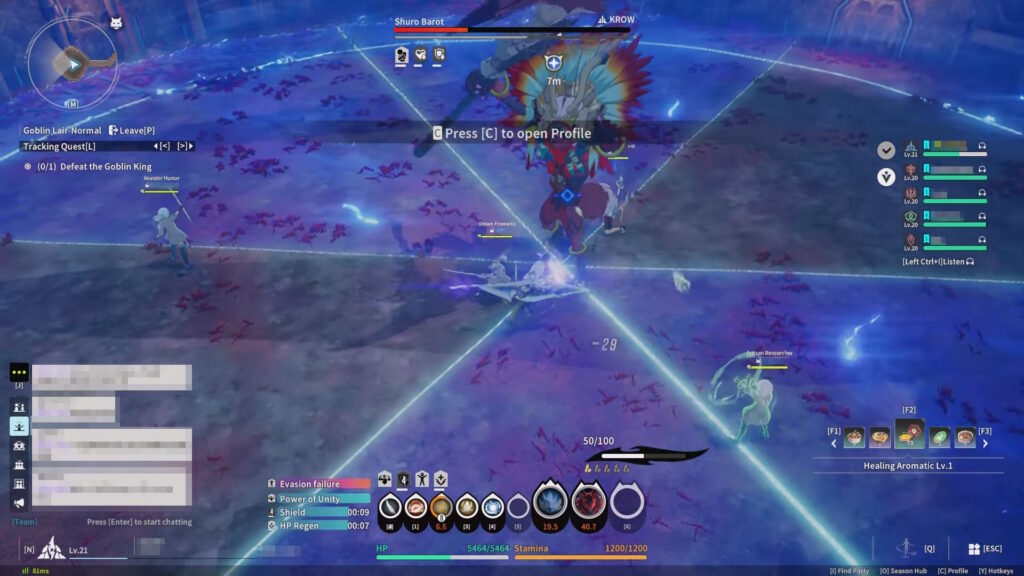
Lightning Orb
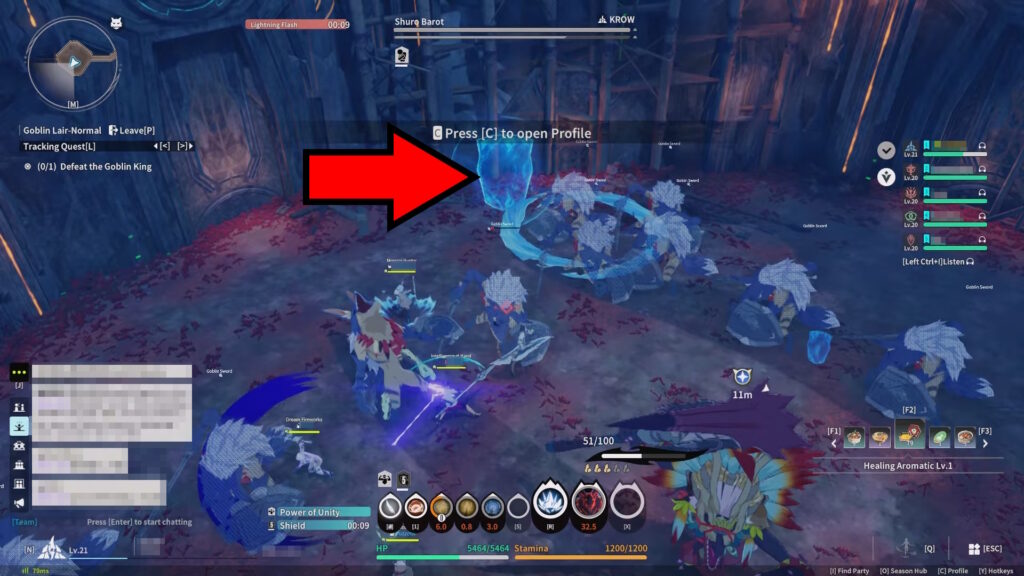
Right after the elemental shield mechanic, Shuro Barot will fire a large orb of lightning at one player. Your party now has to use the elemental shields from before to bounce the ball around, kind of like ping pong.
The ultimate goal is to hit Shuro Barot’s exposed back. So, keep bouncing the lightning orb between each other until you can do this!
On Normal and Hard difficulty, it’s actually possible for a single player to do this entire mechanic on their own. The orb is slow enough that you can just Phantom Dash to keep up with it and complete the mechanic yourself.
However, this is a lot harder on Master difficulty. Two players will need to properly coordinate their elemental shields for this one!
Also note that bouncing the orb back to Shuro Barot’s shield or outside of the arena will fail the mechanic. If that happens, your entire party will get wiped!
On the upside, Shuro Barot is vulnerable during this entire mechanic. The players that aren’t engaging with the elemental shields can just continue dealing damage as normal. So, ideally, the DPS players won’t be on shield duty.
Lightning Pizza
The last notable mechanic happens shortly after the lightning orb one. Shuro Barot will start “slicing” the arena into blue sections sequentially.
Standing on one of those blue sections will disable your Phantom Dash temporarily. You can only move normally and jump, but not dash!
After a short delay, each separate section will start to detonate and deal high damage. The sections detonate in the same order that Shuro Barot summoned them in.
To avoid this mechanic, simply pay attention to the sequence and walk onto an area that has already detonated. It’s as simple as that!
Keep this up and you’ll defeat Shuro Barot before long. So, that’s all you need to know to complete the Goblin Lair dungeon in Blue Protocol: Star Resonance.