 52 articles
The Warlock is the brand new class added with the Lord of Hatred expansion in Diablo IV and it hit the ground running. Right out of the gate, it established itself as one of the strongest classes in Season 13 and the Pit is where it really shines. The class revolves around Soul Shards which define your build identity and the playstyle you commit to going into endgame.
For melting Pit bosses specifically, the Apocalypse build is sitting firmly in S Tier right now and is one of the top contenders for pushing high end content. It leverages massive damage multipliers and is clearing Torment 12 content while putting out some of the highest boss damage numbers the class has to offer. In this guide, I will break down exactly how to build it so you can take it into the Pit and start seeing those numbers for yourself.
Best Endgame Warlock Build
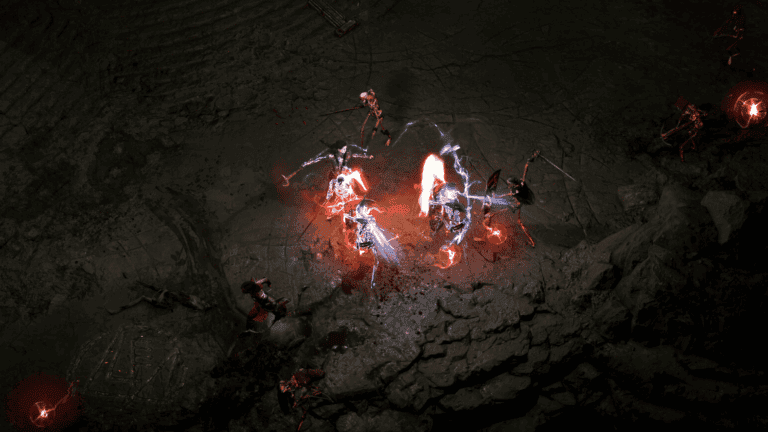
The build I am going with for this guide is the Apocalypse build. The main reason for choosing it over the others is the insane AOE damage it puts out. It is one of the easier builds to actively use since you do not need to be doing a lot mechanically to see results. Point it at a pack of enemies or a boss and watch the fire AOE do its thing. The visual payoff is also genuinely satisfying.
The main downsides worth knowing about are mobility and item dependency. Builds like Dread Claws have a clear edge when it comes to moving around the Pit quickly. Apocalypse trades that off for raw damage output. On top of that, the build does require a couple of key items before it starts performing at its best.
 Best War Plans Trees for Diablo 4 EndgameJul 3, 2026
 Diablo 4: New Mythic In Season 14 (Versions, and How to Get Them)Jul 3, 2026
 Best Ways to Get Horadric Gems in Diablo 4Jul 3, 2026
Main Mechanism of the Apocalypses Build
The core of this build revolves around the “Apocalypse“ skill. It creates a massive sigil that detonates after 2.0 seconds and deals 666% damage to all enemies within the blast radius. On its own that is already powerful. But paired with the “Annihilation” Warlock skill, it becomes spammable which is where things get out of hand.
The key mechanic to understand is the stack system. Apocalypse launches a hellfire blast that requires at least 20 stacks to fire. Every Hellfire skill you use generates stacks up to a maximum of 100. Each stack increases both the explosion size and the damage by 40%.
So the more stacks you build up before detonating the bigger and more destructive the blast becomes. You can see how quickly this snowballs once you are consistently hitting high stack counts.
Hellfire Skills
For your Hellfire skill you have two options depending on what content you are pushing. If you want maximum AOE coverage go with “Chain Whips“. It converts Umbral Chains into a Hellfire skill that whips around your target. It deals damage per second to surrounding enemies and covers an even larger area when empowered by Volatility.
If you are focused on single target damage for boss killing specifically then “Skull Splitter” is the better pick. It converts Blazing Scream so it fires out smaller Lesser Demon Skulls that seek out enemies and deal focused damage. Pick whichever suits what you are trying to clear.
Gear
Let’s talk about gear. The first and most important piece you need is the Unique Gloves called “Hands of the Worldbreaker“. What makes them so powerful is that they cause Apocalypse to deal up to 340 to 400% increased damage when cast inside a “Sigil of Chaos“.
The damage scales based on the number of kills the Sigil has stored, which means the longer your Sigil has been active and accumulating kills before you cast Apocalypse, the harder it hits.
On top of that the gloves reclassify Apocalypse as a Sigil skill. This is a massive deal because it means Apocalypse now benefits fully from the complete “Ritual of the Nameless” set bonuses which are built entirely around empowering Sigil skills. The synergy between the gloves and the set is what pushes this build into genuinely broken territory.
Chest Armor
The next essential piece is the Unique Chest Armor called “Fleshwrit Carapace“. This chest amplifies all Sigil Skills by 70 to 90% increased damage which is already a significant boost on its own. But what makes it truly valuable for this build is its passive effect.
Active Sigils automatically gain 1 kill every second regardless of whether you are actively killing enemies inside them. On top of that any unused kills stored in a Sigil are saved rather than lost when the Sigil expires.
This means you are constantly building up kill stacks passively in the background even during downtime. Combined with the “Hands of the Worldbreaker” scaling off stored kills, the “Fleshwrit Carapace” essentially guarantees that your Apocalypse cast will always have a healthy stack of kills behind it regardless of how the fight is going, making your damage output far more consistent than it would be without it.
Pants
To increase the survivability of your character, go with the Unique Pants called “Teremity“. It allows you to receive healing when you are at 100% health which is then converted into a Barrier worth up to 80 to 100% of your Maximum Life. This lasts for 8 seconds.
In a build that is constantly consuming Life through empowered Hellfire Skills and the Scorching Fragment, this barrier effectively acts as a second health pool that absorbs incoming damage before your actual Life starts dropping.
On top of that, Teremity also allows you to drink Healing Potions even when you are already at full Life. This means you can proactively build up the overheal Barrier before engaging rather than waiting until you are already taking damage to pop a potion.
Amulet
For the Amulet slot you have two solid options depending on how you want to approach the build. The first is the “Banished Lord’s Talisman“. After spending 275 of your Primary Resource, it grants you 4 stacks of Overpower. Your Critical Strikes that Overpower then deal 15 to 18% increased damage per stack of Overpower on top of that.
This amulet pairs particularly well with the Ritualist Shard since both revolve around stacking and benefiting from Overpower. The more consistently you can trigger the “Banished Lord’s Talisman”, the more damage and size you are squeezing out of your Occult skills at the same time.
The alternative is “The Hemat Stone“. This one takes a different approach entirely. It doubles the potency of all bonuses granted by both Command Valloch and the Ritualist Fragment simultaneously. On top of that, your Occult Skills deal 20 to 30% increased damage across the board.
Either amulet works well in this build so the choice ultimately comes down to whichever one you have available and which damage pattern you prefer to play around.
Ring
For resource management, the Unique Ring called “Ring of Starless Skies” is an absolute must have for this build. Every time you spend your Primary Resource, it reduces the resource cost of your skills and increases your damage by 10% for 3 seconds. This effect stacks up to a maximum of 50% increased damage.
Soul Shards
You also need to run the “Ritualist Shard” with this build. It causes Occult skills to deal 3.5% increased damage per stack of Overpower and gain 10% increased size per 2 stacks of Overpower. At 4 or more stacks of Overpower, Occult Abyss Skills apply an additional Hex to enemies on hit and Occult Hellfire skills gain a 30% chance to grant Volatility for 4 seconds when cast.
The size scaling on your Occult skills from Overpower stacks is particularly valuable for this build since larger Sigils cover more ground and store kills more efficiently which feeds directly into your Apocalypse damage.
For the fragment choice, go with the “Scorching Fragment“. It makes all Occult Hellfire Skills permanently empowered at the cost of consuming 4% of your Maximum Life when cast. On top of that, Volatility can now stack up to 3 times. Each stack increases the damage of empowered Skills by 10% and the Life they consume by 1% per stack.
The Command Valloch component of this Fragment is also worth highlighting. It causes Valloch to siphon its own life to Fortify you for 8% of your Maximum Life and makes Valloch pay 100% of Life Costs instead of you while you have Siphoned its power.
This effectively offloads the life cost of your empowered Hellfire skills onto Valloch which frees you from the downside of the life consumption mechanic entirely during those windows.
Aspects
On the offensive Aspect side, there are two worth slotting into your build. The first is the “Aspect of Scorching Heat“. It makes your Hellfire Skills deal increased damage equal to 60 to 80% of your Fire Resistance Damage Reduction.
This means stacking Fire Resistance serves a dual purpose in this build. It not only keeps you alive against fire damage but directly converts into offensive output for all your Hellfire Skills at the same time.
The second offensive Aspect worth running is “Cremator’s Aspect“. While you have 4 or more stacks of Overpower active, all your Fire Skill casts deal 70 to 100% increased damage.
Given that this build already revolves around building and maintaining Overpower stacks through the Ritualist Shard and “Banished Lord’s Talisman”, hitting that 4 stack threshold consistently is something you will be doing naturally anyway. “Cremator’s Aspect” essentially turns that existing synergy into a significant damage multiplier on top of everything else already running in the build.
Skill Tree
In the skill tree there are a few key priorities to focus on. “Apocalypse” is the centerpiece of the build so max it out first. From there, invest points into “Double Blast Apocalypse”, “Survivor Damage Apocalypse” and “Annihilation Apocalypse” to push the skill’s damage ceiling as high as possible.
On the Sigil side both “Sigil of Chaos” and “Sigil of Subversion” are must-haves. Sigil of Chaos is what the “Hands of the Worldbreaker” scales off directly, so having it fully invested is non-negotiable.
Finally make sure to max out “Umbral Chain” as it is used to build up stacks for “Annihilation Apocalypse”, which is one of the key ways this build maintains its damage output consistently throughout a fight. Check the image below for the entire skill tree.

Wrapping Up
That covers everything you need to run the Apocalypse Warlock build in Diablo 4: Lord of Hatred. It takes a few runs to get comfortable with the flow but once everything is in place and the synergies start clicking together, it is one of the most satisfying and destructive builds the Warlock has to offer right now.