 24 articles
Operation Poison Pill is the first Operation added to Black Ops 7 Endgame and it launched with Season 3. It is a structured multi-match progression system made up of 10 steps, each with its own set of objectives you need to complete before moving onto the next. Work through all of them and you unlock access to the Link Forger Glitch Fracture, a Nightmare difficulty arena where things get significantly harder.
The rewards are worth the grind though. Completing steps earns you things like weapon blueprints, animated camos, emblems, Double XP tokens, and the new Restore Token consumable that lets you recover lost skills and loadouts after dying. The final reward for clearing the Link Forger with specific operators is the exclusive Override Operator Skins for Grimm, Mason, and Anderson. In this guide, I will go over every step so you know exactly what you are walking into.
Ultimate Guide For Operation Poison Pill
You do not have to complete all the objectives for a step in a single mission. You can spread them out across multiple matches and your progress will carry over between runs. Each step you complete will unlock the specific rewards tied to it. You can keep track of everything, including your current step, objectives, and rewards, directly from the Operation Endgame screen inside the game.
One thing worth knowing is that the objectives get progressively harder as you push further through the steps. Later steps will also require you to be operating in higher zones.
 Black Ops 7 Zombies: Free Ray Gun World At War Easter Egg GuideJun 28, 2026
 Black Ops 7 Zombies: Secret Takeo Easter Egg Guide | Reunion Dark OpsJun 28, 2026
 Black Ops 7 Zombies: Nekomancer Wonder Weapon Guide (Kowakujo) All Correct StepsJun 27, 2026
Step 01 – Party Crasher
- Objectives (zone 1 or higher):
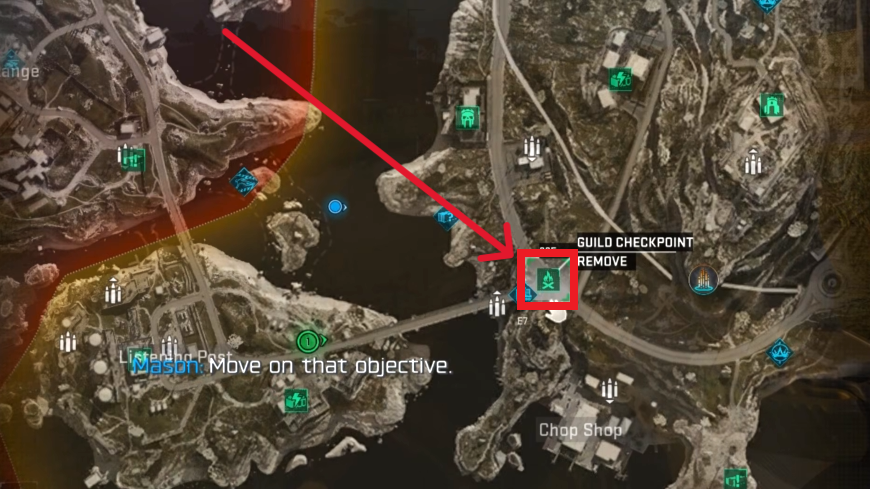
- Ping a Guild Checkpoint.
- Complete a Guild Checkpoint Activity.
- Complete a Gear Drop Activity that was called in from a Guild Checkpoint terminal.
- Obtain a Scorestreak from a Supply Drop.
- Rewards:
- Poison Pill (weapon charm).
- 1000 XP.
Guild Checkpoints are scattered all over the map of Avalon. They show up on your map as a green campfire icon. The first thing you need to do is ping one on your map to mark it, then make your way over to it. Once you arrive, clear out all the enemies in the area to complete the activity.
After the enemies are down, head inside one of the tents and look for the console. Interact with it to “Locate Supply Drop“. Shortly after, a supply drop will fall from the sky somewhere in the nearby area. Head over to it and interact with it to secure it. You will receive a Scorestreak from the drop as a reward. Once you have done all of that, Step 01 is complete.
Step 02 – Press The Attack
- Objectives (zone 1 or higher):
- Kill 5 enemies with a Scorestreak.
- Complete 3 Activities.
- Complete 1 Assignment.
- Escape Successfully from Avalon.
- Rewards:
- Restore Token (consumable).
- 1000 XP.
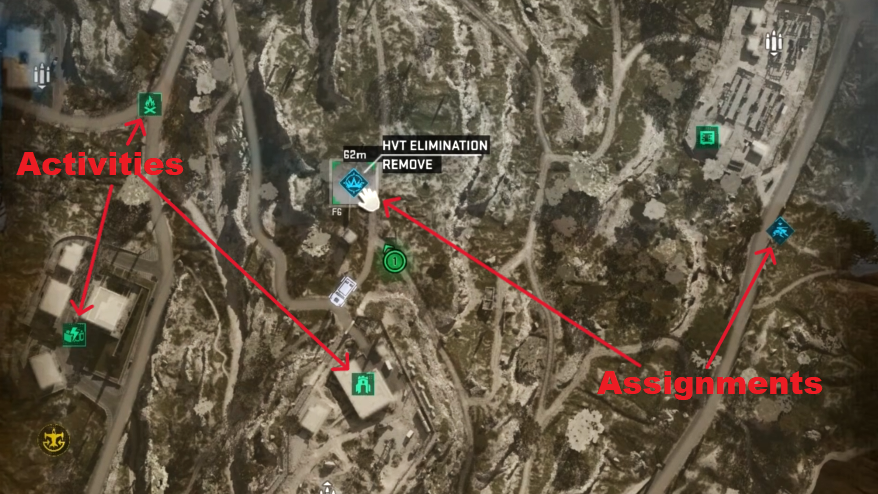
For the 5 kills with a Scorestreak, you can use the one you picked up from Step 01 to knock that out without any extra effort. For the Activities, they are spread all over the map and show up as green icons. You can complete any three of your choosing, so pick whichever ones are closest or most convenient for you.
You also need to complete one Assignment, which is denoted by a blue icon on your map. Assignments are a bit longer and more involved than regular activities. If you want to get it done as quickly as possible, HVT Elimination is a good option. Finally, to finish off this step entirely, you need to successfully exfil from Avalon.
Step 03 – Eyes In The Sky
- Objectives (zone 1 or higher):
- Complete a Surveillance Drone Activity.
- Complete an Operative Elimination Activity.
- Rewards:
- Double XP Token (consumable).
- 1000 XP.
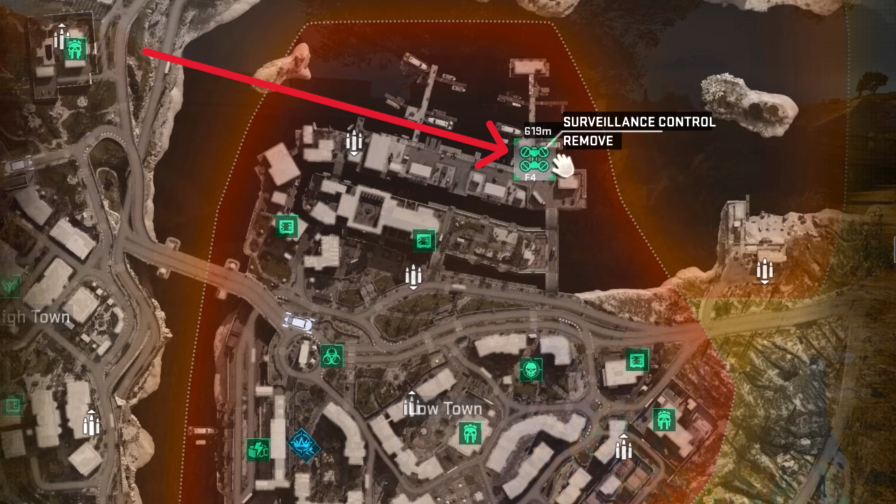
For this step, you need to complete two specific activities, the Surveillance Drone and the Operative Elimination. Both of these are directly connected to each other, so completing one triggers the other.
Start by heading to the green drone icon on your map. You will find a Surveillance Drone patrolling the area. Shoot it down and then interact with it once it hits the ground. This will automatically trigger the Operative Elimination activity, where a wave of enemies will spawn around your location. Clear them all out and this step will be done.
Step 04 – Command Breaker
- Objectives (zone 1 or higher):
- Clear a Guild Command Center.
- Jailbreak a Weapon to upgrade its rarity and damage.
- Rewards:
- Node Husk (emblem).
- 2500 XP.
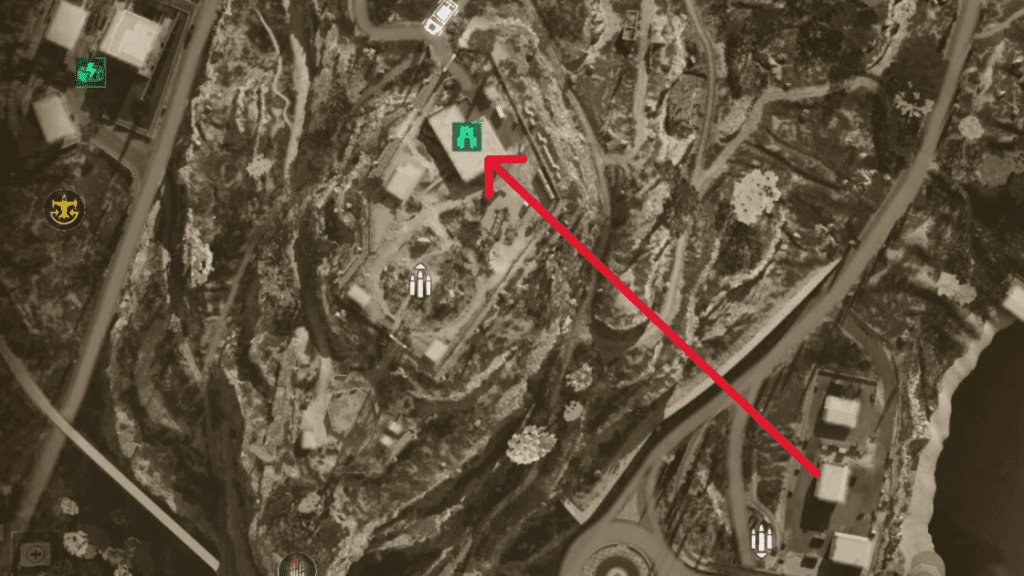
For this step, you need to clear out a Guild Command Center by taking down the Guild Commander inside. These are easy to spot on your map as they show up as a green castle-like icon. Head over to one and fight your way through until the Guild Commander is eliminated and the center is cleared.
Once the Command Center is clear, head over to the Jailbreak Workbench inside and jailbreak one of your weapons to increase its rarity. This will mark this step complete.
Step 05 – Mystery Boxes
- Objectives (zone 2 or higher):
- Complete 3 Mystery Cargo Assignments.
- Use a Redeploy Drone.
- Complete 2 Surprise Shipment Activities.
- Rewards:
- Double Battle Pass XP Token (consumable).
- 2500 XP.
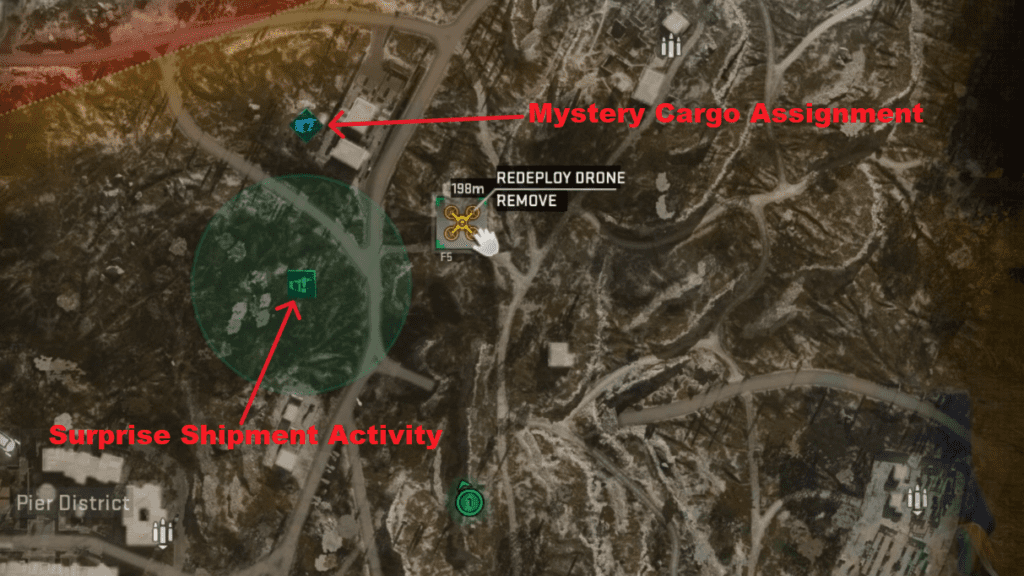
This step is a bit longer than the previous ones and requires you to be in Zone 2 or higher. First, you need to complete three Mystery Cargo Assignments. These show up on your map as a blue question mark container icon. Each one will have you surviving a couple of enemy waves before taking down a mini boss at the end. They are not too complicated but expect each one to take a few minutes to get through.
Next, you need to redeploy using a Redeploy Drone. These are fairly easy to find. Finally, you need to complete two Surprise Shipment Activities, which are marked by a green exclamation mark container icon on your map. These are quick and straightforward. Simply get close to the container and a random enemy will spawn inside. Eliminate it and the activity is done.
Step 06 – Hit List
- Objectives (zone 3 or higher):
- Complete 3 Prime Target Activities.
- Complete a HVT Assignment.
- Rewards:
- Toxic Entry (decal).
- 2500 XP.
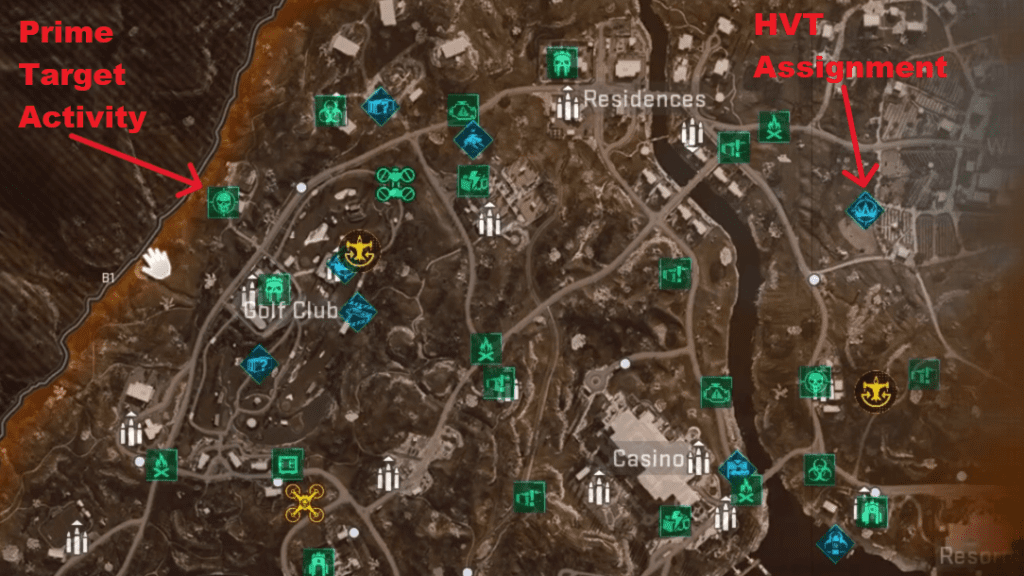
For this step, you need to be operating in Zone 3 or higher before anything will count. Start by completing three Prime Target Activities, which show up on your map as a green skull icon. These are pretty straightforward encounters and require you to defeat one Guild Officer.
After that, you need to complete one HVT Assignment, indicated by a blue crown icon on your map. Track it down on your map, complete the objective, and this step is done.
Step 07 – The Red Mist
- Objectives (zone 3 or higher):
- Kill 100 Fear Enemies with Critical Kills.
- Eliminate 3 Fear Special Enemies.
- Eliminate 1 Fear Elite Enemy.
- Rewards:
- Double Weapon XP Token (consumable).
- 5000 XP.
For this step, you need to be in zone 3 or higher again. Start by getting 100 critical kills on zombies. The easiest way to rack these up is by consistently aiming for headshots. Next, you need to eliminate 3 special types of zombies. These will spawn in automatically as you play so you do not need to go hunting for them specifically. Just keep playing and they will show up on their own.
Finally, you need to take down 1 Fear Elite enemy. These spawn in zone 3 and higher and are the tankiest of the zombie type enemies you will encounter in this operation. Keep moving, stay aggressive, and chip away at it and you will get it down without too much trouble.
Step 08 – Elite Hunt
- Objectives (zone 4 or higher):
- Eliminate 3 Elite Enemies.
- Open an Item Case Dropped from an Elite Enemy.
- Rewards:
- Thorned Muzzle (loading screen).
- 5000 XP.
For this step, you need to eliminate three Elite enemies. These can be either the human or zombie versions. I would recommend sticking with the human Elite enemies as they are a bit easier to deal with compared to their zombie counterparts.
The best place to hunt them down is the Low Town area. Human Elite enemies tend to spawn there pretty frequently so you should not have to wait long before running into them. Once you take down an Elite enemy, they will drop an item case on the ground. You only need to open one of these to complete the objective.
Step 09 – Earth Shaker
- Objectives (zone 4 or higher):
- Participate in and complete a World Event.
- Obtain or Upgrade an Exotic Skill.
- Rewards:
- Looking Good! (emote).
- 5000 XP.
For this step, you first need to participate in and complete any World Event. There are various world events that pop up across Avalon so keep an eye out for them as you play and jump into one when it appears.
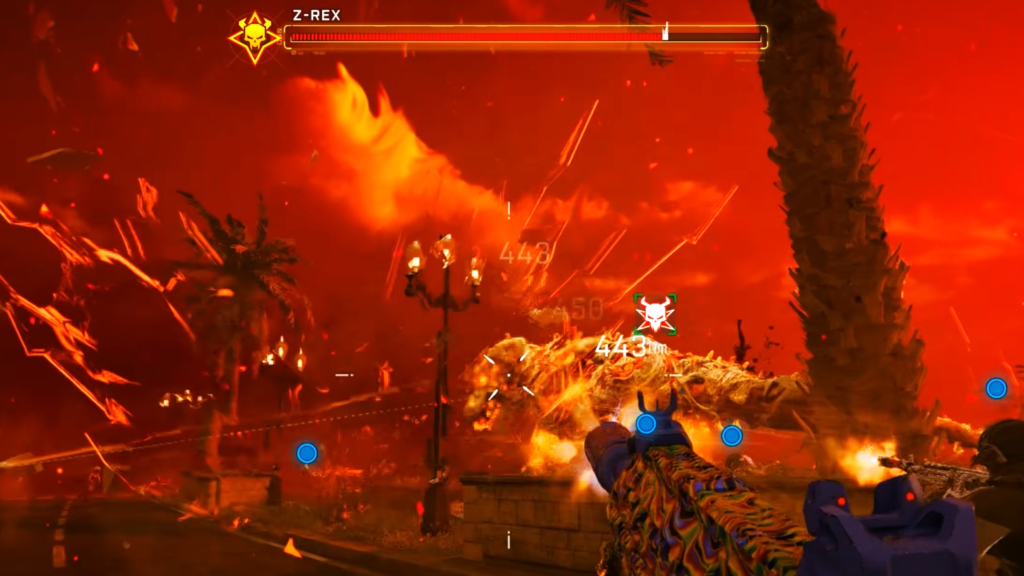
The second objective requires you to obtain or upgrade to an Exotic Skill, and the way to get this is through the Z-Rex World Event specifically. It is worth knowing that the world event you get is luck based, so you cannot guarantee which one will show up. However, if Z-Rex happens to spawn during your session, that is your opportunity to knock out both objectives in a single run.
Glitch Step – Link Forger
- Objectives (zone nightmare):
- Defeat the Strike Boss O.S.C.A.R. while on this Step to Reveal the Link Forger Glitch.
- Acquire an Exotic Weapon or Upgrade a Weapon using the Exotic Fabricator.
- Enter the Link Forger Glitch and Defeat the Glitch Boss.
- Acquire a Nightmare Skill.
- Rewards:
- Venomous Override (weapon blueprint).
- Fractal Death (calling card).
- 7500 XP.
- Glitch Fracture Special Rewards:
- Anderson Override Skin.
- Defeat the Link Forger Glitch Boss as Anderson.
- Mason Override Skin.
- Defeat the Link Forger Glitch Boss as Mason
- Grimm Override Skin.
- Defeat the Link Forger Glitch Boss as Grimm.
- Blighted Camo.
- Unlock any one Override Operator Skin.
- Virulent Camo.
- Unlock all three Override Operator Skins.
- Anderson Override Skin.
For the first objective of this step, you need to track down and defeat the Guild Strike Boss that spawns on the map. Specifically, you are looking for the Strike Boss O.S.C.A.R. You can hover over the nightmare zone on your map and it will tell you what boss has spawned. Once O.S.C.A.R. is down, you need to get your hands on an Exotic weapon. You can either acquire one directly or upgrade one of your existing weapons at the Exotic Fabricator.
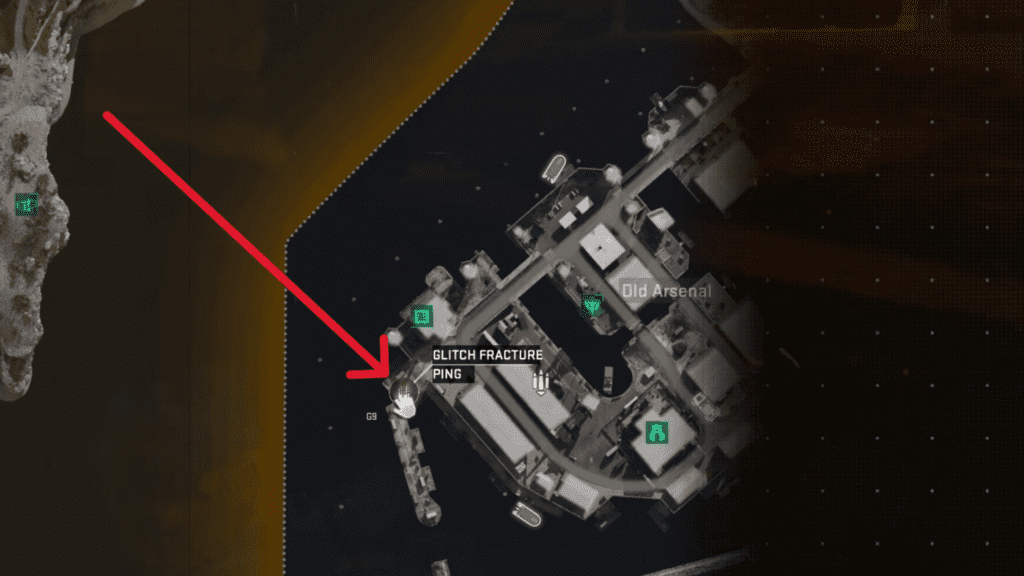
Once you have completed all the previous steps, the Link Forger Glitch Fracture location will finally be revealed on your map. Make your way there and interact with it to enter. This is the final and most challenging part of the entire Operation so make sure your Operator is fully built up and your squad is ready before going in.
Inside, you will need to fight through waves of enemies before facing the Glitch Boss. The boss is no joke so stay coordinated with your squad, keep moving, and focus fire to bring it down. Once the Glitch Boss is defeated, a Nightmare Skill Case will drop. Open it up and grab the Nightmare Skill from inside. This will mark the completion of Operation Poison Pill.
Wrapping Up
Operation Poison Pill is a solid grind from start to finish and the rewards are genuinely worth putting the time in. The early steps are manageable enough but things ramp up significantly once you hit Zone 3 and beyond, so make sure your Operator is in good shape before pushing into the later steps. Get your squad together, work through it consistently across multiple sessions, and you will have the whole Operation wrapped up in no time.
If you are experiencing lag spikes while playing and are not sure how to fix it, give our How to Fix Lag Spikes in BO7 guide a quick read.