162 articles
Getting all of the upgrades for your Workshop is vital for progression in ARC Raiders, but it’s hard if you don’t know what to prioritize first and which spots to farm.
After all, getting all of the upgrades requires hundreds of materials. There are a lot of different types, and you’ll need loads of some of them! It’s no easy task, and it takes some time to do it all.
It’s also worth noting that materials are limited early on, so your real goal is to unlock power spikes at the right time, all while minimizing any wasted effort when farming.
Thankfully, our guide will help you with all of this!
 Hotel Panorama Puzzle Solution in ARC RaidersApr 30, 2026
 ARC Raiders: How to Find & Use Dockmaster’s DetectorApr 30, 2026
 ARC Raiders: Where to Find Turbine CompressorApr 30, 2026
Workshop Upgrades Guide in ARC Raiders
The Workshop is split into several crafting stations, with each having a different progression path. Meanwhile, each station upgrade requires a combination of common materials, components from ARCs, and mid-tier components.
Since early upgrades unlock efficiency while later upgrades unlock power, you should prioritize your crafting capability early on instead of chasing rare materials.
That said, let me give you a handy chart showing you everything you will need for every upgrade of every station in the Workshop. There are quite a lot of materials to track, but this should help you as a sort of checklist!
Here’s the full table of every upgrade and the required materials:
| Workshop Station | Level 1 | Level 2 | Level 3 |
| Gunsmith | Metal Parts x20 Rubber Parts x30 | Rusted Tools x3 Mechanical Components x5 Wasp Driver x8 | Rusted Gear x3 Advanced Mechanical Components x5 Sentinel Firing Core x4 |
| Gear Bench | Plastic Parts x25 Fabric x30 | Power Cable x3 Electrical Components x5 Hornet Driver x5 | Industrial Battery x3 Advanced Electrical Components x5 Bastion Cell x6 |
| Medical Lab | Fabric x50 ARC Alloy x6 | Cracked Bioscanner x2 Durable Cloth x5 Tick Pod x8 | Rusted Shut Medical Kit x3 Antiseptic x8 Surveyor Vault x5 |
| Explosives Station | Chemical x50 ARC Alloy x6 | Synthesized Fuel x3 Crude Explosives x5 Pop Trigger x5 | Laboratory Reagents x3 Explosive Compound x5 Rocketeer Driver x3 |
| Utility Station | Plastic Parts x50 ARC Alloy x6 | Damaged Heat Sink x2 Electrical Components x5 Snitch Scanner x6 | Fried Motherboard x3 Advanced Electrical Components x5 Leaper Pulse Unit x4 |
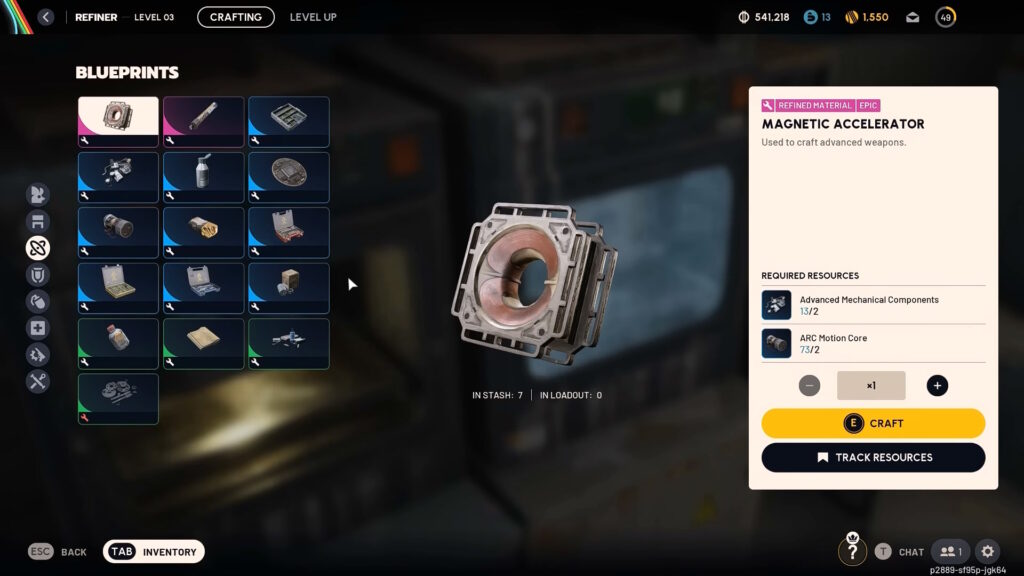
| Refiner | Metal Parts x60 ARC Powercell | Toaster x3 ARC Motion Core x5 Fireball Burner x8 | Motor x3 ARC Circuitry x10 Bombardier Cell x6 |
As you can see, you need to do quite a lot of scavenging to get everything upgraded fully. So, what would be the best order to prioritize upgrades for a smoother progression? Let’s get into it!
Which Benches to Prioritize
The first station you want to focus on is the Refiner. After all, it’ll allow you to craft some of the materials required to upgrade other stations.
Get it to Level 2 as soon as possible, then work towards Level 3 when possible. It will save you from having to rely on luck to loot advanced materials.
After that, you want to focus on either the Gunsmith or the Gear Bench. If you have a lot of weapon blueprints, go for the Gunsmith. Otherwise, the Gear Bench is a better choice.
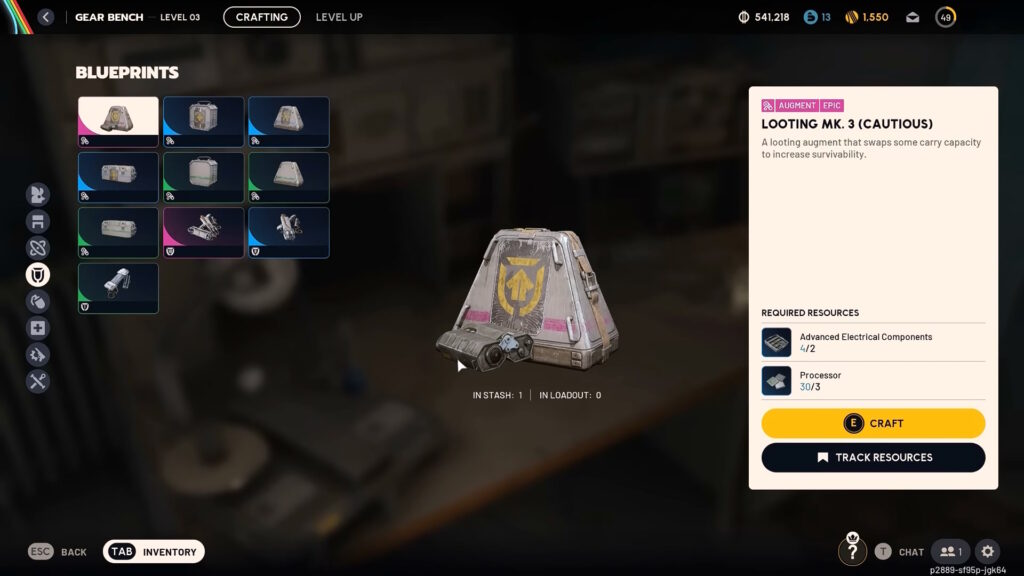
If you’re indecisive, the Gear Bench is a better choice early on. It allows you to craft Shields and Augments, which always come in handy in this game!
Thankfully, though, the Gunsmith and Gear Bench don’t share many materials. So, you can upgrade them both concurrently if you have the loot for it.
After that, we recommend getting the Explosives Station and Utility Station to Level 2. They give you access to some nice tools, but the Level 3 unlocks aren’t anything amazing. So you can just prioritize Level 2 and then only do Level 3 later on as you organically gather materials.
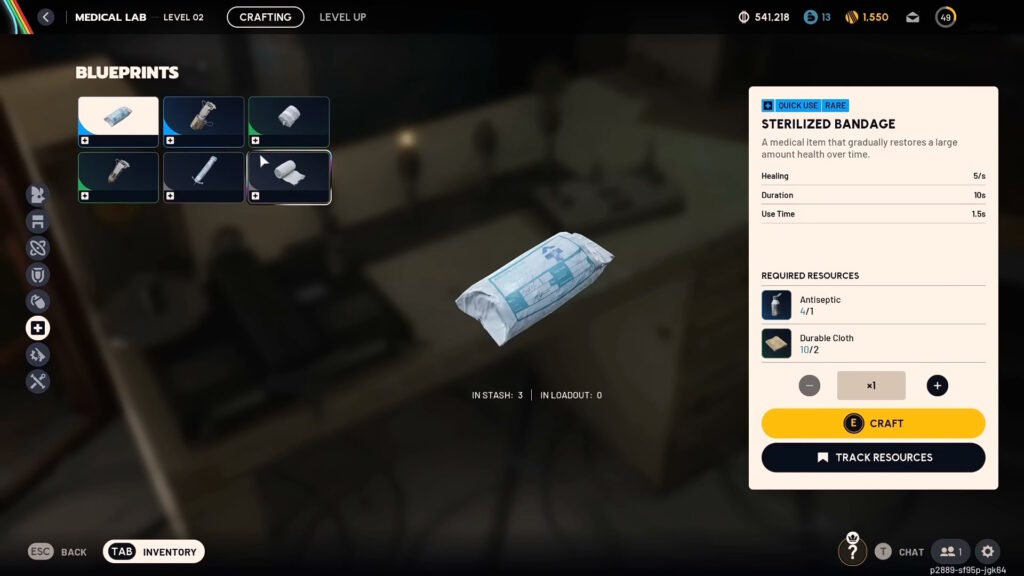
Last priority is the Medical Lab. Reaching Level 3 with the Medical Lab is very rewarding, mind you! It unlocks the Vita Spray, which is the best healing item in the game.
However, the Medical Lab’s third upgrade requires 5 Surveyor Vaults. That means you have to take down Surveyors, which are very rare ARCs. Plus, you only get 1 Surveyor Vault per kill, for the most part.
So, while the Medical Lab is very worthwhile to upgrade fully, it’s not a good idea to focus heavily on it. Just upgrade it when you can, but focus on the others first.
Material Farm Spots
When it comes to the farming spots, we’ll have to break them up into categories based on the type of area and loot. That is things like Residential, Medical, Commercial, and such. It’s all based on the same categorizations the game itself uses, of course!
Do note, though, you should make sure to destroy and loot ARCs you encounter in all of these spots. Taking them out as you loot the other materials should get you enough of the ARC-specific materials, as well.
If you need help with the ARCs, we recommend looking at our guide detailing every ARC type.
Residential
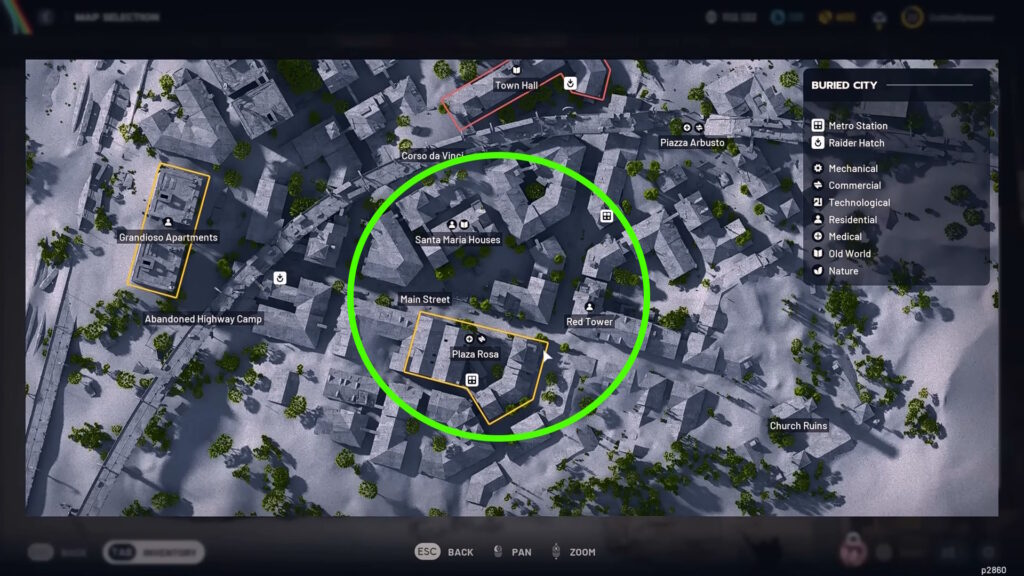
For the Residential loot, we recommend the cluster of buildings in the southeastern part of the Buried City. It’s along the Santa Maria Houses, Red Tower, and Plaza Rosa. This also doubles as having some Medical and Commercial loot.
What’s extra convenient here is that Plaza Rosa also has a metro station! It allows you to extract easily after a quick loot run.
In here, you can find the following materials mainly:
- Chemicals
- Durable Cloth
- Fabric
- Plastic Parts
- Power Cables
- Toasters
There’s also usually a Bastion patrolling around Plaza Rosa. You can use the area’s rooftops to bring it down easily, making it a solid source of Bastion Cells.
Similarly, you can also usually spot a Bombardier near the Santa Maria Houses. Hide inside the residences there and shoot out at the Bombardier until you break it down for its Bombardier Cells.
Worth noting, this is also a good farming spot for Dog Collars, Very Comfortable Pillows, and Cat Beds. You’ll need those if you plan to also fully upgrade Scrappy… and you really should, honestly.
Mechanical and Industrial
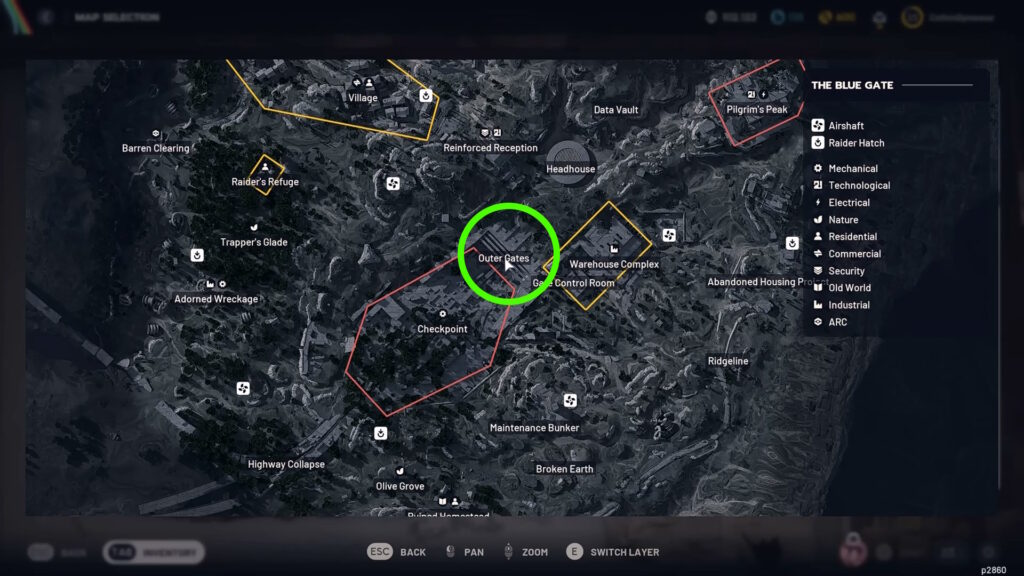
Next up, we’re pairing Mechanical and Industrial loot together. Mainly because you can find both types of loot together in the underground section of the Blue Gate map. You can enter it from the Outer Gates POI for the easiest access.
This tunnel has loads of breachable and lootable cars and containers. All of them have a solid chance of getting you the materials you need!
Here are the main materials you can get in this spot:
- Industrial Battery
- Mechanical Components
- Metal Parts
- Motors
- Rubber Parts
- Rusted Gear
- Rusted Tools
Medical

When it comes to Medical loot, we recommend the Hospital building on the Buried City map. Unsurprisingly, a hospital should have all your medical needs! So, here’s the list of the main types of materials you can gather here:
- Cracked Bioscanners
- Rusted Shut Medical Kits
- Laboratory Reagents
- Fabric
- Chemicals
- Durable Cloth
- Antiseptic
Since this is an indoor farming spot, it’s also a good place to find Ticks and Fireballs. You’ll need to take them out for their materials, so this is as good a place as any!
Technological and Electrical
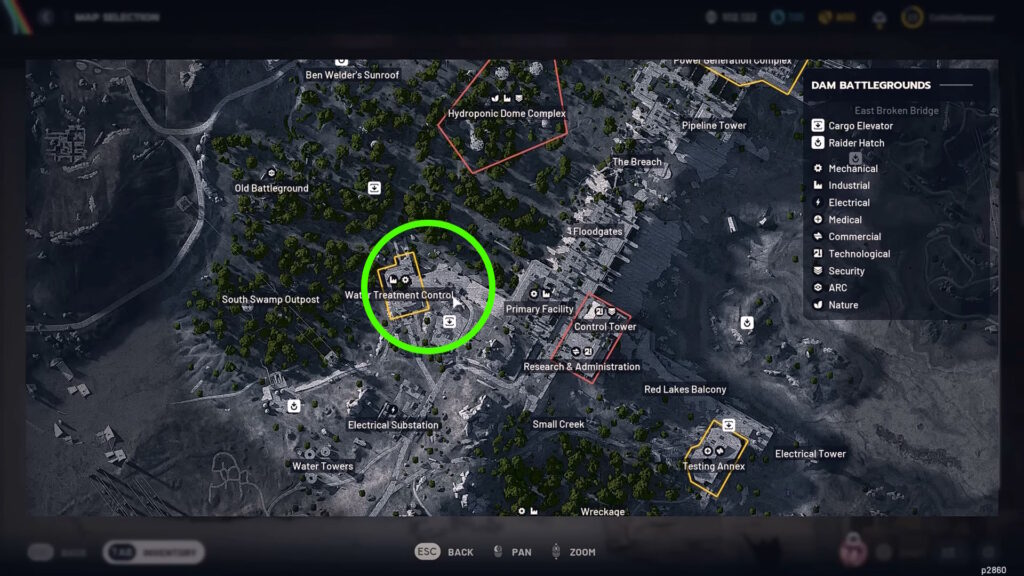
Moving on, it’s time to talk about Technological and Electrical loot, which can often be found together. For this one, we recommend the Water Treatment Control POI and the buildings east of it on the Dam Battlegrounds map.
Here’s a quick list of the loot you can find at this spot:
- Damaged Heat Sinks
- Fried Motherboards
- Power Cables
- Electrical Components
- Metal Parts
- Plastic Parts
Important ARC Parts
Last but certainly not least, it’s time to talk about materials that are exclusively obtained as drops from ARCs! While things like ARC Alloys and Wasp Drivers are plentiful, others require a more focused effort to get.
We’ve covered some of the basic ones on some of the previous farm spots, so this section will focus on key ones that aren’t found in any of the previous spots.
Rocketeer Drivers
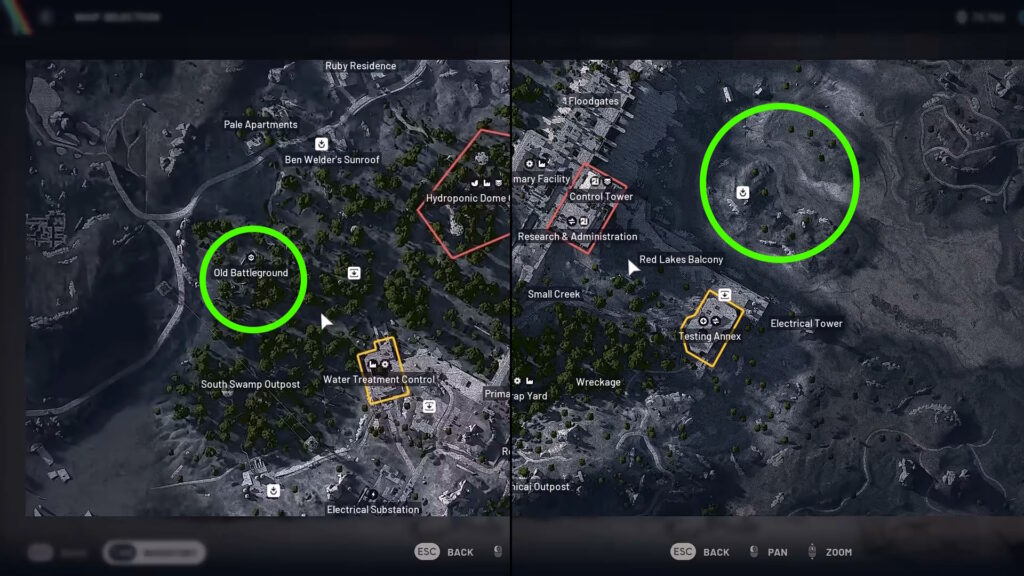
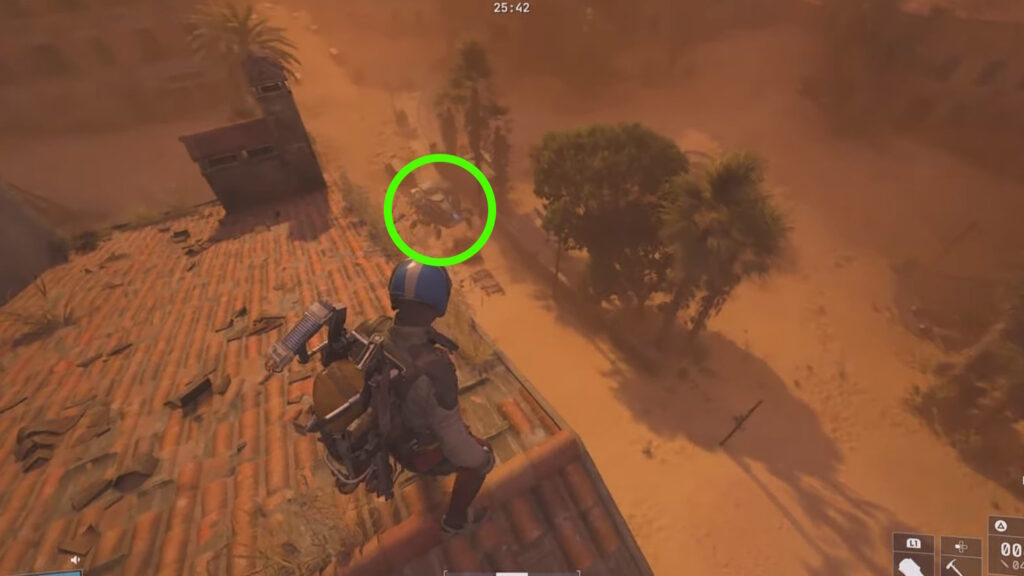
First off, Rocketeer Drivers. This is one of the easiest ones, as you can farm it without even fighting Rocketeers! Just loot the broken ARCs by the Old Battleground and Red Lakes areas in the Dam Battlegrounds map.
Similarly, sometimes there’s a Husk Graveyard event on any of the maps. Loads of broken ARCs will spawn all over the map, mostly broken Rocketeers. Keep an eye out for that!
Sentinel Firing Cores
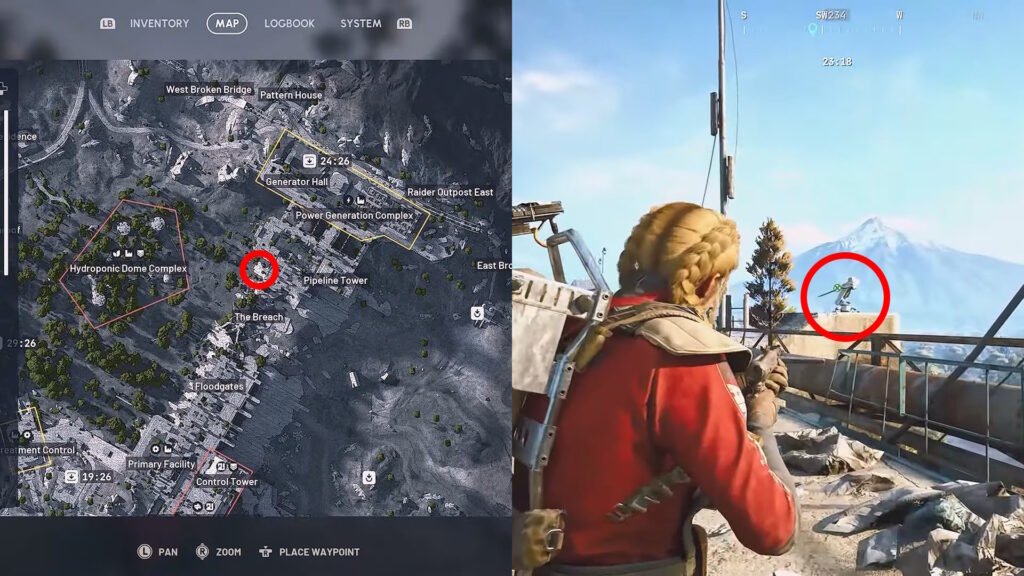
For Sentinel Firing Cores, there are two good spots on the Dam Battlegrounds Map. The first is in the northern part of the map, just a bit north of The Breach.
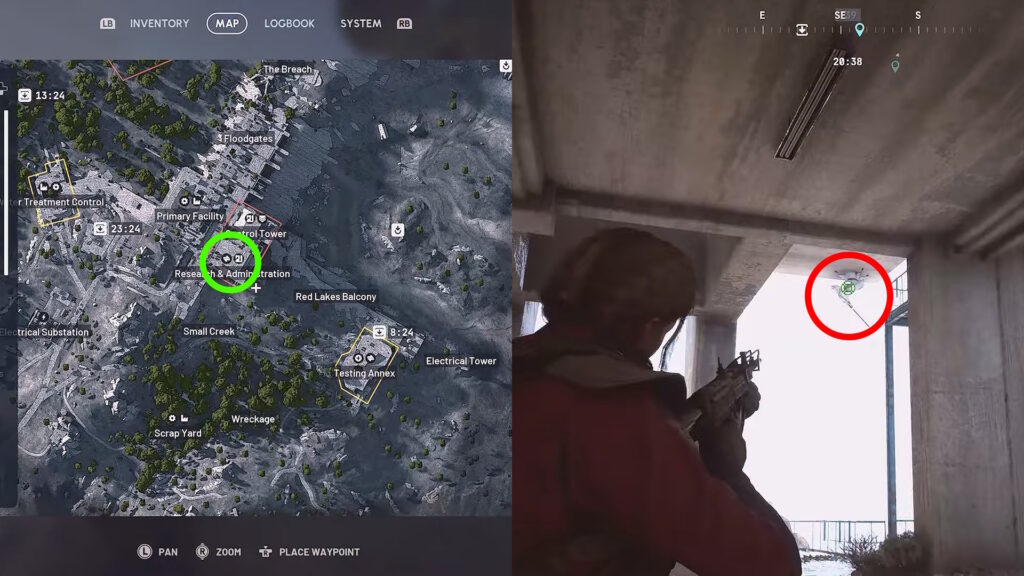
The second spot is at the Research & Administration building near the center of the map. A Sentinel can spawn near the top of that building, along the eastern stairs.
Surveyor Vault
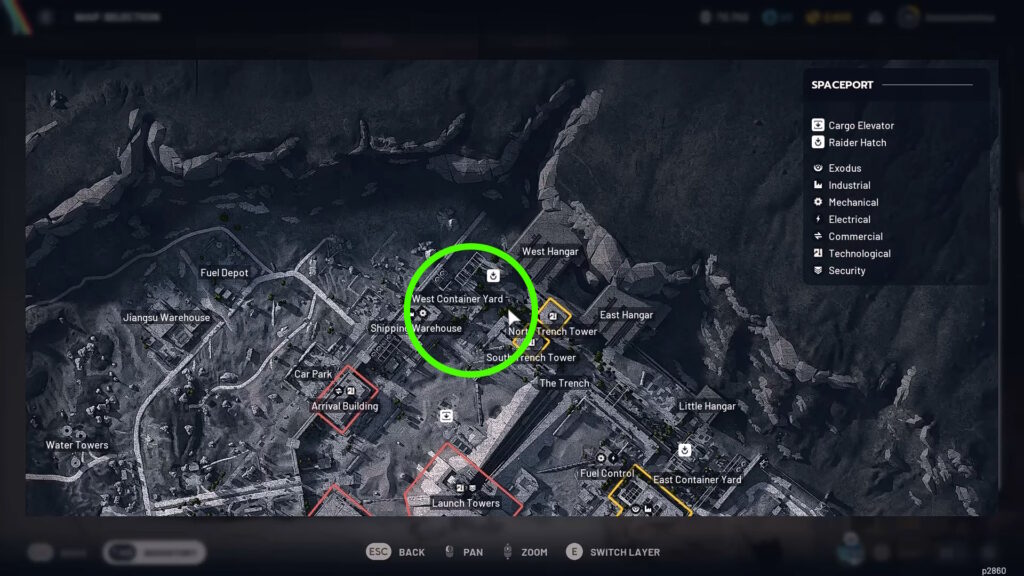
As we’ve mentioned before, this one is pretty tricky! The area around the West Container Yard in the Spaceport map seems to be a solid spot for finding Surveyors.
The thing with Surveyors is that they move around a lot. So, they are super unreliable to farm. Furthermore, they usually only even drop a single Surveyor Vault!
To help find them, look out for any blue beams of light going to the sky. These are usually shot out by Surveyors who are actively scanning their surroundings.
Leaper Pulse Unit
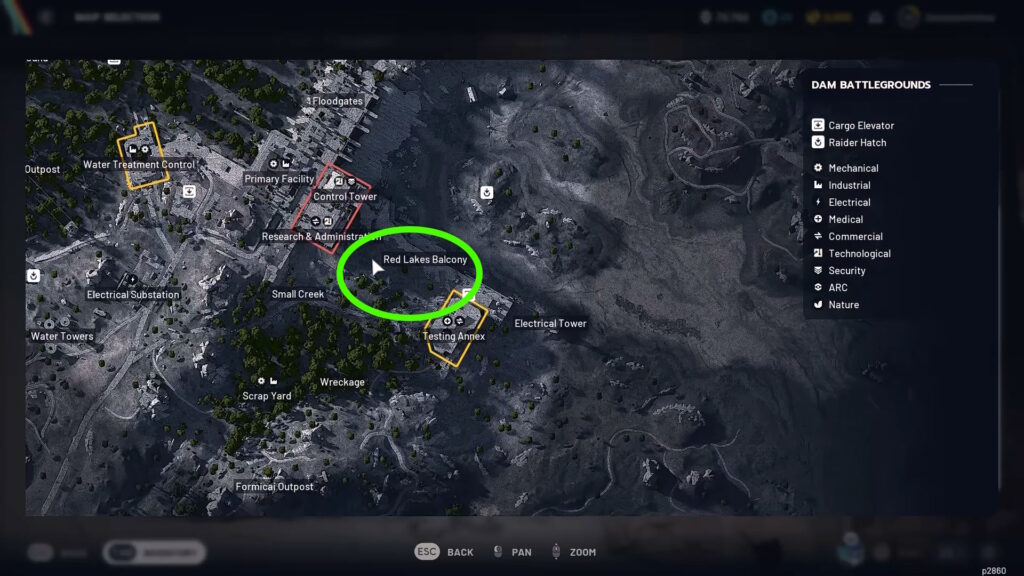
When it comes to Leapers, the best spot seems to be the Red Lakes Balcony on the Dam Battlegrounds map. You can usually find a Leaper or two patrolling the area.
The usual method to deal with it applies, of course. Focus on leading them near small buildings, then hide in the building, taking shots at the Leaper until you manage to take it down.
So, there you have it, that’s everything you’ll need! You now know what materials you need for all Workshop upgrades in ARC Raiders, what to prioritize, and spots to farm them at.