162 articles
If you want to make it out alive in ARC Raiders, you’ll need to learn how to beat every ARC type in the game.
ARCs are the dangerous robotic threat that dominates the topside in this game. You’ll frequently have to contend with them during each match. In most cases, they’re as much of a threat as other players, if not even more so!
Most ARCs follow the same general rule: armor plates absorb damage while exposed cores, joints, optics, thrusters, and glowing components take significantly more damage.
This makes heavy ammo and explosives now more important than ever in the current meta because late-game ARCs have stronger armor values than they did during earlier versions of the game.
 Hotel Panorama Puzzle Solution in ARC RaidersApr 30, 2026
 ARC Raiders: How to Find & Use Dockmaster’s DetectorApr 30, 2026
 ARC Raiders: Where to Find Turbine CompressorApr 30, 2026
In this guide, we’ll go over every type of ARC and how to fight them. We’ll go over their weaknesses, main things to look out for, and even what loot they drop!
How to Beat Every ARC in ARC Raiders
Before we go into the details for each specific ARC type, we want to give a couple of general tips for taking them on.
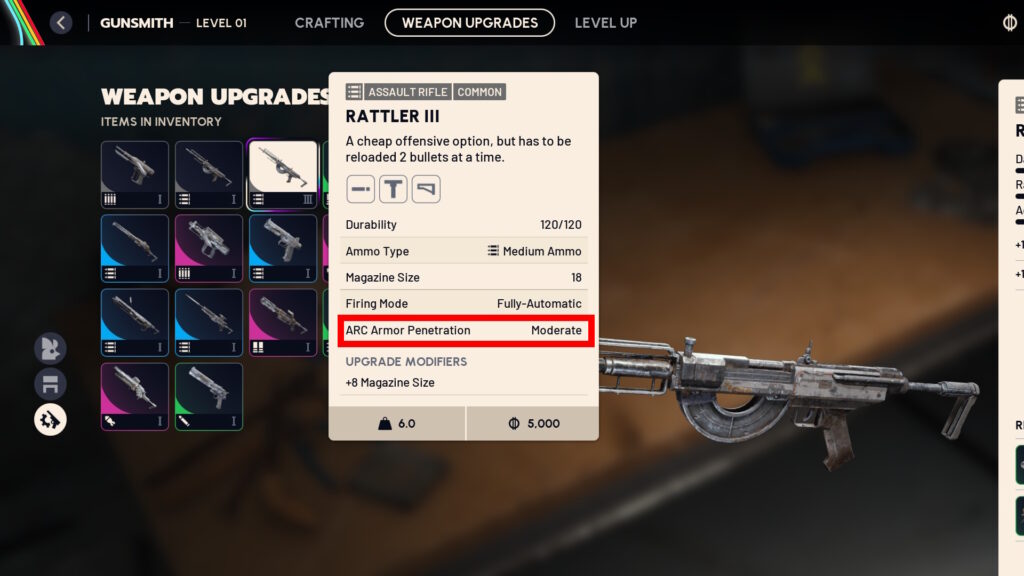
The first thing to keep in mind is your weapon of choice. Pay attention to the ARC Armor Penetration stat on your weapon. The stronger it is, the better the gun will be for dealing with ARCs!
This also essentially means that guns that are good for PvP are not necessarily good for PvE.
For example, the Tempest might be great for PvP, but it only has Moderate armor penetration. The Ferro has a Strong armor penetration rating, so it’s better against ARCs.
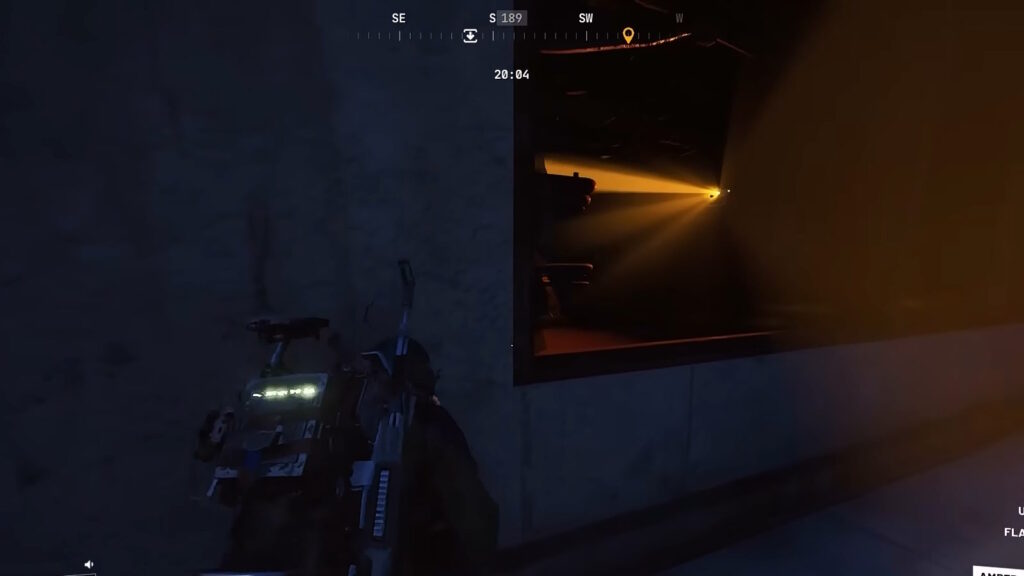
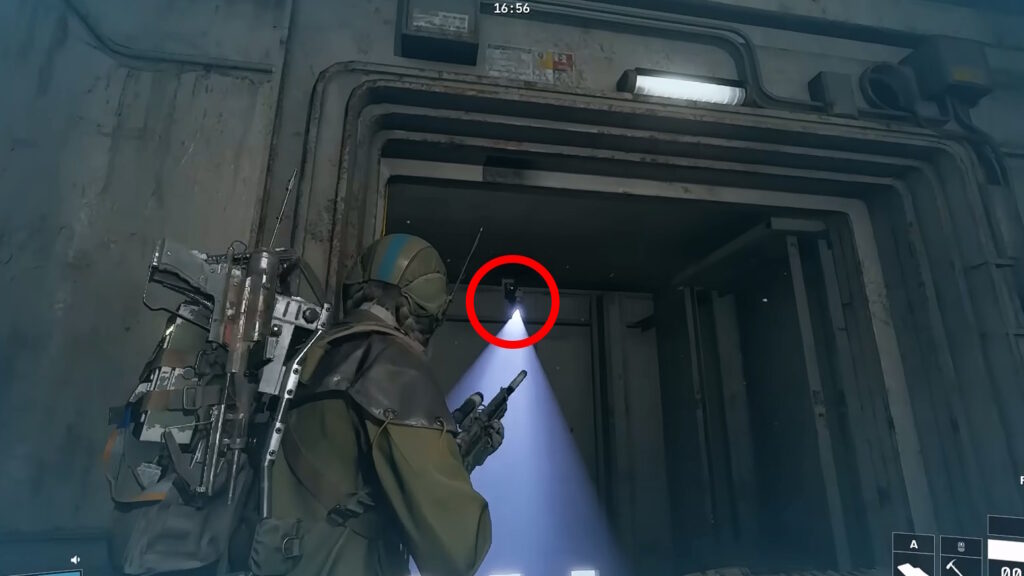
Another important thing to keep in mind is the searchlights on the ARCs. Almost every ARC has these lights in one way or another, though they’re not equally obvious on all of them. Nonetheless, these do help you spot them, especially when it’s dark.
Additionally, those search lights also help you know the ARC’s current patrolling status, as follows:
- White or Blue – Unalerted, searching for Raiders.
- Orange – Aware of nearby Raiders, but doesn’t know their position. The ARC will search for Raiders in the last place it saw or heard them.
- Red – Found Raiders and knows where they are, so it’s actively in combat mode.
That said, light ammo is effective against smaller enemies like Pops and Ticks. Medium ammo works as a balanced option, while heavy ammo is the best choice for breaking armor and exposing critical weak points.
Now, a lot of larger ARCs feature layered weak spots. By shooting their legs, armor plates, or canisters, you can expose an internal core which basically acts as their weak point.
Moreover, positioning matters just as much as weapon choice. Most ARCs are deadly in open terrain but become much easier to manage when fighting around hard cover, elevation, or tight angles.
With these things in mind, let’s go over how to deal with each one of the ARCs we know of!
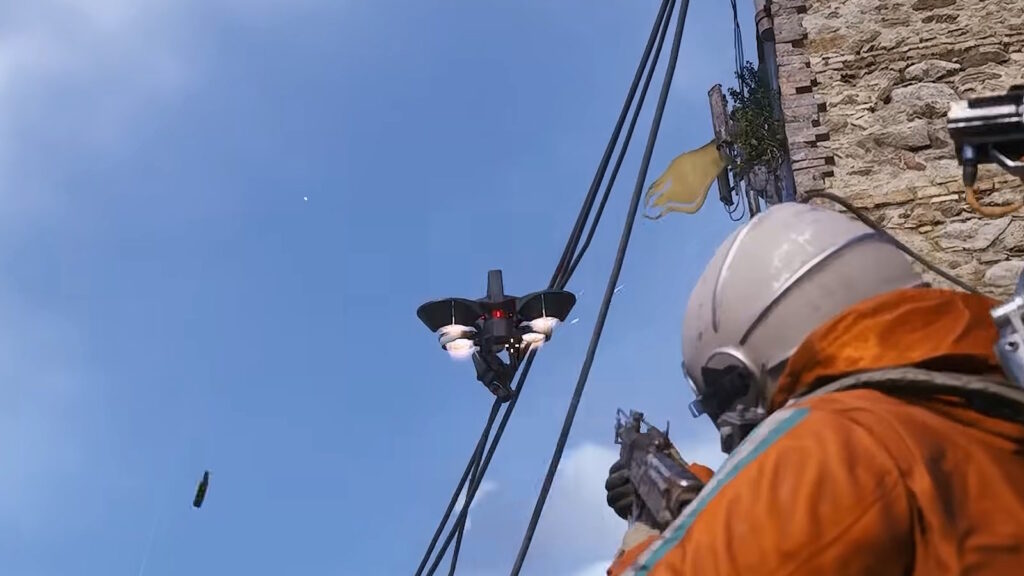
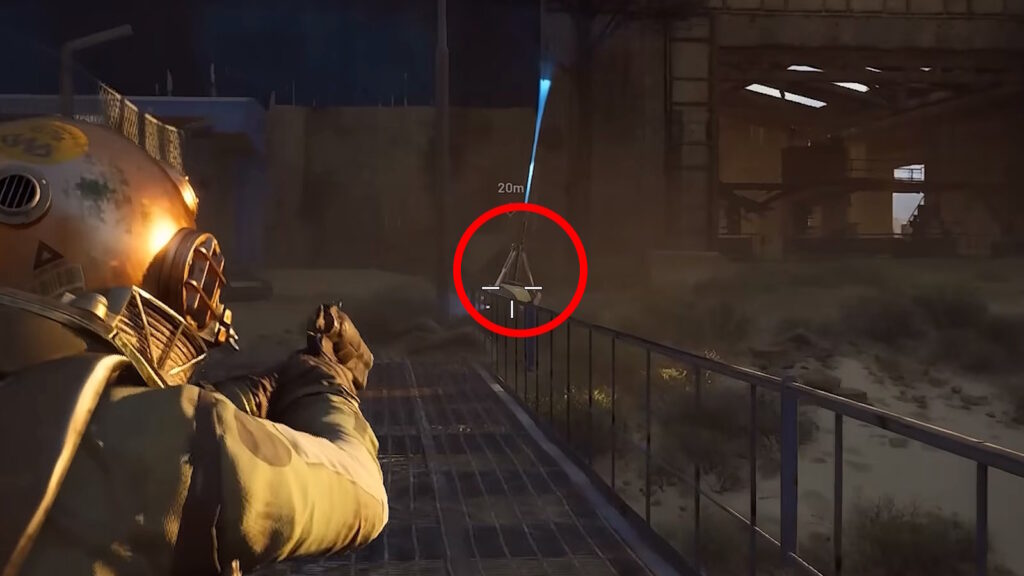
Wasp
Wasps are these fast-flying surveillance drones, and they also happen to be one of the most common ARCs. Don’t let its small size make you think that it’s not a threat, though, as they can become surprisingly annoying during gunfights.
They fly around the skies, so make sure to look up every now and then to spot them. If it’s dark out, they also have a very bright searchlight that gives away their position.
In combat, you want to try aiming for the thrusters on its corners. Destroying two thrusters will make it fall to the ground, which can directly kill it if it falls from high enough. Even if it doesn’t instantly kill it, it’ll be unable to fly and will be much easier to finish off!
To avoid its attacks, you simply need to use cover. Hide behind walls or inside buildings, staying out of its sight. Try only popping out of cover to shoot at it between its volleys.
Since they have unpredictable movement patterns, you’re better off using burst fire weapons than slow precision weapons.
When you take it down, you can claim the following loot from it:
- ARC Alloy
- ARC Powercell
- Wasp Driver
- Light Ammo
- 100 XP (Destroy), 200 XP (Loot)
Since they regularly drop Powercells and Driver components, they make for good farming targets if you’re low on upgrade and crafting materials.
Hornet
Hornets are also armed flying drones just like Wasps. However, think of them as the more dangerous version as they deal electrical damage and can apply constant pressure from a decent range.
You can often find them alongside Wasps. That said, Hornets are a tad bigger and better armored, but also a tad slower.
They fire slow-moving electric darts that can temporarily stun you upon contact. This doesn’t do much damage on its own, but it can give other ARCs or Raiders an opening to finish you off!
Dealing with one is more or less the same as dealing with a Wasp. Use buildings and any cover you can to hide from its shots. Pop out between its shots to retaliate and focus on breaking the unarmored thrusters on its backside to get it down from the sky!
On top of that, it’s also a good idea to get far away from Hornets. Their electric darts are relatively slow, so more distance will make them easier to dodge.
When it comes to loot, here’s what you can get from Hornets:
- ARC Alloy
- ARC Powercell
- Hornet Driver
- Simple Gun Parts
- Medium Ammo
- 150 XP (Destroy), 250 XP (Loot)
Make sure to stay as mobile as possible when dealing with Hornets. You’ll also want to use medium and heavy weapons to quickly finish them off.
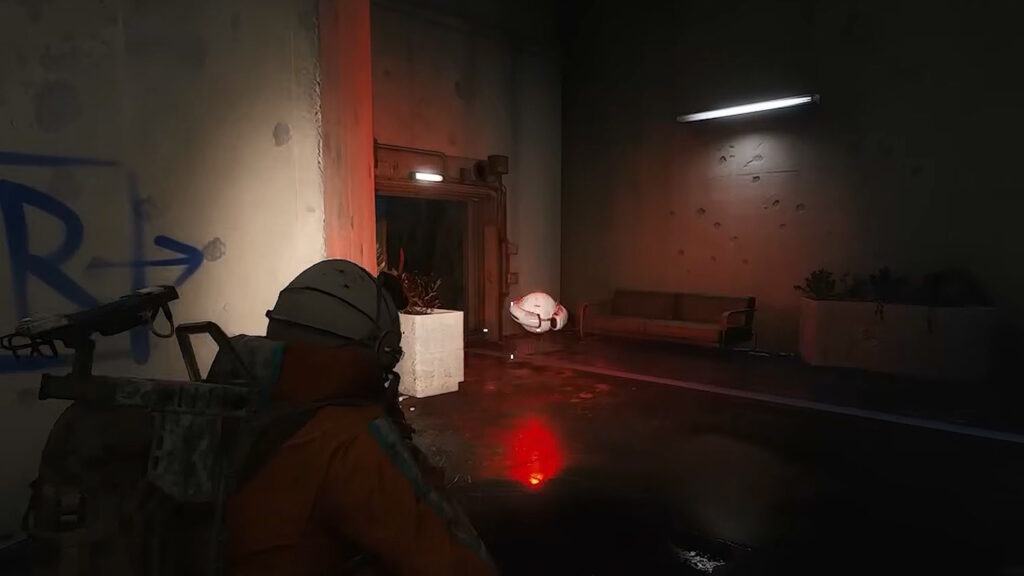
Snitch

Another drone-like ARC, except that it has no combat abilities at all. You can differentiate the Snitch from Hornets and Wasps due to its dome-shaped build.
The Snitch has no weapons on its own. Instead, it merely acts as a spotter. As its name suggests, the Snitch flies around the sky, looking for Raiders, and alerting nearby ARCs and revealing their positions upon spotting them.
When you spot one, eliminate it immediately whenever possible. You want to hide from its spotlight while shooting it down. Luckily, the Snitch is really easy to take down, at least when it’s on its own.
Loot-wise, here are its drops:
- ARC Alloy
- ARC Powercell
- Sensors
- Snitch Scanner
- 100 XP (Destroy), 200 XP (Loot)
Rocketeer

Rocketeers are considered the most dangerous of all the drone ARCs, having caused the most Raider deaths back in the Server Slam! They’re large and decently-armored, not to mention they use a rocket launcher to attack.
Their long-range explosive attacks can be extremely punishing if you remain stationary.
If you are in combat with a Rocketeer, I highly recommend finding cover as soon as possible. Its rockets have a very large blast radius which can make it nearly impossible to run away from on reaction.
Instead, you want to play around cover. You won’t take damage from the rocket blasts if they hit the cover you’re hiding behind! Also, keep in mind that it fires two rockets at a time.
Do be careful with buildings themselves, though. Buildings with lots of openings can be death traps, as the rockets can fly into the openings, leaving you without a place to run.
Back then, the strategy was to target the thrusters first. However, focusing on the armor flap above the eye is now the more effective option. Destroy that section, and you’ll reveal an internal core that takes massive damage when hit.
The only problem is that the Rocketeer is pretty resilient. For this, I highly recommend bringing an ample supply of heavy ammo and a weapon with high ARC Armor Penetration before you even think of taking it on!
If you manage to successfully take down a Rocketeer, you’ll be able to get the following loot:
- ARC Alloy
- ARC Powercell
- ARC Motion Core
- ARC Circuitry
- Advanced ARC Powercell
- Heavy Gun Parts
- Rocketeer Driver
- Heavy Ammo
- 500 XP (Destroy), 200 (Loot Per Part)
Tick

The Tick is a speedy, six-legged ARC that is almost exclusively found inside large buildings. It normally attacks Raiders by jumping at their faces and grabbing onto them.
If you get grabbed by a Tick, you need to hold the interact button to fight it off and pull it away from your face. You take light damage while grabbed, of course, but you’re also completely unable to act. This can be extremely dangerous if there are other ARCs or players nearby!
The best way to deal with Ticks is to pay attention to the sounds they make. They emit a high-pitched screech once they spot you, so use that as your cue to look around for them.
Thankfully, Ticks are one of the weakest enemies in the game.Their weak point is, quite frankly, their whole body! Moreover, even a single shot from any weapon would take them out.
However, they can be dangerous in groups as they can alert nearby ARCs quickly. By the way, here’s what you can get when looting them:
- ARC Alloy
- Tick Pod
- 50 XP (Destroy), 100 XP (Loot)
Pop
Compared to most ARCS, Pops almost have zero protection. This means you can take them out quickly, just like Ticks.
However, it’s worth noting that Pops are suicide bombers! They quickly rush towards Raiders they spot and detonate themselves, dealing massive damage with the resulting explosion.
To deal with Pops, you mainly want to run away from them. Make some distance before firing at them, as they’ll still detonate when shot. However, they do only take a couple of shots at most to destroy.
When running, pay attention to the red lights on the interface, as they let you know where the Pop is coming from. Also, they can’t jump over obstacles. So, vaulting over objects is your best bet to make distance.
As much as possible, eliminate them immediately before you focus on larger nearby threats. This is because ignoring them will only cause you to take unnecessary damage.
When it comes to loot, here’s what Pops will give you:
- ARC Alloy
- ARC Powercell
- ARC Thermo Lining
- Crude Explosives
- Pop Trigger
- 50 XP (Destroy), 100 XP (Loot)
Fireball
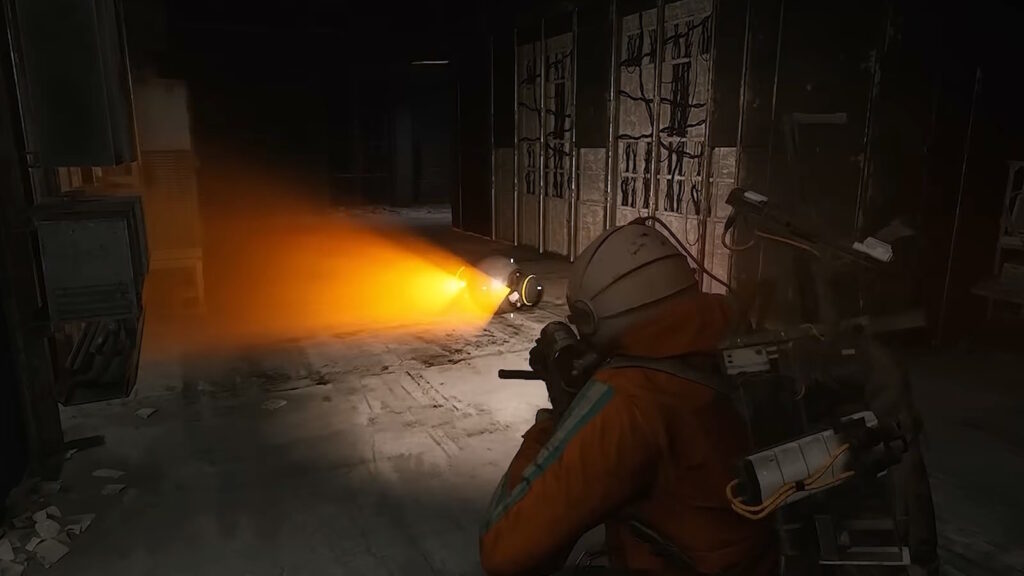
Similar to Pops, these are fairly small ball-shaped ARCs that you commonly find inside larger buildings. You can tell them apart from Pops by the lack of a ring and their darker paint job.
When a Fireball spots a Raider, it’ll instantly try to rush to them to use a flamethrower. The flamethrower doesn’t have much range, but it can set Raiders and the environment on fire. Avoid the fire, as it can deal a lot of damage quickly!
Many players still don’t realize that the exposed front opening during flame attacks is their actual weak spot. Timing shots into that opening can destroy them extremely quickly, even with weaker weapons.
Here’s the list of the Fireball’s loot:
- ARC Alloy
- ARC Powercell
- Crude Explosives
- Fireball Burner
- 100 XP (Destroy), 100 XP (Loot)
ARC Surveyor
These are large balls that you can usually see rolling all over the place in exterior areas. However, they’re not really a combatant, as their name indicates.
If you spot a Surveyor and fire at it, it’ll simply try to roll away to escape. However, it will ram any Raiders that get in its way when escaping, which can deal a pretty decent amount of damage.
To take down a Surveyor, wait for it to scan its surroundings. It’ll expose its core when doing so, allowing you to deal massive damage! Otherwise, it has fairly strong armor on its exterior.
You can get the following loot from these skittish ARCs:
- ARC Alloy
- ARC Powercell
- ARC Motion Core
- ARC Circuitry
- Advanced ARC Powercell
- Sensors
- Surveyor Vault
- 200 XP (Destroy), 300 XP (Loot Core), 100 XP (Loot Part)
Turret
Next are the simple Turrets. These static ARCs can be found inside larger buildings, appearing as a sort of surveillance camera with a mounted gun.
Once a Turret spots you, it will start firing at you for a few seconds. Get into cover and wait it out, then pop back out to return fire while it reloads. It has no weak points, but it’s also not particularly resilient!
Fortunately, most weapons can destroy them quickly. My personal recommendation when taking them out is to use cover to peek and eliminate them before engaging larger ARCs nearby.
Here’s what you can loot from these Turrets:
- ARC Alloy
- Light Ammo
- Simple Gun Parts
- 100 XP (Destroy), 200 XP (Loot)
Sentinel
The Turrets’ more outgoing sibling, you can find Sentinels perched atop buildings’ exteriors. Sentinels give away their location thanks to their red lasers, which let you know where they’re aiming.
To take them out, look for cover near wherever the Sentinel is aiming. Get out of cover to bait their single shot, then pop out to return fire. Rinse and repeat until you manage to take it out!
Lastly, as usual, here’s the Sentinel’s loot table:
- ARC Alloy
- Advanced ARC Powercell
- ARC Coolant
- ARC Synthetic Resin
- ARC Thermo Lining
- ARC Motion Core
- Sentinel Firing Core
- Heavy Ammo
- 200 XP (Destroy), 300 XP (Loot)
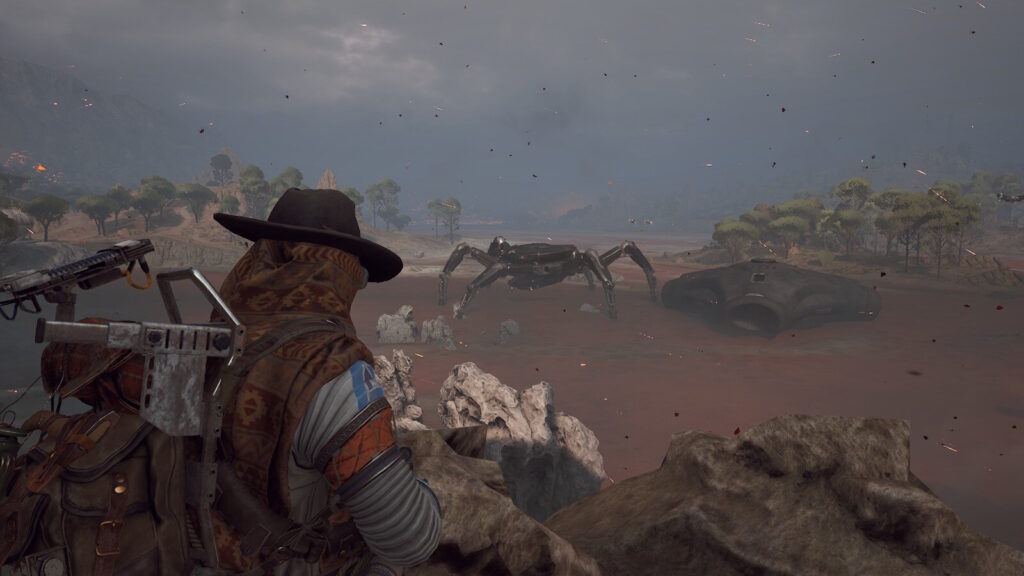
Leaper
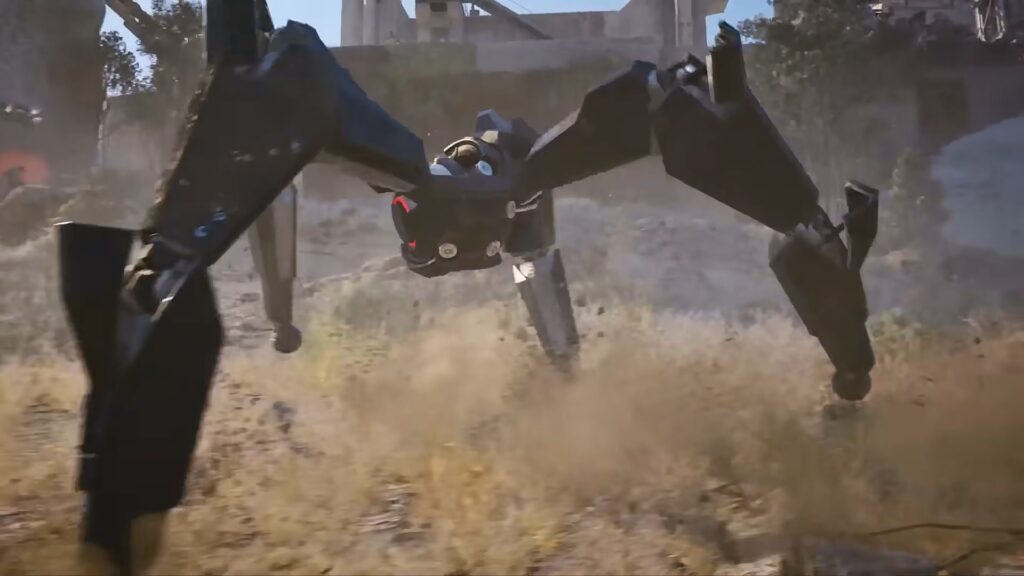
Leapers are still one of the most dangerous and feared enemies in ARC Raiders.
It’s a huge arachnid ARC, and as its name implies, it attacks by leaping directly at a Raider. If it manages to land on the Raider, it will smash them and deal a massive amount of damage.
After the Leaper lands from its jump, it will usually surround itself in shockwaves. These shockwaves will shred through Raiders’ shields and health, so they’re as dangerous as the leap itself!
When fighting a Leaper, we highly recommend looking for small buildings to hide in. A common mistake a lot of players make is fighting one in open areas. Always lure it into buildings that are too small for it to enter but still allow you to see outside.
That said, a Leaper’s eye and leg joints are its main weak spots. You can focus on breaking the leg armor first to slow it significantly and expose the vulnerable sections underneath.
For this one, I recommend using fire and explosives to deal with Leapers. Stun tools like Showstoppers are also useful for giving you a window to deal a lot of damage.
Leapers drop some of the best crafting materials in the game. If you manage to take one down, you can get your hands on the following:
- ARC Alloy
- ARC Flex Rubber
- ARC Performance Steel
- Advanced ARC Powercell
- Explosive Compound
- Mechanical Components
- Leaper Pulse Unit
- 500 XP (Destroy), 600 XP (Loot Core), 200 XP (Loot Parts)
Bastion

The Bastion is a slow walking fortress with thick armor. However, don’t underestimate it because it’s slow, as it’s extremely resilient and has devastating firepower.
The Bastion mainly attacks by using its mounted gatling gun. Whenever it has a Raider in its sights, it will fire its gatling gun at their position for about 3 seconds straight.
After it fires its volley, it has to stop for a brief moment to cool down.
Back then, the strategy was to target the yellow kneecaps on all of its legs. Breaking them will impair its mobility while also exposing the unarmored inner core, which you can shoot for more damage.
However, the better option is to shoot the yellow cylinder on its back to reveal the internal core. Destroying that will instantly destroy the Bastion!
Don’t try to brute force your way into the front of the Bastion, as you’ll only end up wasting ammo. Instead, have a teammate bait its attacks while you hit its weak points at the back.
Here are the items you can get by looting the Bastion and its parts:
- ARC Alloy
- ARC Powercell
- ARC Motion Core
- ARC Circuitry
- Advanced ARC Powercell
- Mechanical Components
- Medium Gun Parts
- Bastion Cell
- Medium Ammo
- 500 XP (Destroy), 500 XP (Loot Per Part)
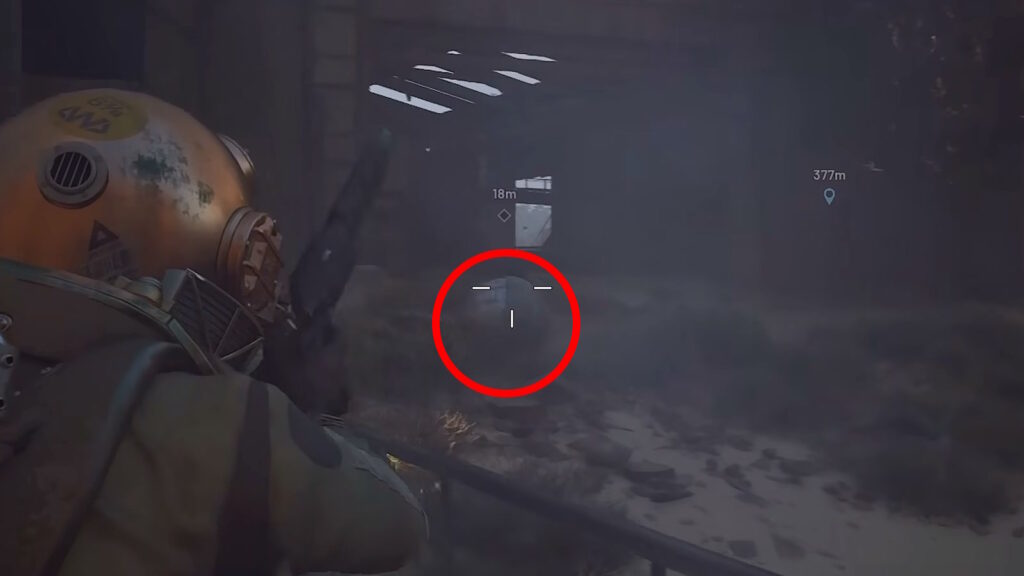
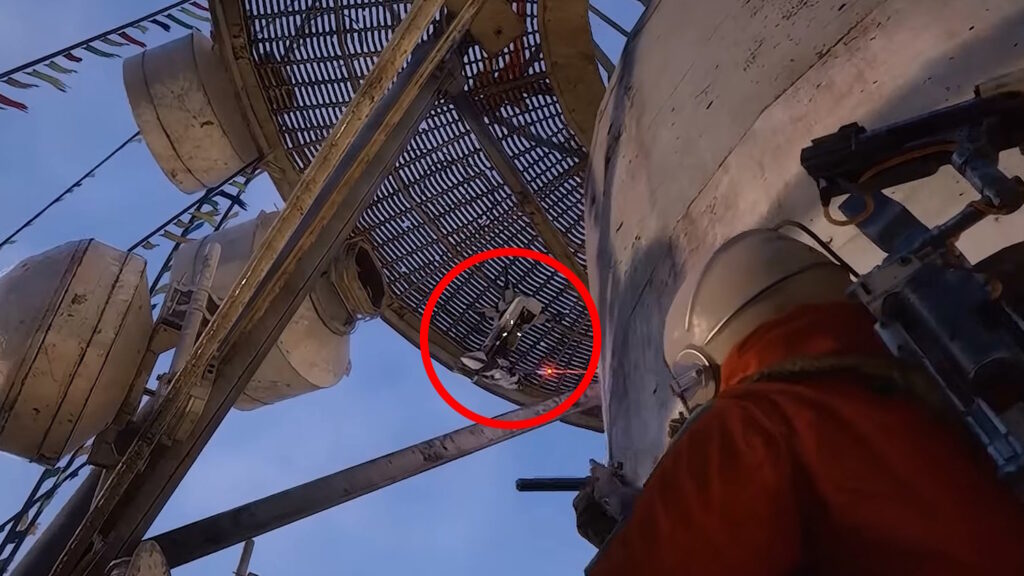
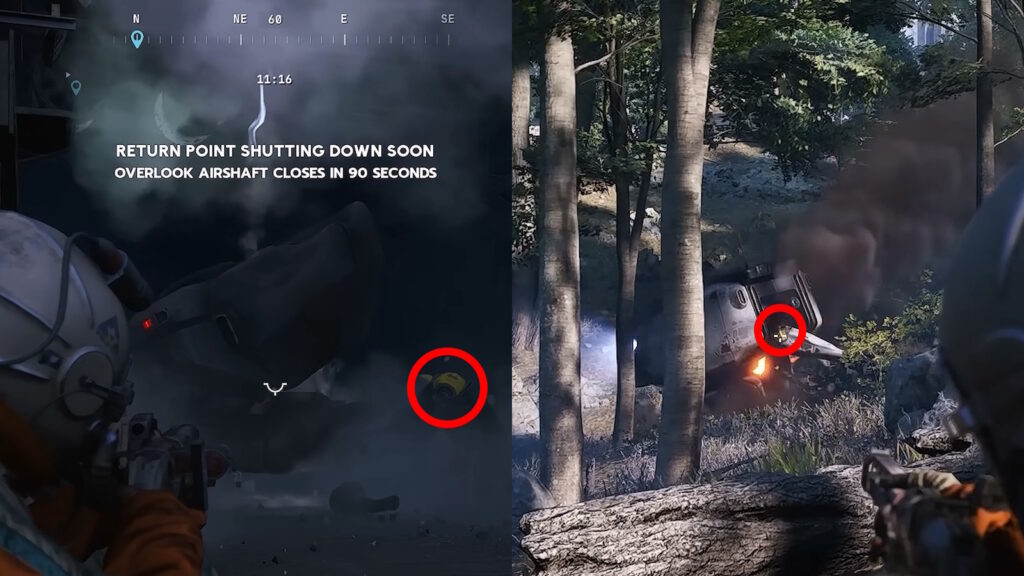
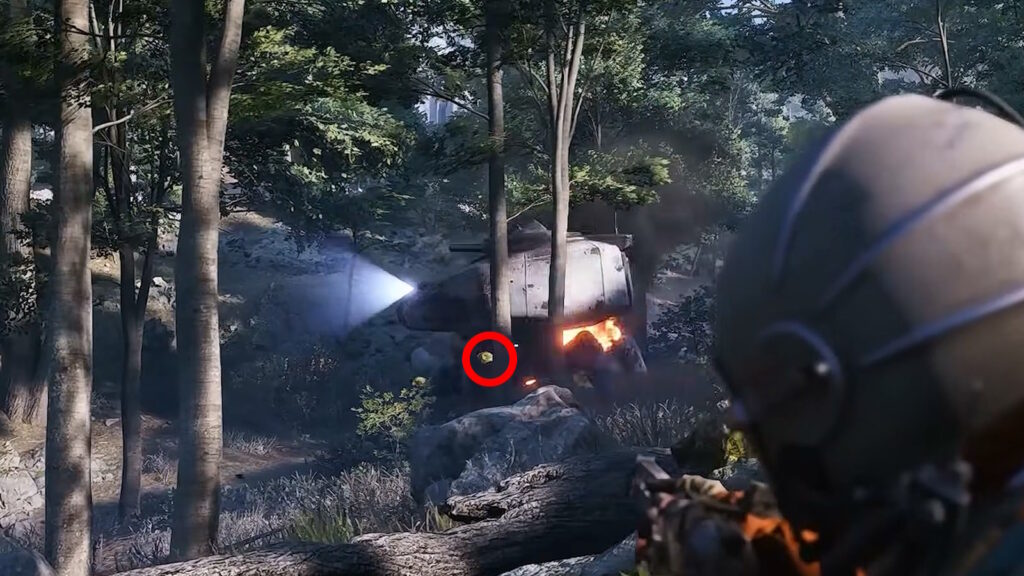
Bombardier

Just like the Bastion, the Bombardier is a slow and artillery-focused ARC. Instead of a gatling gun, it uses a mortar to decimate Raiders it spots.
When you encounter a Bombardier, your best bet is to run under a roof of some sort. That’s because the Bombardier’s shots must first go up to the sky before falling, so you can avoid them by staying under cover.
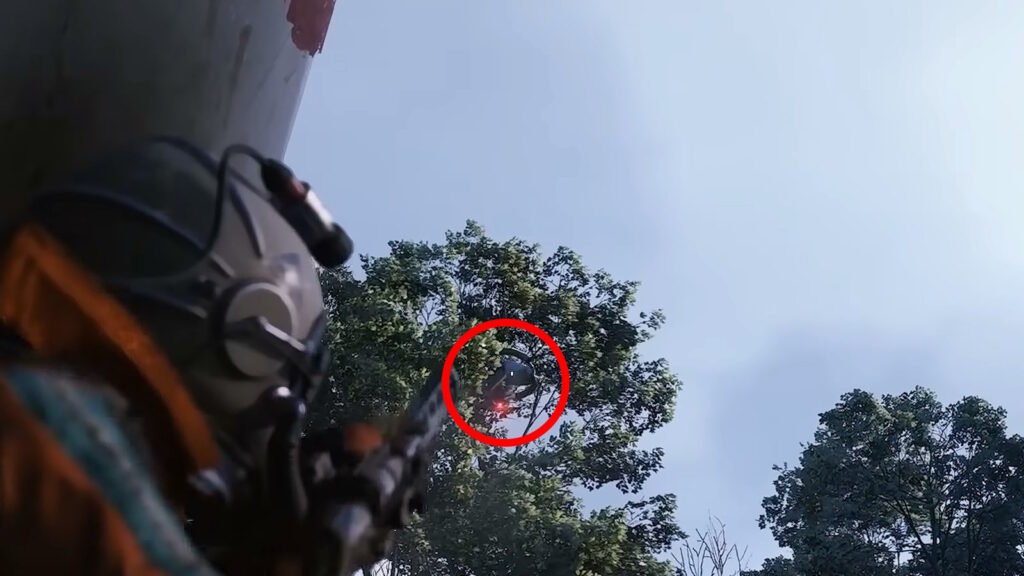
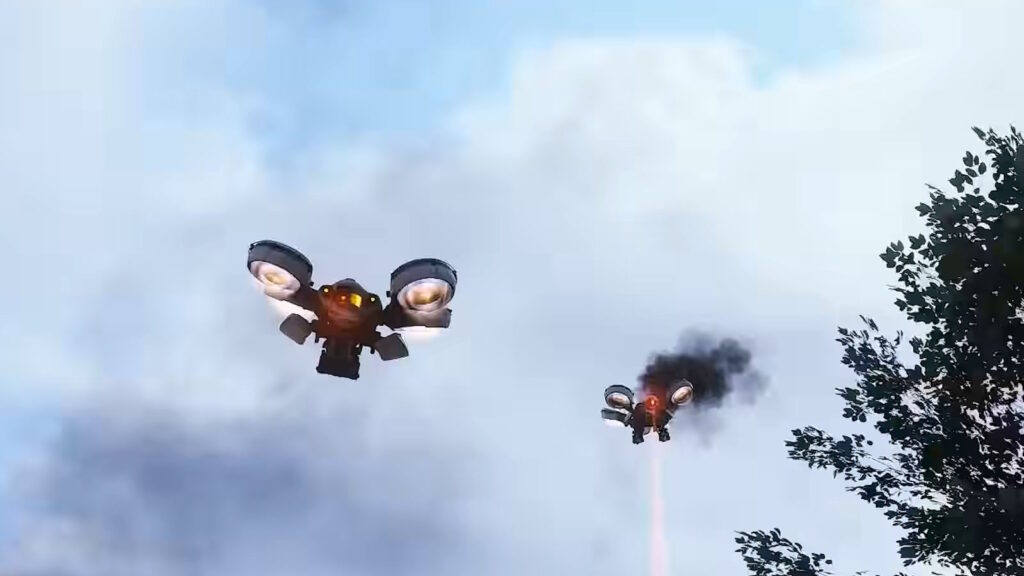
Also note, the Bombardier is accompanied by spotter drones, like the one shown above. These help the Bombardier aim its shots, so taking them down should be your first priority.
That said, the strategy for the Bastion also applies to the Bombardier. Simply shoot the yellow kneecaps on its legs or the yellow container in its back to expose its internal core.
When it comes to loot, there’s a lot you can get from the Bombardier and its parts:
- ARC Alloy
- ARC Powercell
- ARC Performance Steel
- Advanced ARC Powercell
- Mechanical Components
- Medium Gun Parts
- Bombardier Cell
- Launcher Ammo
- 500 XP (Destroy), 500 XP (Loot Per Part)
Shredder
The Shredder is a new high-threat ARC variant introduced in later updates.
It’s a floating enemy that specializes in close-range burst damage and area denial. To take it down, you have to focus on its turbine and exposed propulsion system which are its primary weak points.
I also highly recommend using medium or heavy weapons against them. Explosives also work extremely well because it tends to hover predictably during attack animations.
Once you take down a Shredder, you can obtain valuable mechanical parts, shotgun ammo, and specialized components from its loot.
The Queen

The last on this list is The Queen, which is no doubt the strongest enemy in ARC Raiders. In fact, I won’t even advise you to fight it, unless you have a squad specifically designed to take it down.
If you do insist on fighting her, make sure not to do this alone! The Queen is extremely armored and will require a squad of Raiders working together to take her down.
Truthfully, there have been very, very few successful attempts against The Queen as of this writing. Even in the Technical Tests and Server Slam, the vast majority of attempts ended with The Queen decimating every Raider!
When fighting The Queen, make sure to target the leg joints early on. The moment its armor breaks, you’ll then see yellow joints and internal cores that you can target to deal massive damage.
During laser attacks, the top section also opens briefly for critical damage opportunities.
As mentioned, this fight is designed for squads and heavy weapon usage. Don’t try to solo The Queen without high-end gear, as not only is it extremely risky, but it also requires a lot of resource investment. Explosives, armor-piercing rounds, and coordinated positioning are essential.
That aside, The Queen is also usually surrounded by other ARCs, mainly Rocketeers. Taking those out should be a high priority, as they can easily take you down as you try to deal with The Queen’s vast array of attacks.
Of course, its loot pool remains one of the best in the game. If you manage to take it down, you’ll be treating yourself to high-tier crafting resources and other items such as:
- ARC Alloy
- Advanced ARC Powercell
- ARC Motion Core
- ARC Circuitry
- ARC Coolant
- ARC Flex Rubber
- ARC Thermo Lining
- ARC Synthetic Resin
- ARC Performance Steel
- Advanced Mechanical Components
- Advanced Electrical Components
- Magnetic Accelerator
- Queen Reactor
- 1000 XP (Destroy), 1000 XP (Loot Core), 500 XP (Loot Part)
ARC Loot Explained
Smaller ARCs tend to provide basic materials like ARC Alloy, Powercells, ammo, and simple crafting components.
On the other hand, larger ARCs offer valuable loot. Enemies like Leapers, Rocketeers, Bastions, and The Queen can drop advanced crafting resources that are required for late-game progression.
It’s worth noting that not every fight in the game is worth taking. You have to evaluate the risk, nearby player activity, and extraction distance first before you commit your resources to taking down certain ARCs. Learning when to fight is just as important as learning how to fight.
And that’s the end of our guide. Now, you should know how to beat every ARC in ARC Raiders! We hope this helps you face off against the robotic threat outside of Speranza.
Make sure that ARCs and other Raiders are your only threat! Check out our optimized settings guideso that you don’t have to fight against bad performance too.