 1 articles
Solo Leveling: Arise Overdrive is quite an involved game with lots of various systems, which can be daunting for anyone starting without a beginner’s guide!
The game has a somewhat unique and grindy progression system, for one. It fits the manhwa it’s based on, but it can throw you off if you’re just planning to do the main story. Then there’s the unique way in which allies are handled, or how its class system works, and more.
In this beginner’s guide, we’ll do our best to help you have a firm grasp on all of these basics!
Beginner’s Guide | Solo Leveling: Arise Overdrive
Picking Your Skill Tree and Playstyle
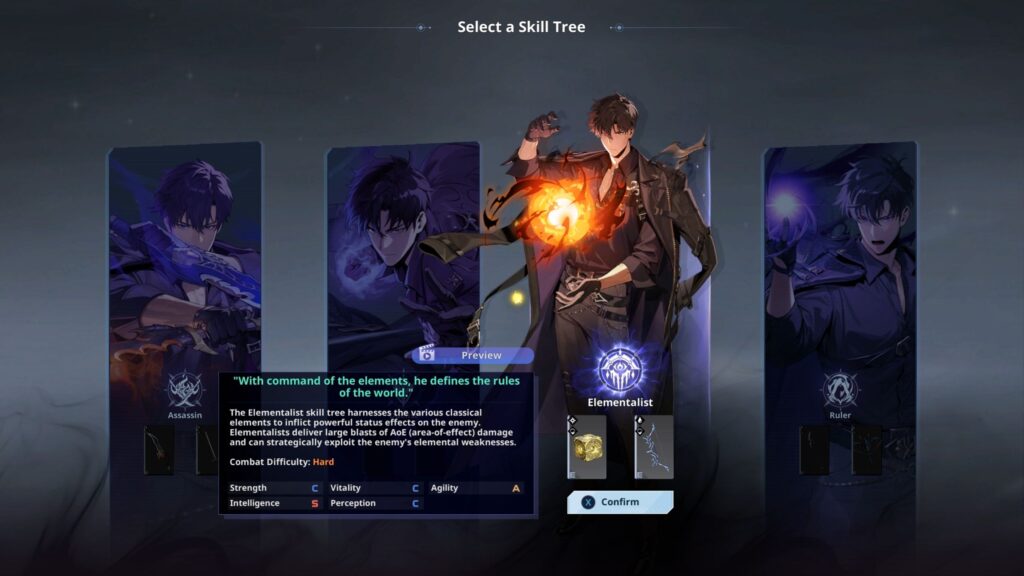
As soon as you start the game, you’ll get to pick from 1 of 4 playable classes for Sung Jinwoo to use. Each one of them offers a different approach to combat, as follows:
- Assassin – A speedy offensive class that excels in agility. Great for ambushing foes and overwhelming them with a barrage of attacks, but its low survivability can be tough to deal with.
- Duelist – The most straightforward class, great for anyone who just wants to charge in and fight foes straight on. Fairly tanky and outputs great damage, which makes it easy to play if you don’t mind its simplicity.
- Elementalist – Master the classical elements to exploit your enemy’s weaknesses, doing great area-of-effect (AoE) damage and inflicting unique statuses. Requires you to be on point with knowing enemies’ weaknesses.
- Ruler – A very versatile class that focuses on dominating enemies through crowd control and AoE attacks. Doesn’t have the highest damage output, but it can easily limit foes’ abilities.
That said, do keep in mind that these are just for your starting class. They help you define what you want to start the game with, but you’re not locked into them. You can learn Skills from all classes throughout the game.
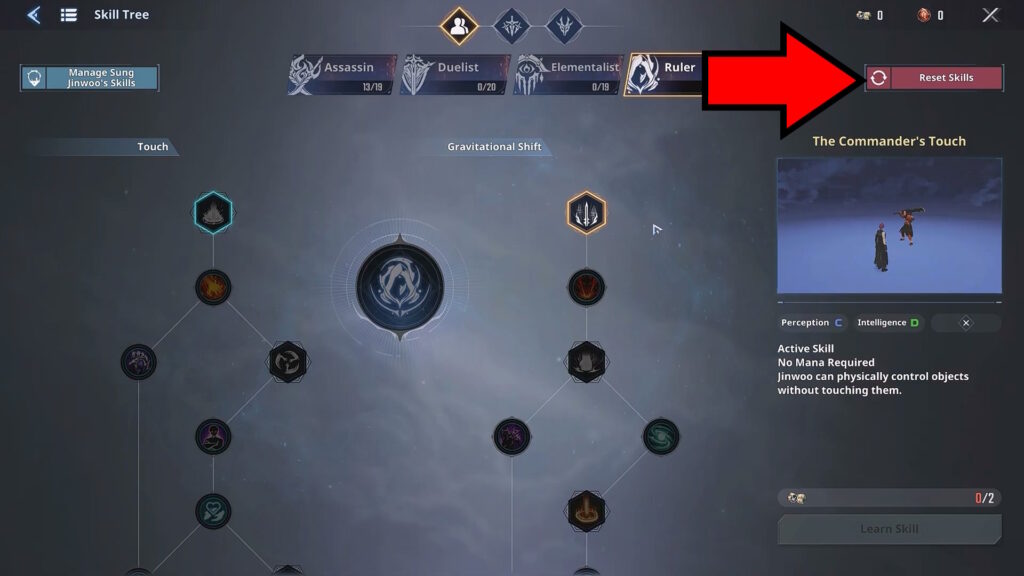
What’s more, you can also reset your Skill Trees to refund any Skill Points you’ve spent. It’s on the top right of the Skill Tree screen, as shown above.
Use that option if you ever feel like changing your playstyle, but keep in mind it requires a small Gold fee.
The Primary Stats
Each one of the 4 classes and their Skills have different Stats they specialize in. You’ll get 5 points each time you level up and you can use them to freely pick which Stats to level up.
Of course, leveling stats without knowing what they do can be tough! So, here’s a quick rundown of each stat:
- Strength – Increases your Attack and decreases the damage you take when blocking. Most important for Duelist skills.
- Vitality – Increases your HP, Defense, and how much HP you regain through potions. Most important for Duelist skills.
- Agility – Increases the damage and frequency of Critical Hits, as well as the window for Extreme Evasion perfect dodges. Most important for Assassin skills.
- Intelligence – Increases your MP and MP regeneration. Also increases your effectiveness at applying elemental status effects and their damage. Most important for Elementalist skills.
- Perception – Increases the minimum damage you can do and how long you have to perform a Deflect. Most important for Ruler skills.
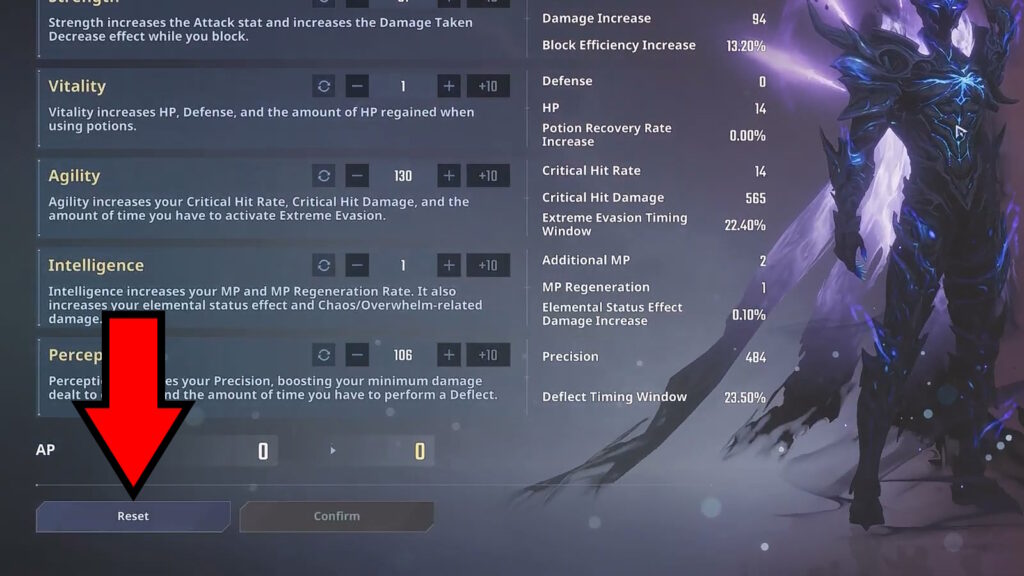
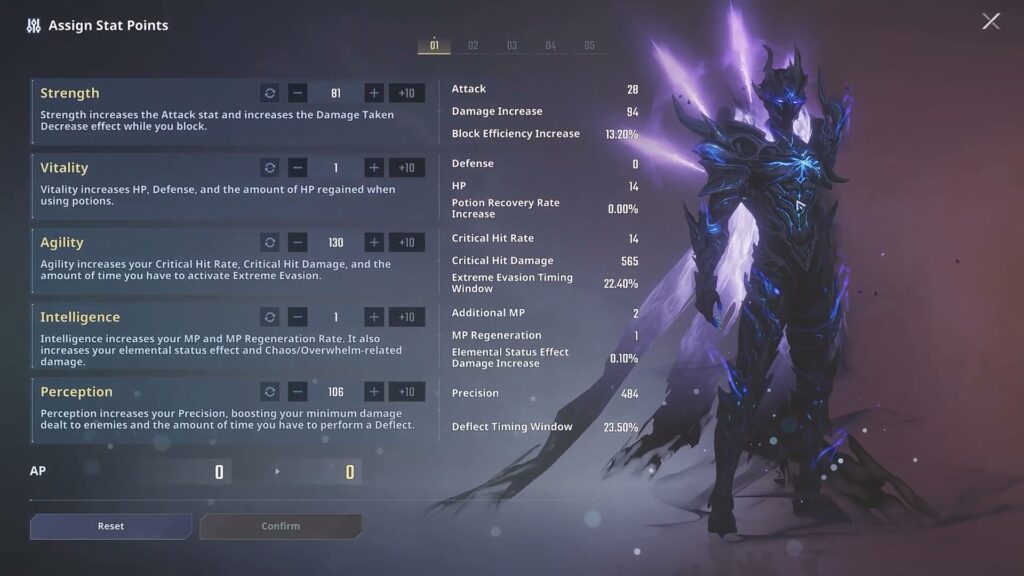
Just like with the classes and their Skill Trees, your choices here are not permanent either. You can select the Reset option in the Assign Stat Points window, shown above.
Pay a Gold fee and you’ll refund all of your Stat Points, allowing you to change your build however you please. So, just like with the classes, you can change things up whenever you wish.
Main Story and World Map | Progression Basics

Shortly after the introductory segments of the game, you’ll reach the Hunter Association Hub. From there, you can take on missions through the central panel. These missions are divided into two categories.
The first category is the Main Story. These are segmented chapters that, as their name says, show you the main story of Solo Leveling. However, the difficulty ramps up quickly here, forcing you to get stronger!
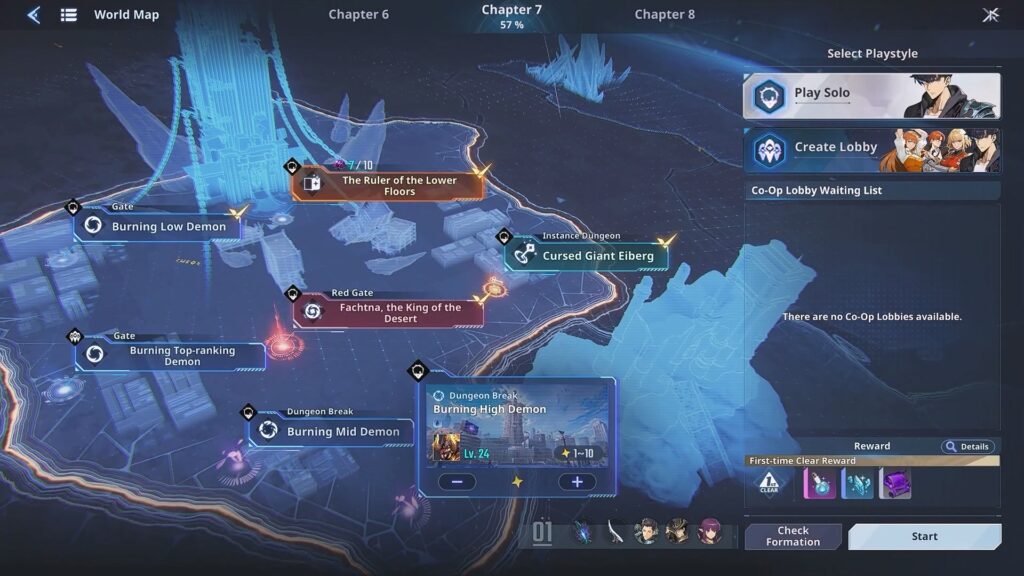
That’s when the World Map comes in. This is a mode where you can tackle side missions which unlock as you progress the Main Story. These missions are your main source of income and EXP.
What’s more, you can change the difficulty of each World Map mission from 1 to 10. You’ll get some extra goodies as a First Clear Reward on each difficulty, so try tackling as many as you can.

As an extra tip here, don’t forget to check Lee Roah’s Special Cafe next to the mission terminal. Her drinks give you various buffs, which can help you overcome challenges beyond your level.
Recruiting Hunters

Some missions and content in this game will require you to have other Hunters with you. These extra characters will provide you with various buffs, but you’ll need to recruit them first!
To recruit Hunters, talk to Lim Hajin next to the central terminal at the Hunter Association Hub and select Hunter Recruitment. Do note, this requires a Hunt Coins fee.
There are no microtransactions here, however. So, to get Hunt Coins, you’ll just need to play the game. They’re given as rewards from missions.
Also note that you can only use this option every 20 minutes. You can’t just recruit Hunters non-stop, sadly.
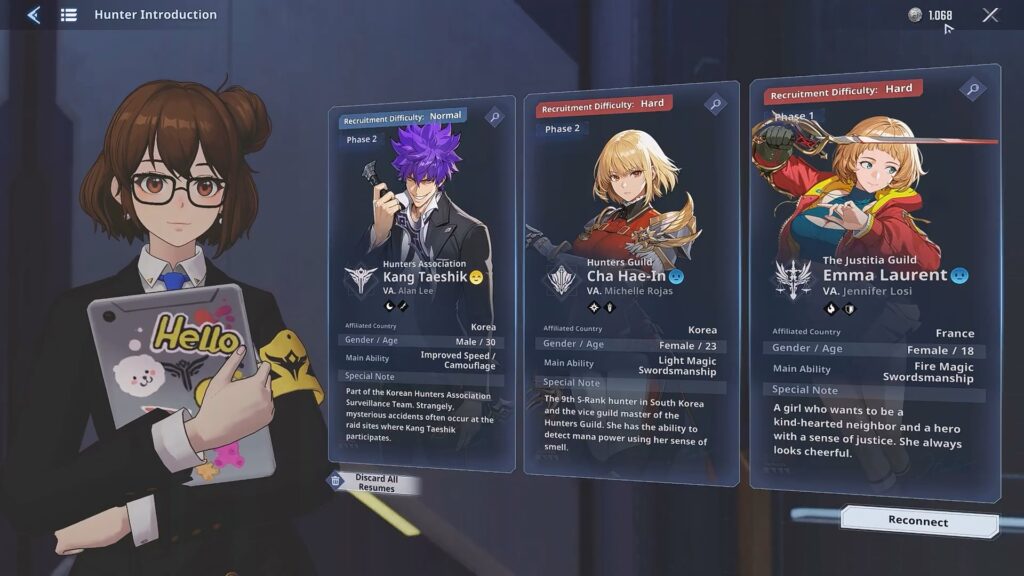
Once you connect, you’ll get a choice of 3 random Hunters. You can then either select one of these 3 Hunters or just back out if you don’t like the picks. Just remember that you won’t get a refund on that initial fee, sadly.
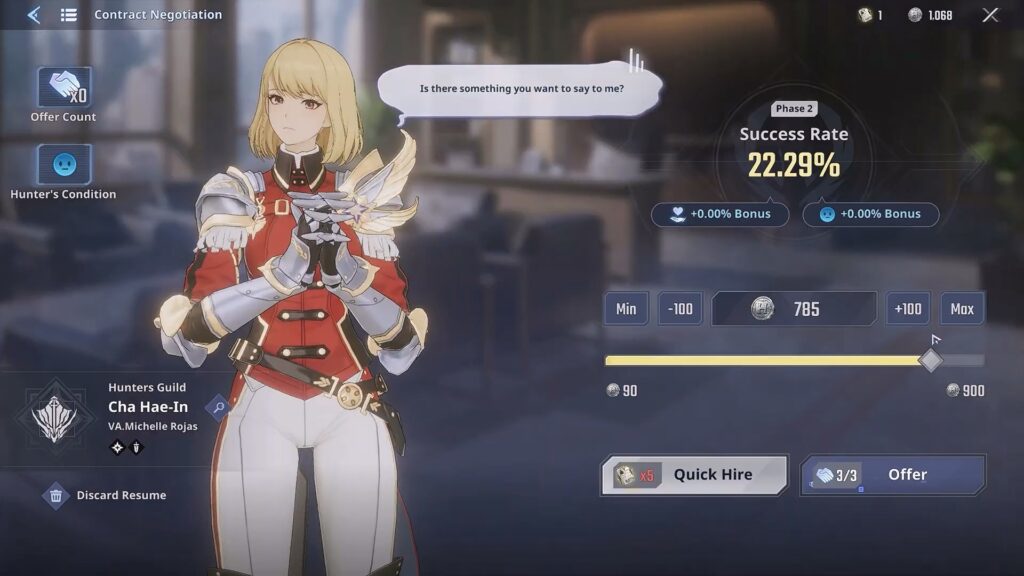
When you’ve picked the Hunter you want, you’ll need to convince them to join you. You can see the Success Rate at the top of the screen.
To increase the Success Rate, increase the number of Hunt Coins you’re offering them. You can offer 3 times per recruitment attempt.
If your offer is accepted, you’ll pay the full amount of Hunt Coins offered and the Hunter will join you. If it’s rejected, you’ll get a partial refund on your offer.
What’s more, offering a high enough offer will also give you a permanent Success Rate boost with that specific Hunter, even if they reject your offer.
Additionally, the Success Rate will also increase when the Hunter is in a good mood. Look for Hunters that have smiling faces next to their names!
Alternatively, you can also use the Quick Hire option. However, this requires Hunter Reports, which are rarely obtained from challenges and story progression.
Get as many Hunters as possible to give you more options and strengthen yourself through their Bonds!
Enhance Your Artifacts
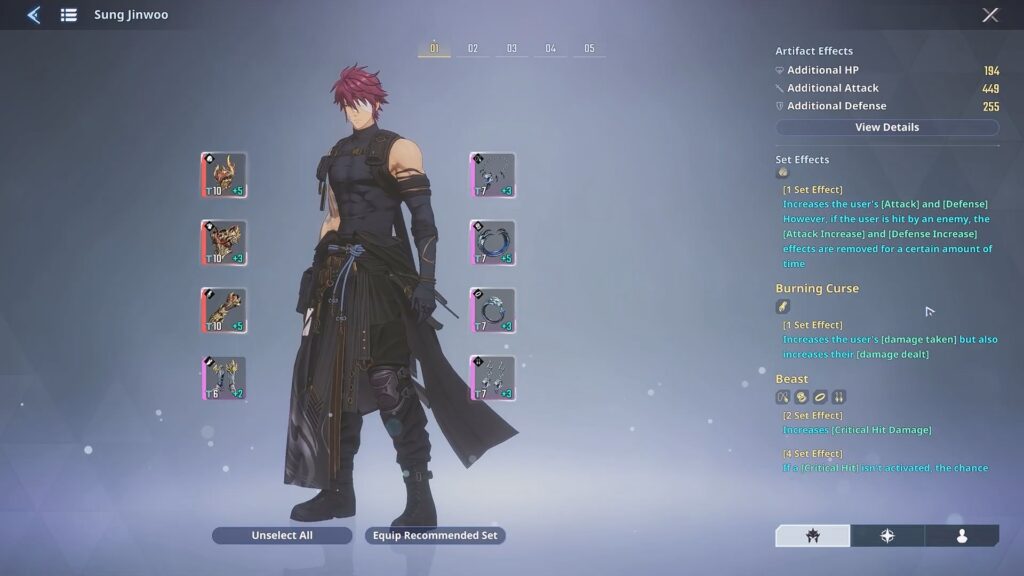
A quick tip we can give you here is to remember to enhance your Artifacts. These items are essentially your armor, giving Sung Jinwoo a variety of stat boosts. They are key to survival!
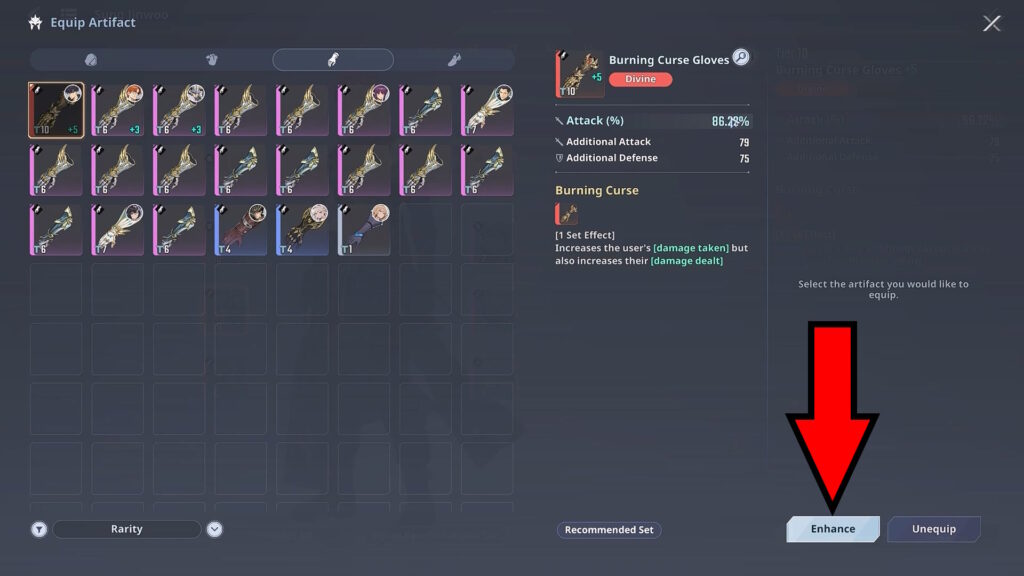
To enhance them, just select them in the Artifacts menu and click on Enhance. You’ll need to pay a fee in Gold and some Enhancement Chips, both of which are obtained as rewards throughout the entire game.
Enhancing is an easy option to miss, but it can really make or break your power levels. Make sure not to ignore it.
Crafting Weapons
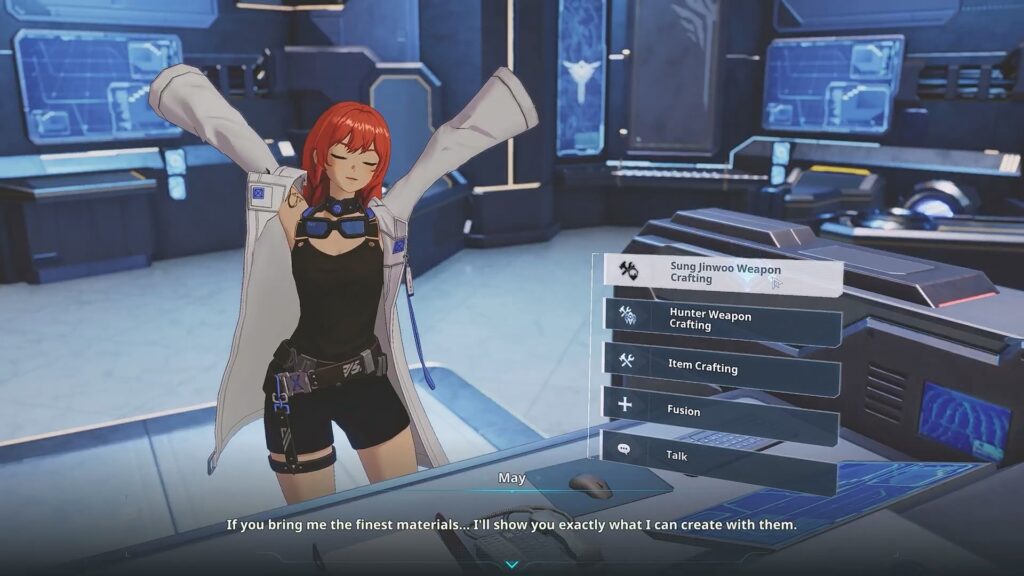
Speaking of getting stronger, you’ll also want to craft better and stronger weapons as you progress! You can do that by talking to May and selecting Sung Jinwoo Weapon Crafting.
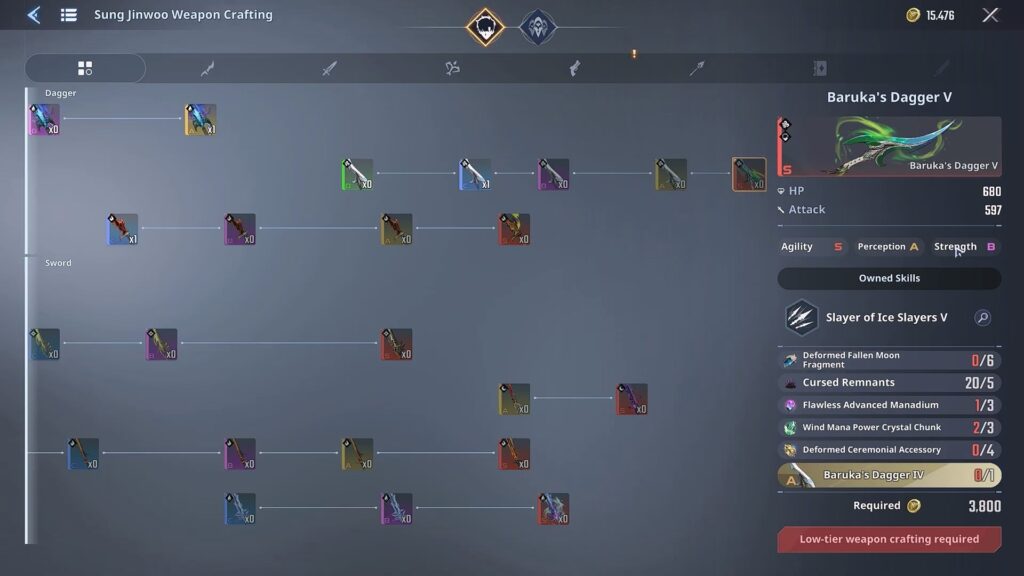
In here, you’ll see the upgrading lines for every single weapon in the game. It starts with the base weapons on the left and goes all the way to the strongest weapons on the right.
Of course, crafting is going to require a variety of materials. The good thing here is that you can just select any material you’re missing from the list on the bottom right of the screen. It will allow you to check the exact missions where materials are found.
Do note, though, you can’t skip steps with crafting in this game. You need to craft the lower-tier weapons on the left to progress to the right. Keep that in mind as you upgrade your gear!
That’s the end of our Solo Leveling: Arise Overdrive beginner’s guide! There’s still a lot more to discover in this game, sure, but this should be enough to help you get started with Sung Jinwoo’s story.