84 articles
The Vessel of Mediocrity is one of the many Adventure Missions you can encounter in Honkai: Star Rail. However, unlike most missions, this one is a bit lengthy as it involves three different parts.
To complete the mission, you need to solve a variety of Fool’s Box puzzles on the Overworld of Belobog.
Solving these puzzles will draw you closer and closer to the completion of the mission.At the same time, you will be able to obtain some rewards for each puzzle you solved.
If you’re struggling to finish this mission, this guide should help you out.
 A Bouquet for the Blessed in Honkai Star RailFeb 17, 2026
 Fundamentals of Imagenesis in Honkai Star Rail 4.0Feb 16, 2026
 Enter Black Cat Instacam’s Delusional Theater Once in Honkai Star RailFeb 16, 2026
All Fool’s Box Puzzle Solutions in Honkai: Star Rail
As mentioned, there are three different parts to this mission, with each part taking place in a different location.
To make it easier to follow, we’ll be covering each part in different sections. Let’s get started.
First Part
The first part of the mission takes place in the Backwater Pass area in the Overworld of Belobog. To start, you have to interact with the Mysterious Girl NPC whose name is actually Cyrille.
Before you start, keep in mind that the solution to this puzzle applies to all other Fool’s Box puzzles in the rest of the mission.
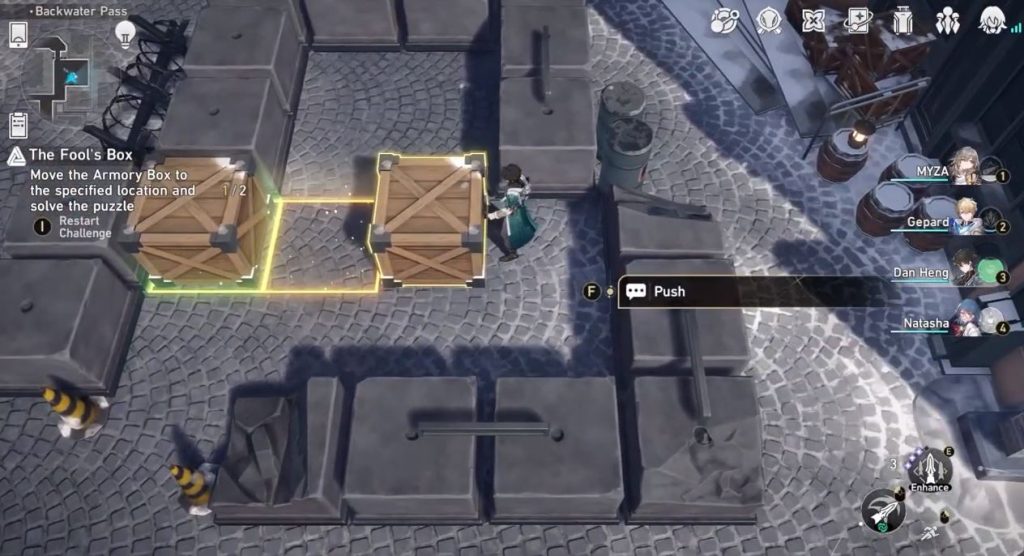
The gist is to arrange the box and place them inside the glowing tiles to complete the objective. For the first puzzle, simply follow these steps:
- Push the lower box to the leftmost corner
- Push the upper box to the bottom once
- After that, push the second box to the left as shown in the image above
Open the chest after completing the puzzle then talk to Cyrille afterward.
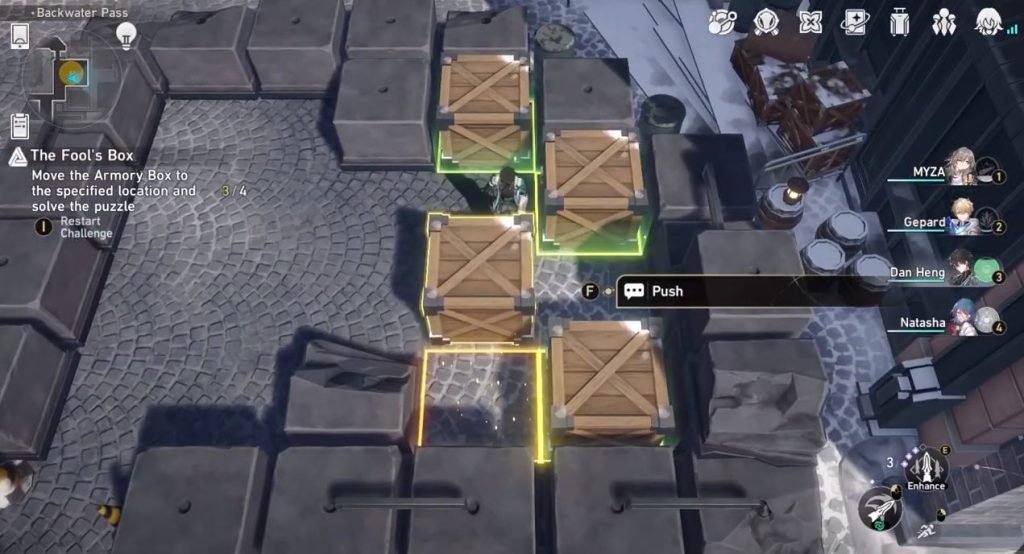
For the second puzzle, you will now have to move four boxes into their designated tiles.
- Push the lower box to the right twice
- Push the box right next to it upward
- After that, push the rightmost box downward
- Go back to the leftmost box then push it downward
- Push the box next to it to the right twice
- Push the remaining box to the right twice then push it downward
You then have to wait for a day before the second part of the Vessel of Mediocrity mission unlocks.
Second Part
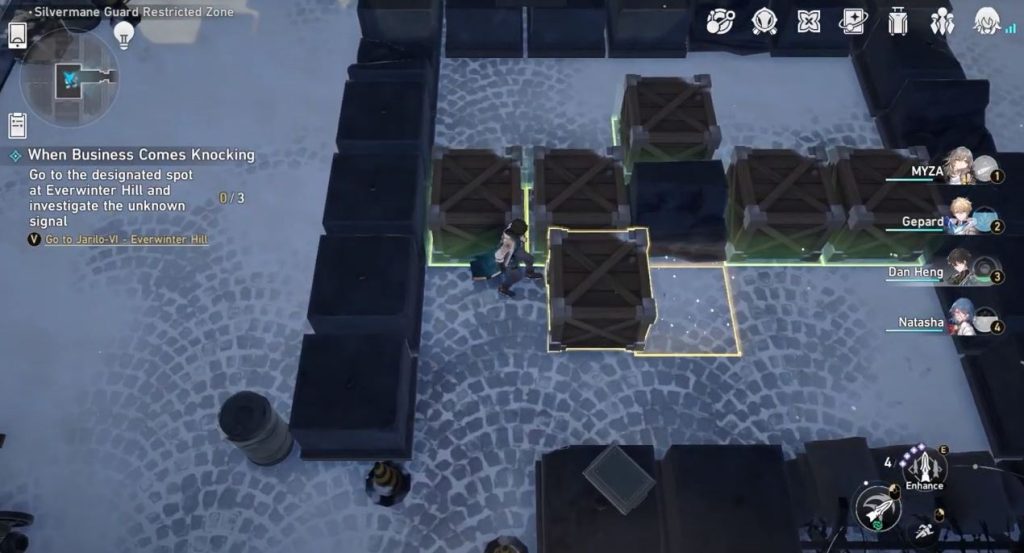
For part two, you need to head to the Silvermane Guard Restricted Zone. The objective remains the same, except you now have way more boxes to move this time around.
There are also two puzzles for the second part, and here’s how you solve the first one:
- Push the upper left box to the left
- Next, push the upper right box to the left
- Go back to the upper left box and push it downward
- Push the lower right box to the right then push it upward
- Then, push the lower left box to the right
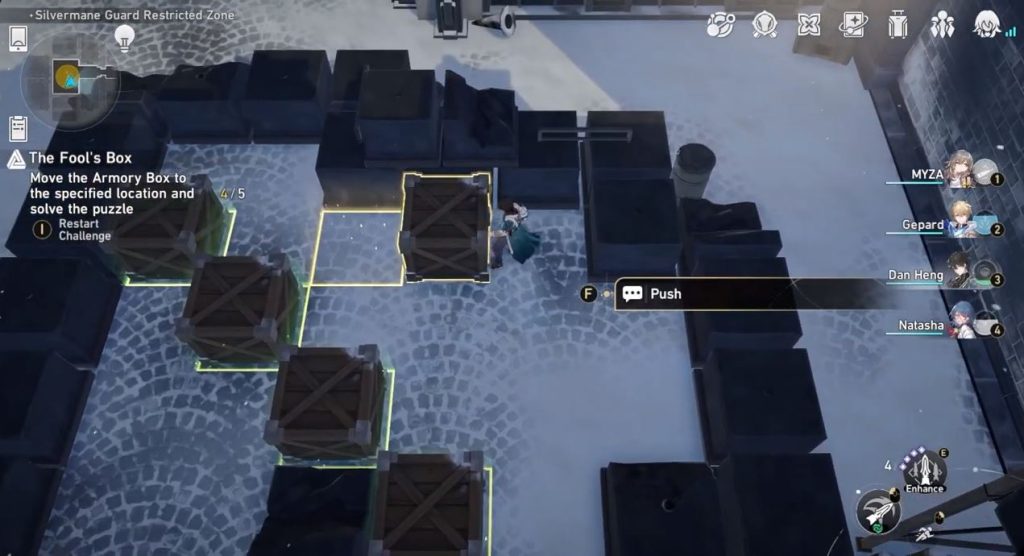
As for the second puzzle, here are the steps you should follow:
- Push the upper left box to the right twice
- Push the middle box downward
- After that, push the middle left box to the left then push it upward
- Next, push the middle right box to the right and then push the lower box next to it downward
- Go back to the middle right box then push it to the left this time three times
- Lastly, push the upper right box to the left
Same as before, open the Bountiful Treasure chest for the rewards then speak to Cyrille. Before you can unlock the third part, you should first complete the main story on Jarilo-VI.
You will receive a text from Dunn, but in case you didn’t receive any, you’ll have to wait for a day for the third part to unlock.
Third Part
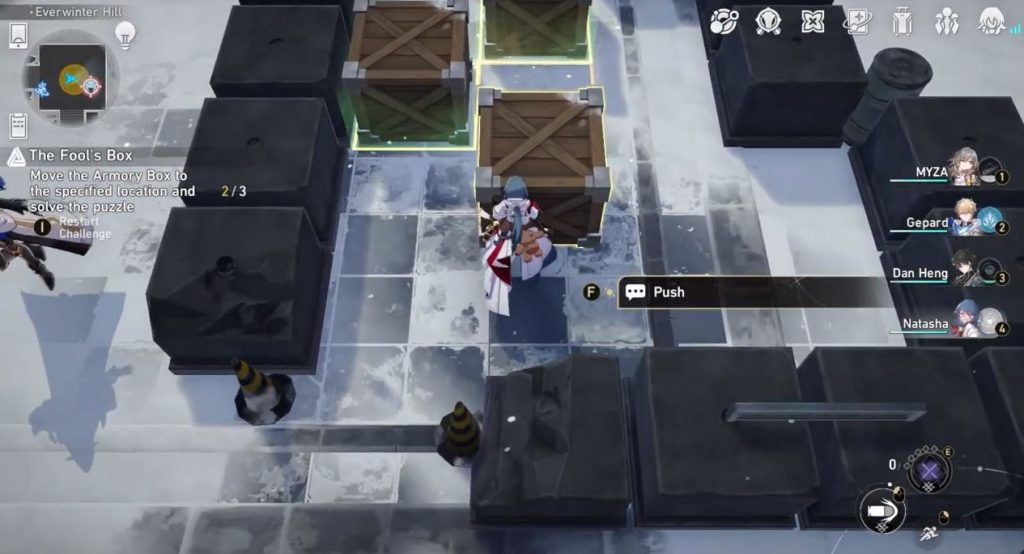
The third part of the mission takes place in Everwinter Hill. This time, you have to talk to the Guardian Shadow in order to start the puzzle.
For the purposes of this puzzle, we’ll be numbering the boxes. The leftmost box is box #1, the upper right box is box #2, and the lower right box is box #3.
This one is quite long despite having only three boxes, so make sure to follow these steps carefully:
- Push box #1 upward twice
- After that, push box #3 to the left twice
- Go back to box #1 and push it downward followed by box #2 downward as well
- Next, push box #1 to the right then push box #2 upward twice
- Go to box #3 and push it to the left once then follow it by box #1 downward
- Back to box #3; this time, push it upward and then push box #1 to the left
- Go to box #2 and push it downward
- Then, push box #1 to the right again and box #3 upward
- Lastly, push box #1 to the left then push it upward
Once you’re done, collect your rewards and talk to the Guardian Shadow who turns out to be Cyrille. You now completed the mission as well.
ALSO READ: Honkai Star Rail: Should You Pull Seele