158 articles
Wuthering Waves has all sorts of challenges and optional content to complete throughout its regions. With the latest 2.0 update, there is an entirely new region called Rinascita, which comes with its own set of quests, optional exploration content, and many more stuff to discover. In this guide, we will be covering the Ruins Where Shadows Roam side objective that you can finish.
How to Start & Complete Ruins Where Shadows Roam Guide
The Ruins Where Shadows Roam exploration side quest is something that you can do at Penitent’s End in Rinascita. It features four different locations where you have to fight special types of enemies, and this guide will be showing you where they are and how to beat them.
To do them in order, just go to the southern part of Penitent’s End and follow the map image below for the optimal pathing from Ruins Where Shadows Roam I to IV. They are not hidden, so you just need to walk over to the highlighted parts of the map to start it.

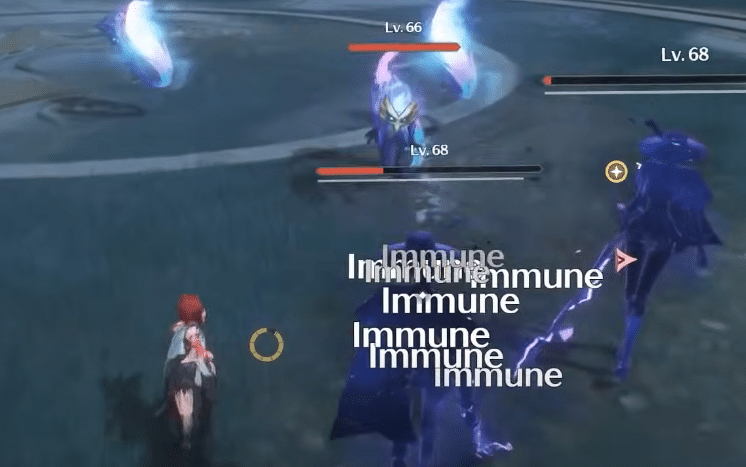
For the first Ruin Where Shadows Roam, there will be “dark areas” around the arena. When standing on these zones, the Tacet Discords that you have to fight will be immune to any form of damage.
 All Starblind Crashsite Tape of Last Words in Wuthering WavesFeb 7, 2026
 All Tidelost Forest Tape of Last Words in Wuthering WavesFeb 6, 2026
 All Mount Gjallar Tape of Last Words in Wuthering WavesMay 13, 2026
The only way to get them killed is by luring them over to the lit Macabre Torches that are scattered on the arena. After receiving a certain amount of damage, the discord will extinguish one of the torches, so be ready to move to the next whenever this happens.
The enemies for these are fairly straightforward, so it really is just a matter of understanding the special mechanics in order to deal damage to the boss. Simply stay in the glowing circles at all times.

For the second ruin, there will be a Fae Ignis echo hanging out near the unlit Macabre Torches. The idea here is to stand behind the torches while the Fae Ignis is aggroed. By doing this, its attack will hit the torch instead, lighting it up and creating circles where you can fight the boss.
Once all of the torches in the arena have been lit, the boss will appear in the middle. From here on out, the fight plays out the same way as the first one. Stay in the circles and move whenever it is extinguished.

For the third ruin, it is just a simple combination of both the ruins’ mechanics. Rather than waiting for you to light the torches, the boss will already be active and will chase you down as you try to light them up.
Just try your best to avoid the boss while also ensuring that the Fae Ignis’ attacks hit the Macabre Torch so that you can deal damage to the main target. There is only one torch here, so you will need to keep re-igniting it every now and then.
As for the fourth and last ruin, this is where things get a little hectic. The mechanics are exactly the same as all the previous ruins, except this time there are multiple bosses to fight at the same time, which are also immune in the dark.
Because of this, you will need to keep running around as the Macabre Torches are going to be extinguished regularly. Just stay mobile and make sure to only fight within the radius of lit torches, and you will eventually be one with this final challenge.
And that is how you complete all four of the challenges in these ruins. It should be noted that this is also done as a part of the Quest of Faith side quest, and it is started as a part of the first ruin, though you can also start it from the other three, but you still need to do it in order.
Once everything is completed, there will be a journal page on the ground that you can pick up. After that, a chest will appear, rewarding you for all of your efforts up to this point. That is all, you should now be done with the quest!
While you are still exploring Penitent’s End, make sure to check out our guide on how to find all the treasure spots in this region so that you can get that out of the way before you go out of this zone.