45 articles
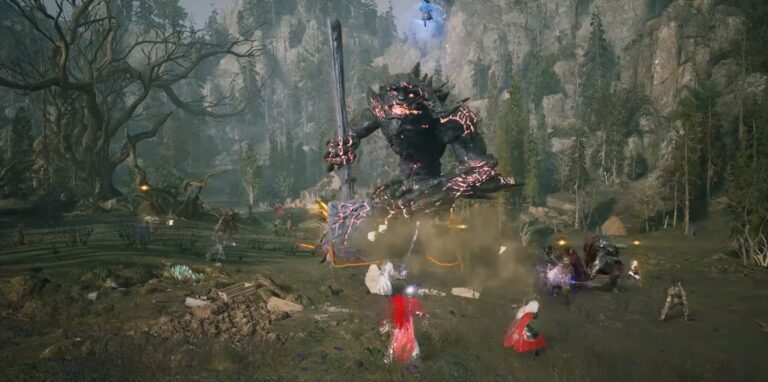
King Khanzaizin is the boss you need to defeat at the end of the Rancorwood dungeon in Throne & Liberty.
This boss is pretty unique, mechanically speaking. While he does directly attack your party, that’s not his main threat. Instead, his main focus is on destroying the arena around him. You’ll need to learn how to deal with him changing the battlefield constantly while also trying to damage him!
In this guide, we’ll tell you how to deal with every mechanic and gimmick so that you can easily defeat King Khanzaizin.
How to Defeat King Khanzaizin in the Rancorwood Dungeon | Throne & Liberty
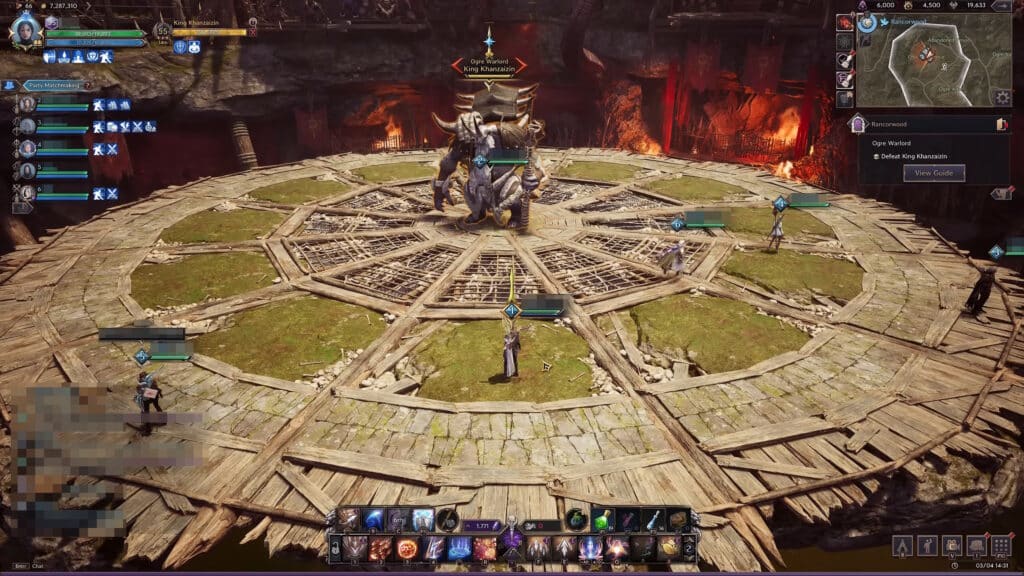
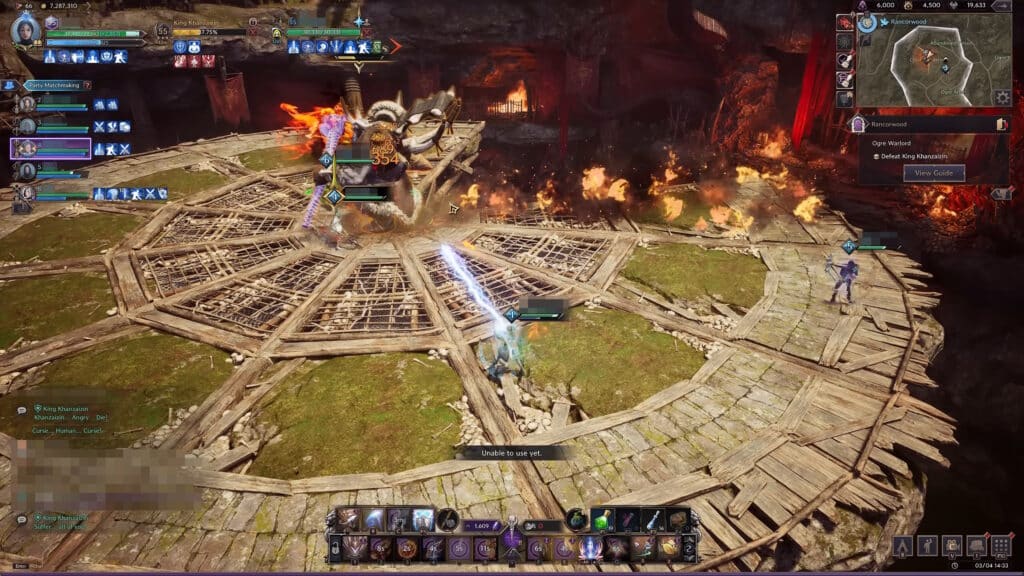
As we mentioned before, King Khanzaizin is a boss who tries to defeat you by controlling the terrain. As such, you should first take heed of the arena’s layout. The fight itself takes place atop a circular platform that’s divided into 3 rings and sectioned into 12 slices. King Khanzaizin himself will sit in the middle of the platform, never moving.
 Throne & Liberty: Tidebully Goblins Event Guide | Splash CoinsJul 26, 2025
 Throne & Liberty: Arkeum Invasion Event Guide | Chaos Golems LocationsJul 14, 2025
 Throne & Liberty: How to Skip Mechanic Dragaryle Hard / Difficult Mode GuideJul 7, 2025
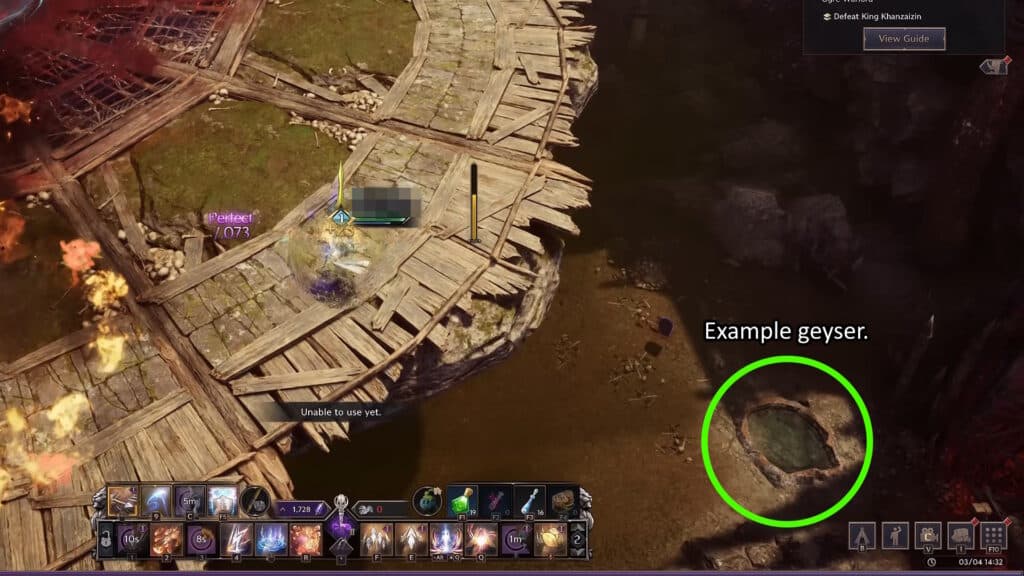
You can also fall off the platform to get to the lower part of the arena. However, you will take damage over time while in there. Thankfully, there are many geysers around this lower section. Should you fall, stand on one of the geysers and wait for it to go off. It will propel you high enough to let you return to the main platform.
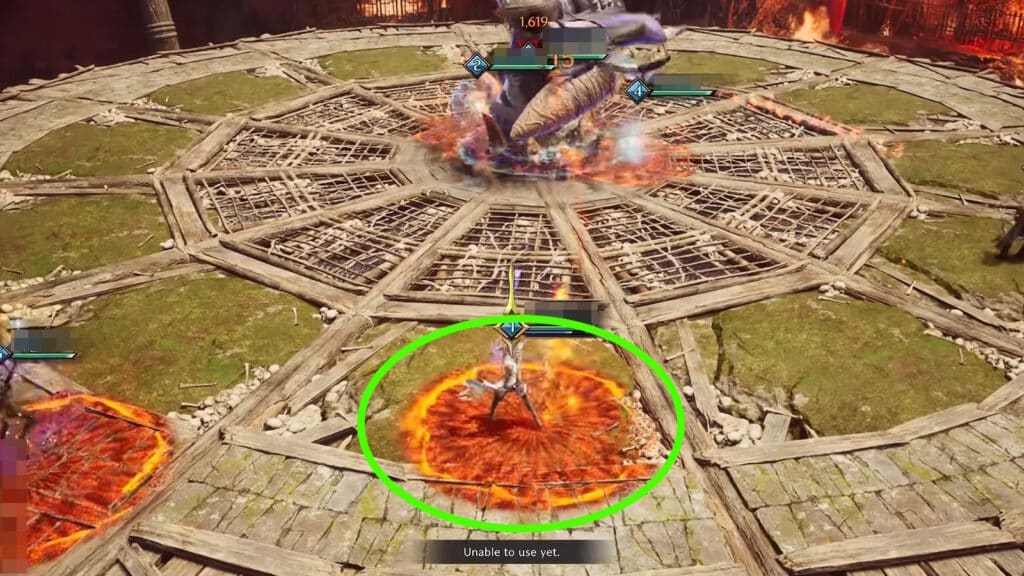
This boss’ most basic attack is a fire explosion. It’s telegraphed by a firey circle at players’ feet. To avoid it, just move away before it detonates. It can deal decent damage if you’re caught in the detonation, but it’s not a big threat.
With those basics laid down, it’s time to go over every main mechanic and gimmick this boss employs.
Black Line Meteor
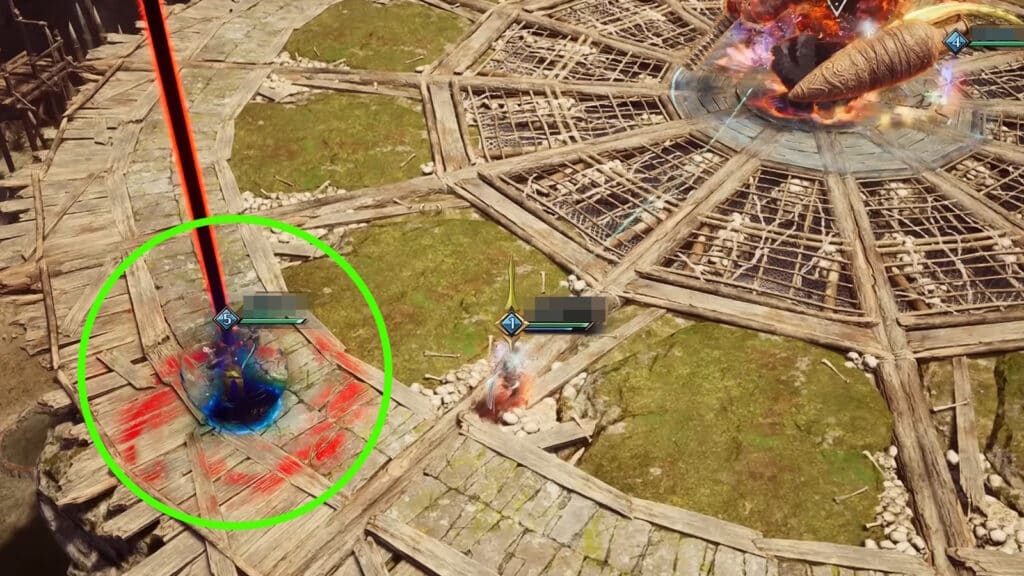
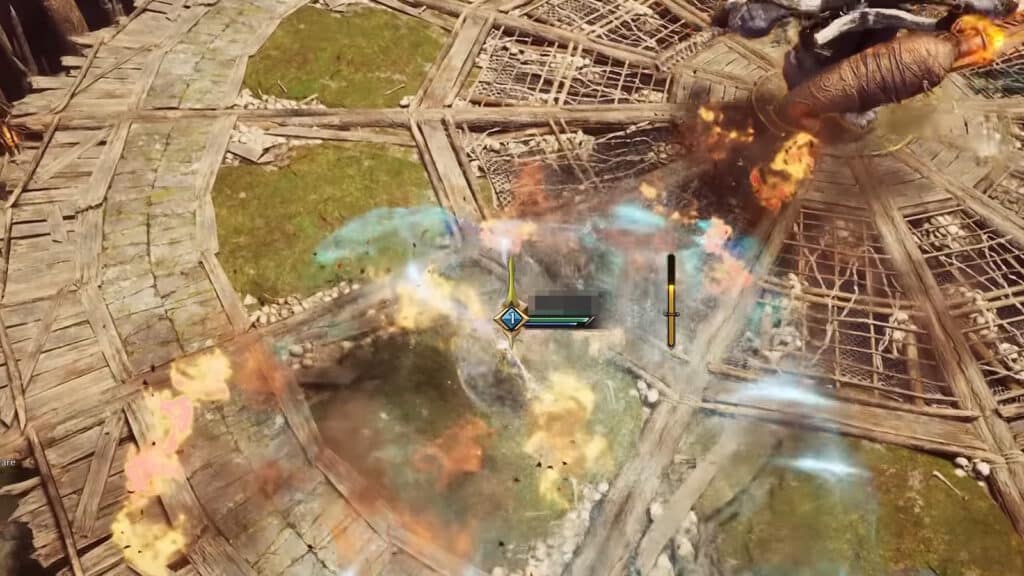
Now, the first real mechanic to keep in mind is that the boss will target the player furthest away with a black and red line. This player will be rooted and unable to move. After a short period, a meteor will fall on the targeted player.
The damage from the meteor is unavoidable for the rooted player. However, it can be minimized by having more party members close to them. So, if you’re not the one targeted, you should make an effort to rush to the targeted ally to help mitigate the damage they take. It will spread the damage across all the players that are hit.

Now, the tricky thing about the meteor is that it will also set fire to whichever slice of the platform it lands on. Get off the burning slice or you will take damage over time!
Ideally, one player should be designated to bait this attack by staying as close to the platform’s edge as possible. That player should make sure the meteor only lands next to slices that are either broken or already burning. This helps minimize how much the fire spreads, making the fight a lot more manageable.
Wrath and Fury
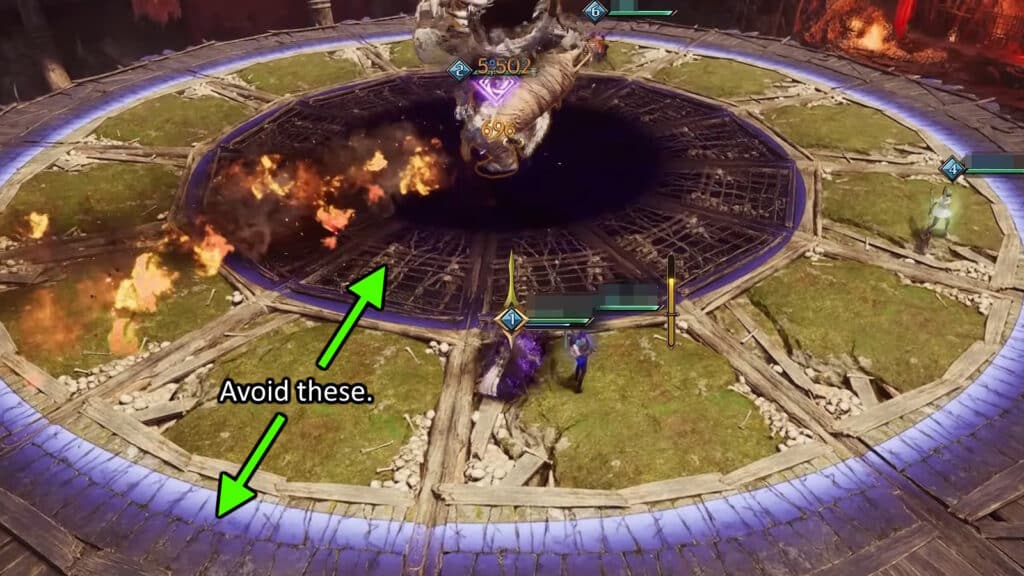
Right after King Khanzaizin uses his black line meteor attack, he will do a pattern of 3 Wrath attacks. These will always hit 2 out of the 3 rings forming the platform. The hit area is marked by a purple highlight, but always follows this pattern:
- First attack will hit the central and middle rings.
- Second attack will hit the middle and outer rings.
- The third and final attack will hit the central and outer rings.
Getting hit by any of these attacks will launch you off the platform, dealing massive damage. If this happens to you, quickly rush to one of the geysers we mentioned before and use it to propel yourself back onto the platform!
To avoid this attack, you’ll want to Perfect Dodge the first attack toward the boss. Then you can avoid the other two attacks by simply getting out of the purple highlights.
Two things will happen right after the 3 Wrath attacks. The first is that the fire from the previous meteor attack will spread to the two adjacent slices of the arena. Make sure to avoid being on them so that you don’t take damage.
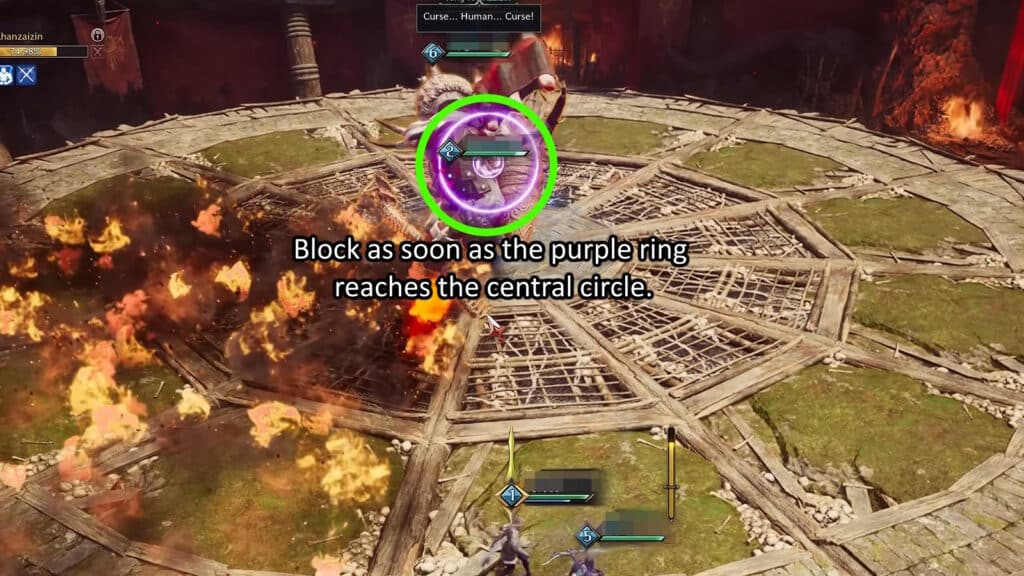
The second thing is that King Khanzaizin will use a Fury attack. Pay attention to the purple circle indicator on the boss when he’s about to use it and try to Perfect Block it.
If you successfully block the attack, you will get a bubble barrier around your character. This will allow you to get on the lower section of the arena without taking damage. Why would you do that, though? Well, to put out the fires, of course!
Firefighting
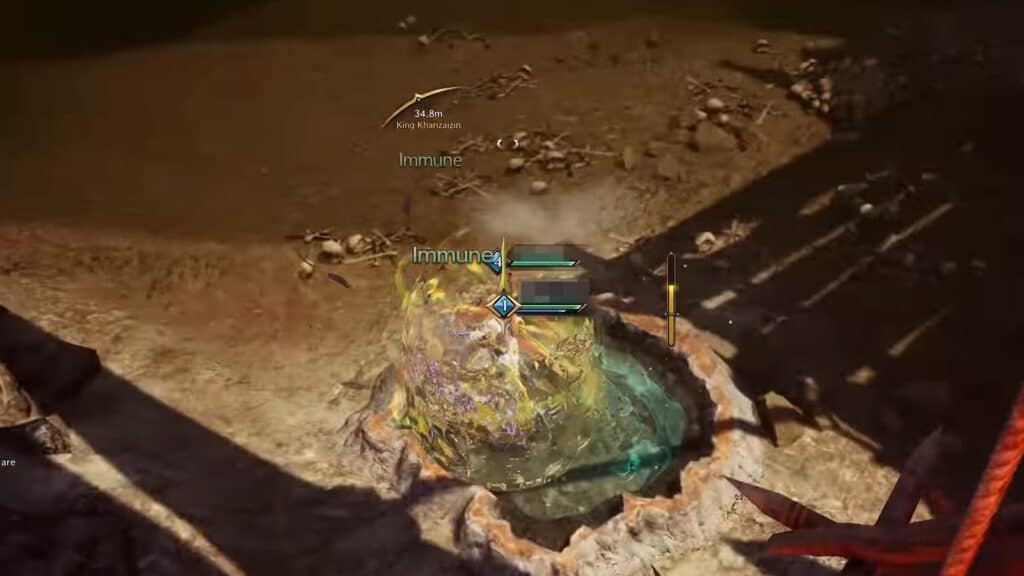
If you didn’t think you would be taking on the mantle of a firefighter in Throne & Liberty when fighting the King Khanzaizin boss in the Rancorwood, we’re sure this is a surprise. For the next mechanic, you want to get off of the platform and drop to the lower section as soon as you get the bubble barrier. Again, only do so if you successfully blocked the Fury attack!
Stand on one of the geysers and the bubble barrier will absorb the water. Then, wait for the geyser to burst and propel you back onto the main platform.
Once you’re back on the platform, walk up to any of the platform slices that are on fire. You will automatically put the fire out, losing the bubble barrier in the process. It’s extremely important that at least 2-3 players do this every time. Otherwise, the entire platform will catch on fire after a few cycles.
Platform Breaker
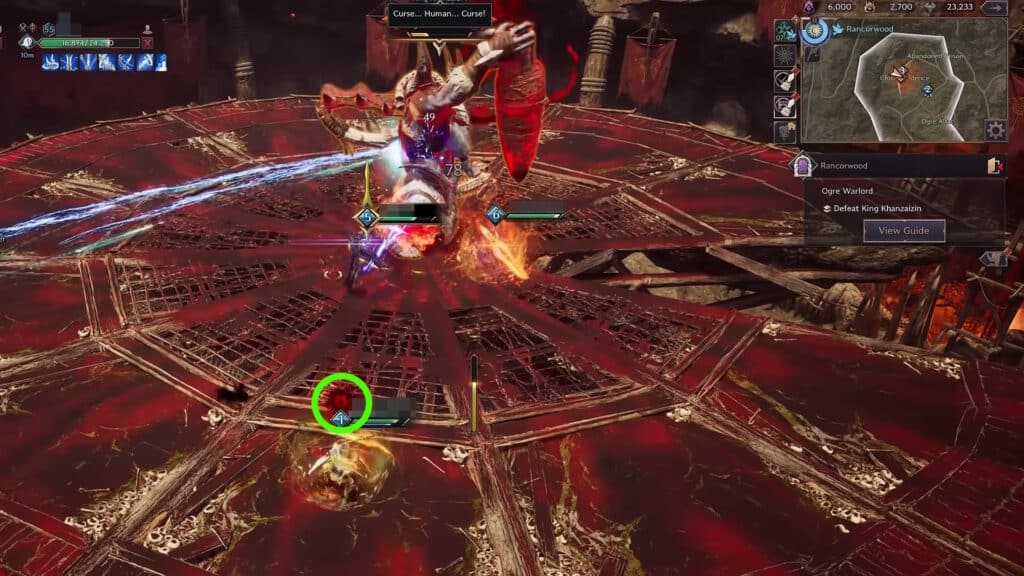
The last tool in King Khanzaizin’s cycle is a large red area of effect attack. This move is completely unavoidable, but it doesn’t deal any damage.
Instead, this move will mark a random player or two with a red orb. King Khanzaizin will then start targeting the players with the red orbs one after another, breaking the slices of the platform that those players stand on. This will also propel the player upward, so they have to try to land on the platform again to avoid falling to the lower section!
Since there’s no way to prevent the platform from being broken, you and your party will just have to try to mitigate its effects. Stand next to gaps the boss has already created to form a contiguous hole. It’s much easier to deal with than having a lot of random holes spread out over the platform.
Also, avoid getting off the platform when marked or having two marked players stand on the same platform together. If you do that, King Khanzaizin will break a random slice of the platform instead.
At this point, the boss’ pattern starts to repeat in the same order, with no changes. You and your party will need to carefully manage the burning and broken platforms while trying to finish off the boss. We recommend having as high DPS as possible for this!
So, there you have it, that’s everything you need to know to defeat the King Khanzaizin boss at the end of the Rancorwood dungeon in Throne & Liberty.
Are you going through “Chapter 12: The World Tree and Red Fog”? If so, you might want to check out our guide on how to burn the contaminated branch during the “Resonating Memories” part of the story quest!