 7 articles
As the first game in the F1 Manager series, F1 Manager 22 offers a different approach than the F1 games. Obviously, that also means that the game will require a different set of skills and knowledge when it comes to car setups.
Since this will be the first time everyone gets to play an F1 Manager game, most of us are still experimenting with one setup after another. In this guide, I’ll show you how you can come up with the best setup for your car.
How to Create the Best Car Setup in F1 Manager 22
Before everything else, let’s have a look at how car setups work in F1 Manager 22. Unlike the F1 series, F1 Manager offers fewer options that you can tweak. Aside from that, each configuration will depend entirely on the driver and the team he belongs to.
You just can’t download a car setup and apply it to your car. Instead, you have to take your time in tuning up each setting for each driver. In F1 Manager 22, you can change the following aspects of a car:
 F1 Manager 2022: Best Teams to ManageSep 1, 2022
 F1 Manager 22: How to Manage Your StaffMar 22, 2023
 F1 Manager 22: How to Manage FacilitiesMar 22, 2023
- Anti-roll distribution
- Front wing angle
- Rear wing angle
- Toe-out
- Tyre camber
Each of these parts can affect a car’s overall balance. Both wing angles can affect braking stability, oversteer, traction, straights, and cornering. The toe-out only affects braking stability and cornering whereas tyre camber affects the two alongside traction and oversteer.
Then there’s anti-roll distribution which affects all except straights. Knowing which part affects your car’s performance is key to creating the right setup for your car.
The Actual Steps
Now that we had a brief overview of how car setups work in F1 Manager 22, let’s now get address the elephant in the room. So, how exactly do you create the best car setup? Well, here are some steps you have to follow:
Start with a Few Adjustments
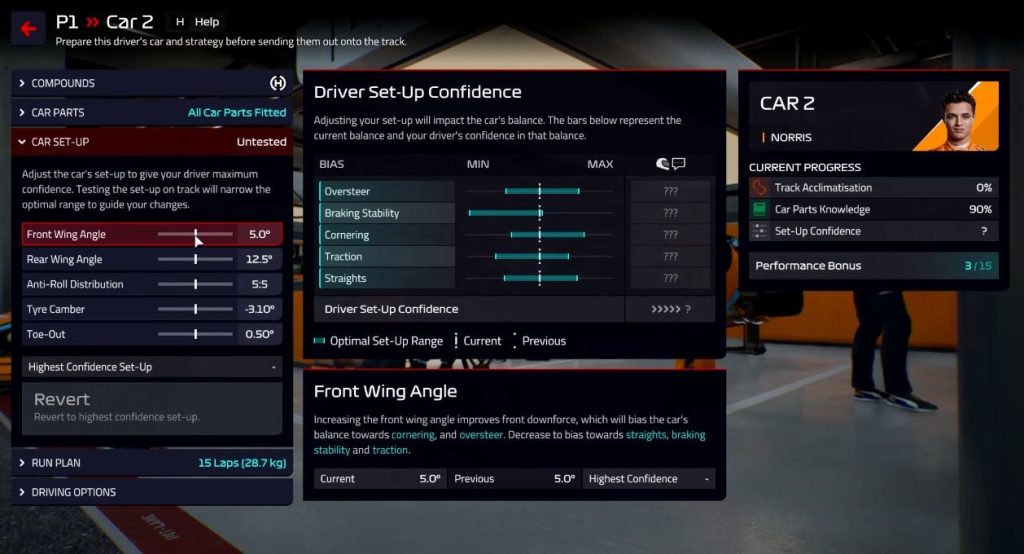
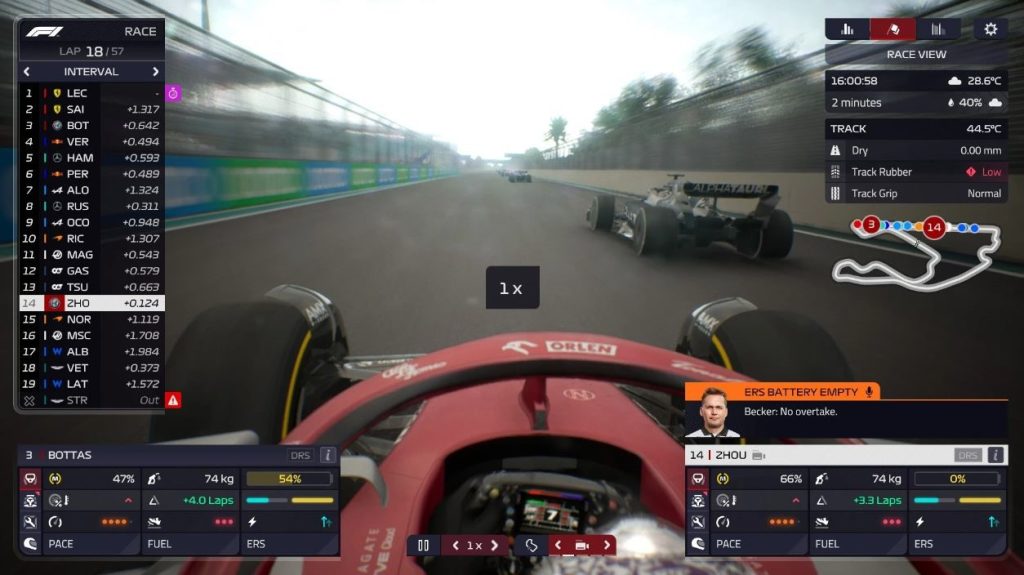
Start a practice session to familiarize yourself with the setup screen. Here, you can find a range of blue bars that signify the range of optimal setup. This range will also depend on your driver’s confidence in the setup.
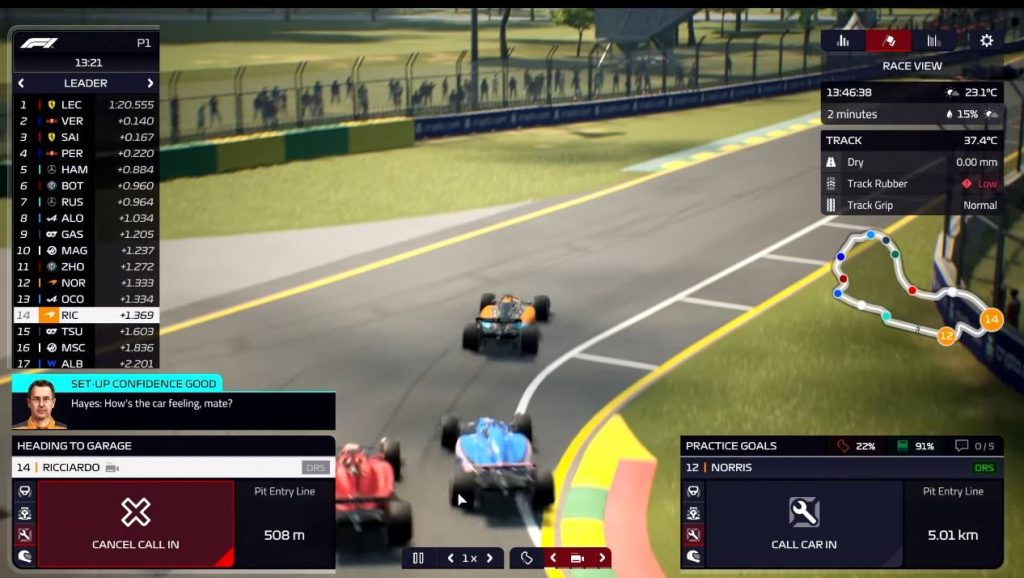
In the blue bars, you’ll find a tiny white bar that will move around depending on the adjustment. You want to aim to move it to the middle at this point. Then, you can send your drivers for a medium-length test run so you can assess their thoughts on your setup.
During the test run, you’ll notice a small chat icon with the number 0/5 beside it. This is the comment box, and once it reaches 5/5, it will then turn blue.
Your driver will periodically give a moment regarding the performance of your setup. Once it reaches 5/5, you want to call him over to the garage to further optimize your setup.
Do Further Adjustments
Once your driver arrives at the garage, click to Reconfigure button to adjust your setup. Here, you’ll notice that the blue bars are no longer as long as they were before. You’ll also see their comments right next to each bar. These are essentially the driver’s thoughts regarding the performance of your setup.
You will also see some red bars with negative comments, and those are the ones you should be focusing on first. Try to move the white bar around until it sits in the middle of the red bar. As for the bars with positive comments, you want to move their white bars a bit farther from the range of the blue bar.
To be fair, adjustments involve making guesses, so try and experiment with the options before you send your car for another test run.
After making the second adjustment, check out the status of your tyres. If they are starting to look worn out, make sure to change them first before doing a test run. If they’re still looking okay, then you can proceed to the test run.
This will mainly depend on the type of tyre you’re using. Soft tyres can only last a single run for the most part whereas medium and hard types can last for a few more. Once you’re ready, proceed to the second test run.
Rinse and Repeat
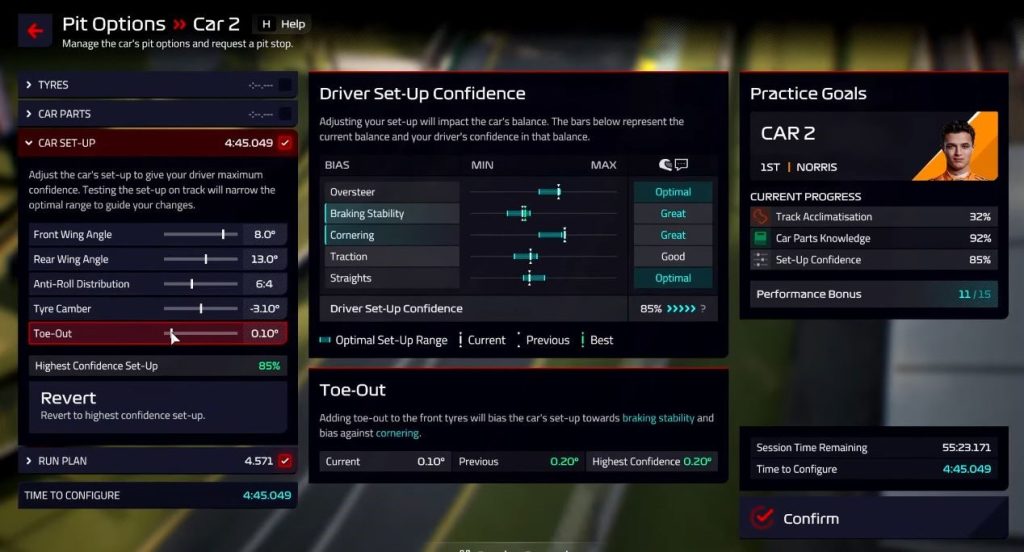
Once the second run is done, you’ll notice that the range of the blue bars is now even smaller. This means you’re almost at your ideal setup. At this point, it’s essentially just rinse and repeat. You take a look at the driver’s comments and then make some adjustments until you reach 100% driver confidence.
This can take you around 3 practice runs, so take your time until you come up with the best setup for your cars.