 24 articles
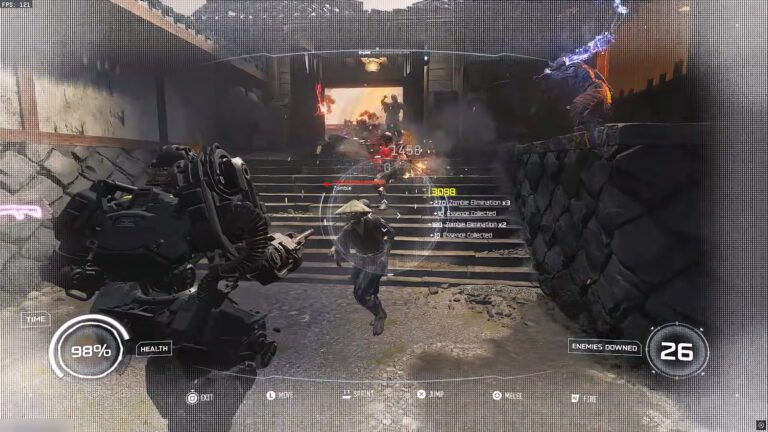
The Paradox Junction map for Call of Duty: Black Ops 7 (BO7) Zombies brings back two classic weapons: the Blundergat and the Sundergat.
Of course, as is usually the case with Zombies, getting these powerful Wonder Weapons requires some work. You’ll need to hunt down parts hidden around the map, deal with unique enemies, and more…
Fret not, though! In this guide, I’ll help you through the entire process of getting these Wonder Weapons.
How to Find the Blundergat Parts
Your very first goal towards the Sundergat in the Paradox Junction map is to make the Blundergat itself. For that, you’ll need to go on a bit of a hunt for 4 separate parts.
 Black Ops 7 Zombies: Free Ray Gun World At War Easter Egg GuideJun 28, 2026
 Black Ops 7 Zombies: Secret Takeo Easter Egg Guide | Reunion Dark OpsJun 28, 2026
 Black Ops 7 Zombies: Nekomancer Wonder Weapon Guide (Kowakujo) All Correct StepsJun 27, 2026
This is quite a process by itself, so I’ll help you through it! However, do note that you don’t need to find the parts in any specific order. You can do them in whichever order you want.
Now, let’s go over how to get all of the 4 parts!
The Barrel
To get the barrel, you’ll need to find a specific yellow cyst in the Future Nuketown. It looks the same as all others, so I sadly can’t provide a visual tell for it, but it has a faint “shining aura” sound that the other yellow cysts don’t have.
Then, when you think you’ve got the right cyst, you just need to kill zombies near it. The yellow cyst will consume the zombies’ souls until it’s sated, at which point it will explode.
If you got the right yellow cyst, it will drop the barrel for the Blundergat once it explodes. If you got the wrong one, it’s alright! Nothing bad happens, so just try again. The video below shows this process.
The Hammer
For the Blundergat’s hammer, go upstairs in the Yellow House in Future Nuketown. Interact with the vials on the desk there to get the SO3 Vial.
With that in your possession, go across the street to the Green House and interact with the sink on the bottom floor. This will allow you to fill the vial with acid, obtaining the H2SO4 Vial.
Next up, you should look around the Future Nuketown until you spot a manikin that emits the “aura” sound. It’s the same type of sound as the one the yellow cyst and other item pick-ups have.
When you know which manikin makes a sound, go to Past Nuketown. Walk up to the manikin you noted earlier and use the H2SO4 Vial on it to melt it down.
Then, lastly, go back to Future Nuketown and return to where the manikin used to be. It will have melted away fully by now, allowing you to grab the Blundergat’s hammer. It should look something like the video below.
Do note that you can melt 3 manikins at a time with the H2SO4 Vial. Also, you can refill it infinitely at the Green House. So, you can try as much as you want, if you don’t hear the “aura” sound.
The Stock
To find the stock for the Blundergat, you’ll need to look for spots with a weird black goop on specific walls in Future Nuketown. There are three of them in the following locations:
- Yellow House Garage, by the northwestern wall.
- Green House, on the upper floor by the stairs.
- Trinity Ave., on the northern wall of the alley.
As with the previous parts, the correct spot should have a faint “aura” sound to it. Stand next to the wall and try to listen in.
Once you’ve found the proper spot, go back to Past Nuketown. Go to the spot where you heard the aura glow earlier and use an explosive to blow up the wall, creating a hole.
Then, finish up by going back to Future Nuketown. Check the wall you blew up to find the hole still there, with the stock inside for you to grab. The video below shows the process and all of the black goop walls.
Sealant
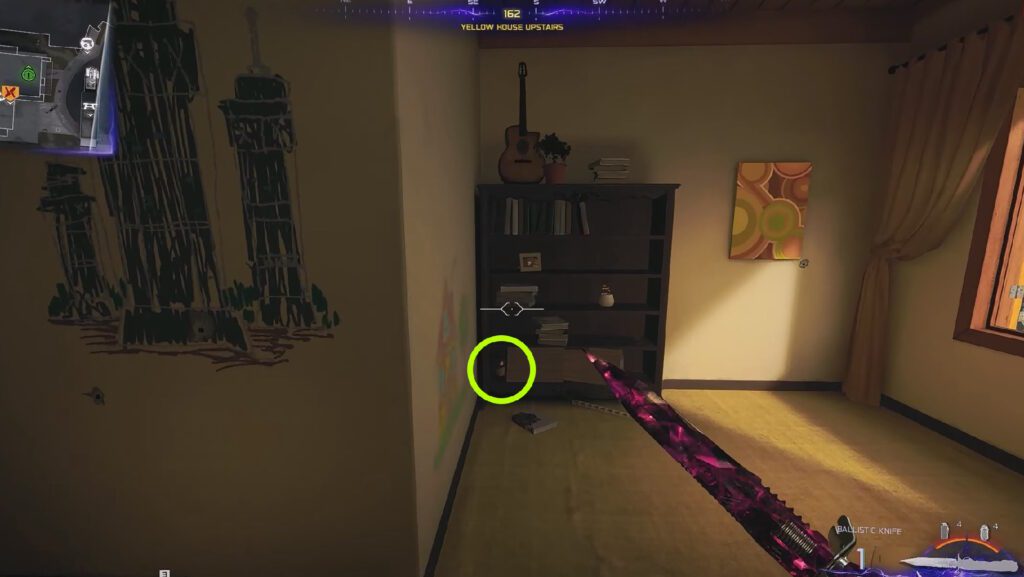
Last but not least is the sealant, which is conveniently also the easiest one to pick up. For this one, just check the bottom of the bookshelf upstairs in the Yellow House in Past Nuketown. Grab it and you’re all done!
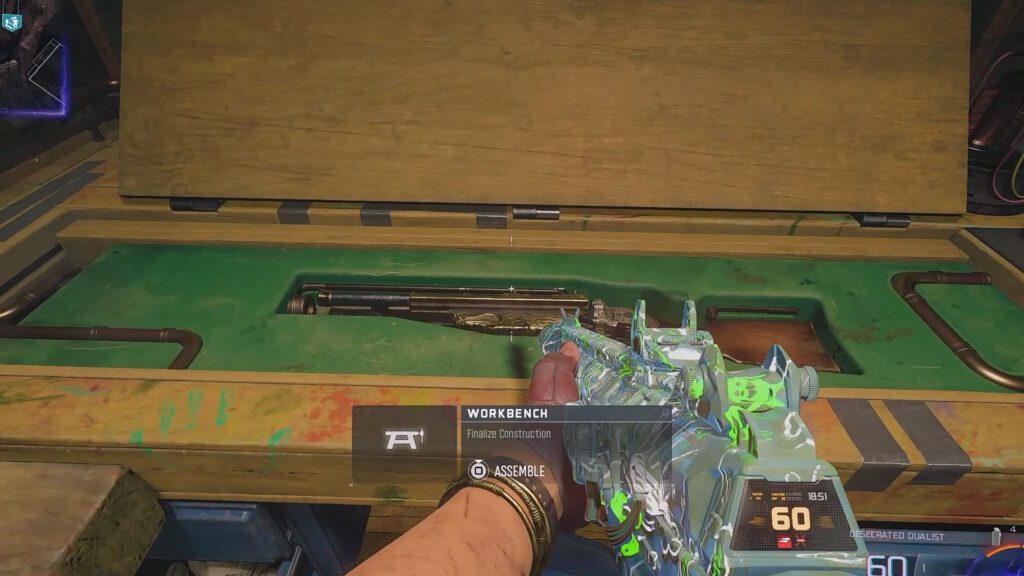
How to Make the Blundergat
Now that you have all of the parts for the Blundergat, it’s time to put it together! For that, enter the truck in the middle of the Cul-de-Sac in Future Nuketown.
Once you’re inside the truck, melee the Workbench there to reveal a hidden slot. Interact with it to put all of the parts in and assemble the Blundergat. It should look something like the video below.
With all of that work done, you can now work towards upgrading the Blundergat into the Sundergat!
How to Upgrade the Blundergat to Sundergat

Next up, you need to play as normal in the Future Nuketown. Now that you have the Blundergat, it’s possible for zombies captured within flaming tornadoes to spawn in random spots each wave. They look like the one above.
Once you spot one of these zombies, I recommend trying to clear as many of the yellow cysts and other zombies as possible first. Then, approach the tornado to free the Tortured Zombie.
The Tortured Zombie will have a blue aura around it and will start chasing you automatically. Do not attack it, though! Instead, lure it back to the Blundergat’s Workbench. The one within the truck in the Cul-de-Sac.
Keep in mind that other zombies and the yellow cysts will drain the Tortured Zombie’s health if they’re nearby. That’s why I recommended getting rid of as many of them as possible.
When you get the Tortured Zombie inside the truck, kill it with your Blundergat. The Workbench will consume the zombie’s soul if you do this correctly.
Now, you need to repeat this process 2 more times, for a total of 3 souls. Do note that the 3rd “Tortured Zombie” will be replaced by a Mimic instead, but the process is the exact same.
When you’ve done the process 3 times, go back to Past Nuketown. Put the Blundergat in the Workbench, then return to Future Nuketown.
Lastly, in Future Nuketown, go back to the Workbench in the Cul-de-Sac and melee it one last time. You’ll receive the Sundergat as your reward, at long last! The video below showcases this entire process.
So, there you have it! That’s everything you need to do for the Blundergat and Sundergat in the Paradox Junction map of BO7 Zombies. Now, enjoy blasting zombies with this Wonder Weapon!