158 articles
In the latest update of Wuthering Waves, we got to see two new characters, one of which is Changli. And now we can also play her companion story called Immortal Blaze.
During her companion story, you will come across two puzzles in which you have to align Light Beams in the correct order by rotating them. I will provide a complete walkthrough of how to easily complete both puzzles in this guide.
Connect the Light Beams inside the Mechanism (all 2 out of 2)
The puzzles themselves are not that hard but doing them for the first time can be a bit confusing. Which is why I have provided ample images in this guide to make things easier. Just follow this guide and you will complete the puzzles in no time.
1st Light Beam Puzzle
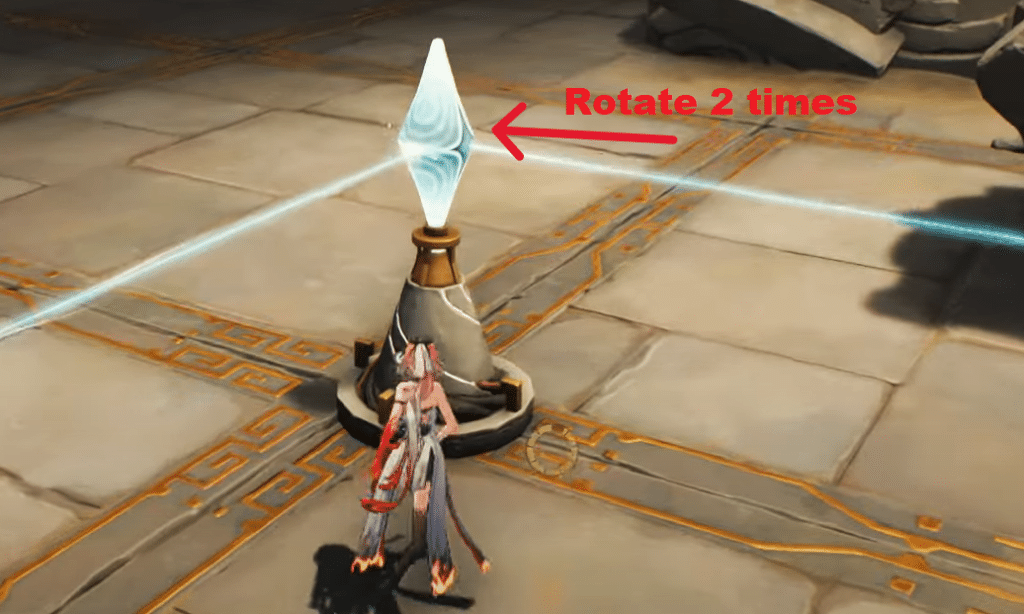
When you get here, interact with the first crystal and activate it. After that, make your way to the crystal shown below and rotate it 2 times.
 All Starblind Crashsite Tape of Last Words in Wuthering WavesFeb 7, 2026
 All Tidelost Forest Tape of Last Words in Wuthering WavesFeb 6, 2026
 All Mount Gjallar Tape of Last Words in Wuthering WavesMay 13, 2026
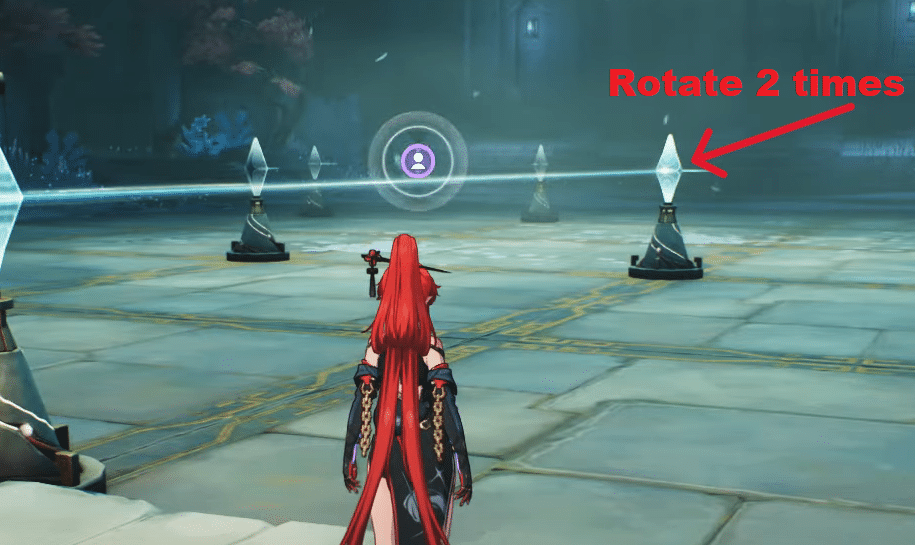
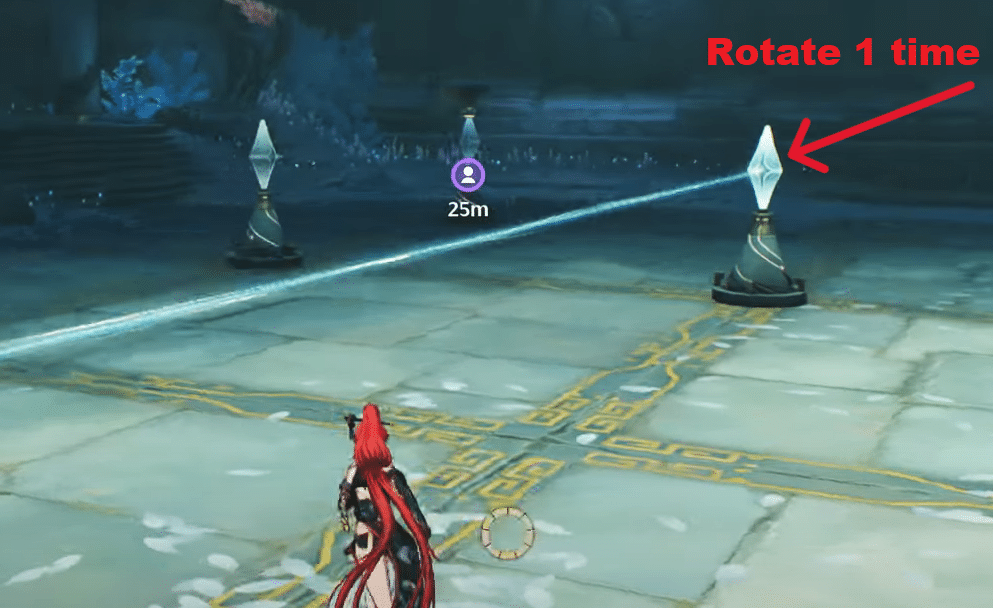
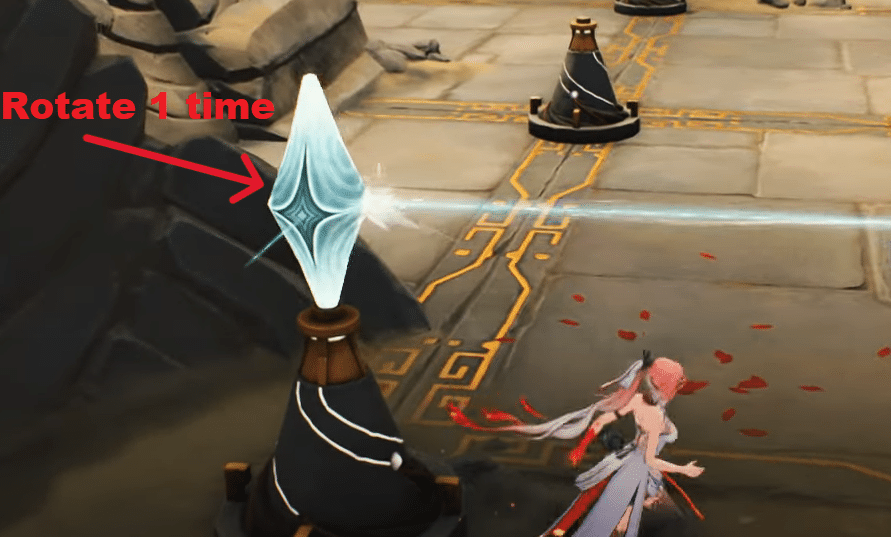
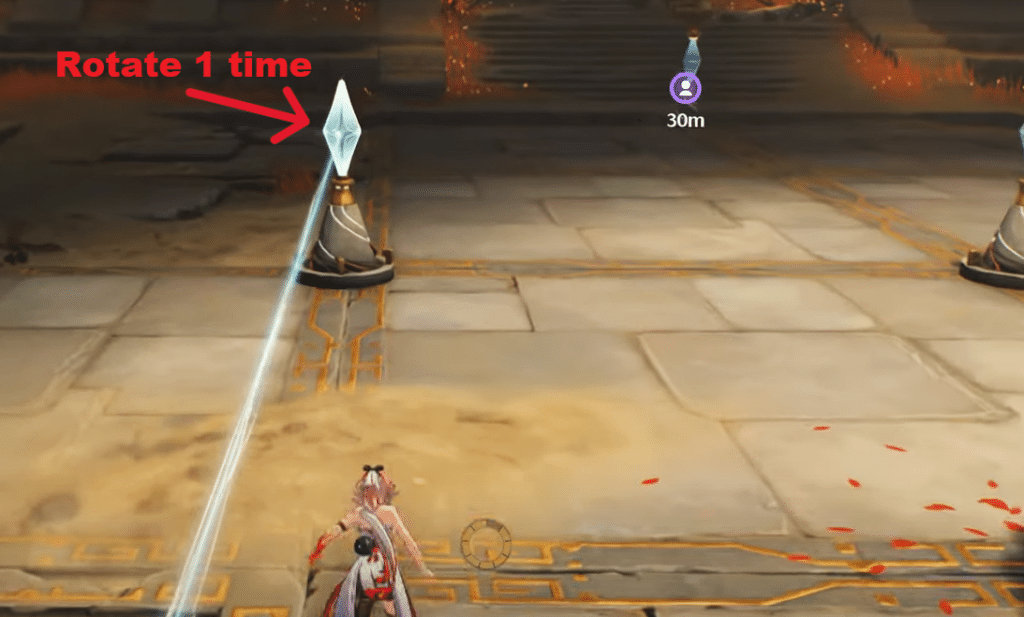
Once you do that, rotate the crystal shown below 1 time.
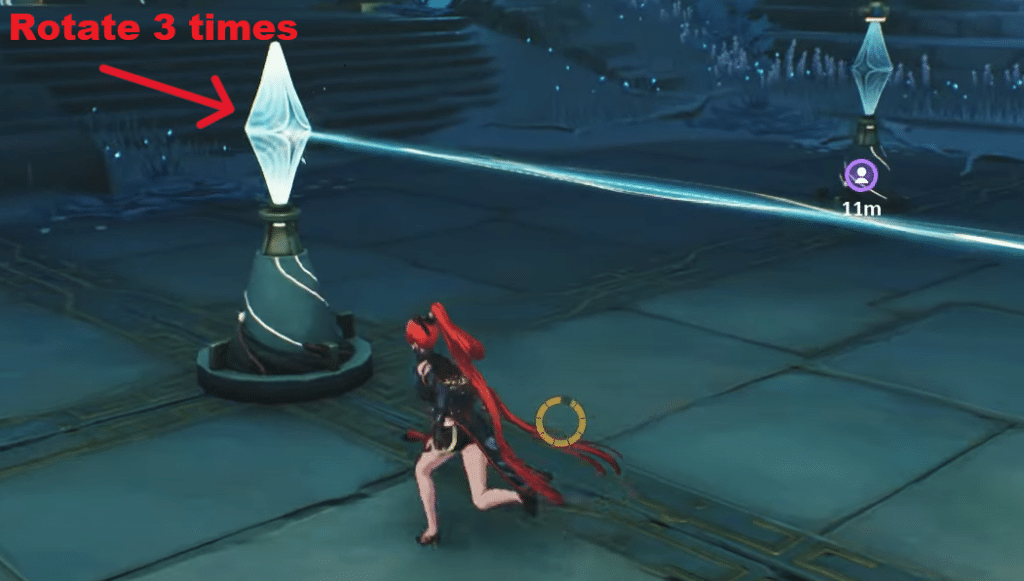
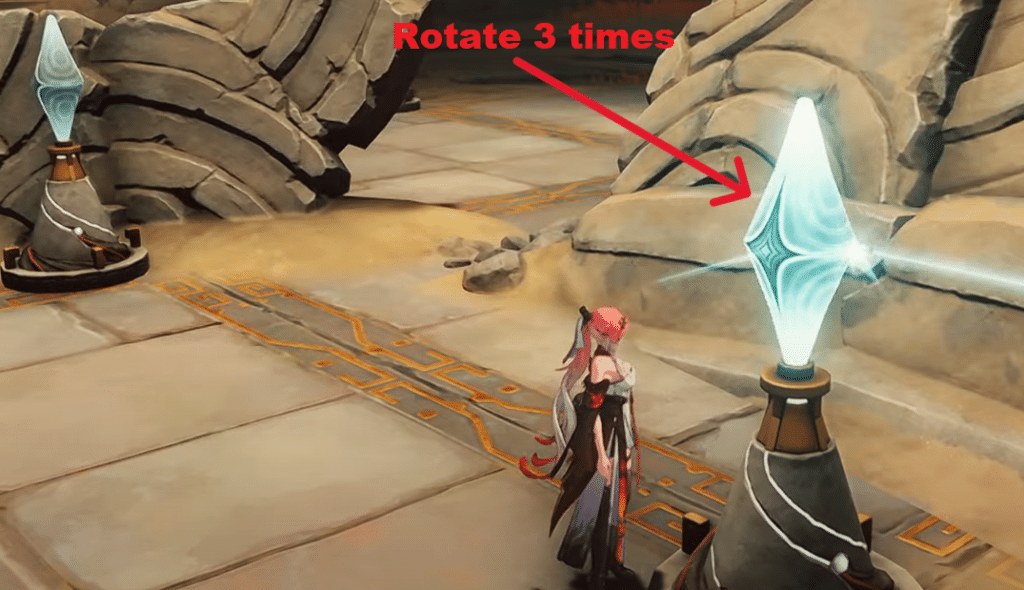
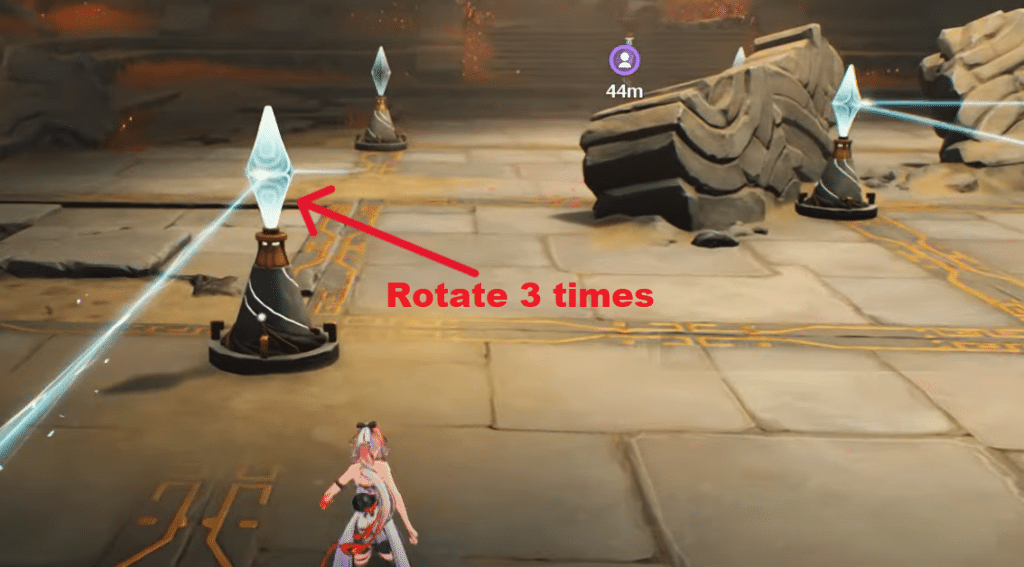
After that, rotate the second last crystal 3 times.
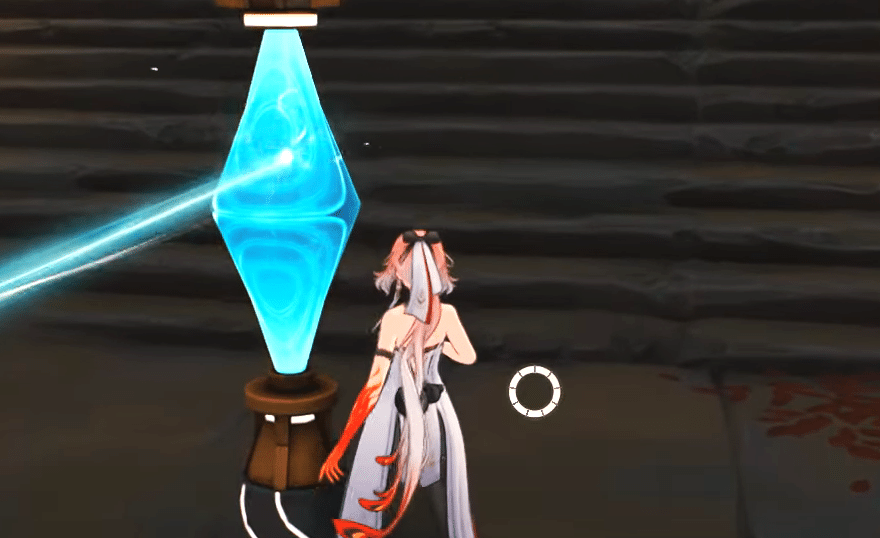
Once you have done this, the objective will be completed and you can move on with the quest.
2nd Light Beam Puzzle
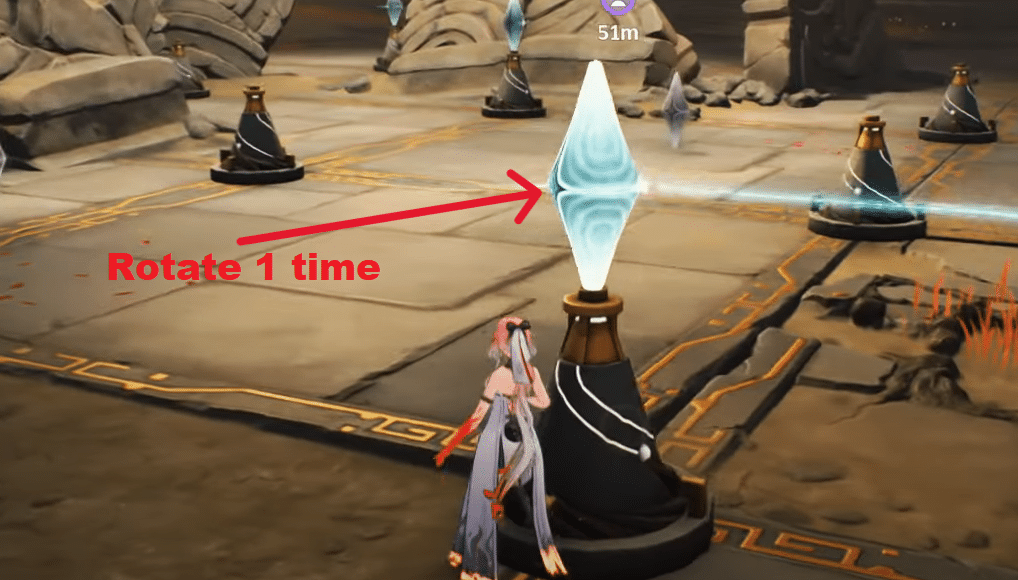
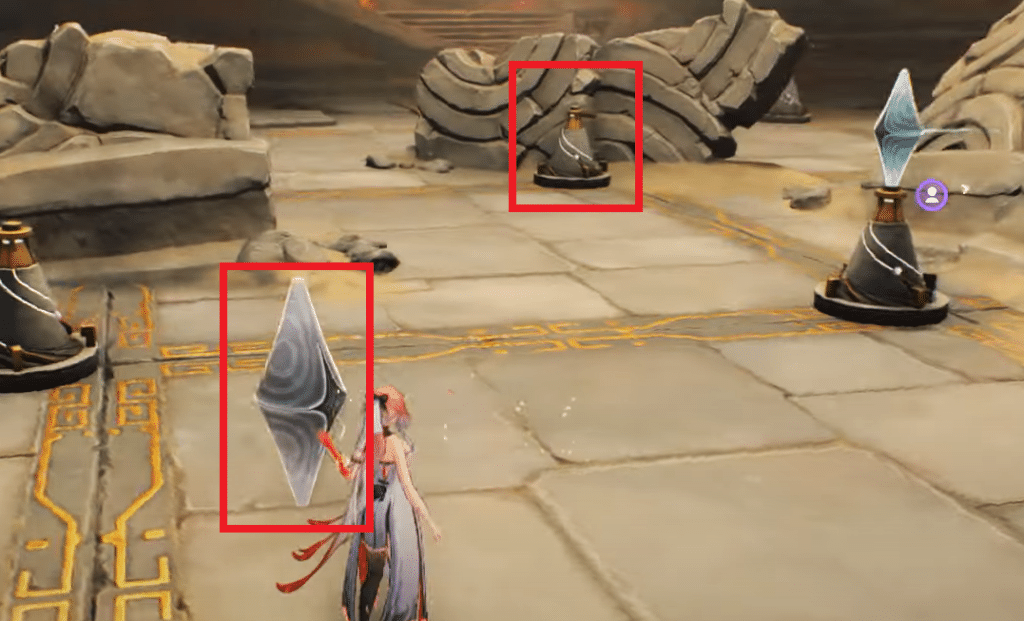
Just like before, when you reach this puzzle, activate the main starting crystal. And after that, rotate the crystal marked below 1 time.
You will find two crystals lying on the ground. Pick one of them and place it in the slot shown below.
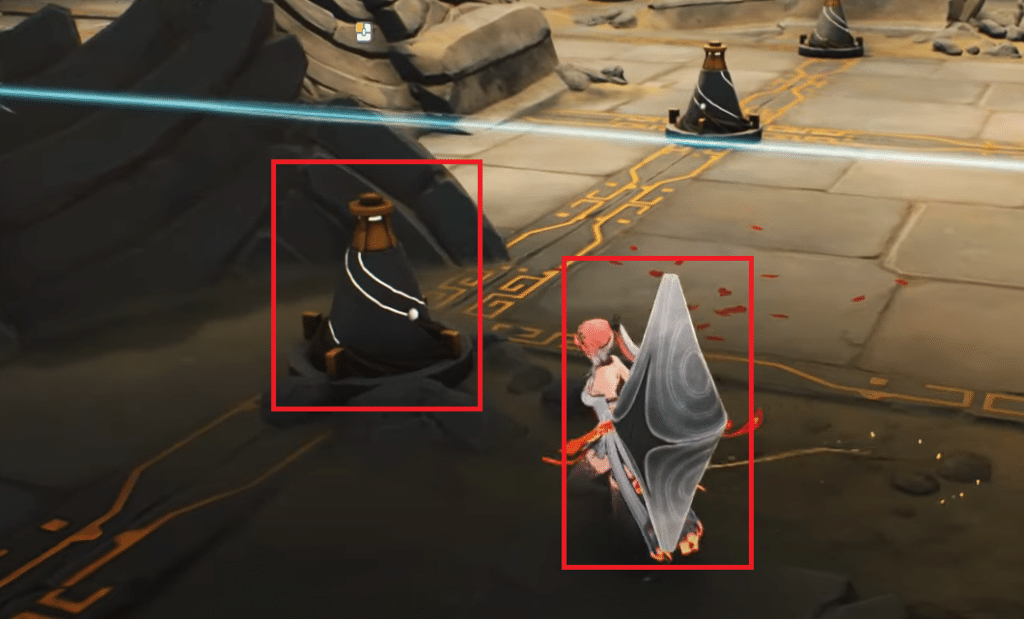
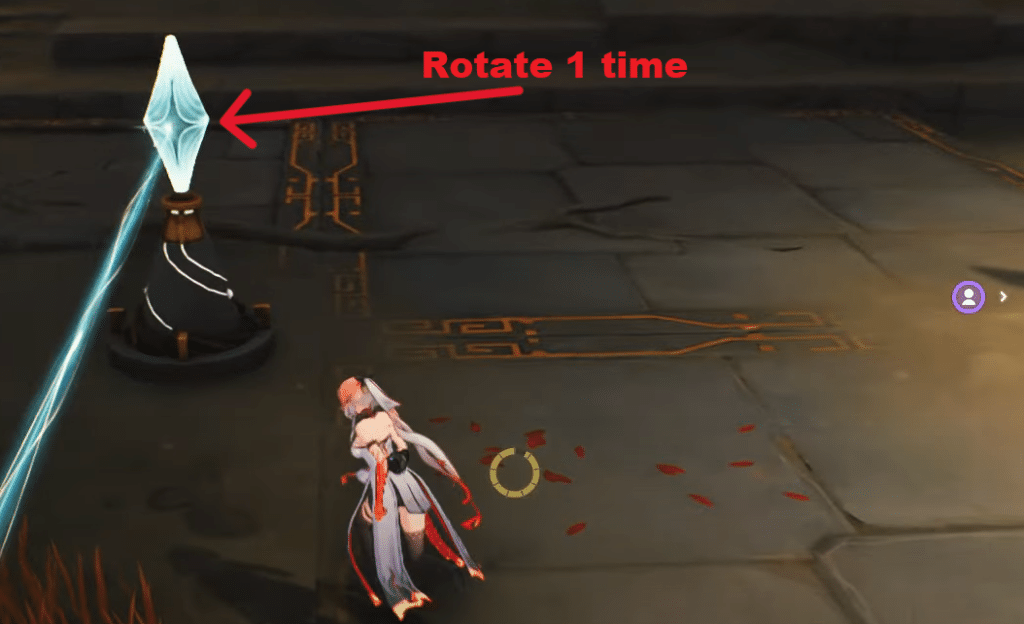
After placing the crystal, rotate it 1 time.
Now pick up the other crystal lying on the ground and place it in the slot marked below.
After that, rotate the crystal marked below 3 times.
Now rotate the crystal shown below 1 time.

Once you are done with that, make your way to the next crystal and rotate it 1 time.
Now move on to the next crystal in line and rotate it 3 times.
Once you are done with the previous crystal, rotate the next crystal 1 time.
Now onto the final crystal, you need to rotate this 2 times.
Once you have rotated the final crystal, the objective will be completed and you can proceed with the next objective of the companion story.
If you still haven’t collected all the Frost Bugs of Mt. Firmament then you can do so by checking our guide on it. Each Frost Bug will reward you with 20 Astrite!