 3 articles
The remade Shi No Numa Zombies map has been released alongside the Mercenaries of Fortune update. This is basically the “enhanced” version of the map which was released back in 2008 on Call of Duty: World at War.
This newer version of the map also comes with its own storyline quest which also has an Easter egg upon completion. If you want to know how to complete the questline, then this guide is for you.
Shi No Numa Easter Egg Guide in Call of Duty Vanguard
The questline is pretty long, and you’ll have to follow a total of 7 steps to see it through. Without further ado, here are the steps you need to follow to complete it:
Step #1: Build the Wunderwaffe DG-2

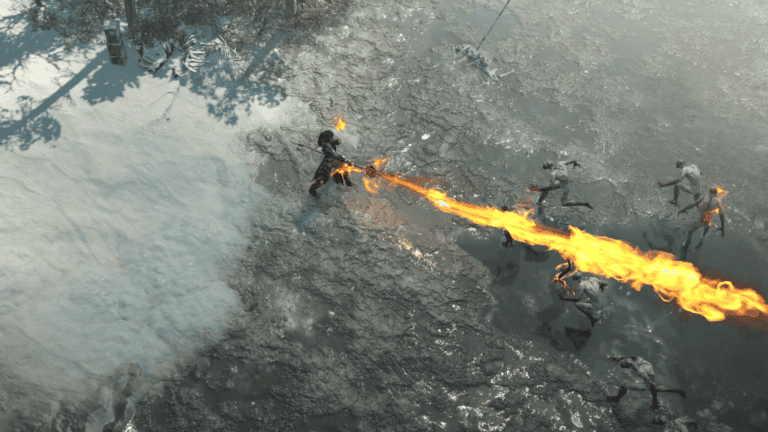
First and foremost, you’ll want to build the Wunderwaffe DG-2 as you’ll need this weapon on the map. The weapon will take a little bit of time to build, and as you go around gathering parts, you can also do other activities while you’re at it.
 Call of Duty Vanguard: Wunderwaffe Build and Upgrade Guide | Shi No NumaMar 23, 2023
 Call of Duty Vanguard: Shi No Numa Song Guide | Samantha’s SorrowMar 23, 2023
I highly recommend skipping down to Step #2 while still actively trying to build the weapon. You can find the weapon inside the Storage hut on the workbench. However, it’s still missing some pieces which you need to find in order to make it work.
You can randomly get it from the Mystery Box, but the problem is that it won’t show up until the tenth round.
To get to the hut where the weapon is located, you’ll want to start from the starting area which is on the upper level of the Main Hut. From there, spend 1,000 Essence points to open the stairs that will take you to the lower floors.
Next, open the gate that will take you to the Doctor’s Quarters. This way, you have already unlocked the area for Step #2 by the time you reach round five. Once round five is over, you should have enough points to spend on opening more areas of the map.
Then, you’ll want to open the gate outside of the Main Hut using 1,000 Essence points. This will lead you to the Fishing Hut.
Gathering the Parts
Once you’re in the Fishing Hut, look for the barrel part which you can find on a shelf. Turn right as soon as you enter the doorway to notice it. Take the barrel and head to the northern part of the map. Look for a green electrical box outside of the Comm Room then interact with it. Kill all of the remaining zombies to end the round.
Lightning will strike the box and a wave of zombies will appear. Do your best to survive the wave, then take the second part of the weapon. Go to the Comm Room and grab the charged Vacuum Tube part which is on the radio. Also, don’t forget to grab the barrel which is on the electrical box.
You can find the third piece inside the office. This is the Electrical Fuse part which you have to take to the storage hut. Inside, you can find an electric trap which you have to interact. This will cause it to break, thus requiring a fuse to fix.
Since you already have it, simply interact with the trap to place the missing part. Activate it and kill zombies until you get an audio cue saying you’ve killed enough. By then, the second Vacuum Tube part is already charged. You can find it on the workbench, so you don’t really need to grab it at all.
The last part will require the help of a special masked enemy type which only spawns on round 15. Once you reach this round, lure this type of enemy to the Excavation Room which is on the lower part of the Main Hut. There, you can find a Tesla coil. Stand near it and have the enemy’s attack power it. You’ll then get an audio cue saying that the coil is charged.
After that, you can now retrieve the last Vacuum Tube part. Go back to the workbench to finally craft your own Wunderwaffe DG-2 weapon.
Step #2: Clear the Monolith
Once you have your own Wonder weapon, go to the Doctor’s Quarters and look for a monolith covered in vines. You need to clear that monolith and destroy the vines. To do so, lure a Boom-Schreier near the monolith and kill it as quickly as possible. This will cause it to explode and clear the vines for you.
You can encounter them as early as the fifth round, though there will be a lot of them in the later rounds.
Step #3: Solve the Puzzle
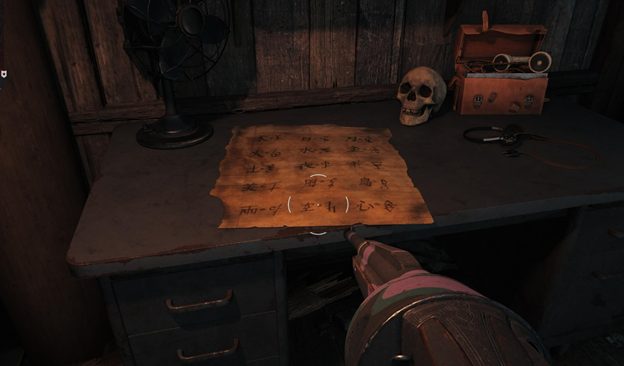
Inside the Doctor’s Quarters building, you can find a piece of paper that has some symbols on it. However, only half of the symbols are shown. You will need fire to reveal the remaining symbols which you can then farm from the zombies. There’s even a huge chance that you already have the symbols you need.
Afterward, you’ll need to look for three disks that you need to place on the monolith the solve the cipher. The first disk is inside the Doctor’s Quarters in the far right room, the second disk is on a Dormitory table, and the third is on Dig Site at a table in front of the Pack-a-Punch machine.
After collecting all three, place them on the monolith. This will prompt you to look for a code that requires three symbols. You can find three systems containing the necessary Kanji symbols throughout the map. The first is on a table in Excavation Room, the second is on a crafting table at Dig Site, and the third is inside the Comm Room on a desk with radios.
Head back to the monolith and enter the symbols you found. Make sure that they are aligned on top of each other in the middle. You can do this by rotating the disks to form a vertical row.
Step #4: Lockdown
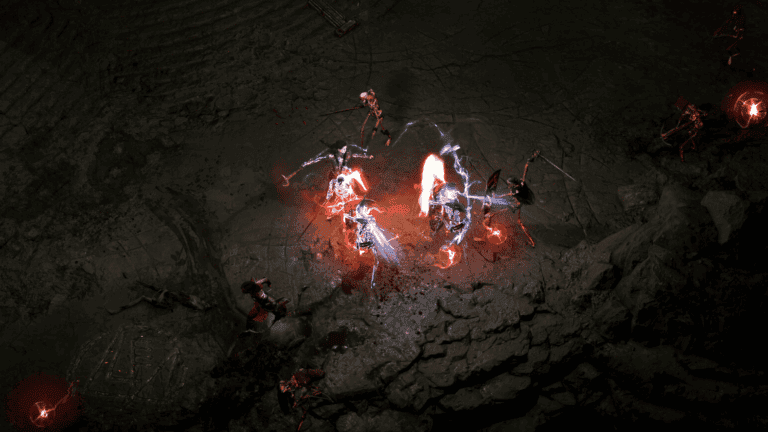
After entering the code, you can find small stone pillars that are glowing red which you can interact with. The number of pillars will depend on how many players are in the game. Each of the players should interact with a given pillar all at once. This will cause a lockdown to occur.
The lockdown will spawn waves of zombies which you should defeat. However, if you have the Wonder Weapon, you must shoot the ones with a blue haze surrounding them. Also, you have to kill them while they’re near the monolith. As soon as you complete this, a mini-cutscene will start playing.
Step #5: Obtain the Flogger Juice
You can get the “Flogger Juice” by killing zombies near the active Flogger trap. You can lure them into the trap and activate it as soon as they’re nearby. Doing so will cause their blood to fill up the fountain right ahead.
Once the fountain is filled, drink the blood to enter Zombie blood mode. In this mode, you can get a special vision that allows you to see red orbs floating around the main room. You’ll want to interact with a red orb, causing it to transfer to another part of the map. Look for the orb and interact with it the second time. This will cause it to drop a relic mirror fragment.
After picking the first mirror piece, you might need to drink the blood again. But if you still have it, go over to the map in the Excavation Room. Here, you’ll find an X mark which is on the upper left part of the map. This is where you can find the second mirror piece.
Head over to that area to find the mirror piece on the ceiling. You just have to shoot it to cause it to drop to the floor, allowing you to pick it up.
Step #6: Interact with the Podium and Shoot Orbs
Once you have both the mirror pieces, go to the Dig Site and look for the podium at the center. Place the mirror pieces on the podium. This will cause glowing orbs to appear depending on the number of players in the game.
Each player should interact with an orb all at once, causing them to float and fly away. Then, you have to track those orbs and shoot them three times. Each time an orb gets shot, it will move to another location. Just follow it until you’ve done it three times.
After completing it, interact with the podium once more. This will then trigger a boss fight.
Step #7: Defeating the Boss
The last step is to beat the boss after it’s been triggered. There are 3 rounds to this boss fight, with the boss being immune to all damage at the very start.
Round one is similar to the fight on step #4 where you have to kill the blue zombies using your Wonder Weapon. However, you have to do this near the podium this time. This will cause a blue bubble to surround the area. Make sure to lure the boss inside of its AOE so you can damage it with your attacks.
Rond two is still similar to round one, except that you’ll be killing Boom-Schreiers this time. The same mechanics apply until you reach the third round. Round three will be a bit more challenging since you’ll need to deal with the mini-gun-wielding enemy type.
After finally defeating the boss, you’ll then get the Shi No Numa Easter egg as well as a cutscene and a calling card reward.
ALSO READ: ARK Fjordur: Where to Find Sulfur and Congealed Gas Balls