162 articles
The Eyes in the Sky quest in ARC Raiders has you climbing, scanning, and ziplining your way across multiple maps. It’s a fun mission that sends you across multiple maps for the sole purpose of installing LiDAR Scanners at elevated locations.
This mission tests both your navigation skills and your patience. While the objectives are rather straightforward, getting to the locations can be tricky, especially with increased player traffic in the areas.
Thankfully, quest progress now saves after each scanner installation. As such, you don’t need to complete all objectives in a single raid anymore. That said, here’s how you can complete this quest.
1. Dam Battlegrounds Map – Control Tower
Your first objective is on the Dam Battlegrounds map at the Control Tower. You want to travel as far up as you can go in the building.
 Hotel Panorama Puzzle Solution in ARC RaidersApr 30, 2026
 ARC Raiders: How to Find & Use Dockmaster’s DetectorApr 30, 2026
 ARC Raiders: Where to Find Turbine CompressorApr 30, 2026
So once inside, get to the elevator that you can zip up. Open the door and turn right, following the stairs until you see a locked door that requires the Dam Control Tower Key.
You won’t need it for this mission, but you know you’re in the right spot if you see this.
Continue climbing higher until you breach a door that leads to the roof. From there, go to the left corner of the roof. That’s where you’ll find your first objective. Interact with the highlighted area to install your first LiDAR Scanner and complete this phase.
Just be careful while moving through the tower as the Dam Battlegrounds have increased enemy activity, especially during storm conditions.
2. Spaceport – Communications Tower
The second scanner location is a lot easier. This time, your next destination is the Spaceport map, where you need to locate the Communications Tower.
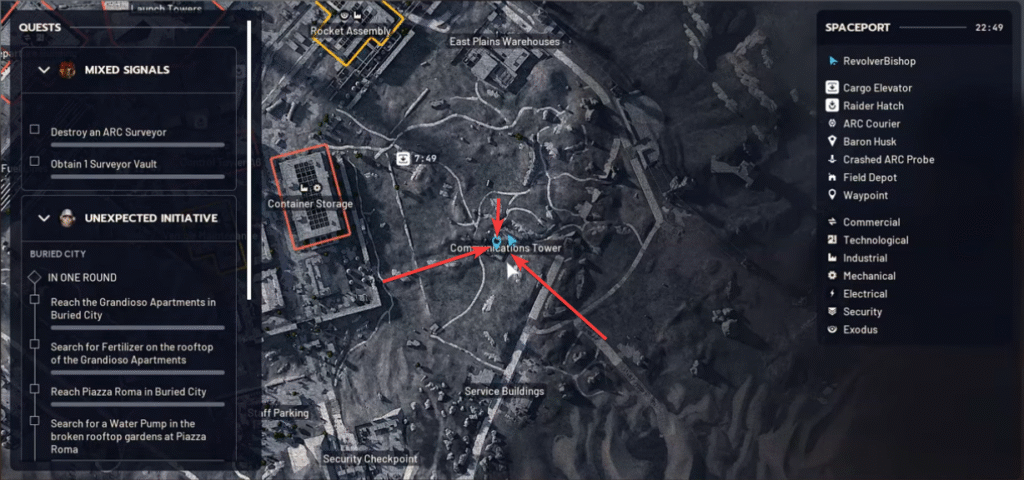
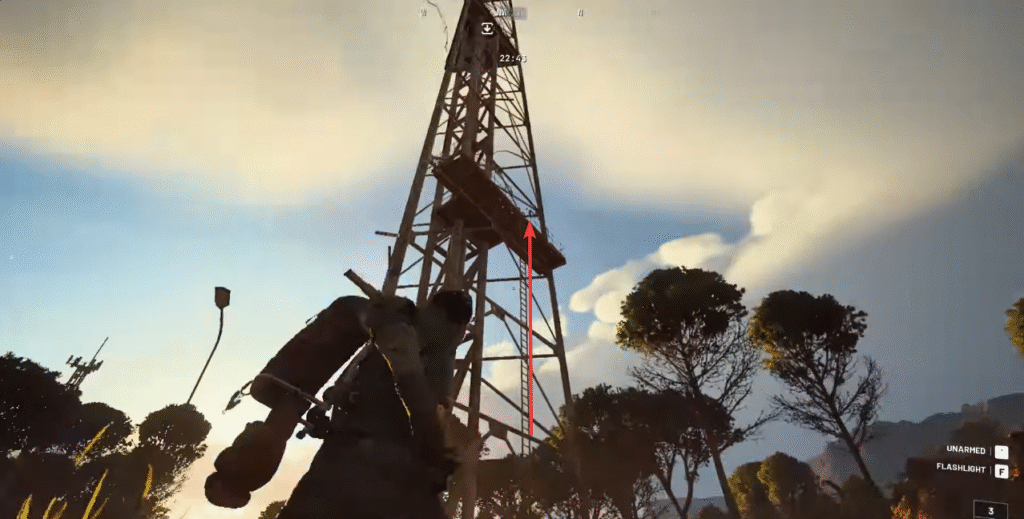
Once doing so, climb the ladder attached to it, and look to the right of the platform.
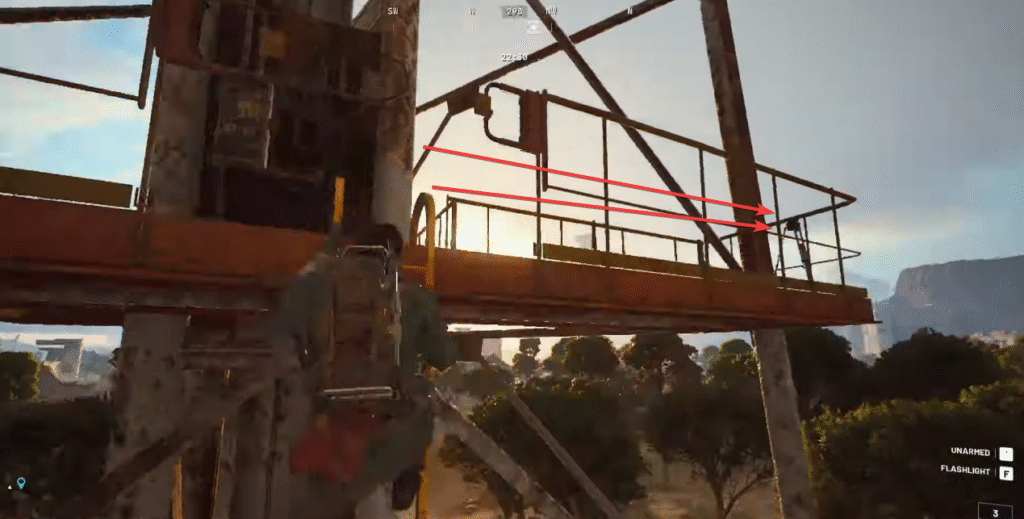
The scanner will be sitting right there, waiting for you to install it. Interact with it to complete the second step. It’s quick and easy!
Compared to the other objectives, this is often the safest and fastest one to finish. However, still make sure to pay attention to enemy activities, as Spaceport can still attract players farming nearby loot routes.
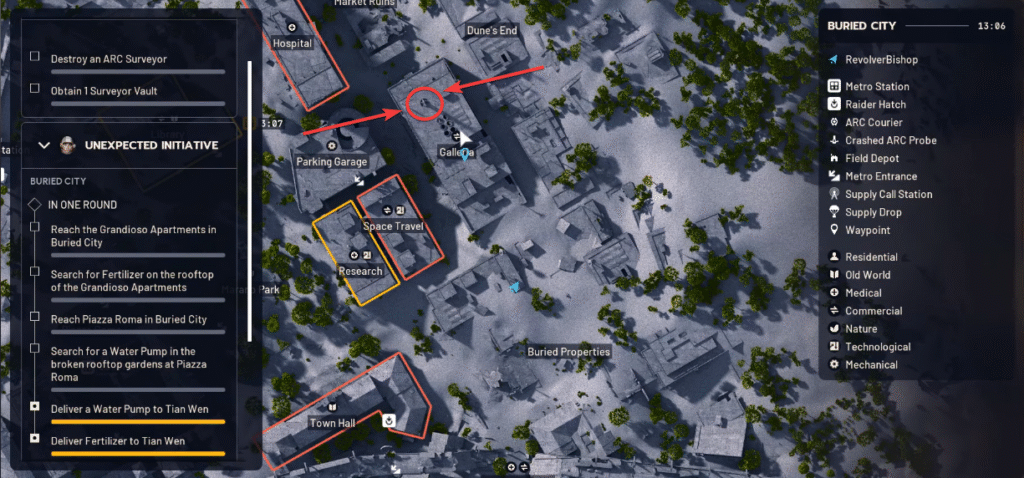
3. Buried City – Galleria
The final part of the quest takes place in the Buried City map at the Galleria building. It’s usually the hardest part of this quest, and this one requires more finesse. There is prep work to be done before heading into battle.

You should buy three zip lines from the in-game vendor Apollo; they cost 1000 credits. But please note that there’s typically a three-per-day limit, so plan accordingly.
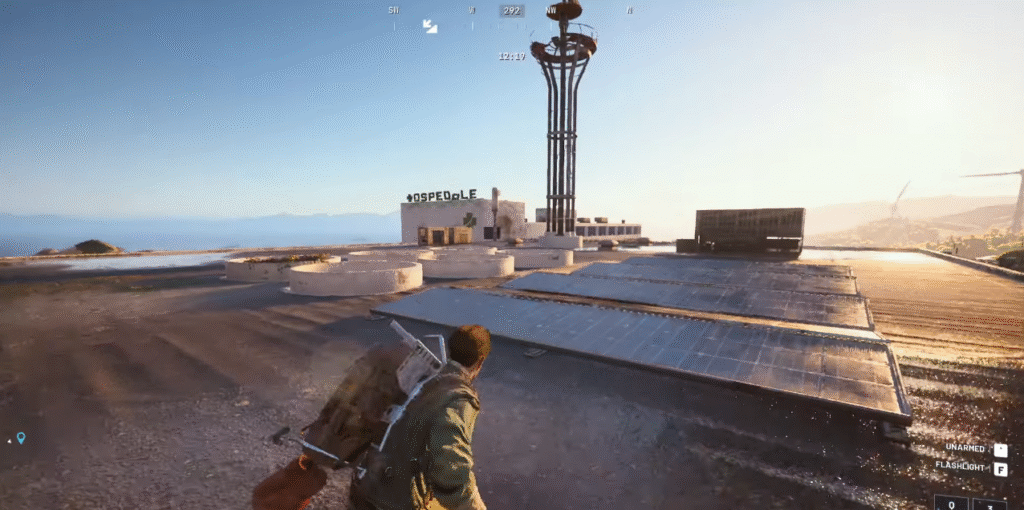
You need to make your way to the roof of the Galleria building on the Buried City map. You can do this by climbing outside of the building on the south side. You are looking for the tall tower made of metal on the roof. When looking at it, you should see the Hospital sign behind it on a different roof.
That’s where you’ll need to install the final scanner.
You need the zip lines in order to get to the top of the tower. Set your zip lines carefully; the first placement might cause an almost fatal fall, so you have to ensure your line connects to the tower’s top. Thus, you need to buy 3 zip lines in case you mess up the placement of the first one or two.
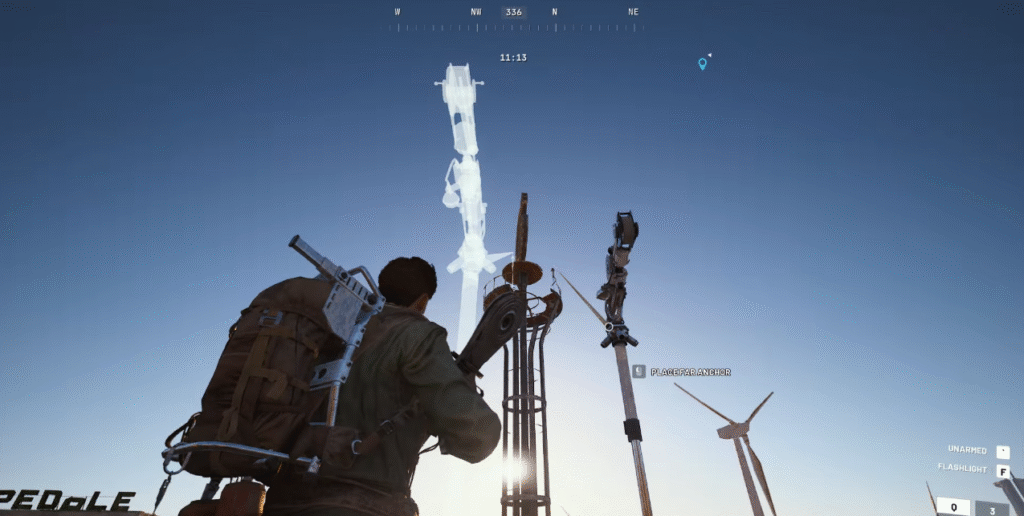
Use the zipline and once at the peak, interact with the marker to install your final LiDAR Scanner and complete the quest. This should give some extra XP and requires no big fights.
Do take note that the area is often contested since nearby rooftops offer strong sightlines for both PvP and ARC encounters. I recommend you extract immediately after you complete your objective here.
Wrapping Up
And that’s all there is to the Eyes in the Sky quest in ARC Raiders! While the first two steps are relatively simple, the final section tests your coordination. The mission is a great way to get comfortable with zip line placement and map navigation.
All of these are crucial for surviving in the world of ARC Raiders.
As soon as you place all three LiDAR Scanners, go back to Shani to receive your rewards. You’ll get 3x Tagging Grenade, 1x Vita Spray, and 5x Yellow Light Stick for your efforts. It also unlocks the After Rain Comes from Celeste.
If you’re looking for other missions in ARC Raiders, check out our What We Left Behind quest guide, as it will send you to all three of these same maps!