


 18 articles
The Kortz Center Heist in GTA Online can be a tough one to complete with the max payout, thanks to the tricky lasers grid and hacking puzzles you’ll need to deal with.
Hacking puzzles are nothing new to heists in GTA Online, sure, but the ones in this heist are particularly tricky. But even those pale in comparison to a very tough laser grid you have to go through to reach the vault!
In this guide, I’ll help you deal with these rough spots to complete the Kortz Center Heist.
How to Complete All Lasers & Hacking Puzzles in the Kortz Center Heist | GTA Online
 GTA 5 Online SOLO Cayo Perico Heist Guide (Stealth + Elite)Dec 26, 2025
 ALL Snowman Locations in GTA 5 OnlineDec 26, 2025
 FASTEST Money Methods AFTER Mansions DLC in GTA V OnlineDec 14, 2025
Fingerprint Hack
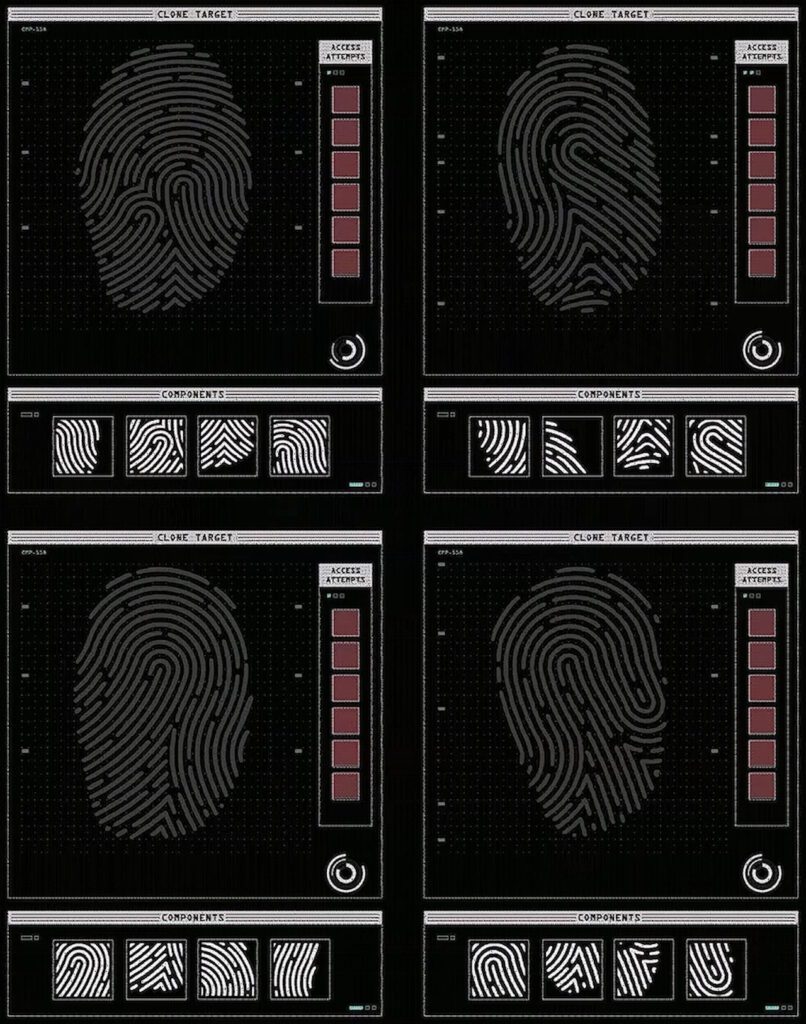
Let’s start off with the easiest of all of the puzzles you’ll need to deal with in this heist. For the fingerprint hacking puzzle, the best way to complete it is to just memorize all 4 potential fingerprints.
For reference, you can see the 4 potential fingerprints and what to choose above. Use this cheat sheet as a reference and you’ll have no issue clearing the hack every time!
Memorize the Dots Hack
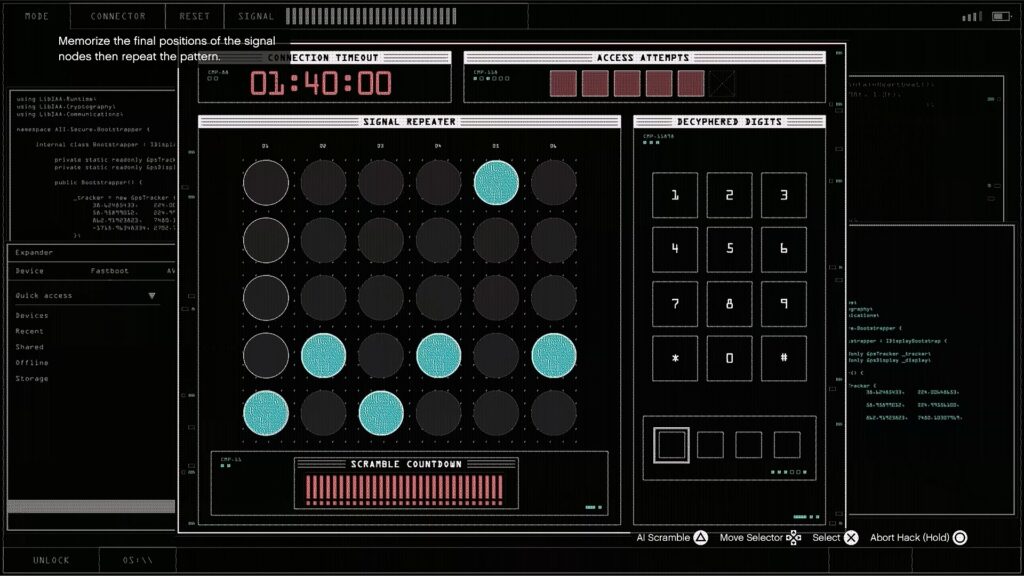
The next hack type you’ll need to deal with is the one that requires you to memorize a sequence of 5 dots (Normal) or 6 dots (Hard).
For this one, various sequences of dots will flash on the screen first. The only one you need to focus on is the one that flashes repeatedly for the last 3 or so patterns, as that’s the one you’ll need to input. You can tell it’s the right one because it’s the only sequence that repeats itself.
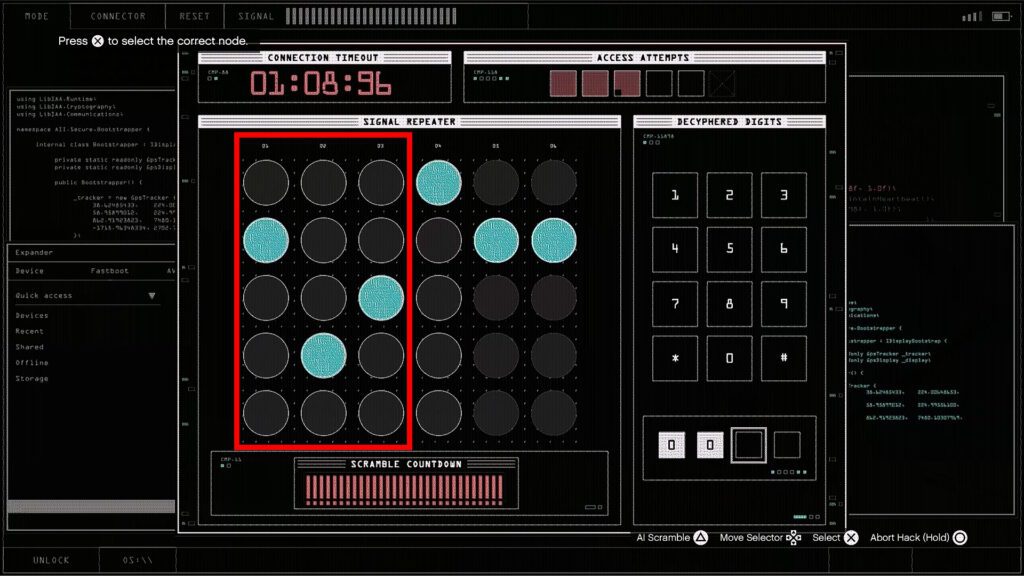
To simplify this, I recommend focusing on only remembering the first 3 dots from the left to right. That is, the ones highlighted in the example above, for reference. Focus on just those 3 and they’ll be much easier to remember than the entire sequence.
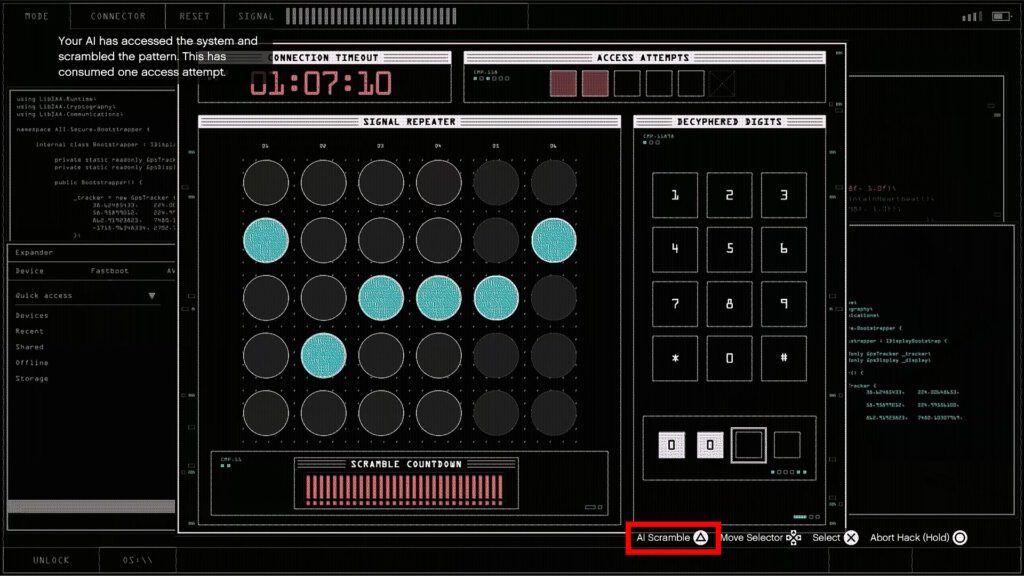
When you’ve memorized it, input the first 3 dots of the sequence and use the AI Scramble feature. You can see the input for it at the bottom of the screen.
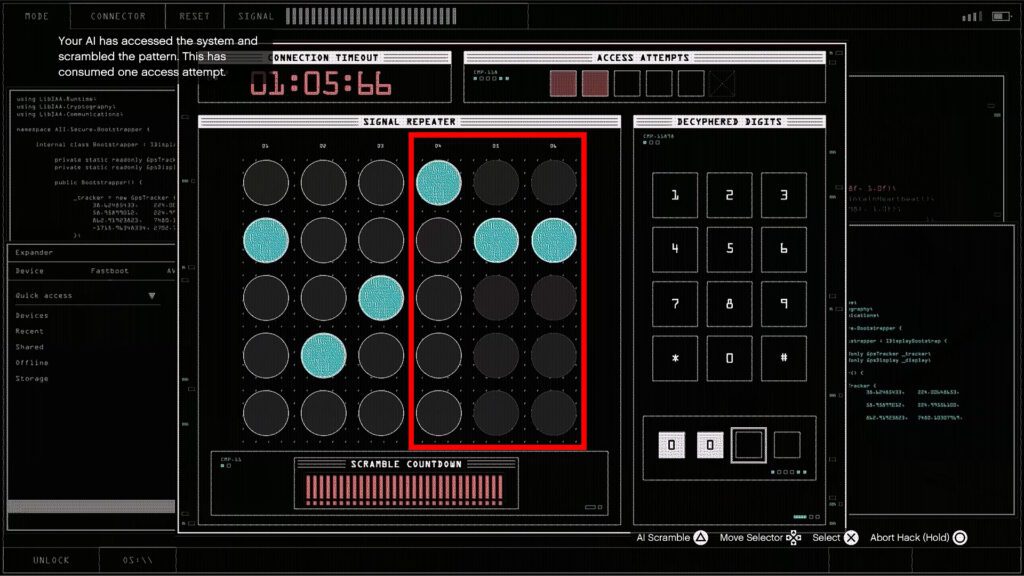
As soon as you press the button for the feature, all of the flashing dot patterns will repeat on screen again. This will allow you to see the sequence again. This time, memorize the last 2-3 dots and input them.
Do keep in mind that using the AI Scramble feature will consume 1 of your Access Attempts for the hack. This shouldn’t be an issue, however, as it’ll make the hack easy enough that you won’t need them all!
In short, the trick for this hacking minigame is just to break up the sequence when memorizing. Memorize and input the first half, then use AI Scramble for the second half. It should make it a lot easier for you!
Avoid the Lasers
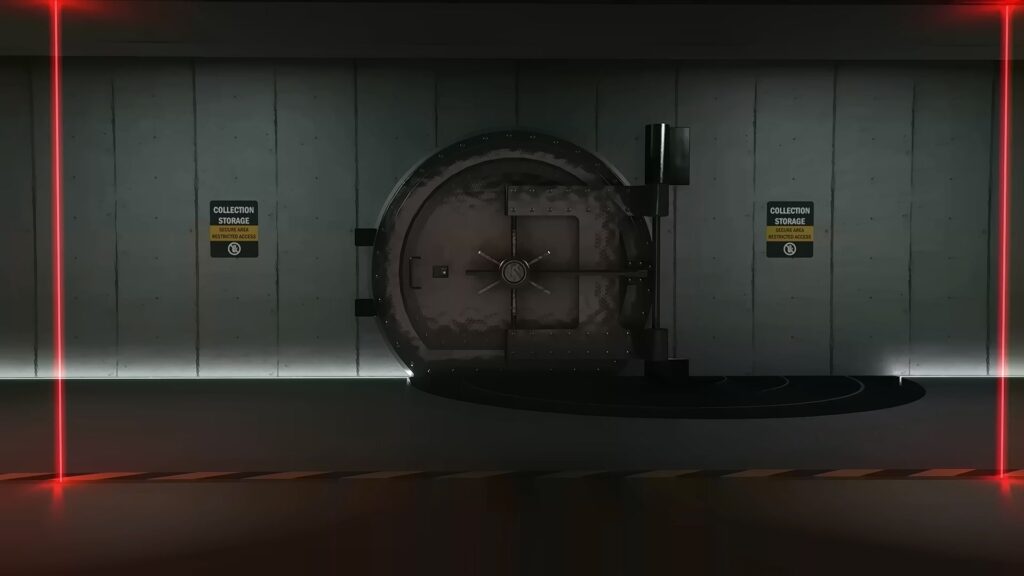
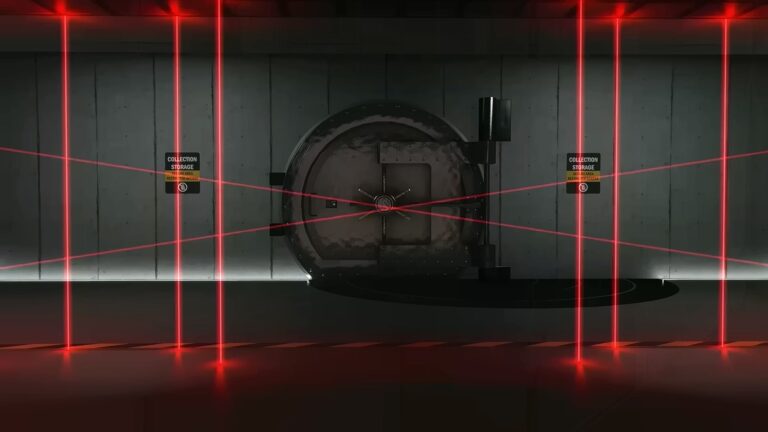
Last but definitely not least, the dreaded laser room. As part of this heist, you’ll need to go through a room full of lasers to the vault. Avoid the lasers to avoid triggering the alarm! Easier said than done, though…
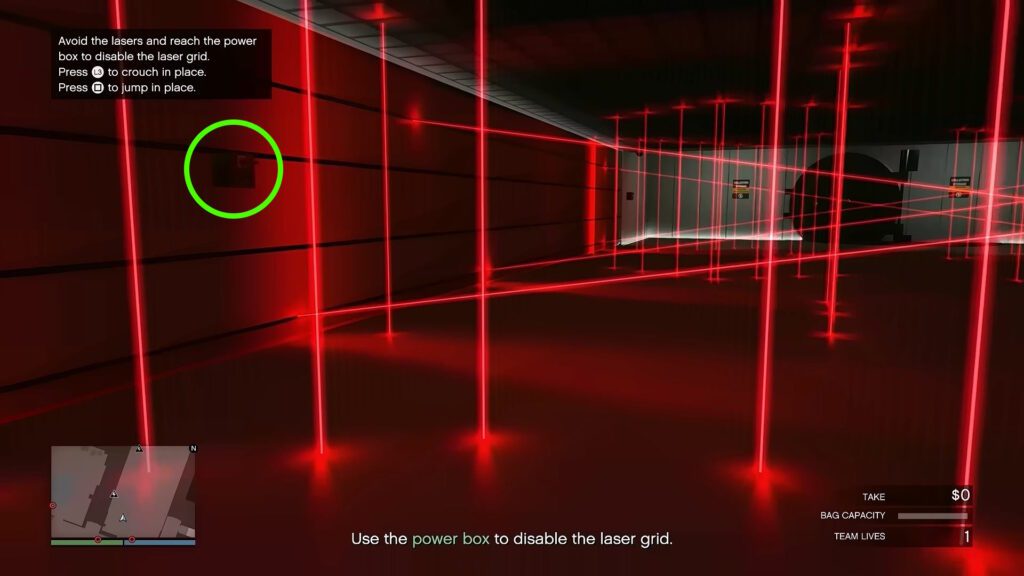
The main thing to keep in mind here, though, is that the laser grid is divided into 3 sections. You can find a power box on the wall after each section. Interact with them to disable the previous part of the grid.
That said, you can also just try rushing to the end of the laser grid if you wish. It’s not necessary to disable every single section in Normal Mode, as just disabling the final one will get rid of the entire laser grid.
Nonetheless, the real trick here is figuring out how to actually avoid the lasers. So, let me help you out by breaking down what each of the potential patterns is like and how to deal with them.
Waving Laser (Normal)
For the very first section of this laser grid variation, you’ll have two overlapping waves of lasers. The trick here is just to wait until they spread, then go through the middle to use the power box on your left. It should look something like the video below.
For this second section, you’ll want to start on the right side of the grid. Go under the first angled laser, then follow one of the moving lasers to go to the left side and go under the second angled laser.
Then, try to carefully weave in between the moving lasers. Don’t rush or panic here, as it’s easier than it looks. Do it right to reach the next power box, as shown in the next clip.
For the final section, you’ll notice that there’s a moving laser section that has two different variations. What you want to do here is to wait for the cross-shaped variation.
To get the timing right here, look for the open square-shaped variation. Then, as soon as it starts to disappear, rush straight ahead. When you see the cross-shaped lasers appear again and go towards you, crouch under the cross to avoid them.
Now, this can be tricky to get right. So, as before, I recommend watching the next clip to grasp how exactly to deal with this.
With that, you’ll be able to reach the final power box and finish this laser grid section!
Cross Lasers (Normal)
The first section of this laser grid pattern is quite easy. Simply hug the left wall and walk right through the first laser cross. Then, wait for the horizontal lasers to turn off and walk between the vertical lasers. Use the next clip as a reference.
For the second section, go to the right wall and position yourself between the third and second laser crosses from left to right. Watch out for the vertical wall of lasers here, it should go right past you to the right.
Once the wall of lasers passes you, wait for the low horizontal moving laser to turn off. Then, go through the crosses and right to the power box, as shown in the next clip.
For the final section, position yourself in the center facing the vault. Go through the crosses, avoiding the vertical laser walls, then wait for a slow horizontal laser to appear.
When the horizontal lasers start getting close to you, crouch under them and wait for them to pass. Then run past the final set of crosses and reach the power box, as shown in the next video.
Hard Mode Lasers
For the very first section of this laser grid, you’ll mainly want to focus on the ground-level horizontal laser. It’s a good idea to try doing this in first-person view, as well, as it’s a tad easier and makes the power box interaction faster.
Get as close as possible to the laser grid, then wait for the horizontal laser to approach the start of the grid. The moment it disappears, rush straight between the vertical lasers to the power box. It should look like the next clip.
As soon as you use the first power box, run all the way back to the start of the room. Then, face the vault and hug the right wall. Just like before, first-person view is highly recommended for this!
Once you’re in position, wait for the moving ground-level horizontal laser to approach the start once again. As soon as it disappears, run straight ahead towards the power box.
As you’re approaching the power box, you’ll likely be face-to-face with a high horizontal moving laser. Crouch under it, then interact with the power box, as shown in the next clip.
For the final section, you’ll need to deal with a very intimidating wave of lasers. However, the trick here is simple and is similar to the previous two sections.
Get as close as possible to the lasers without touching them, then wait for a ground-level horizontal laser to appear.
Once it gets close to you and disappears, you should also have a clear path through the waving lasers. So, just run right through to finish this dreadful laser grid, as shown in the next video!
Wrapping Up
With that, you should now know how to deal with all of the tough lasers and hacking puzzles required to complete the Kortz Center Heist in GTA Online.
Ultimately, this is all going to require practice, particularly with the laser grid section. So, I recommend being very patient and careful when dealing with those. At least now you know how to handle them, though!







Found another tip?
Share your extra strategy, correction, or question below. Helpful comments can make this guide better for everyone.