290 articles
Version 6.6, Luna VII, just came out for Genshin Impact and it brought a new set of updated Spiral Abyss challenges for you to beat.
These are a pretty tough bunch this time around, as is to be expected based on the last few patches! That said, learning what characters to bring and how to deal with these bosses makes them more manageable.
In this guide, I’ll tell you how to defeat the bosses of every updated Spiral Abyss chamber in 6.6.
12-1-1: Super-Heavy Landrover

The first new threat in the Luna VII update, the Super-Heavy Landrover, will require you to have a team focused on Pyro damage. This isn’t a suggestion, either, being basically a requirement.
 Genshin Impact: Natlan Underwater Luxurious Chest Monetoo Puzzle Solution in Ameyalco WatersSep 3, 2024
 Genshin Impact: Wooden Model Alpaca Puzzle SolutionSep 3, 2024
 Genshin Impact: Qispi Natlan Daily Reset Luxurious Chest Puzzle SolutionSep 3, 2024
But let’s start from the beginning, right? The Super-Heavy Landrover has massive Resistance at 150% for every single element by default. This makes it practically impossible to bruteforce.

However, dealing Pyro damage to the Landrover will make it start to heat up. You can see how this is progressing by looking at the circular Pyro gauge under its health bar.
Once the Pyro gauge reaches 50% or so, the Super-Heavy Landrover will switch to its Overheated phase. During this phase, its Resistances all drop down to a much more manageable 50%.
When the Pyro gauge reaches 100%, the Super-Heavy Landrover will summon a Cryo Ward to block damage and cool itself down. To break this Cryo Ward efficiently, you’ll need to deal 14 Pyro hits.
Once you manage to break the Cryo Ward, the Super-Heavy Landrover will be Paralyzed and its Resistances will all drop down to -20%. That means this is your big chance to deal damage, so try to finish it off!
Ultimately, having a solid Pyro team is all you really need to take down this boss efficiently. I also highly recommend having some Dendro characters so that you can trigger the Burning reaction, which absolutely melts the boss.
12-1-2: Lord of the Hidden Depths

The main gimmick for this boss is that it will protect itself with a Deepdark Shield, which is 45% of its Max HP. Removing this shield efficiently will be key to dealing actual damage to the boss!
Dealing any Elemental damage to the Shield should whittle it down. However, if you want to be efficient, you’ll want to apply Lunar Reactions primarily. Lunar Reactions deal 300% more damage to the Deepdark Shield.
As such, this boss is much easier if you simply have any character that can trigger Lunar Reactions. Columbina on her own, for example, could absolutely shred the Deepdark Shield.

If you don’t have any character that can trigger Lunar Reactions, you’ll instead need to defeat the minions summoned by the boss.
Each minion you defeat will damage the Deepdark Shield. Defeating all 4 of the minions will fully destroy the shield, leaving the Lord of the Hidden Depths exposed to direct damage.
If you’re going to deal with the minions, I highly recommend having a character that deals strong AoE damage or one that can group up enemies. The minions aren’t super close to each other, so you need to make up for that.
Whichever method you go for, you have about 18 seconds to destroy the Deepdark Shield. Failing to shred it in time and the boss will deal massive damage to you, which can often lead to failure.
In short, your best bet for dealing with this boss is to bring a team that’s focused on Lunar Reactions to destroy the shield fast. Ideally, you want Lauma or Nefer, but Columbina can work well too. Alternatively, bring characters with strong AoEs and grouping abilities.
12-2-1: Primo Geovishap

A bit of a breather boss, compared to the others in the current Spiral Abyss iteration. The Primo Geovishap really has very little going on for it besides being a damage sponge. That said, there are still some things to look out for!
The first thing you want to look out for is to wait a few seconds at the start of the fight. Once the fight begins, the Primo Geovishap has massive Resistance upwards of 200%. This lasts for a few seconds, so don’t waste your stronger abilities early.
Aside from that, it’s also a good idea to have a Shield character. You can use them to deflect some of the Primo Geovishap’s attacks, which greatly reduces its Resistances to -20% (Physical) and -40% (Elemental) for 5 seconds.
The main attack to counter is the Primal Shower attack. The Geovishap telegraphs this attack by doing an elemental breath at the ground in front of it, then releasing a counterable elemental blast shortly after.
Nonetheless, this is a very straightforward boss overall. Any team should work well for it, provided you do have a Shield character in there for the counter. Other than that, just watch out for its damaging attacks and whittle it down.
12-2-2: Grounded Geoshroom
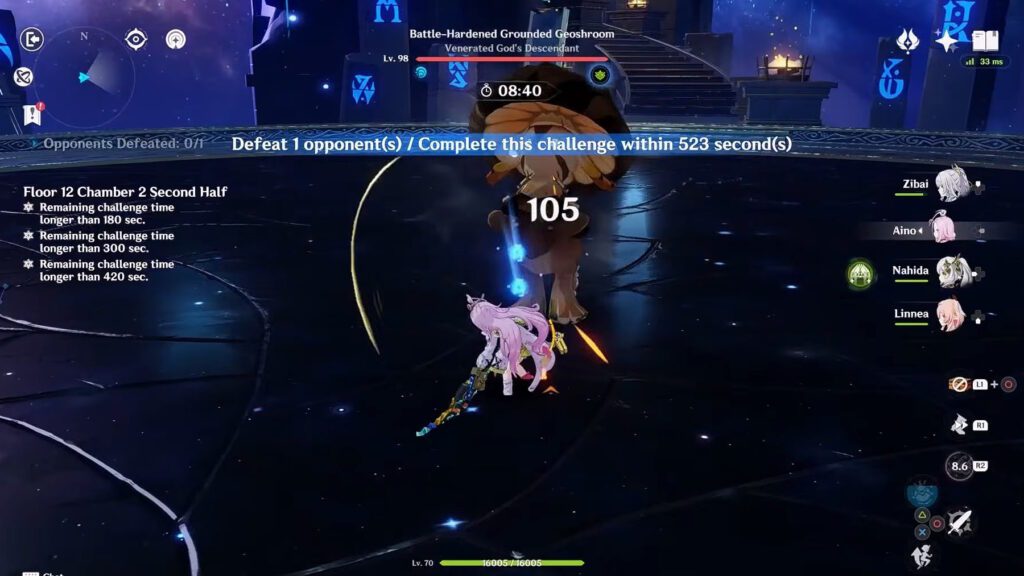
The Grounded Geoshroom is a bit similar to the Super-Heavy Landrover from earlier. For this fight, you’ll need a Dendro-Hydro team. You should not use Pyro or Electro characters under any circumstances.
The reason for that is that the boss starts the fight in the Scorched state, which gives it 130%-150% Resistances across the board. You’ll need to get it out of this state to deal any proper damage.
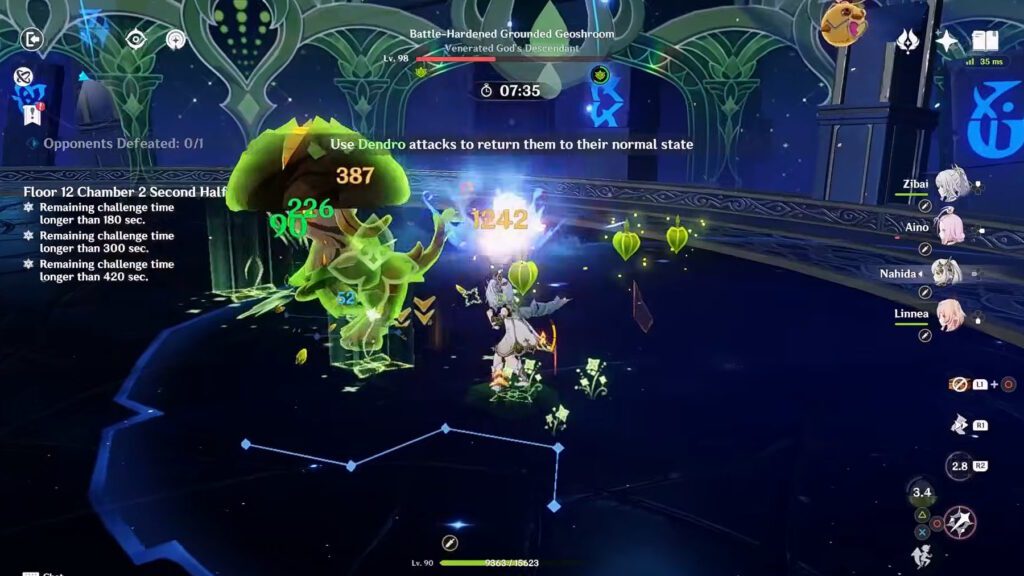
To remove the Scorched state, you’ll need to deal damage with Dendro until you fill up the Dendro gauge below the boss’ health bar. Once it’s filled all the way through, the Geoshroom will go back to its normal state with only 10%-30% Resistances.
The reason why you want to avoid Pyro and Electro here is simple. Pyro will reset the Dendro gauge and force the Scorched state. Electro will enlarge the boss, give it a new attack, and partially reset the Dendro gauge. Neither of these are good for you!
So, ultimately, you’ll want to make a team consisting of Dendro and Hydro characters. Aim for Bloom Elemental Reactions for the best damage. Even better if you have Lauma, Nefer, or Columbina, since they allow you to go for Lunar-Bloom instead.
In short, make a Bloom or Lunar-Bloom team and focus on using Dendro to reduce the Geoshroom’s defenses. Sadly, it’s an extremely limiting boss when it comes to team building.
12-3-1: Hexadecatonic Mandragora
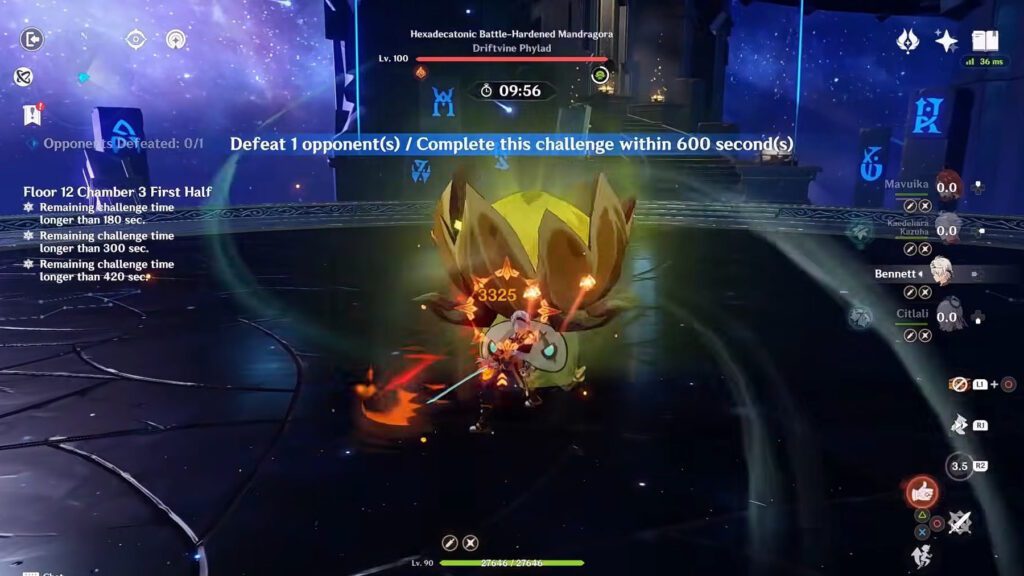
As a complete reversal from the previous boss, this time you’ll need to bring Pyro and Electro attacks. Do not use Dendro at all, as the boss has 205% or 135% Resistance to it, depending on its state.
For this boss, you’ll notice that the Mandrogora has a gauge with an icon of itself below its health bar. This gauge will drain automatically over time, but it’ll take 35 seconds to empty by itself.
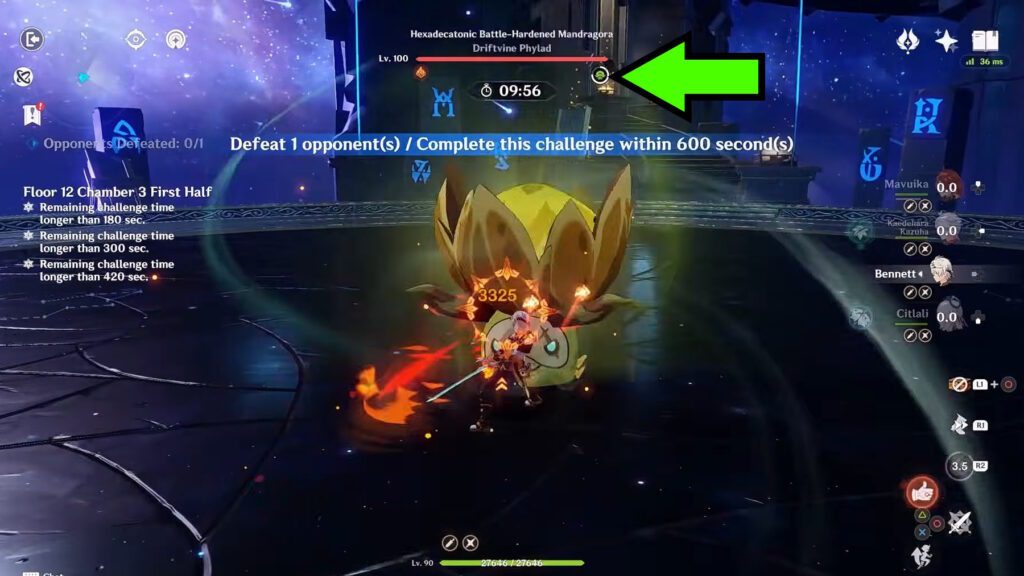
To speed up emptying the gauge, hit the Mandragora with Pyro and Electro attacks. The exact effectiveness varies by attack, but each hit from these elements will drain the gauge.
Once the Mandragora’s gauge is fully empty, it will burrow underground and spawn a group of Mini Mandragoras. It’ll spawn 1 Mini Mandragora for every 2% of remaining Max HP. This state lasts around 18 seconds, represented by the Mini Mandragora gauge below the health bar.

Your goal here is to defeat all of the Mini Mandragora before the time is up. At the bare minimum, no more than 2 Mini Mandragoras should remain alive.
If you successfully defeat enough Mini Mandragora, the Mandragora will reappear and immediately get stunned for 6 seconds.
Its Resistances are also lowered to 10% (besides Dendro at 135%), and will remain lowered until it summons the Mini Mandragora again. So, it’s your best chance to do damage!
In short, being fast in this fight relies purely on how effectively you can deal with the Mini Mandragora. Good grouping characters like Venti, Kazuha, and Sucrose are an absolute must to succeed here.
13-3-2: Battle-Scarred Rock Crab

The last new boss in the current Spiral Abyss, this one is once again going to require a Dendro-focused team. More specifically, you need to trigger Bloom-related Elemental Reactions, so Dendro + Hydro is the bare minimum.
That said, any Bloom-related reaction will count for what you need. That includes Burgeon and Hyperbloom from using Pyro on Electro respectively on Dendro Cores, for example. But it also extends to Lunar-Bloom.
As soon as the fight starts, the Crab will summon a bunch of Stoneborne Seeds and start floating in the air. Your goal here is to create Bloom-related Elemental Reactions on the Stoneborne Seeds to destroy the seeds.
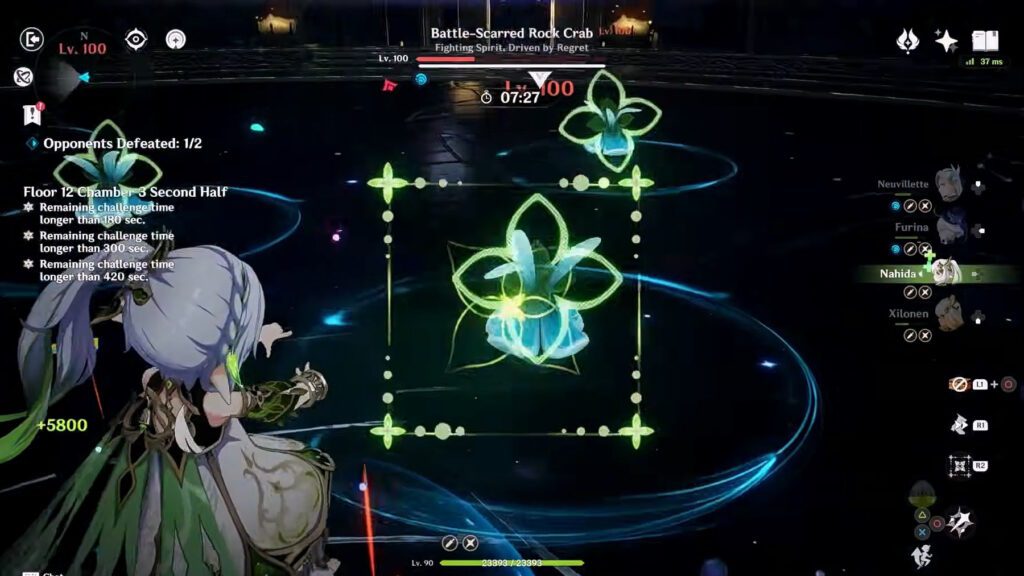
If you manage to destroy all of the Stoneborne Seeds quickly enough, the Crab will fall and be paralyzed. Its Resistances will drop to -30% and it will be stunned for 5 seconds. It’s your big damage window!
If you don’t manage to Bloom the Stoneborne Seeds in time, the Crab will detonate them. This can do extreme damage, being a guaranteed one-shot in most cases. That said, you can avoid the blast by being at the edges of the arena.
Do note that the Crab can also place Stoneborne Seeds even without going for the floating charged attack. While not necessary in those instances, applying Bloom on the seeds is still ideal, as it does pretty good damage.
Ultimately, this fight is purely reliant on your ability to apply Bloom to the Stoneborne Seeds quickly. Once again, Lauma and Nefer are the best characters to use against this boss. But any strong Bloom team should be able to do well enough here.
Nonetheless, that’s all you need to know to beat all of the new chambers in the Spiral Abyss in version 6.6 of Genshin Impact, Luna VII!