Locations
One Piece Odyssey – ALL 25 Nami Item Locations (Treasure Sensor Guide)
Find all 25 of the Money Nami Item Locations!
Published
1 week agoon
By
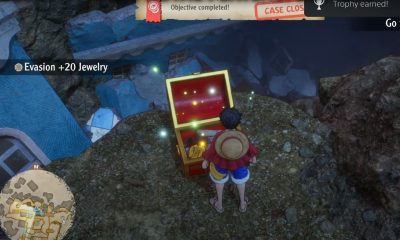
David MickovNami is a very fun character to be playing as in One Piece Odyssey. One of the perks that she has is finding a lot of money that can be found throughout the world of the game. In this guide, we will show you all of the 25 Nami Item Locations that you are able to find to achieve the Treasure Sensor trophy. Let’s get started.
ALL 25 Nami Item Locations (Treasure Sensor Guide) – One Piece Odyssey
Nami Item 1
Get inside the Great Sandy Desert and just in the middle of the ground here you will find the Item.
Nami Item 2
In the Great Sandy Desert and in the large desert field you will find a little shack with a guy inside of it. Here you will find the item.
Nami Item 3
Just look behind the tents inside the camp area that you can make in the center of the island in Great Sandy Desert.
Nami Item 4
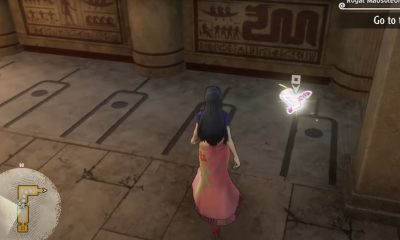
Get inside the Dinners Casino inside the Alabasta map region. Then while inside, head to the right or east side of it and you can find the Item just next to the casino machines.
Nami Item 5
Go to the Desert Near Alubarna and to the top right corner of the this map. Here you will find a wooden structure and on top of it is where you can find the Nami item.
Nami Item 6
Inside the Desert Near Alubarna once again and next to the tent as you can see in the picture above. Just get next to the 2 NPCs that are dancing on the structure and you can find the Item.
Nami Item 7
Again inside the Desert Near Alubarna and to the left corner of the map where you can place your camp. Here just get to the highlighted position and you can find the Item on the ground.
Nami Item 8
Go to the other side from the Item location 7. Go to the top right corner of the camp you see in Desert Near Alubarna and here you can find the Item just on the wooden structure.
Nami Item 9
Go to the south east side of the Desert Near Alubarna and inside this very small corner, you can find the Nami Item.
Nami Item 10
Inside the Alubarna map in the middle section where there is a long road. Just go to the very small corner with the people around it and you can find the Item.
Nami Item 11
Inside the Alubarna map once again and to the center part of the map where there is an opening. Just go to the right corner of this little region here and you can find the Item.
Nami Item 12
In Alubarna and on the west side of the map. Here you can find a very small cart to be pulled around. The Item will be just behind or next to you, depending on where you’re coming from.
Nami Item 13
Go to the very north west side of the Alubarna map region and just in front of the bar and restaurant that you can get inside of. You will see it just in front of the entrance.
Nami Item 14
While inside the Water Seven City Area look for this bar place. The Nami Item will be just inside of it next to the entrance and the wall.
Nami Item 15
For this one just walk to this general location with Nami and you are able to find it just placed on the ground.
Nami Item 16
Head to the highlighted area shown in the picture above and follow the stairs all the way to the top until you reach the Nami Item next to the iron fence.
Nami Item 17
Inside the Water Seven City Area and on the very left side under the bank market location icon on the map. Just head on to the little park with the large tree and you can see it.
Nami Item 18
For this one just go on the opposite side from the Item Location 17. You can see it just next to the main road.
Nami Item 19
Inside the Water Seven City Area and then on the east side of the map. Look for the Nami item just where the stairs are touching the higher floor and you can find the Item.
Nami Item 20
At the large stairs next to the water fountain in the center of Water Seven City Area. Just get to the middle stairs and you can see the Item.
Nami Item 21
This one will be just on top of the item Location 20. Walk up on through the stairs and get to the highest possible stairs. In the center of them is where you can find the Item.
Nami Item 22
Head inside the Water Seven City Area and then find this little location next to the straight river in the middle. Take the stairs that lead you down to the river and you can find the Item next to it.
Nami Item 23
Go to the Dressrosa City Area and head to this little region that you can see in the picture above. Head next to the house and just in front of its entrance is where you can find the Item.
Nami Item 24
For this one, you need to head all the way to the top right corner of the Dressrosa City Area. Find the ruined houses in the highlighted position above and you can find the Item on the stairs.
Nami Item 25
Head to the opposite side now, or to the west side of Dressrosa City Area. Here you can find a wooden cart just next to the house entrance. The Item will be right beside that cart.
Those are all of the 25 Nami Items that you are able to find in One Piece Odyssey. We hope that this guide has helped you out in finding them all. Have fun!
Locations
Resident Evil 8 Village – Foundry All Item Locations | Heisenberg Factory
Jesse, we need to find more loot!
Published
5 days agoon
January 27, 2023In Resident Evil 8 Ethan Winters graduates from a helpless confused systems engineer to a father who’s hell-bent on getting back the severed parts of her frozen daughter. He still gets shaken every now and then especially in the mad house, but hardship builds character! What it doesn’t build is your eyesight as you might have missed some items along the way while you were busy with your rescue attempt. So if you’re not busy cheesing Soldats in a narrow corridor now would be the best time to retrace your steps and pick up everything else you forgot earlier in the game.
All Foundry Item Locations | Heisenberg Factory | Resident Evil 8 Village
Remember, your map is your best friend! The game uses the same map from the 2019 Resident Evil 2 remake so look at the floor plans closely and make sure that the rooms are all tinted blue before you step out!
When you arrive at Heisenberg’s front yard hug the wall to the left and follow that until you see a wrecked vehicle with its trunk open. You can find some rusted scrap in there, now head on to the left side of the doors and there you will see another car with metal scrap instead.
After going through the main door head to the left of the room towards the shelves and collect the gunpowder lying about. That is the only piece of loot you will find in this room.
Next room is the study, the corridor you go through will have nothing so feel free to breeze through that. Once you’re in you can find a unit of Chem Fluid on some shelves straight ahead and you’ll also have a short interaction with the great Heisenberg himself. He can’t keep getting away with it!
Basement B4
Once he does get away with it you’ll find yourself at the disposal chamber in Basement 4. Here are the items you can find here:
- Rusted Scrap – Can be found on the floor after you land inside the chamber
- Gunpowder – On some oil barrels near the rusted scrap you just found
- Rusted Scrap – On the west side of the chamber, you’ll know once you see a piece of corrugated metal with yellow paint on it
- Rusted Scrap – This one is on the north side of the chamber, go down and you’ll see it on the floor
- Metal Scrap – In the trunk of a rusted car in the middle of the chamber
- Wooden Crate – Can be found on the corner of the platform once you go up the ladder
B4 Walkway
The only loot you’ll find here is a Wooden Crate that contains 2400 Lei.
B4 Vacant Room and Storage
Make a right once you see the elevator to get to this room. Inside you will see some rusted scrap on a workbench. You can find more chem fluid in the storage area. You’ll have to come back here later for the Bister Skull after you get the Iron Horse Ball.
You can also find 1 Perfect Crystal Mechanical heart at the B4 passage after defeating the Soldat Panzer.
MB4 Materials Room
Take a right once you clear the ghouls by the door, you will see a Wooden Create here with 3000 Lei in it. Across that is another wooden create with Explosive Rounds.
Head further down into the Foundry and you will come across more Rusted Scrap on top of a workbench. Across that should be a bottle of Chem Fluid located on some shelves.
For now go to the Generator Room Walkway and pick up the Gunpowder lying on top of a barrel, near that should be a refrigerator which contains one unit of Yellow Quartz.
Once you get inside the examination room take a left and pick up the Rusted Scrap on top of the workbench.
Make your way around the room and past the Soldat until you get to the back, in here is a chest that contains a Relief Mold.
Private Passageway
Here you will see a desk that will require a lockpick. Go ahead and open that to receive three units of Magnum Ammo.
B4 Engine Room
Head towards the end of the corridor to find a Wooden Crate that contains a box of Handgun Ammo.
The next Wooden Crate is at the middle section of the room, again tucked in the corner. It contains 3 Rounds of Sniper Rifle ammo. Across that should be some Explosive Rounds. You will also find a Polycrystal Skull along with 1400 Lei before you head for the ladder.
Head up the ladder at the end of the room and make a right to get one unit of Rusted Scrap.
B4 Backup Generator Room
At the end of the corridor is a wall that’s about to fall apart. Shoot a grenade launcher round there and get the Shotgun Shells inside next to the 5000 Lei inside the chest.
Heading in further to the right you will see another wooden crate which contains 3 Shotgun Shells
Deeper in the room you will find a cabinet to your left which will have 1 Mine. Next to that is a lathe with 1 Gunpowder on top of it.
MB4 Storage
Entering the room to your left is another chest which holds the Cog Mold. It’s on top of another bench.
Go back to the door you came in from and head towards the end of the room. Here you will see the Factory Map for all the Lower Levels. Across that should be a unit of Gunpowder.
B4 Maintenance Passage
You can find another wooden crate here containing 3 Shotgun Shells. Make for the south side of the room to find one more crate that holds 4 Sniper Rifle Ammo.
MB4 Small Power Regulator Room
One or two Explosive Rounds can be found on the ground corner of the southwest platform, easy to miss as it’s dark around this area.
B4 Small Power Regulator Room
You’ll find one Gunpowder inside a metal locker on the northern side of the room. Keep walking down the corridor to find a wooden crate with 3 Shotgun Shells in it.
B4 Small Storage
There’s another wooden crate on the south side of the room. Inside you will find 2 Flashbangs, next to that is a locker with some Sniper Rifle Ammo. There is also a Large Crystal on the wall in the north west corner of the room.
MB4 Large Power Regulator Room
You can get one mine that’s on the small table in the northwest area of the lower level.
On the eastern side of the same level is a wooden crate that has some Handgun Ammo in it, right next to that is another metal locker with a landmine inside.
Wake up the Soldat Eins on the operating table in the northwest to get the two bags of 3000 Lei and some Magnum Ammo.
B3 Large Power Regulator Room
You should be able to see a metal locker on the upper levels, this one has some Shotgun Ammo in it.
Take a few steps back from the locker and look to your right. High up on the wall on the south side is 1 Yellow Quartz. You can get this by shooting at it.
MB4 Operating Room Entry
You can find some Sniper Ammo in the metal drawer in the corner of this room.
MB4 Operating Room
Once you’re in the rom look to your right, you’ll find one lockpick on top of a table next to a Soldat Eins. Behind the first Soldat is a workbench with 2 Flashbangs on it. Across that is a box of Handgun Ammo lying on top of an operating table.
After dealing with another Soldat ambush go inside the room where it came from and grab the bag of 10000 Lei to the right of the audio log.
B3 “L” Passage
You’ll find more Gunpowder on top of a cardboard box once you get to the north east section of the corridor. Across that is another table that has some Shotgun Ammo inside.
This crate can be found on the southwest section of the corridor and it holds 1100 Lei.
B3 Storage
Here you’ll find some Gunpowder on the left side of the room, it’s on a metal shelf. Across the shelf is some Rusted Scrap on top of another workbench.
MB3 Construction Tunnels
You can find this wooden crate next to the ladder leading to the Construction Platform. Inside is a box of Handgun Ammo.
You’ll find a path deviating towards the right, at the end of this path you will find two pipe bombs, one herb growing on the wall, one wooden crate with some Gunpowder in it and two haulers carrying a few thousand Lei.
Head further into the shaft until you find a yellow bird cage, shoot that down to get 3 Sniper Rifle Ammo.
Located on the right side of the cavern is a metal locker with a Lockpick inside of it. Further in the room is a Large Crystal on the ground next to the giant drill.
MB3 Maintenance Passage
You can find two Large Crystals, one Vivianite, and one Yellow Quartz when you destroy the cracked wall in this area.
MB3 Grinder Shaft Walkway
Go to the southeast corner of the chamber and approach the pile of junk near the walkway. You can get one Metal Scrap here, next to that is a wooden crate that contains 8 Sniper Rifle Ammo.
More Gunpowder can be found on top of some wooden boxes on the western walkway on the same floor.
Moving up the stairs on the 2nd level walkway is some Rusted Scrap on top of some more boxes. Follow the walkway and you’ll find a wooden crate with 2400 Lei inside of it.
At the very top of the walkway is another wooden crate with a box of Handgun Ammo inside of it.
B2 Grinder Shaft
The only loot here is a box of Handgun Ammo inside of a wooden crate.
B2 Grinder Shaft Maintenance Room
Upon entering you will see another group of wooden boxes to your left, on top of these boxes is the Factory Map for the Upper Levels. To the left of those boxes is a drawer with some Chem Fluid in it.
B2 Storage
There’s a small tunnel at the end of the maintenance room, follow it and at the end you will see some Gunpowder. On the other side of the room is a chest that contains a Ball Mold and next to that is a box of Handgun Ammo inside a drawer.
B2 Ventilation Duct
Resting on top of the broken walkway is one unit of Yellow Quartz. Head further down the tunnel to find one Metal and Rusted Scrap.
B2 Maintenance Access
You can find one bottle of Chem Fluid inside a yellow plastic container on the right side of the room.
B1 Storage
When you enter the room head straight towards the chest to get a Key Mold, to the left of that chest are two Explosive Rounds on top of some plastic containers, and to the left of those containers is a metal locker with some Shotgun Shells in it. Finally, across that is a bird cage with more Handgun Ammo.
B3 Materials Room
Backtracking a bit here, go to the southern door that leads to the L passage and shoot at the underside of the pipe to get one Yellow Quartz. The power needs to be restored to access the platform here. After that the room should turn blue.
MB4 Heisenberg’s Quarters
You can get some Lei here after wasting 4 Haulers, on the workbench to the left is some Rusted Scrap and is the chest is another sack of 5000 Lei. Behind that chest is another table that has two piles of Scrap on it and some Gunpowder.
B1 Walkway
You still kicking? Good we’re nearly there! On the northeast corner of the platform is a wooden crate that has 1600 Lei in it.
Head towards the left side of the platform and drop down to the pipes below. Follow that to the end to get some Shotgun Ammo and two Mines.
B1 Power Room
Heisenberg is starting to get annoyed here. If you know a thing or two about loot being shoved towards you too frequently you know a fight is about to go down. In this room you can get one Landmine from the metal locker, some Handgun Ammo inside of the metal desk in the left corner, a First Aid Med, and a wooden crate with some Shotgun Ammo.
To the left of all that is another wooden crate with 2100 Lei inside of it.
B1 Maze
After the walls have been busted go to the northeast side to get some Sniper Ammo resting on top of the pipes.
On the opposite room where you got the Sniper Ammo is some more Handgun Ammo next to the door.
Do a quick 180 turn from where you got the handgun ammo and walk down the corridor until you see a Mine laying on top of some more pipes.
B1 Cargo Control Room
Once you’re in this room open the metal locker to your right for some Chem Fluid. At the back of the room is a Cigar on top of a metal desk.
B1 Small Storage
At the end of another crawlspace is a room where you can find some Herbs, Chem Fluid, Metal Scrap, and more Shotgun Ammo. Don’t forget about the Goat of Warding on top of the oil drum!
B1 Cargo Bay
Next to the green cargo container is a wooden crate with some Rusted Scrap inside of it.
Head towards the ladder and make a right. You’ll find another crate here with some Metal Scrap inside of it.
B5 Scrapheap
After Chris drops some more lore on you and you’re given control of your character again, head to the left side of the room to find a First Aid Med on top of a wooden table.
Finally, across that table is your last Wooden Crate. Well, for Heisenberg’s Factory at least. Gun it down for 2100 Lei and you’re done! You’ve looted everything that isn’t bolted to the ground!
ALSO READ: Where to Find Missing Painting in Resident Evil Village