72 articles
The Elder Scrolls IV: Oblivion has just gotten a remaster out of nowhere, and it includes all of the expansion packs and DLCs of the original game, such as Knights of the Nine. In this guide, we will go through the puzzles in Fort Bulwark, which is a part of the Wisdom of the Ages quest and might be a bit confusing for some.
Wisdom of the Ages Quest Guide | Fort Bulwark Puzzle Solutions
First, upon entering Fort Bulwark, follow the first couple flights of stairs down and keep turning left to go through the path leading to the south. In your first long corridor, there will be an extra path to the right leading to a door.
Go through this door, which will lead to a wider corridor with a raised drawbridge. This will become relevant later. For now, proceed to the other end of the room west, which takes you to an old wooden door.
Open the old wooden door and proceed forward. This is a linear path, so just keep moving forward until you find a room with a bunch of conjurers in it. Get rid of them however you see fit so we can proceed to the next step.
 Oblivion Remastered – Top 10 Best Short Swords & How to Get ThemMay 30, 2025
 Oblivion Remastered – Restoration Spell Tier List for Master Difficulty ModeMay 30, 2025
 Top 10 Heavy Armor Sets in Oblivion RemasteredSep 6, 2025
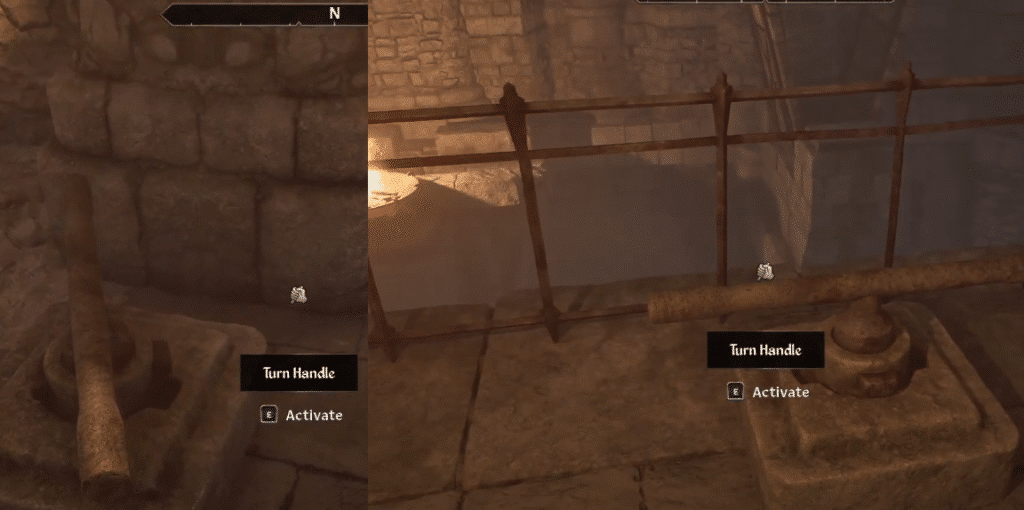
Once you have killed all the conjurers, go ahead and activate the turn handle in this room. After that, backtrack a little bit and the gate on the only other alternate path that was previously closed should now be accessible.
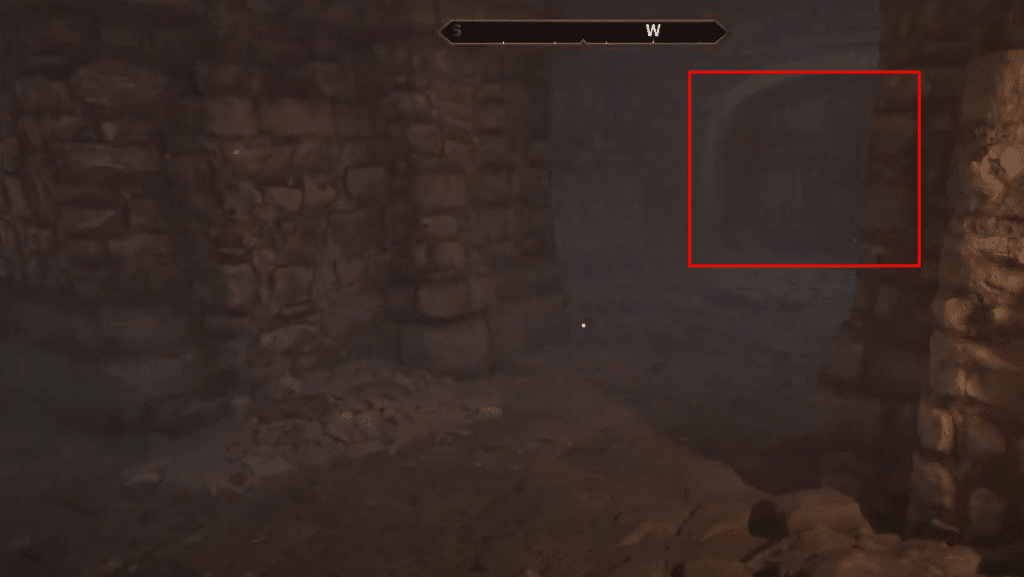
Go into that corridor until you reach another turn handle overlooking a set of raised drawbridges. Upon activating the turn handle, you should see the bridges lower below you. Once that is done, backtrack all the way out into the main room from earlier.
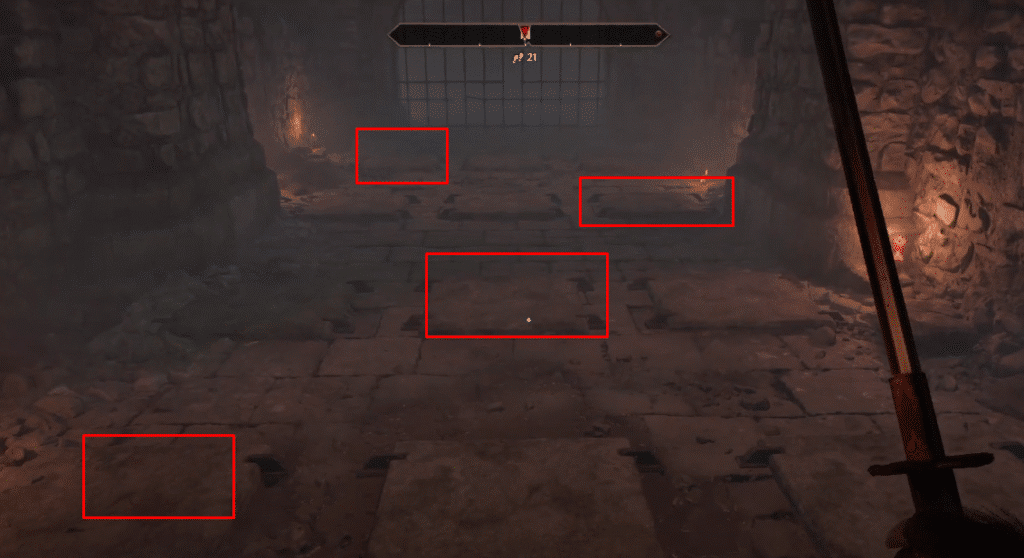
Upon going back to the main room with the drawbridges finally lowered, proceed through the bridge and then you will eventually find yourself facing the tile puzzle. This is the first actual puzzle of the lot, so what you need to do is step on the correct tiles to open the way forward.
From the start of the puzzle, step on the following tiles:
- Set #1 – Left Tile
- Set #2 – Middle Tile
- Set #3 – Right Tile
- Set #4 – Left Tile
Once you get through this room, you will find yourself in a new area. Here, you can free Sir Thedret, who will be calling out for help in one of the cells. Free him and proceed with the rest of the quest.
Keep following the quest marker and fight all of the conjurers you may encounter along the way. Eventually, you will reach an area with a lot of drawbridges and some arrow traps from the ceiling. Just take your time and proceed slowly.
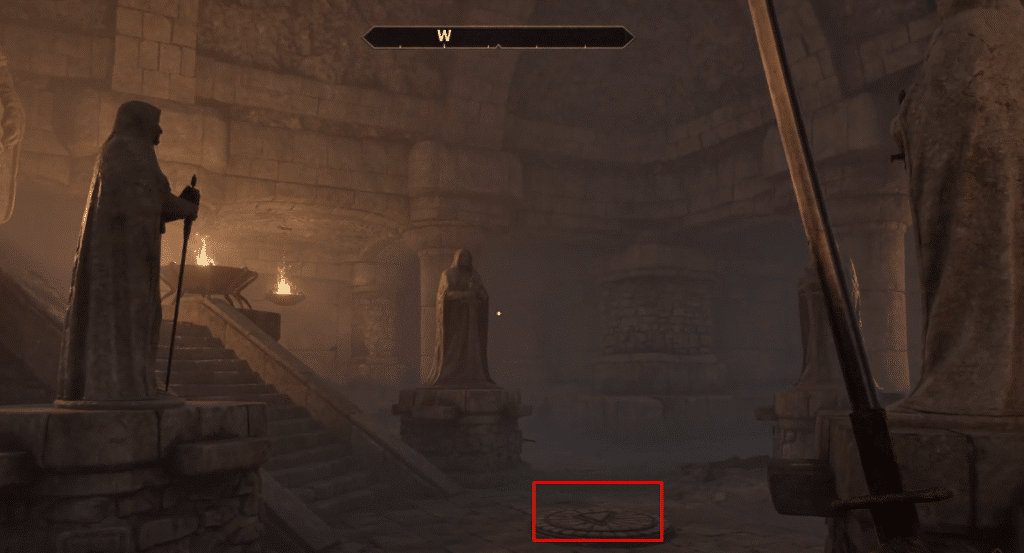
These traps activate at a predictable enough pattern, so as long as you are not rushing, you are free to lower the drawbridges and get through it unscathed. Eventually, you will reach a room with four statues in the middle.
First, clear the area of enemies so that you are free to move the statues without taking unnecessary damage. After that, your goal here is to rotate the statues in the correct orientation.
This one is pretty simple. All you need to do is use the turn handles at the base of each statue until every single one of them is facing the symbol in the middle, right on the floor. Once everything is in the correct orientation, the lights will go off.
A path to the south of this room will open up, so proceed through it. You will eventually reach a dead end with a chest in an elevated positions surrounded by statues with more chests at their bases.
This is another puzzle, and your goal here is to simply insert each item in the correct chest so that their respective statues turn around. Basically, every time you step on the pressure plate beside the chest in the middle, an item will appear above one of the other chests in the room.
You cannot actually grab them. In reality, these are actually hints as to what you are supposed to do in this room. Every time you attempt to solve a part of the puzzle, including at the start, a random item of Rodgar will appear in the central chest.
Through trial and error you should eventually be able to identify which chests each item belongs. There are a total of eight Rodgar’s items, and they belong in the following chests:
- Rodgar’s Gem – Northwest chest, the one at the very corner.
- Rodgar’s Skull – West chest, directly to the left of the one at the center.
- Rodgar’s Hammer – Southwest chest, second from the door.
- Rodgar’s Book – Southwest chest, right beside the door.
- Rodgar’s Stone – Northeast chest, at the very corner on the opposite side from where the Gem is placed.
- Rodgar’s Helm – East chest, directly to the right of the one at the center.
- Rodgar’s Goblet – Southeast chest, second from the door.
- Rodgar’s Sword – Southeastchest, right beside the door opposite of where the book is placed.
Once all of the items have been placed in the correct chest and the statues have turned around, you can now proceed to the last part of the fort by moving straight past the central chest.

The only thing left to do from this point on is to grab the Shield of the Crusader at the end of the hallway. The altar it is resting on has various other potions and scrolls that you might want to grab as well.
From here, the quest should now tell you that you’ve succeeded and can now leave this area. There is a path to the left of where you got the shield, which will lead you straight outside, back to the raised drawbridge that you saw at the very start.
Congratulations, you can simply backtrack to the main entrance from here without having to walk all the way through the rooms leading up to this one.
While you are here, consider taking a quick look at our guide on how to get the unicorn mount in Oblivion Remastered. If you have played the original before, it is still where it has always been from the very start, and it is essentially a free mount that is extremely fast and has no real strings attached outside of the fact that it is not officially yours even if you can ride it.