28 articles
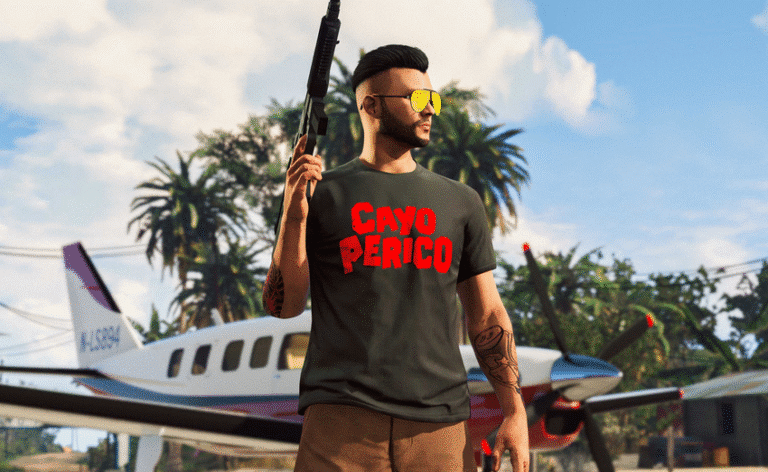
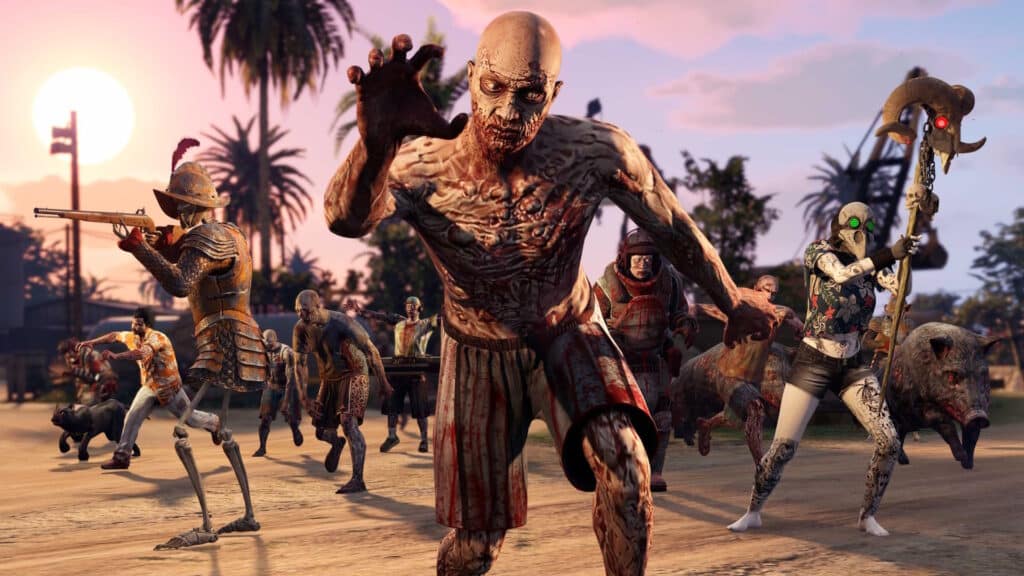
The Cayo Perico Zombie Survival update is here for GTAV Online. This adds a new challenging Survival game mode, and clearing 10 Waves of it before September 10th will reward you with the new Buccaneer outfit! This is easier in groups, of course… but what if you wanted to do it on your own? Well, that’s exactly what we’re going to help you accomplish.
Cayo Perico Survival Solo | GTAV – Survive 10 Waves Guide
Wave 1 – Conquistadores and Panthers
The very first wave is, as you might expect, fairly basic overall. You can easily survive most of it by just standing near the starting point and shooting the regular zombie enemies with an SMG or assault rifle of your choice.
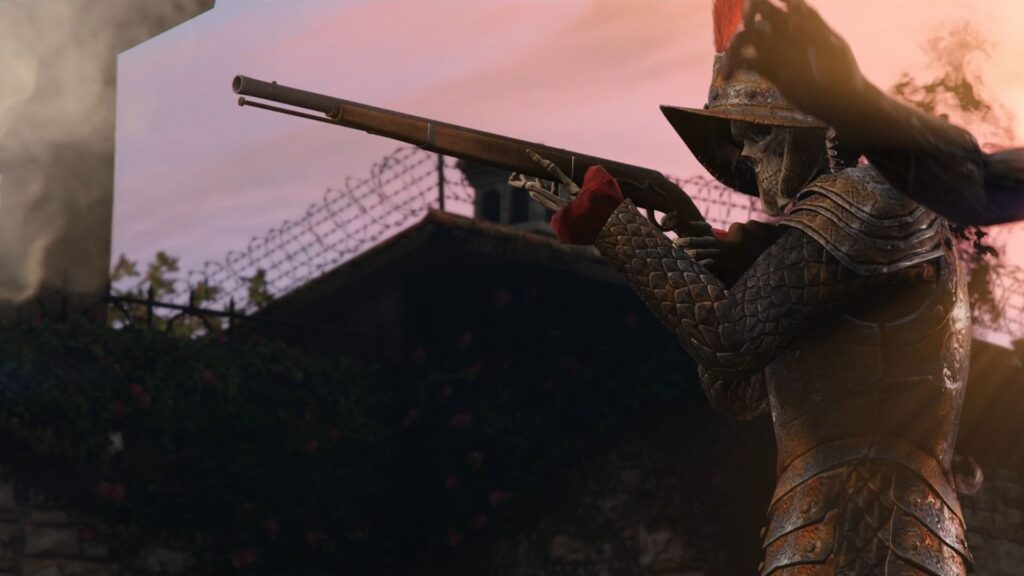
Eventually, though, you’ll start to see armored skeletons with muskets start spawning. They have muskets, allowing them to shoot you and deal damage from long range. Most importantly, the only way to kill them is to run up to them and do a melee attack! Your guns won’t damage them.
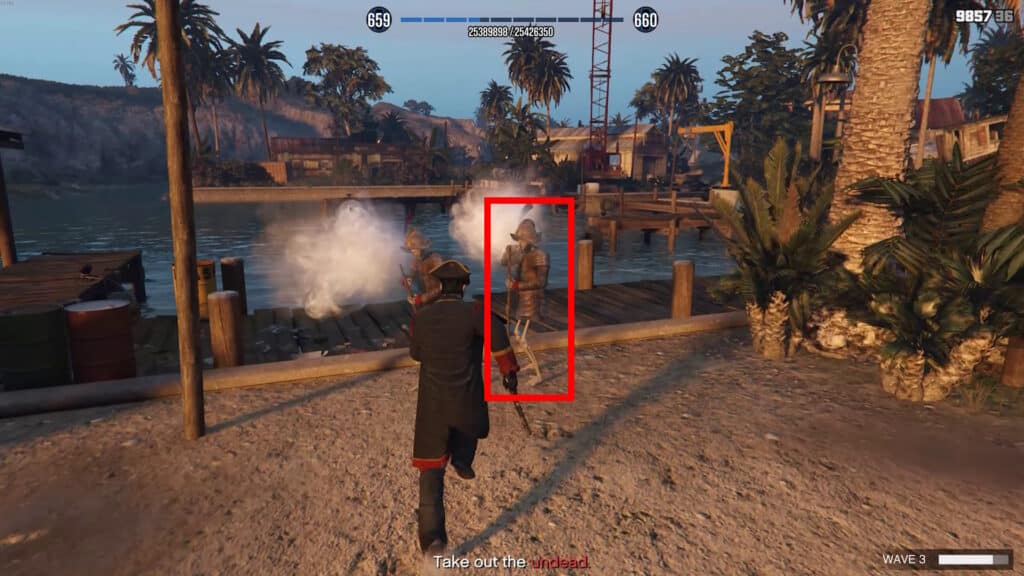
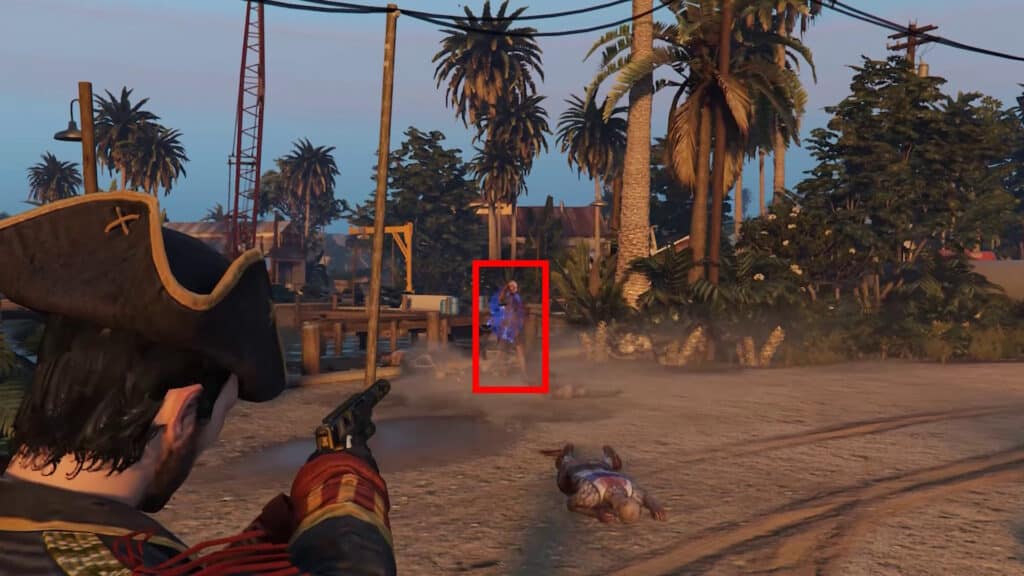
Near the end of the wave, black panthers will spawn to attack you. Killing them, however, will not progress the wave. Instead, you have to look for the Panther Trainer undead, which is shown above. They usually stay away from you and have a dark red smoke signaling their location. Killing them will automatically kill all panthers, as well.
 GTA Online All Potential Mansion LocationsNov 18, 2025
 GTA V: Unlock The Slasher Clown Outfit, Please Stop Me Mask & Halloween Rewards 2025Oct 2, 2025
 GTA V – How to Unlock the Buccaneer Outfit, Panther Tour Jacket, & the I Survived Cayo Perico TeeAug 29, 2025
Wave 2 – Splitters
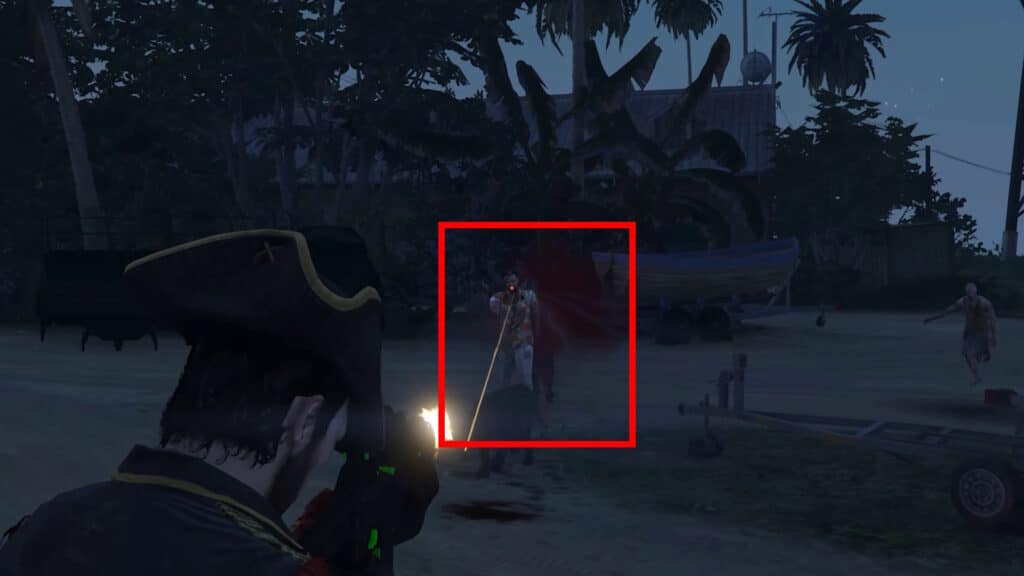
The second wave works more or less the same as the previous one, but with the addition of Splitter zombies into the mix. These zombies have a white smoky aura to them, as shown above.
When you “kill” a Splitter, it won’t directly die. Instead, smoke will appear near them and they will split into another pair of zombies. They can do this up to five times, so they can overwhelm you if you’re not careful. The easiest way to take them down is to just use a Molotov to kill them all in one go. Alternatively, the Minigun works pretty well, too.
Besides that, you’ll also need to deal with the Consquitadores and Panther Trainers, like in the previous wave. Again, we recommend focusing on the trainer as much as possible once you see the panthers appear. Only fight the panthers themselves if you need to make space.
Once you kill enough zombies to clear the wave, a blue dot will appear on your minimap. Follow it and enter the car it leads to. It will take you to the next area of the Cayo Perico Survival.
Wave 3 – Boars and Explosive Zombies
You’re now in a whole new area. It’s a pretty open area, too, which makes it easy to spot incoming enemies. We recommend sticking to the middle of the road, avoiding the grass.
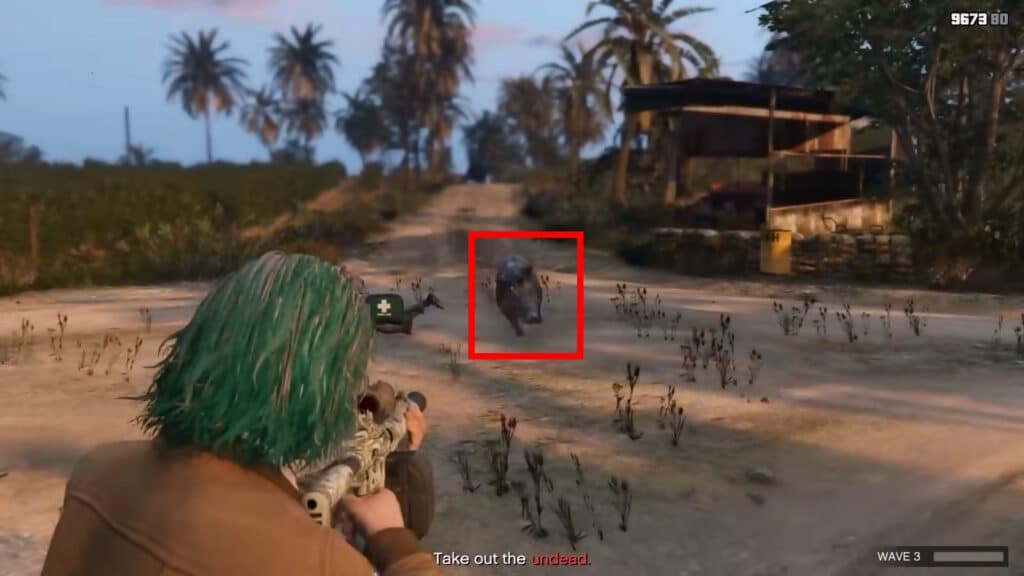
The main reason for that is that you will now need to fight Possessed Boars as well. These boars will rush you to attack you, so they’re quite predictable and not too big a threat. However, they’re also pretty tanky! So, make sure to shoot them down first so that you can keep them from getting too close.
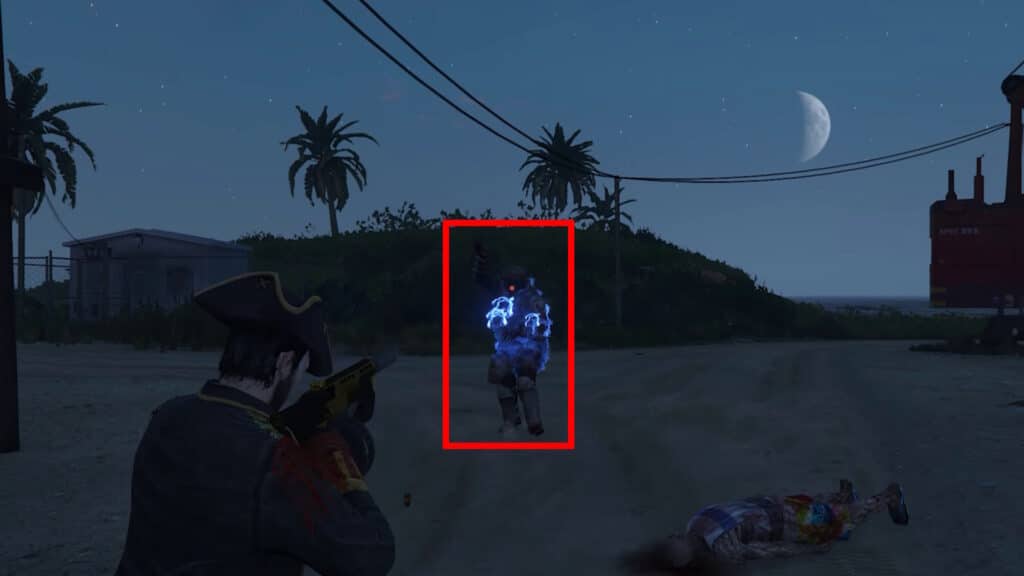
The other new enemy type from this wave is Explosive Zombies, which have a blue electric EMP aura as shown above. Make sure not to get close to them! Kill them from a distance to avoid their explosion. Remember, they will explode when killed too, so shoot them from afar.
Wave 4 – Mage Zombie
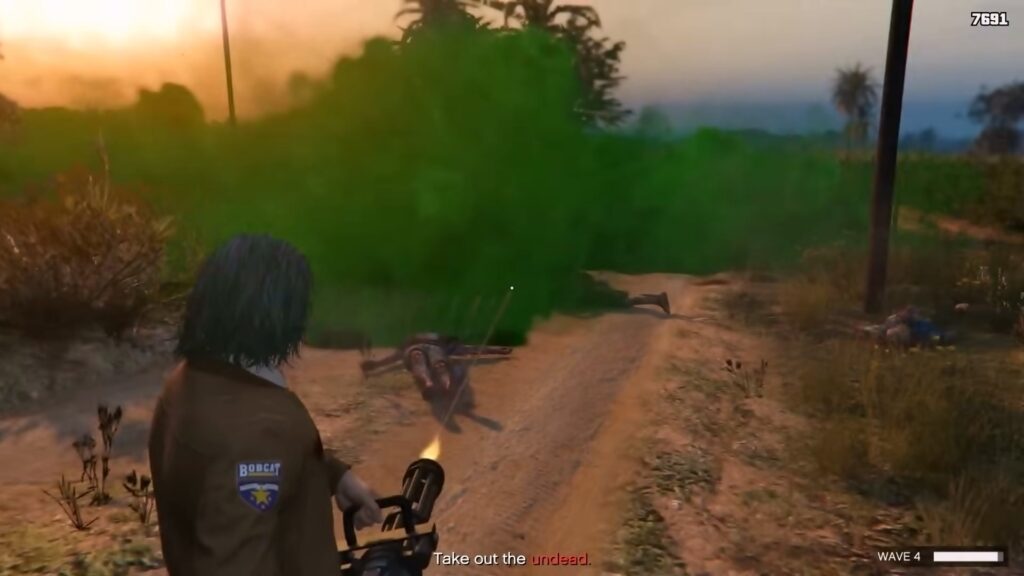
The 4th wave of the Cayo Perico Survival in GTAV is mostly the same as the 3rd wave. You’ll have to contend with the exact same enemy types until the very end. There’s a twist, however! Right near the end of the wave, a dark green gas will appear. This gas is poisonous, so make sure to move away from it if you spot it! Focus on killing any remaining zombies and avoiding the gas.
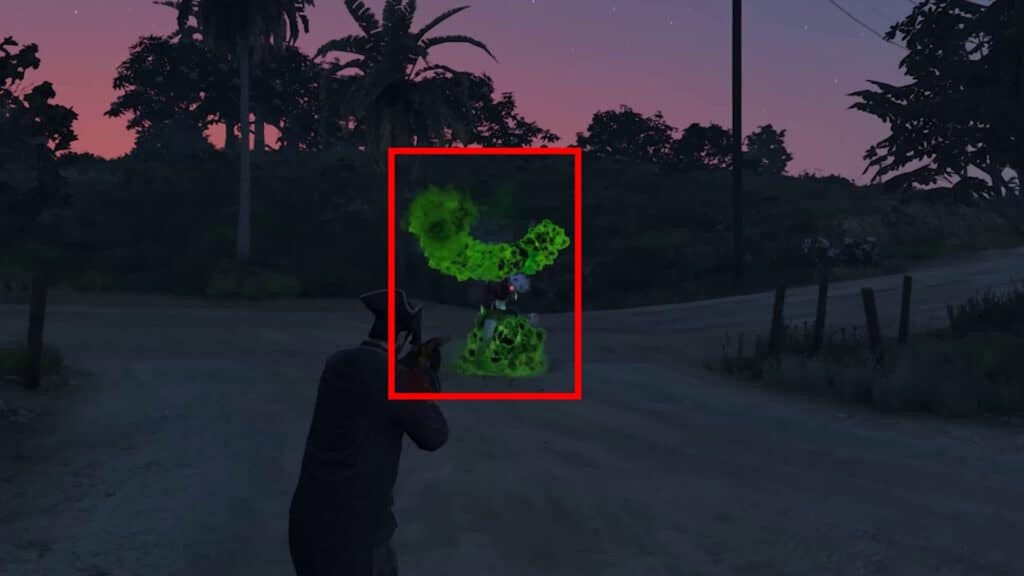
Once you have some breathing room, it’s time to track down the Mage zombie that’s creating the poisonous gas. They should have a small cloud of the same gas near them, which helps spot them. Additionally, they make extremely loud noises similar to ducks, which you can also use to help track them down. When you find them, just kill them quickly to finish the wave.
Do note that these Mages have a ridiculous amount of health. Use your strongest weapons, such as the Minigun and RPG, to kill them quickly. They’ll become more common and even tankier in later waves, too…
With all that said and done, follow the blue dot on your map again to reach the next zone.
Wave 5 – DJs and Armored Zombies
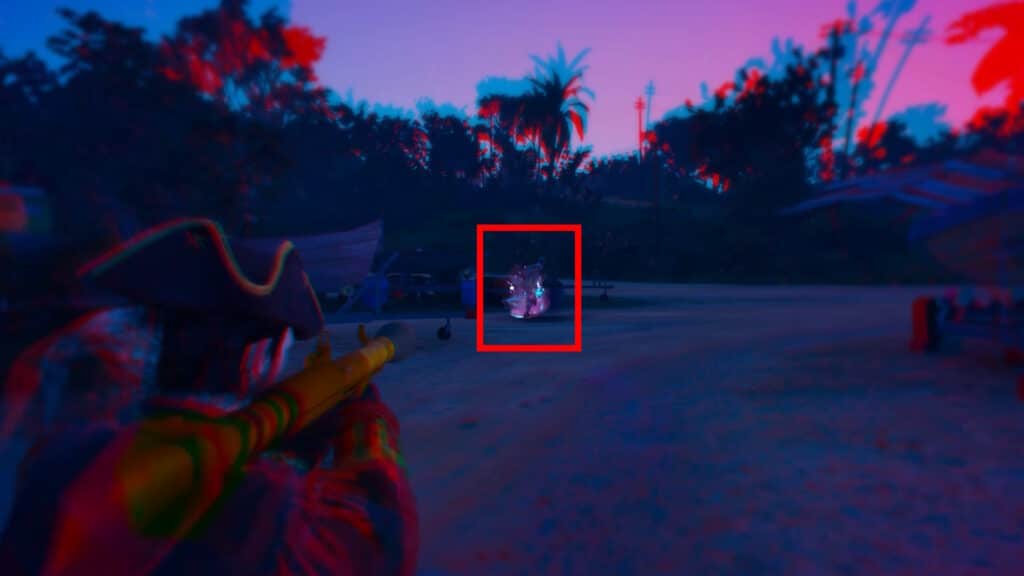
New area, new threats! The first and most annoying new threat starting in this wave is the DJs. You can tell that a DJ is active once you see the psychedelic camera effect shown above.
Thankfully, DJs are stationary and have a lot of sparkles surrounding them, giving away their position. Look for them quickly and shoot them with a strong weapon, such as the RPG, to take them out. The RPG also sets them on fire, allowing you to stay on the move while the fire finishes them off.
The main reason you need to prioritize these DJs is twofold: they speed up other zombies and also slow you down. To make matters worse, your character will be forced to dance if the DJ is active for too long! As you can imagine, this makes you extremely easy to kill for the other zombies. So, focus on DJs as soon as you know they’re around.
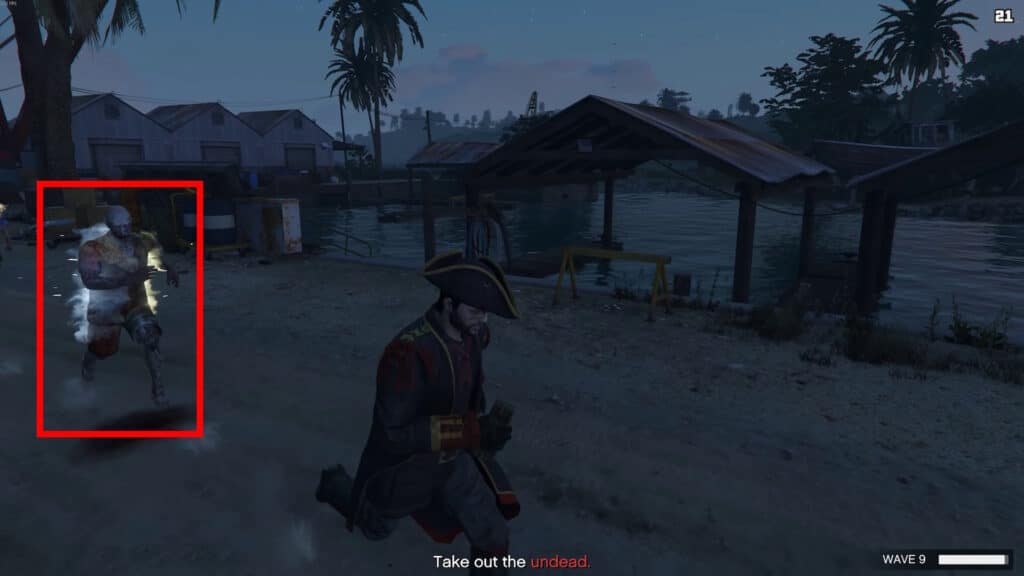
Additionally, Armored Zombies will now spawn, too. These are zombies decked out in full riot gear, so they can take a lot of damage. Thankfully, they’re a tad slower than others, so they’re not a huge threat. Explosives are the best way to damage them.
Do note, Armored zombies can also be Explosive zombies in later waves, as shown in the example above. Keep that in mind and ensure that you keep your distance from them!
Waves 6 to 10 – Extra Tips
By Wave 6, you’ve already seen everything you have to contend with in this mode. From now on, it’s all up to you! All zombie types can now spawn, with their numbers and overall strength increasing in each subsequent wave.
A good trick you can use if you’re feeling overwhelmed is to quickly drop Molotovs and Grenades behind you. Just make sure your character is running toward the camera and throw the explosive to drop it behind you. It’ll set any zombies chasing you on fire, potentially thinning the horde. This works particularly well if you’re being chased by Splitters!
Additionally, make sure to stock up on Snacks and Armor before starting the survival. You’ll want all the health you can get for this one, trust us.
Also, as always, try to make sure to stick to the clearest areas you can. Starting with Wave 8, you’ll be at a dock with a clear strip of path that’s fairly open. Ideally, stay there as it will make spotting and kiting the zombies easier.
Lastly, we once again remind you to focus on DJs first and Panther Trainers second. These are your top-priority targets, in that order. The DJs’ effects are too potent to deal with, and the Panther Trainer can spawn panthers nonstop while alive. Taking them out ASAP makes survival much easier.
So, there you have it, that’s our tips to help you clear all 10 Waves of the Cayo Perico Survival solo in GTAV. Manage to complete this challenge before September 10th and you’ll unlock The Buccaneer outfit!
Want to get even more outfits? Check out our guide on how to get all outfits from the Cayo Perico Zombie Survival update.